The Grow Awards 2026 🏆 


Likes
Comments
Share
@L1lium
Follow
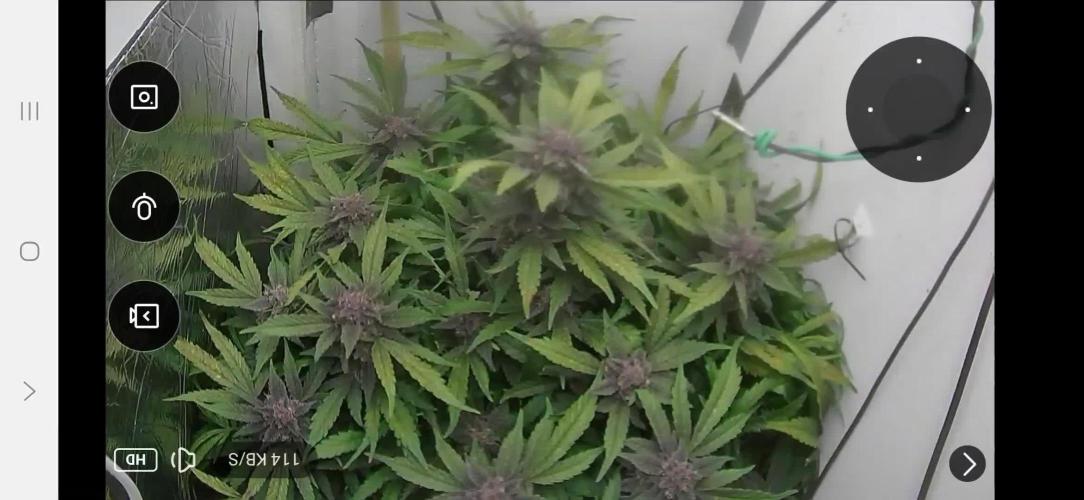
Es ist soweit! Am Freitag habe ich die fünf Easy Buds nach knapp 11 1/2 Wochen abgeschnitten und geerntet.
Leider musste ich feststellen, dass eine Pflanze ziemlich stark befallen war. Ich vermute eine Milbenart oder möglicherweise Fliegeneier. Unterhalb der Blätter waren etliche dunkelgelbe und dunkelbraune Eier, die man auf den ersten Blick kaum erkennen konnte. Bei genauerem Hinsehen sieht man jedoch, dass sich der Befall auf die ganze Pflanze ausgeweitet hatte.
Glücklicherweise blieben die vier anderen Pflanzen verschont. Aus diesem Grund trockne ich die Pflanzen auch getrennt voneinander. Die befallene Pflanze wollte ich nicht direkt wegwerfen, sondern erstmal trocknen lassen. Im Nachhinein werde ich schauen, wie ich mögliche Schadensbegrenzung betreiben kann.
Die vier gesunden Pflanzen werden in einem geschlossenen Zelt in einem Trocknungsbeutel getrocknet.
Die befallene Pflanze habe ich in dem Folienzelt aufgehängt und mit einer Plane abgedeckt. Nach wenigen Tagen der Trocknung sieht soweit eigentlich alles gut aus. Die Eier scheinen nicht mehr zu schlüpfen, sondern fallen von der Blüte ab oder verschrumpeln zu Kompost. Ich hoffe, dass es dabei bleibt.
Der Geruch hat sich nach dem Abschneiden deutlich verändert. Schon nach der kurzen Trocknungszeit kann ich einen intensiveren Geruch feststellen, der sich noch nicht so richtig beschreiben lässt. Die Blüten waren stark mit den sogenannten "Sugar Leaves" verwachsen, weshalb ich sie grob getrimmt habe, um sie zum Trocknen aufzuhängen. Nachdem die Blüten vollständig getrocknet sind, werde ich die Buds noch einmal einzeln trimmen und durch meine Trimm-Maschine von Vevor jagen.
Der Ernteprozess hat zu zweit circa eine Stunde gedauert. Die Pflanzen waren zum Zeitpunkt der Ernte noch sehr gesund und kräftig. Die Verwurzelung war trotz des geschlossenen Topfes sehr gut.
Die schönste Bud hat definitiv die zentrale Pflanze, Greta, ergeben. Nass hätte ich den Bud auf mindestens 12 g geschätzt.
Ein Gesamtgewicht des nassen Pflanzenmaterials habe ich nicht ermittelt. Sobald alles trocken und fertig beschnitten ist, werde ich das Tagebuch um den trockenen Betrag ergänzen. Stand jetzt würde ich schätzen, dass der Ertrag aller Pflanzen bei circa 40-50 g liegt, was mich für meinen ersten Grow ziemlich zufrieden stellt, besonders in Anbetracht dieser wirklich sehr simplen Strain.
Mehr Infos und Fotos folgen in Kürze, wenn das Curing beginnt.
Bis bald! :)

Likes
5
Share
@DemonDabsSolventless
Follow
🚨🚨🚨🚨🚨
Week III
🚨🚨🚨🚨🚨
A WEEK OF A LOT OF PATIENCE, PLANTS STOPPED AND I TRIED TO MODIFY THE WIDE ASPECT OF LIGHT TO UNLOCK THEM, AS I HAD ALREADY SCHEDULED LET'S PULL ON TO 6 WEEKS OF VEGETATION AND WAIT FOR BETTER DEVELOPMENTS
📝📝📝📝📝
Notes
📝📝📝📝📝
CHANGE IN THE WATERING JOURNEY, LEAVING 1 WATERING DAY FOR 2 DRY WATERING FOR EVERY DAY NO, BEING 1 WATERING WITH NUTRIENTS AND ANOTHER WATER ONLY.
📝📝📝📝📝
Likes
29
Share
@Rounder
Follow
Its been crazy week I Started giving them more nutrients I think a bit too much I had ok 13/14 from canna. I think they are okay but the leafes are too green? What you think? Should I out and hps to get larger and de ser buds?
Thanks

Likes
7
Share
@HegauHillsFarmers_D23
Follow
Die RP 43 hat in dieser Woche begonnen die ersten richtigen Stempel zu bilden 👀
Auch der Stretch war in dieser Woche sehr stark ausgebildet, sie hat sich fast verdoppelt 🌱🍀 Ich hoffe sie geht nicht mehr arg zu lange in die Höhe 😏
Ich habe zusätzlich in dieser Woche die untersten Triebe entfernt und sie zwar lichter geschnitten ✂️
Aufgrund der Blütenbildung habe ich begonnen den Blütedünger anzupassen und Big-Bud sowie B52 ergänzt.💦
Sie wird langsam hungrig und benötigt die Nährstoffe.


Likes
19
Share
@ArtisticGrown
Follow
Why hello, if you are still here thank you for the love & support. I cant believe we are already on the start to week 3 of bloom!
This lady here has been streching the last 2 weeks! During the first week of bloom I gave her nutrients with both bloom a & b as well with bud candy! Then water in betwen watering. Shes been needing watered everyday in this 10 Gallon pot! So im very careful with the nutrients and keeping a close eye on her! Ive also used dried coconut powder with irrarated, ph balanced water. To help the roots absorb the nutrients and really up take!
Im beyond ready to see what week 3 brings us! Ive been behind on defoilation only taking about 3 to 5 leafs a day just to try to get other coals light!
If you have any question feel free to ask! Much lovee lets go guava!!!
Likes
3
Share
@LittleBigTrees
Follow
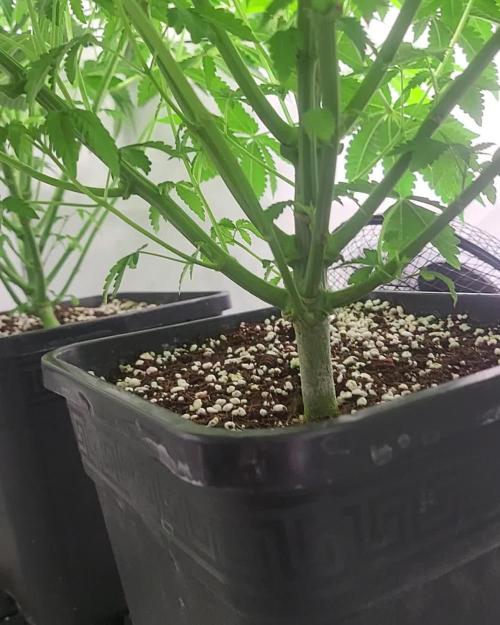
Still not given any food at 35 days since popping. She's growing well and I've put her in a 4ltr pot.
I've pinched the top out to slow down the vertical growth.

Likes
4
Share
@Janerussel
Follow
F week 7. I had nutrient lockout and ph started to swing down. I wasn't mixed my nutes right. I should have kept more break between adding the nutes and let it blend in peace.I lost some days because of that. Now everything should be under the control. The plant smells really strong. Cola nuggets are really hard but the trichomes are still mainly transparent.

Processing
Likes
10
Share
@DonPablo_
Follow
buds are very visible and getting some mass (still really small though) and really satisfied with the number of bud sites. REALLY REALLY can't wait to harvest these ladies.
P.S. the plant at the end of the last video is an autoflower we planted a few weeks ago.


Likes
57
Share
@TheBudWhisperer
Follow
Week 8 of flower is in the books and this show is quickly coming to an end. I said last week we had about 7-10 days and I was spot on at the 10 day mark. I was only wrong about the order. The cheese is ready to chop before the rest and the gorilla cookies, cherry Bomb and lemon haze will follow in due course. The cheese is a beast and it’ll take a little time to get it all run through the bowl trimmer. At least the big one goes first. Her tallest colas have foxtailed like mar, despite the late supercrop. You can tell where the sweet spot for the light is at about 10” distance from the canopy. Any closer than that and the tails begin to show prominently. It’s a good example of just how close you can get to these fixtures with a little bit of prior experience. It’s been noted for the next run😎👍😎. The res. is on an h2o2 only flush for the remainder until the rest are ready to come down. Not a moment too soon either - the pollen chucking project has stalled out waiting for these girls to finish and now that we’ll have a little extra room, we can start running our cuts in the aerocloner🤟. Not long at all now folks. Thanks for tagging along through all this. Learned a bunch about this system and we’re back to hardware mode to make some serious improvements for the next run🤙😎. I love hardware mode😉.
Background/Repetitive Nonsense
The strain line up on this grow is look’n quite saucy 😈. We’ve got 2 FB strains this time around - Gorilla Cookies (seems we always have some GSC cross in the works). Mainly because the colours look stellar and remind me of a sugar breathe we did last year that was 🔥. The other FB is their original Cheese strain... because we already smoked all our cheese... and we really like our cheese...😉. Emerald triangle was kind enough to include a freebie of Lemon Haze. Wasn’t really big on the list but we haven’t done a haze strain to write home about yet so worth a go👍. The last is a Cherry auto from Bomb seeds that we’ve been trying to get to for months. Let’s just hope that she’s not a dud like the last bean.
The new digs for this run are courtesy MarsHydro👊. Their 2x4 single grow tent, paired with a shiny new 240w QB courtesy ViparSpectra.
These folks were kind enough to discuss a collaboration and as a result, here we are to test out the gear with an inaugural run of autos. Each week, we’ll try to expand on some of the benefits of each, as well as any limiting factors or considerations that need attention when pondering purchase.
Already I can say that both are high quality products in terms of overall craftsmanship.
MarsHydro 2x4 Grow Tent:
Excellent construction in terms of durability. Reinforced stitching on the zippers and corners ensures zero tearing. Conveniently placed screen vents and intake/exhaust ports. The ceiling exhaust port only exists on the right side. Perfect for me but not great if you’re running exhaust from the top on the left side (left side wall port makes up for this however). The aluminum frame is rigid enough to support the weight of the lights and accessories. Once you have some weight in the tent, she’s go’n nowhere and you can assemble and break it down in record time if moving or stashing the grow op.
Only limiting factors I’ve noticed is that temp. Control will be an issue for a tent. It just doesn’t have the same insulating ability as a wood cabinet or other permanent enclosed space. No worries, this is offset by a small desktop heater and keeps the environment exactly where desired. The other issue was a production problem - the ceiling vent was accidentally stitched into the corner seams on the assembly line. Again, no real issue - just pulled it out with no damage or fraying to the tent or port👍.
Website link here:
https://www.mars-hydro.com/grow-tent/buy-mars-hydro-grow-tent-24x48x70-2-x-4-cabinet-closet-grow-box-upgraded-diamond-1680d-mylar-for-sale
ViparSpectra 240w Quantum Board:
This thing is sleek and slick in terms of design. Closest comparable to it that I’ve seen would be spiderfarmers line of qbs. They feature the same top-o-the-line components and roughly similar spectrums. Where VS takes the advantage is in the convenience of the dimmer nob which is easily accessible and works great at 50% with no strobing👍. The heat sink is also larger which contributes to lower temps. That’s not a good thing in my case but beneficial for most folks.
I can already say that this will be a great fixture through all stages of growth. Where I know this light will excel will be in the veg. Stage for sure. Dimming function gives seedlings a much better chance of success with the ability to use lower lighting levels early on and the coverage area on a 240w is great. The average grower will find this panel suitable and fitting to their needs in a 2x4 grow space although I’d suggest 2 units if going any larger than that. The total output in this space equates to about 30w/sq.ft. Which is a decent amount of coverage based on power vs. Growprint. Ideal for veg. Certainly but, in flower - I tend to run closer to 50-60w/sq.ft to achieve higher yields. Again, similar fixtures have performed admirably in the past and while this wouldn’t be considered an “entry-level” fixture, I’d recommend that any grower new to the game not skimp on lighting and start with one of these. The price points are a great value for quality LED tech. These days, so there’s little reason to even consider a lesser fixture👍.
I have no detail on limiting factors for this light as yet but have heard that stock branded fixtures don’t necessarily incorporate enough red diodes. I’ve seen no issue myself but confess - I’m no lighting guru.
Website link:
https://www.viparspectra.com/collections/xs-series/products/xs-series-xs2000
***8% discount when using code: “ItBudWhisper”***
Happy to have you along for the ride if you made it this far through my opening rant!!😎🤟😎🤟😎


Processing
Likes
14
Share
@Silverback_Guerilla
Follow
THURSDAY 11/29:
Impressive plants..both of them. Cruella is waaay more sensitive to heat and needs soil with VERY good drainage. She wilts for a few hours every time I water her, no matter how little I give her. I continue to poke and prod it with my moisture probes regularly to keep it from compacting too much for her. Carlotta hasn't given me any problems at all. She's just a little slower, but almost Cruella's equal in size now.
I foliar fed a few times and did a photo session.
FRIDAY:
Foliar fed a few times and tweaked a few things..
They are both spending most of their energy making flowers now...only grew a half inch last night.
SATURDAY:
Both Cruella and Carlotta continue to stretch. I fed therm with about 1/3 gallon of full-strength bloom nutes today and foliar fed them a few times and re-positioned them.
SUNDAY:
Cruella's buds are swelling up a bit now. I plucked off most of her burnt-up leaves and she's looking quite sexy now.😋 Carlotta's main stalk and branches have really thickened up. She's gonna be able to support some super-sized colas like her older sister now.👍
I tweaked my ventilation on Saturday and the temps were staying at or below 84, so... I quickly added my other 60w 3500k COB light to the tent..it's and positioned it on the Cookie-twin's backside.. 😎
MONDAY:
I foliar fed them today and will again for a few more days, but will probably start rinsing them off with ph'd spring water after that. Their buds are starting to thicken now.
TUESDAY:
Cruella and Carlotta both appear to have root problems. They look overwatered even when i just feed them a little and even when they are almost dry. I probed their soil very well and they were actually almost dry. I just fed them a tiny dose (12 oz each) of ph'd water with boomerang, kangaroots, calimagic, and some bat guano powder. If I don't see improvement in the next couple of days, I'll assume they are rootbound and transplant them into 5 gallon fabric pots.
Likes
15
Share
@Naujas
Follow
79 days!!!!! and the harvest is already harvested :) The whole growth until week 6 went very well, then the girl got a little worse, (I think it's my mistake, which I described in previous weeks), but besides all that she managed to ripen perfectly, matured stiff flowers, full of shiny sticky trichomes with a very, very sweet aroma ;) 210 gr of wet buds, I also collected a lot of sugar leaves from which I will make bubble hash :) I can't wait to taste it :) this is my first trip with Sweetseeds Looking at the flowers I understand that I will definitely repeat it :) I will leave more feedback after the smoke review:) good luck to everyone.
Likes
4
Share
@Mrs_Larimar
Follow
2024-09-07
easy to grow,
resiliant, hard to hit
she had ahard start with cold and rain and lots of wind
she mastered that all very good
structure like lots of little buds coming together to a big cola
smells wondeful, has a lot of long trichomes
THC Medium - Up to 19%
Medium Yield - Up to 400gsm
Indica Dominant Ruderalis: 80% Indica / 20% Sativa
Flowering Time -

Processing
Likes
12
Share
@NorCal311
Follow
This grow I am going to do it differently. I am going to do day tracking instead of date tracking.
I am using using pre-grown ( two grows ago) Coco mix with nature suppers soil to experiment with reusing grow medium.
The pots are 5 gallon air pots. I have never used these before so we will see. The 1st take on them that they are very messy compared to fabric pots.
Once established, I will be using half strength Advanced Nutrients for Coco since these are autos.
Day 1 - 3 Seeds soaked overnight and were put directly into the 5 gallon pots. I pre-soaked the Coco with 5ml/gallon Clonex and covered the seeds with a mason jar.
Day 2 - Temp stayed around 78 all day with me going in and out of the tent looking for a sprout. Nothing yet. 😀 Kept the Coco moist under the jar.
Day 3 - Nothing popping
Day 4 - Two have popped.
Day 5 - One did not pop so I put another seed in
Day 6 - The little ones are growing up. It brings a tear to my eye. 😥
Day 7 - The replaced seed looks to be comming up.

Likes
8
Share
@jaydee702
Follow
She is small Due to the restricted Root Space in the tiny pot but She Is A Sticky
Girl that looks like a Stripper with all the Glitter that formed on her in the last week of flowering she could go a few more days but then i wouldt have harvest
on my contest diary

Likes
37
Share
@NoProbation4Weed
Follow
- Day 63 of Flower Light reduction to 50%
- Day 65 of Flower Last time Watering
- Day 67 of Flower Lights out for 3 days
- day 70 of Flower Harvest
Trichomes are about 15% amber and 80% cloudy with 5% clear
Temperatures for drying gonna be 19°C and RH around 55%.
She is looking beautiful and her Smell is so intensive you cannot unsmell it. Its Loud!
Has Some Fruity (Plum or Tangie like), Soapy and Floral Notes to it.
Smokes like a champ and in adition also a purple washer!!


Likes
94
Share
@love_2_grow
Follow
Another week has passed, and we're closer to the end than I estimated.
I chopped their mom on Day 70 and expected similar for her offspring, but we're now on Day 49, and the girls look to be done in a week or two.
I've started seeing more frost, which indicates that the trichomes are turning cloudy.
No amber yet, though. So there's that.
It will take a while longer. But 21 days? With the senescence I'm seeing?
Press X for Doubt: [ X ]
Likes
7
Share
@Kevs_Best
Follow
DE:
In der zweiten Blütewoche zeigt der erste Last Dance-Phänotyp weiterhin starken Stretch und wird immer buschiger. Die Blätter sind tiefgrün, glänzend und sehr vital – die Pflanze nimmt Nährstoffe optimal auf. Erste kleine Blütenansätze sind erkennbar, und der Duft intensiviert sich langsam, was auf eine aromatische Blüte hindeutet. Die Struktur bleibt stabil, und die Hauptcolas beginnen, sich klar zu definieren.
Der zweite Phänotyp entwickelt sich weiterhin kompakt, zeigt aber ebenfalls kräftigen Stretch. Die Blätter wirken gesund und robust, und die Pflanze bildet gleichmäßig mehrere Seitentriebe aus. Auch hier ist ein leichter, süßer Duft bemerkbar, der sich Woche für Woche verstärkt.
Insgesamt ein sehr dynamischer Verlauf der zweiten Blütewoche – beide Pflanzen zeigen gesunde Entwicklung, gute Struktur und eine deutliche Duftentwicklung.
EN:
In the second week of flowering, the first Last Dance phenotype continues to stretch strongly and is becoming even bushier. The leaves are deep green, glossy, and very healthy – indicating optimal nutrient uptake. Early flower sites are visible, and the fragrance is slowly intensifying, hinting at an aromatic bloom. The structure remains stable, and the main colas are starting to define clearly.
The second phenotype continues to develop compactly but also shows vigorous stretch. The leaves look healthy and robust, and the plant is forming multiple side shoots evenly. A subtle sweet aroma is noticeable here as well, gradually increasing week by week.
Overall, a very dynamic second week of flowering – both plants show healthy growth, good structure, and noticeable fragrance development.
Likes
2
Share
@TheBudWhisperer
Follow
Week 5 and PK deficiency has been corrected. Buds are building and feeds have been consistent at the high end of the maxi-bloom ratio - 2.5tsp/10L. Hopefully the higher pk strength doesn’t create any burn issues with the other, healthy plants.
Some very light pruning but generally leaving them all alone. Current choice cuts are plants 1,3,4 in terms of overall resilience and moderated nute reqs. This is an all-important consideration before we also start looking at overall aesthetic pheno traits. At least for running the F3s when the time comes. This strain is proving a little more challenging to grow than expected.
Likes
94
Share
@SensimillaP
Follow
These ladies had to be transplanted last week and some defoliation was done aswell.
