The Grow Awards 2026 🏆 


Likes
Comments
Share
@Grower_Of_Persia
Follow
week intel:
we had some dear guests of family from foreign country to meet again after years so i had to make some free space for their stuff therefore girls are going to be gusts too for a week in their neighbors home :D some times unpredicted things happen you must be ready to change at any time , so i moved some and chopped off weak ones
stresses :
E.C stress around 1.2 3 times per week
feeding:
replaced b-52 with Bloom base nutrient
i feed them 3 times this week with this order :
day 1 : i feed them high with base nutrients(calcium & micros (half dose) + Bloom) about 631 ppm - 1.2 e.c to cause a little stress.
day 3 : i feed them high dose of Top-Max + Bloom Base nutrient around 600 ppm - 1.2 e.c to let them recover a little but not fully recover still a little stress will caused.
day 5 : i feed them high dose of Feeding Booster around 630 ppm - 1.2 e.c to cause stress this last week
guide of the week :
we are in the final phases of this run , i'm happy about quality but depressed about quantity :D

Likes
21
Share
@CanadianFillmore
Follow
Welcome to week 3F of growfessor theatre, 4x4 edition.
The ladies are looking happy and healthy. Do-si-dos received a heavy defoliation, there were a ton of small inner branches starved for light, so they got cut.
LSD, Green Crack and Mandarin dreams all received a light defo, yellowing leaves were removed.
Lighting provided by Mars-Hydro TSW2000.
Thanks for stopping by, tune in next week growfessors for the next episode 👽🌳💚


Likes
2
Share
@pzwags420
Follow
week 3 i defoliated and increase nutes to week 3 strength. Liking the growth I'm getting from these phenos especially #1. At the end of week 3 Pheno # 1 is deff growing the best but I will flower out other 2 as well. Stem rub giving same smell on all 3 phenos. I cant describe smell of it yet but it is different then anything else I have now or have run in the past.
Likes
102
Share
@OrganicNature420
Follow
The mutants ended up being the best. An all rounder for sure. Smoke update coming soon with pics. The grow gods were with me through this one 💚

Likes
120
Share
@DogDoctorOfficial
Follow
Welcome back to another thrilling update on our Lego Ninja Tropical Tangie Run. Week 7 has been an exhilarating journey of rapid growth and breathtaking canopy development. Our Tangie is proving to be an extraordinary ninja superstar!
Last week, we embarked on an exciting transplant adventure. Our fearless Tangie had outgrown her previous home, so we bravely transferred her to a spacious 25-liter fabric pot. With the assistance of Aptus Holland Mycor Mix, we ensured a smooth transition, providing her with beneficial mycorrhizal fungi. These underground helpers are like her very own ninja squad, supporting her root system and establishing a strong foundation.
To continue supporting her growth and development, we incorporated the incredible Aptus All-in-One Pellets into the soil. These pellets act as potent ninja power capsules, packed with essential nutrients. Each watering session delivers the perfect dose of nourishment, fueling our Tangie's journey to greatness. She's thriving with optimal health and vitality.
And let's not forget our loyal companions, the trusty Lego Ninja buddies. They have remained steadfast by our side throughout this green adventure, offering both moral support and an unwavering display of ninja vibes in the grow room. Who would have guessed that little plastic warriors could be such fantastic companions?
After the successful transplant, it was time to introduce our Tangie to the art of scrogging. We skillfully installed a scrog net, creating a framework for her to weave her way through. This setup resembles a challenging ninja obstacle course, encouraging her to grow horizontally and maximize her bud production. It's truly remarkable to witness her impressive moves as she gracefully and sexily fills up the space.
Of course, proper nutrition remains crucial for our Tangie's ninja training. Instead of using Aptus Holland Veg Watering Mix and All-in-One Liquid separately, we have now transitioned to solely relying on the pellets. These convenient premixed pellets integrated into the soil eliminate the need for additional liquid NPK. This simplification allows us to focus on other essential aspects of her training.
To ensure she remains pest-free, we have been diligently conducting leaf picking sessions, which also serve as an opportunity to check for any unwanted visitors. So far, our Tangie has passed with flying colors, and her vibrant 9-fingered leaves are a fantastic sign of her overall health.
As our Tangie continues her epic ninja journey, she basks in a PPFD of 600. These photons act as her loyal ninja training partners, stimulating robust photosynthesis and fostering explosive growth. With each photon absorbed, she becomes increasingly formidable, ready to take on any challenge that lies ahead.
In summary, Week 7 has been an absolutely exhilarating chapter in our Lego Ninja Tropical Tangie Run. The successful transplant, the magic of Aptus products, the support of our Lego Ninja buddies, and the installation of the scrog net have all played vital roles in our Tangie's remarkable progress. We owe a tremendous SHOUT OUT to Aptus Holland, Dutch Passion, and Grow Diaries for their continued support and exceptional products for the love and for it all, without them nothing we see here wold be possible.
Join us for the next update, where we will delve deeper into the fascinating world of ninja training techniques and witness the unfolding of our Tangie's extraordinary ninja powers. Until then, continue cultivating with joy, embrace the indomitable ninja spirit, and remember that every plant has the potential to become a botanical ninja superstar!
As always thank you all for stopping by, for the love and for it all , this journey of mine wold just not be the same without you guys, the love and support is very much appreciated and i fell honored and blessed with you all in my life<3 <3 <3
#aptus #aptusplanttech #aptusgang #aptusfamily #aptustrueplantscience #inbalancewithnature #trueplantscience #dutchpassion #dogdoctorofficial #legoninjago #growerslove
With true love comes happiness <3 <3 <3 Always believe in your self and always do things expecting nothing and with an open heart , be a giver and the universe will give back to you in ways you could not even imagine so <3 <3 <3
Friendly reminder all you see here is pure research and for educational purposes only
<3 <3 <3 Growers Love To you All <3 <3 <3

Likes
6
Share
@PoshGrow
Follow
Welcome to Auto Alaskan Purple Grow by PoshGrow!
🍀 Week #10 2020 September 24th. - October 1st.
General Info:
When planted: 2020 July 23rd.
Week: 10
Days: 63 - 70
Last Update Day: 2020 September 30th.
Plants: 5 Alaskan Purple Auto.
Equipment:
Tent: MarsHydro 1mx1mx2m or 39"x39"x72".
Light: HLG 260w V2 Rspec QB Kit.
Exhaust: 4" 322 CFM fan + Viper Carbon Filter.
Intake: 4" 100 CFM Inline Fan.
Oscillating Fan:
Lower: 4" Ram Fan.
Upper: 9" Voxon Box Fan.
Humidifier: Taotronics TT-AH001.
Dehumidifier: Pavlit MD750.
Soil: NPK soil 40% Compost, 50% Peat Moss, 10% Agroperlite.
Pot: 7 gallon Fabric Pot x 5pcs.
Nutriens: Fox Farm Trio.
PH Correcton: Chemoform pH-Minus Granulat.
PH Pen: Cheap Chinese one, I callibrate it every time I use it.
Water pump:
Digital microscope: cheap Chinese USB X4, 1600X.
Comment
Removing all popcorn buds really pays off. Buds getting bigger and fattier every day. Right down corner girl will be done fastier then other ones, I think shes going down upcoming week! Ill start checking trichomes with digital microscope. Also this week was the last with nutritions, from now on, going to use only pH corrected water to flush those beautiful girls😉✌️
Peace!


Likes
36
Share
@Growbody
Follow
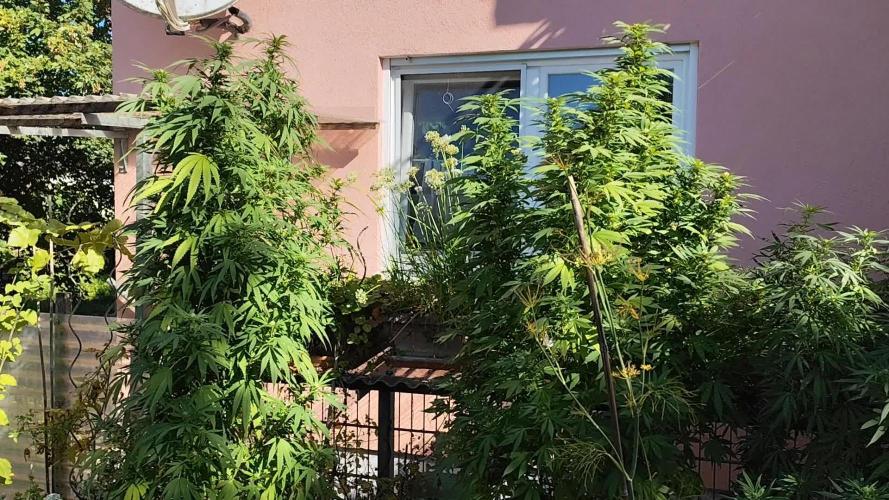
Hallo und herzlich willkommen zu meinem Growbericht Outdoor 2025 mit den Sorten Power Flower Feminized, Royal Medic Feminized und Special Kush #1 Feminized, alle 3 von Royal Queen Seeds. Es ist das erste Mal, das ich Töpfe für den Outdoor grow verwende, bisher waren alle Gorilla grows und direkt in die Erde gepflanzt.
Die URL der Power Flower Feminized: https://www.royalqueenseeds.de/feminisierte-hanfsamen/120-power-flower.html
Die URL der Royal Medic Feminized: https://www.royalqueenseeds.de/cbd-samen/148-royal-medic.html
Die URL der Special Kush #1 Feminized: https://www.royalqueenseeds.de/feminisierte-hanfsamen/138-special-kush-1.html
Die Planung für den Grow ist, die Samen in easyplug Anzuchtwürfeln keimen zu lassen und danach in 0,6L und 2,2L Plastiktöpfen, dann letztlich in die neuen komplett doppellagigen ROOTIES 15 Liter Wide Version Stofftöpfe umzutopfen. Sobald die Witterung es zuläßt, sollen die Pflanzen an die frische Luft.
Es ist schon eine Weile her, das der Grow losging, die Bilder sind jetzt aktuell.
Tag 197: Die drei Großen geniesen die letzten Sommertage an der Sonne bei nahezu Windstille. Der abgebrochene Ast wächst offensichtlich gut wieder an, keine welken Blätter vorhanden. Mit dem Höhenwachstum ist langsam Schluß, die drei Ladys konzentrieren sich auf ihre Blüten.
Tag 200: Seit gestern Mittag sind die drei Grazien wieder im Trockenen untergebracht, seitdem hat es 40 Liter/m² geregnet und es regnet weiter. Und einen Temperatursturz von Samstag mit 29°C auf Montag mit 13°C hat es gegeben.
Wenn's dir gefallen hat, schau wieder vorbei ✌️😎
Likes
5
Share

Likes
43
Share
@TheCannaProphet
Follow
~ FastBuds PAPAYA SHERBET Photoperiod~
Well here we go on another journey together through 'Canna-land' and this one's kinda special... forget that, it's VERY special because this is FastBuds newest surprise for the community, a FEMINIZED PHOTOPERIOD STRAIN!🤯
I was fortunate enough to score these seeds, of which only 1000 were available and can't wait to see what this strain can do! This Papaya Sherbet, according to FastBuds, is a hybrid with a 9-10 weeks flowering period. For a more detailed and accurate description of this strain the following from FastBuds says it best:
"Combining the massive stature of Papaya (Oni Selection) with the strength and resilience of one of our best keeper cuts (Sunset Sherbet), this strain develops into a big, expansive bush adorned with numerous bud sites that later transform into a generous harvest of medium-sized buds. Papaya Sherbet flowers deliver a signature flavor of premium cannabis with subtle citrus undertones that emerge upon inhaling. During growth, her aroma makes for a sweet yet pleasantly bitter fragrance, giving you an idea of what the smoke will taste like. Notably stress-resistant, Papaya Sherbet is a great choice for growers working in challenging environments. She is very forgiving and rebounds quickly from any adversity, allowing growers the freedom to experiment with confidence that she will take everything like a champion she is. This strain embodies resilience, flavor, and abundant yields in every grow cycle."
Sounds like an epic strain and I personally cannot wait for this lady to strut her stuff!😍
________________________________________________________________________________________________________________________________________________________________________________________________________________________________________________________________________________________________________________________
The Setup:
This is going to be an outdoor grow, but I have started the Papaya Sherbet photoperiod indoors as our weather is still a bit too chilly to put a newly sprouted seedling outside (nighttime temp's dipping regularly into the 40's℉).
The plan is simple... let her grow inside under a 19/5 light schedule until the nighttime temperatures are in the mid 50's℉, which shouldn't be long. After which, she'll be moved outside and transplanted into the soil which I have already setup and inoculated with beneficial microbes from BioTabs and slow release dry amendments from Gaia Green. Once she's established herself outside she'll be given periodic top dressings of Gaia Green 4-4-4 and 2-8-4 along with worm castings and Compost Tea's. Her grow area is approx. 5'x5' and I have posts and a trellis net set up already for when she gets bigger to aid in training her. Let the fun begin!🤪💚
________________________________________________________________________________________________________________________________________________________________________________________________________________________________________________________________________________________________________________________
Weekly Updates:
9/4- The 4th week of flower is here and the FastBuds Papaya Sherbet photoperiod is looking fantastic! She's loaded with flowers that are all beginning to get frosty!
9/6- My daily watering campaign continues with me giving the Papaya Sherbet approximately 5 gallons of well water from the garden hose.
The flowers on the Papaya Sherbet are stacking away and the frost continues to accumulate!
9/8- Today, before watering the Papaya Sherbet, I did some needed plant maintenance, removing a bunch of old dead leaves, along with a handful of shade leaves that were yellow.
9/10- Well with four weeks of flower behind her now, the Papaya Sherbet photo is almost halfway through with another 5-6 weeks to go. I only hope and pray🙏 that the weather cooperates and stays cool and dry!
Thank you for checking out my diary, your positive comments and support make it all worthwhile! 💚Growers Love!💚😎🙏
Likes
5
Share
@Major
Follow
hello that's it we're in the home stretch I'm starting to rinse my plants the buds are okay I'm very happy with my upcoming production. and already tested in smoke I'm happy😃😃😃😃😃😊


Likes
55
Share
@MadeInGermany
Follow
Info:
Unfortunately, I had to find out that my account is used for fake pages in social media.
I am only active here on growdiaries.
I am not on facebook instagram twitter etc All accounts except this one are fake.
Flowering day 29
since time change
to 12/12 h.
Hey guys :-) .
The lady is developing very nicely.
The buds start to grow.
This week it was poured twice with 1.2 l each (sewing materials, see table above).
As always, the tent was cleaned and the plants checked for health.
Have fun with the update.
Stay healthy 🙏🏻
You can buy this Nutrients at :
https://greenbuzzliquids.com/en/shop/
With the discount code: Made_in_Germany you get a discount of 15% on all products from an order value of 100 euros.
You can buy This Strain at :
www.Zamnesia.com
☝️🏼☝️🏼☝️🏼☝️🏼☝️🏼☝️🏼
Strain
Gelato clone from mother (Zamnesia )
☝️
Genetics: Wedding Cake x Gelato x Gelato 33
Vega lamp:
2 x Todogrow Led
Quantum Board 100 W
💡
Bloom Lamp :
2 x Todogrow Led
Cxb 3590 COB 3500 K 205W
💡💡☝️🏼
Soil :
Canna Coco Professional +
☝️🏼
Nutrients :
Green Buzz Liquids :
Organic Grow Liquid
Organic Bloom Liquid
Organic more PK
More Roots
Fast Buds
Humic Acid Plus
Growzyme Big Fruits
Clean Fruits
Cal / Mag
Organic Ph - Pulver
☝️🏼🌱
Water: Osmosis water mixed with normal water (24 hours stale that the chlorine evaporates) to 0.2 EC. Add Cal / Mag to 0.4 Ec Ph with Organic Ph - to 5.8 - 6.4
Likes
83
Share
@MrJones
Follow
mrjones Gorilla Cookies === IN TENT DRYING PLEASE CHECK BACK IN A FEW WEEKS!===
🔹🔹🔹🔹🔹🔹WEEKLY GOALS🔹🔹🔹🔹🔹🔹
PREHARVEST REPORT
🍃 Harvested 5 Gorilla Cookies from FastBuds today, the Buds looked amazing and put about 1500 grams into the Drying Tent!
🔹🔹🔹🔹🔹🔹🔹🔹🔹🔹🔹🔹🔹🔹🔹🔹🔹🔹
Rambling - Going to be shooting for a week to 10 days, the dry tent variables will be 55/60% RD and 65F Light Air Movement.
🔹🔹🔹🔹🔹🔹🔹🔹🔹🔹🔹🔹🔹🔹🔹🔹🔹🔹
▶️Saturday 02.06.21 / Harvested today these buds are sticky, sweet, and just beautiful!
🔹🔹🔹🔹🔹🔹🔹🔹🔹🔹🔹🔹🔹🔹🔹🔹🔹🔹
SOIL MIX
COCO - 70/30% Tupur Royal Gold 30 GALLON
WORM CASTINGS 5 GALLON
LOBSTER COMPOST 5 GALLON
PERLITE 6 GALLON
INSECT FRASS 2 CUP
ORGANICALLY DONE GROW 5 CUPS
BUILD A SOIL COCO MINERAL MIX 6 CUPS


Likes
8
Share
@JeyGanesha
Follow
Ancora pochi giorni ed è arrivata al traguardo.forbibben runtz very very good.fino AD oggi è la autofiorente più buona che ho trovato per la mia patologia.mi Allevia tutti i dolori e tutte le pene della vita 😂🤣🤤😍💪..grazie a madre natura e a fast buds per aver creato questa bella, preziosa e sacra pianta..... Om namah shivaya
Likes
1
Share
@Drtomb
Follow
Smells are really starting to come out. Some slight burn on the sour diesel, that's with a 500ppm nutrient solution.
Attached a video so you can see the buds much better


Processing
Likes
70
Share
@CBD_Sweden
Follow
@MephistoGenetics,
Hi all the happy people here in GrowDiaries.
This is my second cultivation ever and it will be fun to try a bigger space than my closet grow.
First, I'm just going to say I'm done with the construction of my new growroom.
The room is 2.14 meters by 1.7 meters and has a ceiling height of 2 meters.
It provides a floor area of 3.6 square meters.
I use a 54 Watt Lightwawe T5 for germination and 2 Pcs 400 Watt HPS lamps.
I have a channel fan that replaces the room air about 40 times an hour to get a comfortable environment in the room, the air enters a fresh air intake from the outside.
The air is purified through a carbon filter to then leave the room to the rest of the basement.
Then I use that heat to heat the rest of the basement.
I will use 10 pcs 15 liter Autopots to grow with and a 100 liter water tank that supplies the pots of water and nutrition.
I will grow completely organically in soil and will watercure my buds to get the best possible medicine for me.
But there are no cultivation rooms to be displayed here, so I continue with what is most important.
Today I have put my seeds in paper towel and hope the seeds have germinated within a few days.
I am very excited to see how the new growroom will work and how this Illuminauto 21 - Sour Crinkle will turn out.
Illuminauto 21 - Sour Crinkle (Grape Crinkle x Sour Crack)
Two of our fastest and frostiest varieties collide to make a sweet and sour delight!
Expect super frosty, compact nugs that won't be a toke for novices.
Destined to be a great strain for extraction work too!
Plant size - Small - Medium
Cycle time - 60-65 days from sprout
Indica/Sativa - 80/20
Frost level - Extra Ridiculous
https://www.mephistogenetics.com/product-page/illuminauto-21-sour-crinkle
.................................................................................................................................................................................................................................................................................................................................................
2017-08-21. Started to germinate the seed.
.....................................................................................................................................................................................................................................................................................................................................................
2017-08-23. Seed germinated and put in small pot in the humidity dome.
.........................................................................................................................................................................................................................................................................................................................................................
2017-08-27. Slow and steady she grows.
---------------------------------------------------------------------------------------------------------------------------------------------------------------------------------------
2017-08-28. Transplanted in 15 liter autopot. Check the roots on this girl
-----------------------------------------------------------------------------------------------------
2017-08-29. New movie of the girl.
-------------------------------------------------------------------------------------------------------------------------------------------------------------------------------------------------------------
2017-08-29.
Hello to you who read my diary, I just want to say that I am pleased that you have chosen to check in with me and in my diary.
I just want to say that I do this for myself and for a steady flow of my medicine.
Everything you read and see in my diary is 100% honest and I will never distort or beautify anything here.
I document my crops so that I can learn from my mistakes and also to look back at those different crops.
I try to update with pictures every day and with text if something special has happened in the garden.
This is my strainhunt for the best medicine and the beginning of my journey with cannabis and the cultivation of it.
-----------------------------------------------------------------------------------------------------------------------------------------------------------------------
2017-08-30. Cleaned the room this morning, just vacuuming and cleaning with chlorine solution. Im testing the fan to control temp and humidity, it works great.
Added some pics and a movie. Everything is looking great right now.
-------------------------------------------------------------------------------------------------------------------------------------------------------------------------------
2017-08-31. 3 new pics.
---------------------------------------------------------------------------------------------------
2017-09-01. New pics and a video from the grow room today.
------------------------------------------------------------------------
2017-09-02. New pic.
----------------------------------------------
2017-09-03. New video from this morning.
---------------------------------------------------------------------
2017-09-04. Week 2 starts now, new pics.
-----------------------------------------------------------------------------------------------------------------------------------------
2017-09-05. KL 08.00. Cleaned the room this morning, just vacuuming and cleaning with chlorine solution.
KL 12.00. The girl got 2 liters of water with nutes in it, added a video.
---------------------------------------------------------------------------------------------------------------------------
2017-09-06. KL 08.00. The girls woke up after their beauty sleep, the leaves are always a bit down after 6 h of darkness, but they will stretch now when the HPS lamp starts.
Everything looks good and I keep trying to tuck the leaves so they get the maximum amount of light where needed. Added pics and video.
--------------------------------------------------------------------------------------------------------------------------------------------------------
2017-09-07. Day 17 from sprouting. I have never tested PH in my grows, when growing organic in soil iv learned that it adapt PH by it self. But im curious by nature so i had to test.
Kl 10.00 Tested PH in the soil, it was 6.9 and tested my tap water and it was 6.8. Added video of the girl.
Kl 22.30. New pics.
------------------------------------------------------------------------------------------------------------------
2017-09-08 KL 08.00. Good morning, added new video.
2017-09-08. Kl 23.50. Gave every girl 3 liters of water and nutes, added new video.
------------------------------------------------------------------------------------
2017-09-09. Kl 21.00. Defoliated a lot and added pics.
-----------------------------------------------------------------
2017-09-10. Kl 08.00. Last day of week 2. New video.
2017-09-10. Kl 23.00. 3 new videos.
