
Likes
Comments
Share


@FlowerForYou
Follow
15/08/24 (FD 22): Started to give my girls some more bio bloom to boost Phosphate & flower development, for now they seem to handle the extra nutes with no problem what so ever!
Also the stretch seems to be done and they reached 1m in height. I wonder how tall they would have gotten if I wouldn't have topped them in week 3?
There is one really weird mutation in the big girls which results in a flat stem with a bend and stunted top...I am really curious to see flower development on this one!
I hope they will reach their maturity in 6 weeks so I can harvest before October when it will get humid & rainy!
Stay tuned

Likes
5
Share


@RastaRick
Follow
Blackberry Gum Auto looks real hungry signs of deficiency... Bio Pk 5-8 dosage upped to 15ml in 1 liter per week for everyone
Buds starting to gain some weight

Likes
28
Share


@Kitties_and_Colas
Follow
We've had a fairly warm week for our part of the world...I hope it holds out, I'd really like another 4 weeks....

Likes
11
Share


@TheMeltCorporation
Follow
Havrested a bit before just becouse i needed to have a harvest before the full one

Likes
8
Share


@xXNoShowXx
Follow
Growing medical marijuana has been such an amazing outlet for me. And I think that I would be in a much much worse place without having in my life as far as cultivating goes. I have formal education in horticulture specialist, however marijuana is so resilient and so strong and so willing and ready to live. But I plan to take it to its limits


Likes
6
Share


@greenbeans420
Follow
Noticed PK deficiency in leaves so added 2 tablespoons on happy frog Bone Meal and 2 tablespoons on Down to earth...
Week 9. Plants liked the added PK but damage was dealt plants getting a heavy flushing.


Likes
Comments
Share

@Hundreds
Follow
All good was draping a little but just needed water and Nutrients so I watered and fed them
Likes
Comments
Share


@Robom069
Follow
Day 39/40 of the adventure, just trimming and letting them cook...

Likes
48
Share


@Aleks555
Follow
Hello, folks. The week went well. We are feeding at 1200 ppm and have activated CO2 supplementation 1500 ppm

Likes
25
Share


@Ganjeiro420
Follow
Eai comunidade GD, uma ótima semana pra todos!!!
Essa semana a planta já está se preparando para a tão esperada hora da colheita, a grande maioria dos tricomas já estão ficando leitosos acredito que só precisa mais dessa semana 🙏
A cor dos Buds da Banana Purple punch já estão meio roxos e açucarados, já a AK auto está com os pestilos com cores alaranjadas, os tricomas já estão bastante leitosos mais ainda quase nenhum âmbar, Irei fazer a colheita dos tricomas 30 a 50 % âmbar☘️
Iniciei o flush essa semana, agora as regas são só com água, não vejo a hora de colher esses Buds perfumados 😍
Likes
8
Share


@Comfrey
Follow
This is the last week for our Tangerine Dream. The same like with my first two plants: bud rot because of very wet conditions. So here I already had experience to spot it early and I lost approximately some grams of the wet top flower.
The week was simple. No water, three days no light at all. Life ends in our basement.
Processing
Likes
16
Share


@S1993
Follow
Buds starting to put weight on and plant has got quite frosty really surprised with how stocky she is!
Likes
15
Share


@BushDoctor740
Follow
Day 11 i feel like the girls are getting stronger so I top dressed with 4-4-4 Gaia Green and watered with recharged tea ph to 6.5.

Likes
13
Share


@TerpTurtle
Follow
A few weeks into flower now for the original Malt MIlkshake
MM#1 with heavy purple punch face off terps and the MM#2 is smelling like a sweet gassy waffle cone
DO NOT SLEEP ON CLEARWATER GENETICS!
Likes
35
Share


@The_Bearded_Grower
Follow
Day 80 Harvesting was a bit of a trick with this one because I used to Trellis Nets but it went very smoothly no accidents and in the end I ended up with a staggeringly large amount of wet weight. My wet weights have a minimal amount of stock so that they more accurately represent the actual weight of the flower itself. In three days roughly I will be putting in the dry weight and then putting all the flowers into curing.
welcome to Day 83 this will be my last update i have now done my final trim and got my dry weight 362.30 gram's !! off one plant. that's 12.77 ounce's i don't sell but my god if i didn't care about laws lol, For a plant thats no cured i will sat it tastes smooth AF and has a nice head high that i didn't really expect from her being that its not cured and didn't really look like she had tones of trichomes. This baby is going to be nice in a month.
I'd like to thank everyone that followed this grow and asked questions as always my friends keep your stick on the ice
Likes
25
Share


@Gutismoke102
Follow
Wow look at her grow we are in the second week of her flowering stretch and she looks amazing. Smells good already omg super excited about this one ☝️🏽

Likes
19
Share


@nonick123
Follow
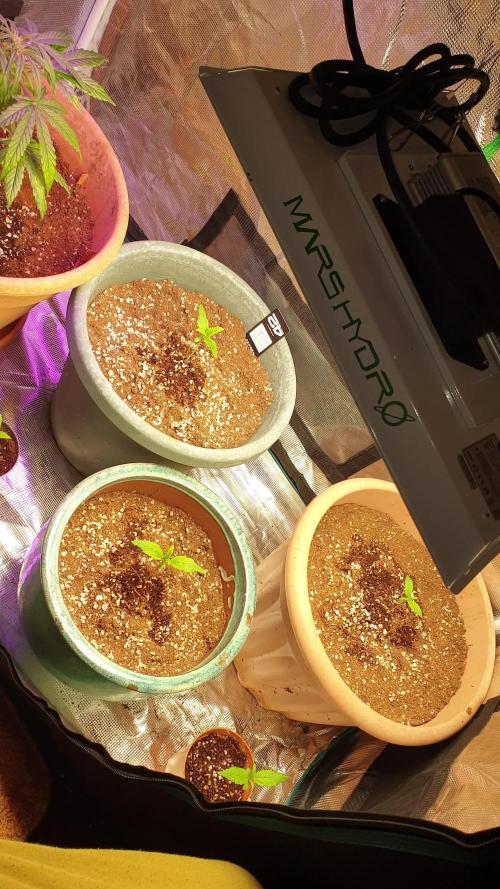
Día 13 (06/05) Nos acercamos al final de la fase plántula. A ver si ahora empiezan a crecer de forma explosiva!
He sido muy estricto con los riegos, dejando que el top hasta el nudillo se seque completamente!
Día 14 (07/05) Hago una mejora en la tienda. Hasta ahora tenia intracción pasiva, pero ahora he instalado una turbina para que impulse aire fresco dentro de la tienda
Día 15 (08/05) Con el calor que hace me sorprende que las macetas sigan aguantando la humedad, pero al hundir el nudillo sigue húmeda. Mañana haré un riego de nuevo
Día 16 (09/05) Relleno el top con sustrato para compensar la compactación y dar mas soporte a las plantas
Riego con 300 ml solo H20 - pH 6,2
Día 17 (10/05) Baño de sol de dos horas.
Día 18 (11/05) Baño de sol de dos horas
Día 19 (12/05) Riego 750 ml H2O + Regulator 0,15 ml/l + CaMg-Boost 0,25 ml/l + Startbooster 0,25 ml/l - pH 6.2
💦Nutrients by Aptus Holland - www.aptus-holland.com
🌱Substrate PRO-MIX HP BACILLUS + MYCORRHIZAE - www.pthorticulture.com/en/products/pro-mix-hp-biostimulant-plus-mycorrhizae
Likes
17
Share


@Naujas
Follow
it's amazing, this growth looks much better than my first attempt, my decision was to put a smaller pot and change the light - the girl really liked it, FastBuds goriilla cookies with a small space manage perfectly:).
Likes
18
Share


@Sti_Cazz
Follow
So this week the plants streched like crazy, the NL started to flower too and has actually become taller then the other 2 plants, even though its technically 2 weeks behind. the strange thing is its way more spacious then the packed Diesel.... it'll be fun seeing how they match up in the end!
My new fan and dehumidifier solved the RH issue I had and I crushed it down to under 50% now! Things are looking like they're on the right track.....fingers crossed!
I wonder if there is anything else I can add , nutrient wise... i know I shouldn't overdo it but I'll play around a bit and see.
Got rid of most bigger and medium fan leaves that i felt were blocking the bud-sites from getting light...again, not sure about if I'm going about this the right way, seems counter-intuitive to get rid of so much green but hey ...it helps greatly with lowering humidity and keeps the bottom of the girls nice and ventilated. I actually took off a bit more because it keeps growing shut.
Update: got some big bud and overdrive from my local grow shop... I'll give it a try...
