The Grow Awards 2026 🏆 


Likes
Comments
Share
@Waveform
Follow
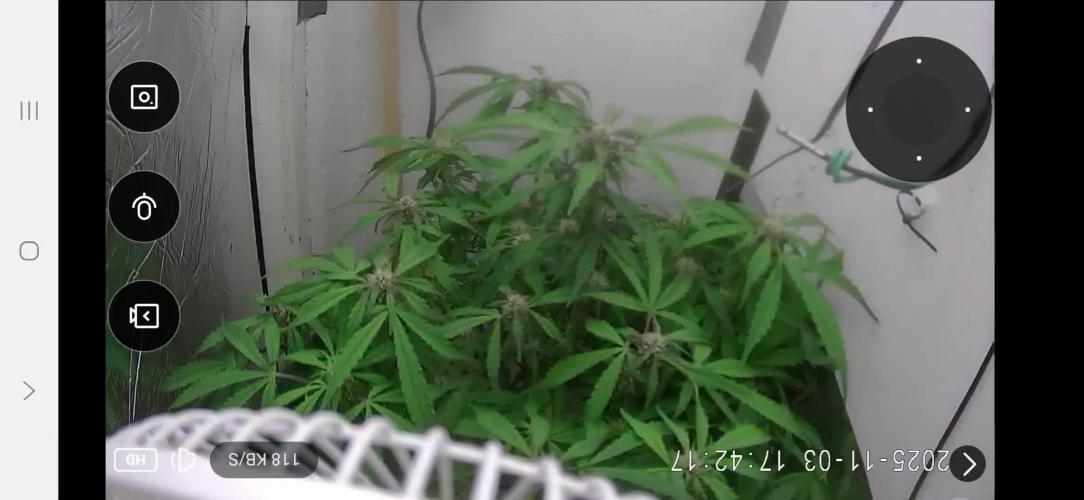
Day 33: What an amazing height and bud gain in just 3 days! Lady #1 is 67 cm tall now, her sister a tad smaller. Both still have a great color, and I dared to cur away just the lowest branches and leaves that do not look like they could gain height in time. Really enjoying this strain so far!
At the end of their day, they are a bit dropping leaves, so clearly no hunger for more light. The impressive growth speed continued on their buds: Tallest lady at 70 cm now.
Their next morning shows growth is still at an impressive 5 cm/day as lady #1 with her leaves erected again stretches now 72, the maximum of my previous growth. Pulled the lights as close as possible to the ceiling and hope they won’t make it much more than 1 m. I activated the Sansi 30 W folded wings LED to give them somewhat of a morning and evening light and to add some more light to their overlapping center branches in the middle of "their" day. Sadly that’s causing some interference to the timelapse videos, but I can’t say they’re perfect if it wouldn’t.
Watching the timelapse video of day 34, I have the feeling the additional light rather irritates them. Maybe the interference is not only visible for electronic eyes. I’ll keep it off next day for comparisons.
Day 35 shows stretch speed has reduced indeed and they seem to be concentrating on leaf and bud growth instead. 75 cm, so we are currently at "only" 3 cm/day. Watered them with a HPE/Bud growth mix again last night, about 1 l each.
Well, forget my words about reduced growth. After they recovered during the night, we are at 77 cm for lady #1.
Which measured at 78 with hanging leaves in their day’s evening. I must have missed a day number – day 36 concludes their 5th week. I gave them another 2 l of fertilised water each and will lave them for the weekend again.
Video shows that growth concentrates now more on leaf and bud development than on gaining height. So I guess my 160 cm tent will be sufficient. For a moment I was worried, but it looks like stretch is over. Anyway, time to rearrange the camera next week. Leaves are running out of focus.

Likes
7
Share
@Albeginner420
Follow
Beginning of week 2 of flower. Another defoliation/ lollipopping done. The cookies surprise me... she's a sativa with vigorous growth with a short internodal space and a bushy structure, but I think she can perform even better.

Likes
10
Share
@Jbcultivates
Follow
Week 5 of flower and the buds are stacking up nice. Plenty of white hairs and the smell is starting to kick up. I’ve got 5 plants. 4 hydro, 1 soil. The soil nugs are getting fat!

Likes
12
Share
@WestieWeed
Follow
RUNNING OUT OF ROOM!!!!!!
light is sitting 12 inch from the top of the plants. Had to put another screen down to give me just a little more room. not to sound like im sucking my self off
but i really didnt expect these plants to grow so well so now its a mad panic to save some room. Getting cold during the day and night here so temp control is still and issue.
week posted a day early due to holiday obligations . hoping the stretch last another day or so before bud start producing
Update
but who the F$%^ knows this is all new to me
Update
Three days into week 10 and i had to push down a second SCOG net and push some of the stems down. showing signs of what i think is light burn .... even though im using leds. dont think its nute burn gonna add some pics and maybe you can see it. these little babies shot up fast one night after being pushed down. the white hairs are starting to really show still got 12 inches of room from the light. With everything ive read online my flowering phase seems to be a bit behind the what i would call normal time line but im guessing its just the strain im growing.

Likes
25
Share
@Swanberg
Follow
Very easy trimming not to many excess fan leaves definitely best yielding.

Likes
26
Share
@Mrs_Larimar
Follow
2022-10-09
Plant grows lovely!
strong with huge Leaves, shes going to be topped.....
very soon
website for for my Fertilisers:
https://greenbuzzliquids.com/en/shop/
Code: mrs_larimar
Breeder Info:
👉Black Sugar is an indica dominant hybrid of Black Domina, L. A. OG and Critical.
It has kept the medicinal properties of L. A OG, a good flowering rate on the Black Domina lineage,
and the compact size of the classic Critical strain. With its small growth, the strain produces large yields
of up to 600gr/m2 on bushy branches. The buds are very dense and stinky.
Black Sugar has a high THC level. The variety has a fruity citrus aroma. Dense smoke gives the effect of relaxation and body buzz.
Good for Smoking before going to bed. It can become one of your favorite Seedsman strain
Genetics Black Domina x L.A OG x Critical
Harvest 450 - 500 g/m²
Flowering 50 - 55 days
THC 20.0%
CBD 1.0%

Likes
2
Share


Likes
10
Share
@Shefman93
Follow
Top dressed at the start of week 10 of veg in preparation to start flower this week. Defoliated and lollipop the bottom and also switched using recharge at every watering to tribus bloom at 1/2 strength to add microbes. Dropped ph to 6.3. The pics and videos this week is from 3 days after flipping the light schedule.the tent took longer to arrive than expected, I honestly would’ve flipped at the end of week 8 if I had the means, hopefully the flower stretchy isn’t massive, the plant sits at 42 inches and the plant pot is 1 1/2 feet so I am running out of space in the tent quickly.


Likes
56
Share
@KingSalomonsWeed
Follow
Das war ein aufregender Lauf. Problemlos, aber aufregend sexy.
So ab Blüte fühlte es sich an wie das Video. Aufregend, Anziehend.
Das ist total geiles Weed!
9 Punkte
Sehr Empfehlenswert für Feinschmecker, die wenig Zeit haben.
Und trotzdem ne starke Brise um die Ohren gehauen bekommen wollen.
03. Februar
Oh Jungs?
Knallt gut!
Schmeckt gut!
SWEET SEEDS, SUPERSORTE!
06. Februar
Munchies und ein tiefer zufriedener Schlaf inklusive. " GEIL "
Likes
27
Share
@Basementganja
Follow
Day 33 - Removed the First set of leaves. (Single finger leaves)
Watered when dry (about 4-5 days between watering now, due to the topping/cloning).
Will either need to be watered with nutrients soon, or root pruned + fresh soil.
Likes
5
Share
@smoking_hills9
Follow
Almost perfect. Very happy with outcome. Definitely will grow again. Hope to get at least 80gr from each tree


Likes
4
Share
@Selkot
Follow
.
YEAR 6 - 1st quarter
----------------------
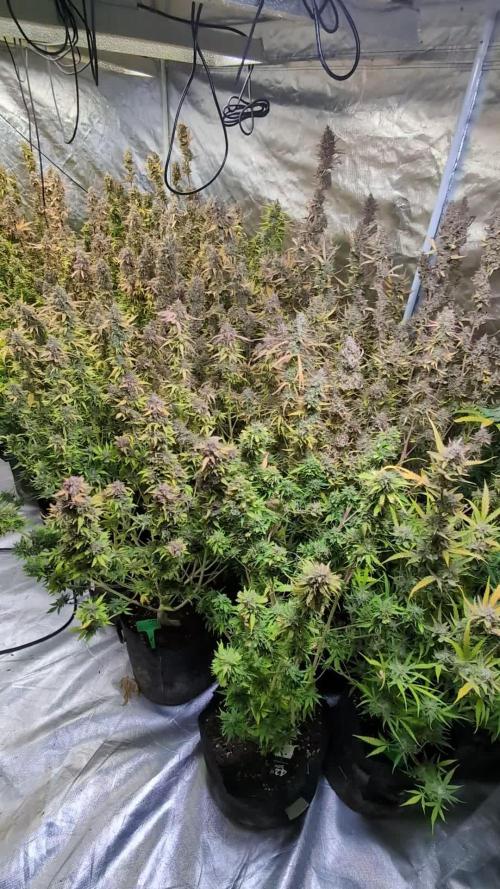
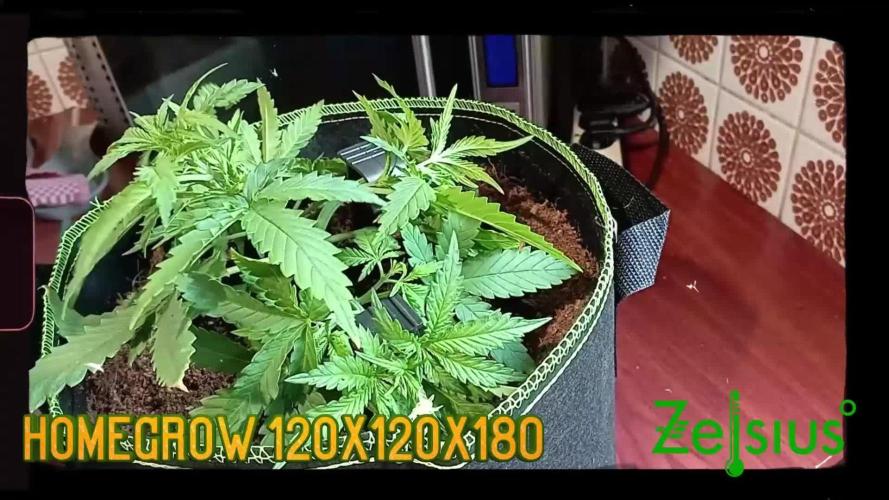
Back from Africa in August 2025, I’m getting back to work 😊
This time, no hesitation about the setup : I’m going big: a 120×120×180 tent with my two TS1000s, plus two FCevo1500s, for a total of 600 W over 1.44 m². That’s finally a decent setup for home use 👌
I’m starting this new season with some Fastbuds: 5 White Widows in 15-liter pots and 1 Banana Purple Punch in an 8-liter pot.
The 5 White Widows produced 558 g : a new record by far! 👍
Shows that nothing matters more than light
The Banana is nearing the end of its cycle; results coming soon.
Likes
Comments
Share
@marcian
Follow
Semana #2
La catástrofe.
Al llegar a mi casa, encuentro este triste escenario.No cerré bien una de las entradas del indoor y una de mis gatas entraron.
Murieron tres plantas.Dos Auto Brooklyn Sunrise y una Xtrem Haze.
Sentía que este cultivo tenia que ser desechado por todos los problemas iniciales, pero decidí continuar para ver que tanto pueden aguantar las plantas y por la inversion en estas semillas.
Las sovrevivientes se veian un poco torcidas, pero veremos que tal siguen.
Por todo esto, a las sobrevivientes (3 Auto Mazar y 2 Xtrem) no les haré ningún tipo de técnica y trataré de abonar con lo mínimo un par de semanas.
Likes
47
Share
@GanjaReaper
Follow
Hello Everyone 👏,
As you can see, are all Cherry Colas growing, they all have a tightrips in their pots for now, for recognition.
Will make nicer pictures of them in a few days.
They are now 4 days from germination🙏.
The humidifier had been added, so I had to adjust the room a lil bit.
Seedlings don't need much nutrients, neighter do autoflowers. with normal soil I would recommend to only give water for 1-2 weeks, since it holds nutrients in it as well.
But since I'm using Cocos for this grow, I might have to add some basic nutrients in the upcomming week.
For this week I gave/give only water turns and Startbooster turns.
Update day 5:
- Lowerd the lights to avoid stretching. they are now at 75cm distance from lamp to pots.
I want them at 40-50 cm, but I don't want to rush it.
- Added another layer of cocos to avoid the soil from drying up therefore the roots from dying.
This will happen because of lowering the lamps down, the soil will get exposed more to heat.
As you can see, the humidifier is doing his thing haha. Pictures and videos where taken without the lights + fans on.
because of that, it will look like this. Still fun thought.
Enjoy 🙌
Likes
38
Share
@kijani
Follow
i killed the poor girl ... i had too many infrastructure issues in the form of leaks and nozzles falling off. we had a funeral, then i tore the house down and rebuilt it so we not have the same none girl related issues again.
i also started another Hawaiian Thai kush seed from my rare collections of zilizopendwa -. the loved nuggets
Likes
14
Share
@TOMI08
Follow
9.hét
Rég voltam itt
A lányok szépen fejlődnek
Tegnap kaptak neem olajat
Csak esővizet kapnak
Lehet a tápanyagot növelnem kéne?mit gondolsz?

Likes
26
Share
@GroloCup
Follow
She's moving along into flower and I've started using a little bloom nutes now that the stretch is tapering off. Took off a few fan leaves that were blocking some bud sites and removed some lower growth that wouldn't make much more than underdeveloped larf. She's definitely crowded in the tent, but she's continuing to go through her paces and should stay on track. She's starting to effervesce and it's a sweet earthy note with a more skunky stem rub. Lets see where this week takes us!

Likes
137
Share
@Wastent91
Follow
Allora, come avete potuto vedere con i vostri occhi, i questa ragazza ha avuto un sacco di problemi fin dall inizio, ha avuto stress da calore, stress da condizioni non stabili come avrei voluto di umidità /temperatura, ma nel complesso è uscita una ganja, un prodotto automedicante davvero interessante, da sperimentare prossimamente con attenzioni migliori! Purtroppo non ero abituato a gestire così tante oaintae in uno spazio così ridotto , al prossimo ciclo manderò in fioritura una settimana prima, altrimenti mi ritroverò con dei mostri un bel po' difficili da gestire in una box come la mia , ma devo dire che sono rimasto davvero sorpreso dei risultati che sono riuscito a raggiungere, merito della mia sconfinata passione per questa meravigliosa pianta magica, e anche grazie a voi che mi seguite! Ne vedrete delle belle prossimamente! Un buon 420 a tutti voi!, fumate e state tranquilli! 💪😸😽💨
