
Processing
Likes
Comments
Share


Likes
2
Share


@Cannaapeace
Follow
Next week is the last week before 2 weeks flash:)
I'm a bit sad that they haven't become any real fat buds, but the next run will be with extremely good seeds, you can look forward to it.
Nevertheless, the cherry runtz looks great, it is covered with trichomes and has a very sweet and sour smell
Cannaapeace

Processing
Likes
32
Share


@Platinouuu
Follow
Ultima Semana amigos!Ya para el dia de hoy llervamos 24 horas de escuridad para darles 24 horas mas para pasar a picar las plantas. Hoy haciendo esta publicacion le quedan 24 horas mas de oscuridad, osea mañana miercoles es el 2do dia de oscuridad para picar. Noto muchos terpenos, en cuanto a produccion, ésta sepa no produce muchos cogollos,eso lo lei luego de ya sembradas, se ven muy bien, les estare contando hacerca de sus efectos, pero su olor es fuerte, me tioene toda la casa olorosa a frutas. Muy contento y deseoso de probar esta sepa. Luego de cuidarlas mucho, se ven alegres, para pasar al proceso de secado, esperen a las cosecha amigos, y gracias por tooodo su apoyo. UN ABRAZO GRANDE A TODOS, buenos humos!

Likes
9
Share


@Jakobyzone420
Follow
Settimana 11 di lavaggio radici aspetto di arrivare alla 12 e taglio tutto sono molto contento se avete consigli su una buona essiccazione e concia vi ringrazio ragazzi 💚

Likes
44
Share


@XperencdGmanXG
Follow
first week of full flower, plant is looking good. 2nd last foliar spray of the year yay! We are getting there. Should be 7 to 9 weeks from now depending on weather. I'd LOVE to see some rain.
Processing
Likes
3
Share


@Jimponic
Follow
Week 5 of flowering stage .
Premium mix from MSNL
3 out of 10 seeds female
Likes
13
Share


@WeedM8
Follow
Hello m8 welcome to this journey with me in this diary will have very interesting strains hope u find something useful
Persi
- [ ] 1st week Veg: germinated in substrate lighting very close so it jets medium high humidity after the 3rd day they started sprouting
- [ ] 2nd week Veg: this week my ventilator broke down and as the temperature stayed very warm nothing developed much
- [ ] 3rd week Veg:fortunately this week i had fixed the ventilation and the temperature has go down a bit allowing the little plants to develop and reinforce
- [ ] 4th week:very good developments in this week I already started feeding a bit two times but i didn’t have to…once was enough
- [ ] 5th week Veg:this week they were very strong green i only had to water them good and keep the ventilators going no stop .They have good hight already ,but as i have to strains together. I want to transplant them when the hight of the other one have stretched… I’m thinking to transplant next week if not the next one
- [ ] 6th week Veg: this week it went great fortunatly i dont have pests that eat my buds i’ve givven a fed once the substrate is very rich already the plants streached very well i will transplant today so be ready m8 i cant wait to show you the progress
- [ ] 1st week Fl:they started stretching and looking very healthy just transplanted
- [ ] 2nd week Fl this week I’ve been away i had a friend taking care of them they stretching very well i hope that she starts putting energy into the flo
- [ ] 3rd week Fl:they are streaching very well ..getting the light very well
- [ ] 4th week Fl:there we aree guys the good stage is heree good high hope dosent effect de prod
- [ ] 5th week Fl:pumping very good this week a lot of changes started already being frosty
- [ ] 6th week Fl:this diaries its not daily updated this week its going’s so great we are close to harvest between next week and the other one . Ill harvest them at diffrent time just because they are not all at the same point of flowi
- [ ] 7th week Fl: im so satisfied from the way that this is going they didnt had any particular stress just that its 29 degrees during light and its going good so farr I haven’t constantly fed like on the peach g and pcr i hope for better taste at the end

Likes
40
Share


@valiotoro
Follow
Easy trim✂️
The buds are super sticky & dense⚡️
The smell is Absolutely DIVINE,flowery sweet & orange🤤🍊🌸


Likes
8
Share


@Comfrey
Follow
The week started with an of trichome production and smell, orange and mandarin peel. Really nice to smell on her. She is packed with flowers and looks quit healthy. I need to have an eye on nitrogen. My potting mixes were a bit too hot and Tangerine Dream maybe needs a flush. We‘ll see how she will looks tomorrow morning and the so decide.
Likes
Comments
Share


@GermanExotics
Follow
First Week i was trying out HPS lights both at 125w but capable of 400w, which i later Switched to two grow the jungle Jackson nemesis 250w not 200w as it said couldnt find the right model to put in. They got Regular water because i was still waiting for most of the equipment. I germinated 10seeds 5 of each and every one germinated pretty fast bout 12to20h.
Likes
5
Share


@RnDgrows
Follow
A great week with the buds really swelling in size and the smell getting more potent!
Gave it a last bit of molasses and continued with the flush.
Trichomes are milky with a few clear still.
Super excited to harvest soon!!!

Likes
13
Share


@Sublyme_ness
Follow
Just look at it. All deformed and shit. Already has a fat stem on it.. maybe the nutes should be toned down? God knows.
4/2. It's like it's growing sooooo many leaves... plain water at end of week. Contemplating defoliating it...

Processing
Likes
8
Share


@Max1973
Follow
Day 14 - Clay balls arrived, all looks good.... 😎
**the rust and damage on the first leaves is nothing to worry about,
the ice cream container water level dropped below the root level, fixed it,
but was cool to learn how fast hyrdo dmg can occur.... 👍
Day 17 - Lookin good... vid....
👍😎👊

Likes
9
Share

@nonick123
Follow
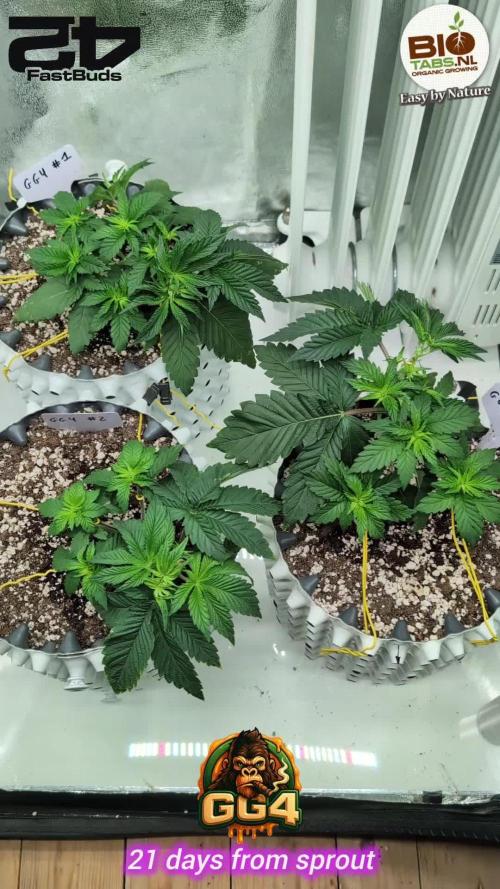
Día 15 (13/10)
#1 se muestra perfecta!
#2 se muestra más afectada en todas las hojas de abanico...
#3 muestra pequeñas manchas...
A ver como evolucionan los próximos días...
Día 16 (14/10) Subo el DLI a 35.5 (No puedo acercar más la lampara)
#1 se muestra con una mini mancha en una de las hojas de abanico más antiguas...
#2 está peor, pero las nuevas hojas de abanico están OK. El crecimiento está ralentizado....
#3 muestra las mismas pequeñas manchas que ayer...
Día 17 (15/10) No visiting
Día 18 (16/10) LST Time!
Día 19 (17/10) Defoliación y ajuste de LST
Riego con 500 ml H2O RO
Día 20 (18/10) Poda de alguna rama que se queda en la parte inferior, y ajuste de LST
Día 21 (19/10) Poda de alguna rama que se queda en la parte inferior, y ajuste de LST
Riego con 200 ml H2O RO
🚀 FastBuds 15% DISCOUNT code "NONICK" fastbuds.com
💦 Nutrients BioTabs 15% DISCOUNT code "GDBT420" biotabs.nl/en/shop/
🌱Substrate PRO-MIX HP BACILLUS + MYCORRHIZAE - www.pthorticulture.com/en-us/products/pro-mix-hp-biofungicide-plus-mycorrhizae


Likes
8
Share


@Weedganja420
Follow
Esta bonita cepa ha estirado mucho estos tres dias que lleva a 12/12 horas de luz.
Mide unos 53 centimetros y esta ramificado muy bien para mi gusto.

Likes
2
Share


@DogDoctorOfficial
Follow
🍃 Purple Haze Photo A — Week 4 | Preparing for Gravity-Fed Growth
Every grow has one plant that quietly starts telling you a story before flowering even begins.
Purple Haze A is becoming exactly that.
Growing under the same Future of Grow LED, receiving the same PPFD, sharing the exact nutrient recipe, environmental conditions and care as every other plant inside the tent, she has decided to express herself in a completely different way.
Instead of remaining compact, she has embraced her sativa heritage and is already showing the elegant structure Purple Haze is famous for.
Longer internodes.
Large healthy fan leaves.
Fast vertical growth.
Strong side branching.
Exactly the characteristics we hoped to see.
This diary is part of my ongoing 12/12 From Seed Challenge, documenting every step exactly as it happens. No shortcuts, no hidden techniques—just honest observations from a home grower enjoying the journey one day at a time.
⸻
🌱 Week 4 Development
This week was all about preparing for the next big milestone.
Purple Haze continued building an exceptionally strong root system while producing vigorous new shoots across every node.
The leaves are deep green, beautifully flat and reaching toward the light, showing excellent nutrient uptake and a very healthy metabolism.
Stem thickness has increased noticeably, giving plenty of confidence that she’ll easily support future flower production.
The spacing between branches also makes her an excellent candidate for training later, allowing light to penetrate naturally through the canopy.
Sometimes you can already tell a plant has personality long before flowers appear.
This one certainly does.
⸻
🚿 Time for AutoPot
This week also marks another exciting step.
Purple Haze A will soon become one of the plants running on my AutoPot system.
Since every plant in this project receives identical lighting, nutrients and environmental conditions, this creates a great opportunity to observe one important variable:
Top watering versus gravity-fed irrigation.
Rather than trying to prove one method is universally better, I simply enjoy comparing different growing styles under the same conditions and documenting the results honestly.
That is one of the things I love most about this hobby.
Every grow teaches something new.
⸻
💧 What is an AutoPot?
For anyone discovering these diaries for the first time, AutoPots are a completely passive irrigation system.
There are:
❌ No pumps
❌ No electricity
❌ No timers
Instead, everything works using gravity.
A nutrient reservoir sits slightly higher than the pots, allowing the solution to flow naturally through the tubing.
Inside each tray sits the heart of the system:
The AquaValve
The AquaValve is an ingenious little mechanical valve.
When the tray becomes empty, the valve opens and allows fresh nutrient solution to flow in.
Once the tray reaches the correct water level, the valve automatically closes.
The plant then drinks exactly what it wants.
Only after the tray is empty again does the cycle repeat.
Because the substrate experiences a natural wet-dry rhythm while always having nutrients available when needed, roots tend to develop extremely well.
Healthy roots often translate into healthier plants.
At least, that has been my experience.
⸻
🌿 Why I Enjoy Growing with AutoPots
Every grower eventually finds methods that simply fit their style.
For me, AutoPots offer several advantages:
• Consistent moisture around the root zone
• Reduced daily watering workload
• Excellent oxygen availability inside the substrate
• Stable nutrient delivery
• Very vigorous vegetative growth
Perhaps most importantly…
They let me spend more time observing the plants instead of carrying watering cans every day.
And honestly, watching the AquaValve quietly doing its job never gets old.
⸻
📊 Week 4 Environment
• Week 4 — Vegetation
• Height: 25 cm
• EC: 1.35
• pH: 6.1
• Temperature: 33°C Day / 25°C Night
• RH: 63%
• CO₂: 639 ppm
• Light Schedule: 12/12
• Water consumption: approximately 1.1 L per plant every 24 hours
⸻
🌿 Feeding Schedule
This week the nutrition remained simple and balanced using the Plagron Terra line.
• Terra Grow – 1.8 ml/L
• Power Roots – 1 ml/L
• Pure Zym – 1 ml/L
• Sugar Royal – 1 ml/L
• pH Plus – 0.03 ml/L
• Lemon Kick – 0.03 ml/L
The plant responded beautifully with rich green foliage, vigorous growth and absolutely no signs of nutrient stress.
Exactly the kind of consistency every grower hopes for.
⸻
💚 Final Thoughts
Week 4 feels like the beginning of something special for Purple Haze A.
She has developed into a vigorous, healthy young plant with beautiful structure, outstanding leaf health and plenty of energy heading toward the flowering stretch.
Now the AutoPot system enters the picture, adding another interesting chapter to this diary.
Whether gravity feeding produces bigger plants or simply makes life easier, we’ll discover together over the coming weeks.
That’s the beauty of documenting everything honestly.
Every plant becomes its own little experiment.
⸻
🙏 Thank You
A huge thank you to everyone following this journey and supporting home growing around the world.
Special thanks to all the amazing companies helping make this project possible:
🌱 Zamnesia Seeds — for the incredible Purple Haze genetics.
? Plagron — for providing the complete Terra nutrient line and outstanding growing media.
💡 Future of Grow LED — for delivering consistent full-spectrum lighting throughout the entire grow.
🌿 GrowDiaries — for bringing together growers from every corner of the world and giving us a place to learn from one another.
And finally…
Thank you for taking the time to follow this adventure. Your comments, advice, questions and encouragement make these diaries far more enjoyable to create.
Growers Love and see you next week, where Purple Haze A begins her AutoPot journey in earnest. 🌱💜
Likes
6
Share


@SolitudeCorners
Follow
Must thank to ripper seed that provide me with these awesome bean🙇♂️
21/2/24
Transplant clone
Vegetative stage
Light and Enviroments💡💧
Light 18/6 (06.00 AM - 12.00 PM)
Aim VPD around 0.7-0.9
Temp26-28 RH70-80
DLI 16-18 PPFD 200-300
21/2/24
Transplant clone
Vegetative stage
Light and Enviroments💡💧
Light 18/6 (06.00 AM - 12.00 PM)
Aim VPD around 0.7-0.9
Temp26-28 RH70-80
DLI 16-18 PPFD 200-300
22/2/24
Water 15L+Silica m/ fulvic 16ml(half) @0.1ec
+V1 130ml @1.2Ec+V2 125ml @2Ec
Ph 5.4 +Silica m/ Fulvic 25ml @PH6 Ec2.1
@11.00PM -Up to 6.2 @08.00AM
23/2/24
Last batch mix @ph5.7
2.30min shot 180ml
24/2/24
Tents feed 19 drippers @25min per min
Water3.8L+Silica mix Fulvic 6ml+1ml root exceluration+BushDoctor5ml total 0.3Ec
+V1 40ml @1.3Ec(50%)+V2 30ml final@2EC
Ph5.7
1min shot every 4and half hours total 4 shots
07.30 Am
12.00 Am
04.00 Pm
09.00 Pm
25/2/24
🏕️
Water 5L+Silica mix Fulvic+V1 45ml+V2 35ml Ph5.6 EC 2
1shot every 3hrs
First shot 12 AM
03.00 PM
26/2/24
🏕️ Last batch mix feed
1Min feed
12.00 AM
03.00 PM
Veg Foliar last 5min before lights off
27/2/24
🏕️ Water5L+Silica mix Fulvic 7ml+V1 40ml @1EC +V2 40ml @2EC Ph5.7
2Min feed
12.00 AM
03.55 PM
06.25 PM
09.15 PM 1min feed, hand watering to adjust any underwatering
28/2/24
Water 16L+Rhino Skin 15ml @0.1EC+Calmag 15ml @0.3EC PH6.9 + V1 125ml @1.2EC+V2 120ml @2EC PH6.2 adjust to PH5.6
Dryback right now is 15% for 24hrs
⛺ Feed
08.50 AM 1.30Min
02.25 PM 1Min
04.50 PM 1Min hand watering to adjust any underwatering
Defoliation most big fans leave

Likes
2
Share


@A_Aron
Follow
Day 50:
Everything is looking happy after the little trimming. Getting ready to head out of town in a few days. Ordered a small automatic waterer from Amazon to assist while I'm gone.
Watering/feeding day.
Each plant got 1 gallon of water with the following things:
5mL per gallon Alaska 5-1-1
30mL per gallon Alaska 0-10-10 (a little more than normal to give them a boost)
5mL per gallon GrowMore Seaweed Extract
15mL Blackstrap Molasses
Scratched into the surface of each pot is a 1/2 cup of Happy Frog Fruit & Flower
Day 52:
Leaving town early on Day 53 for 5 days. To prepare for the time I'll be gone I got an automatic watering system from amazon. Since I only use a total of 4 gallons during watering and only need one watering done while I'm gone, a single bucket will do the trick. I set up the system, installed two watering stems per pot, and made a looped system. In the bucket of water, I added nothing but the water. I don't want to have to worry about stirring it or anything like that. I set the system up to water when lights come on during the 3rd day I'm gone, Day 55. After I had the system set up I watered/fed the plants.
Each plant got 1 gallon with the following:
5mL per gallon Alaska 5-1-1
15mL per gallon Alaska 0-10-10
5mL per gallon Grow More Seaweed Extract
15mL Blackstrap Molasses
Plant 2 also got 1.25mL of AGT-50
Plant 3 also got 15mL of Liquid Culture Microbes
Plant 4 also got both the AGT-50 and LCM at the same amounts above.
Hope the watering system works.
Likes
11
Share


@DeepRootsGrowTrees
Follow
FORBIDDEN 🚫 RUNTZ BY FASTBUDS
Week #9 Ovetall
Week #8 Veg
This week she's starting to stretch out and looking 👍 she's going to be a good size plant she's bushy with many tops. Stay Growing!!
Fastbuds Forbidden 🚫 RUNTZ
Likes
23
Share


@Joni2017
Follow
Day 66, she continues the very healthy flowering 🙌 size 80 cm👏🏻👏🏻 temperature 24º C ☀️, humidity 60% 💧 watering 750 ml alternating one day with nutrients and another without nutrients with osmotized water 💦💦 Session 45 min. of binaural sounds for growth and healing 🎼 and music 😉👍