The Grow Awards 2026 🏆 


Likes
Comments
Share
@Bread_n_Buds
Follow
Here we are again ready to start again, always under the sign of Zamnesia, we make our fantastic plants and we show you what we are capable of. We have 5 autoflowering strains and 5 photoperiodic ones and now we present them to you.
The fourth autoflowering that we present to you is our version or rather of Zamnesia forgive me if I start to feel at home, it is the Northern Lights. Here we are talking about a classic of classics naturally in the Zamnesia version as I said above with the right ruderalis it really promises big harvests in a short time. There is great competition on this plant and I have grown some very good ones let's see what the home one is like.
To explain my germination method which is a combination of experiences acquired in the field and readings of the right advisors, I have chosen to divide it into phases so whoever wants can follow them and understand better step by step.
- Preparatory Phase ---- Check the average temperature in the room, humidity status to understand if it is the case to start or wait, I decided for the end of August because the temperatures start to drop towards the 22-25 degrees recommended for germination.
Then another thing more or less credible depending on the sensitivity is the control of the lunar phases. I believe in it a lot, it is a method that ancient farmers used to understand when it was best to plant depending on the attraction of the moon. To make my life easier I use a simple app that advises you on the right time to plant, harvest and put in the jar (depending on the lunar phases).
- Phase 1 --- Soaking in water. There are many authoritative friends who advise against this method due to the risk of drowning, but I have always been fine and I follow the rule if it opens in water the seed is almost certainly healthy and will come out of the ground 90% normally.
- Phase 2 --- Opening the seed in water. As soon as the seed opens and the root comes out a little, you have to be very very careful not to leave the seed in the water open for too long. This is why there is a risk of drowning. So as soon as the root comes out, it must be planted. Do not wait for it to stretch out a lot, you can wait a little longer in the absorbent paper, but not in water.
- Phase 3 --- In the meantime, while I soaked the seeds, I prepared my pots: I use small biodegradable pots (choose the ones with holes underneath for drainage). A few hours before working with the opened seeds, I moistened the soil with water adjusted to the right pH (5.8 - 6.2) and Plagron Power Roots. The small root is now open and we can make a little hole with a toothpick, widen it and insert the seed. Not too deep with the root facing downwards. From Serious Seeds we learned the dome technique: if you put a small dome of soil on the seed the water will settle on the sides avoiding overwatering problems.
- Phase 4 --- The plant emerges from the soil. So far I have not put the light, now I turn it on at minimum after half a day of soil to give direction to the seedlings. The first week the light will be gradually brought from 40% to 60% to go to 70% - 75% in the remaining weeks of veg. During the first week maximum, I keep the cycle of 24 hours to avoid stretching. Be careful not to exceed the first week at least with photoperiodic plants.
- Germination % --- In water 20/20 seeds have opened for good luck I'm waiting to talk when they come out of the ground but it seems that we are going towards an excellent percentage of germination..."Not too bad"...
- Soil and Food --- The soil used is entirely organic in its entirety and is the Plagron Promix that will be used with the 100% organic pack provided by Zamnesia complete with all the main fertilizers for your plant buy it at the link --
https://www.zamnesia.io/it/11457-plagron-easy-pack-natural.html
// Strain Description // Born from the rib of a classic, Northern Lights Automatic is a weed from the past, but with a futuristic update. This feminized version sees Northern Lights hybridized with a ruderalis to create an extra sweet variety, that all fans are sure to love. Growers can expect abundant results in just 9 weeks, from seed to harvest! -
- Get a seed of this fantastic strain --- https://www.zamnesia.io/it/3324-zamnesia-seeds-northern-lights-automatica-femminizzata.html
- Soil and Fertilizers entirely organic --- https://plagron.com/en
- Growbox --- https://www.secretjardin.com/
- Music and sound --- I made my girls listen to 432hz frequencies and music from www.radionula.com
- Z --- You can find these seeds, much more from the world of cannabis, mushrooms and an incredible series of accessories and gadgets on the reference site not only mine but of many growers ----
https://www.zamnesia.io

Processing
Likes
Comments
Share
@Fergie
Follow
Hey guys so here is f.b.t 2 still on fire and loving the new LEDs . Really loving how this girl is coming along structure everything is on point 😀 temps outside here are soaring so my Aircon unit is running at full power and have started running my Aircon water through my r/o setup and adding 5ml of calcuim and magnesium supplements to each 3 gallon bucket water i produce . So far so good til next week . 😀

Likes
2
Share
@Pi_growing
Follow
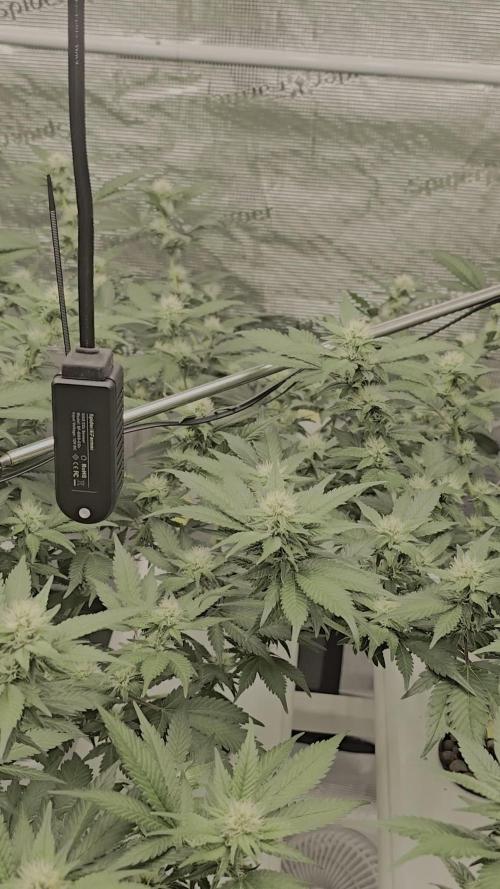
Day 22 begin of week 4
Ec drifted to 2.1 so i gave them a little flush while prepared the new water.
For week 4 ph is 6,0 and ec 1,9 maybe raise to 2,0
Ppfd ~ 850
The dehumidifier got a fulltime job now the Ladies are drinking ~8 liters a day

Likes
2
Share
@Saintvicious
Follow
Here we goooo! Etsy seeds here we come. So far have been happy with them.


Likes
39
Share
@King_Green21
Follow
New environment set up will be transplanting into bigger pots Friday then watered in.
Day 25 - Today I transplanted them in to 12.5l super air pots and moved them to there new home fed them ph’d balanced water only and will leave till Monday again as the coco has added charge and I’ve seen good results when potting on in the past :). I also activated the exhale Co2 bags to maximise photosynthesis.
- I leave the lights on 25% for the first couple days so they and raise over the 3 week of vegetative growth.
Day 27 - Gave them a little trim removing and large fan leaves covering bottom branches as I don’t like removing main branches so try to get them to come thru as early as I can, won’t touch them from now till 1 week before the switch when I’ll top and defoliate.
They will be on same nutrients now till the switch aswell watering as and when they need it.

Likes
13
Share
@Mrs_Larimar
Follow
2022-10-30
It was pure Joy to Grow them again.
In the Beginning of Flower i was not so happy with them,
but after another Week in the Floweringroom and some Nutrients, they packed up.
Plants loved the Setup with god Temp,VPD, Wind, Nutrients and Light!!
They are colorful and absolutely Pleasing.
a Big Role in this Grow were the new Lights Playing
All the Plants loved the Spectrum of the
HYPHOTONFLUX HPF-4000 (2x)
Plants were growing vigor, looking superhealthy
Harvest was an easy Job!
Bringing me well formed thick and dense Buds with alot of Frosting on them
Just look at the Pictures
Processing
Likes
21
Share
@SmithicusAlbertaCanada
Follow
This week the girls kind of blew up a bit, and I've added a second trellis. I've stopped trying to fight the higher temperatures and am instead aiming to increase Humidity to make up for the extra perspiration, so far it's working well, though, the plants are drinking a lot more. Check it out, hope you're all having a great week! 🙏
Likes
35
Share
@mbatista
Follow
Hi Folks, i'm glad to share with you these awesome results. With a simple prune scheduling: Two Topping (weeks 4 and 5 of veg) and a huge defoliation on week 3 of flowering (you can see in the 3h photo the comparsion).
The result was 12 top colas and a Powerful and frosty buds.
Thanks for following the diary!
cya! :]

Likes
4
Share
@AutoCrazy
Follow
This little auto is really smelling nice these days. She is starting to fade out so she is in the final stretch now. I will be tracking the trics going forward now.
😎🍿🍻🌱


Likes
42
Share
@MadeInGermany
Follow
Hey everyone 🤗.
A lot has happened this week ☺️.
Not surprised that the plants look so extremely dark, is that because I sprayed them with neem oil as a preventive measure , because I discovered a very young trip on a plant.
This annoys me extremely, because the attachment room is very clean and neither shoes nor dirty clothes come in when you enter the room 😩.
But since I had the problem in most cases years ago, I am very confident that I will get the problem under control very quickly 😃.
Otherwise, everything is developing very well as usual 👌.
I wish you a lot of fun with the new update, stay healthy 🙏🏻 and let it grow 😃.
You can buy this Strain at :
https://sweetseeds.es/de/cream-caramel/
Type:
Cream Caramel
☝️🏼
Genetics:
Blue Black
x
Maple Leaf Indica
x
White Rhino
👍
Vega lamp:
2 x Todogrow Led
Quantum Board 100 W
💡
Bloom Lamp :
2 x Todogrow Led
Cxb 3590 COB 3500 K 205W
💡💡☝️🏼
Soil :
Canna Coco Professional +
☝️🏼
Fertilizer:
Green House Powder Feeding
☝️🏼🌱
Water:
Osmosis water mixed with normal water (24 hours stale that the chlorine evaporates) to 0.2 EC. Add Cal / Mag to 0.4 Ec Ph with Organic Ph - to 5.5 - 5.8 .
Likes
57
Share
@BudBoutique
Follow
Welcome to Bud Boutique Grow Diary - really appreciate all your love and support :)
Dont forget to check out my other current grows!
🗓️ This Week:
- Day 23: 2/3 plants got transplanted into 2 liter pots with a lot of mycorrhizal from Great White Shark around the roots & pothole. lets get them roots even stronger!!
- plant development is still really super strong and fast as you can see
- Ive started a little to late with the slow release organic nutrients so both bigger plants got a few deficiencies I need to face and fix within next week
- Day 25 - recovered well from the transplant shock
- 1/3 inside AC Infinity Germination Kit
- keep up high humidity with about 80% and open the dome completely now to get them used to the environment
- heatmap reduced to 22° Celcius - especially for the night
Thank you for still staying with me 💚
___________________________________________
--- 🌱 Strain (Sponsor) 🌱 ---
🏷️ PEACH GIRL by Art Genetix
https://www.artgenetix.world/product-page/peach-girl
---💡 Lighting ---
💡AC INFINITY - Germination Kit
https://acinfinity.com/grow-accessories/propagation/humidity-domes/humidity-dome-germination-kit-with-seedling-mat-and-led-grow-light-bars-5x8-cell-tray/#product-warranty
--- 🥗 Nutrients and Feeding
* 🍸 PLAGRON Algae Baseline grow + Additives: Power Roots, Sugar Royal, Pure Enzym, Silic Rock
* 📅💪 baseline grow: 4ml/l & additives: 1ml/l each
https://plagron.com/de/hobby/produkte
--- 🏭 Grow Setup ---
* 🏠🌿 Indoor: Homebox 120x120x200cm (4x4)
* 📐🌀 PrimaKlima exhausting Fan 1180m3/h (running on 60-80%) & Can Light Filter 800m3/h & 1x Fanbox 1x Dyson fan for Air circulation
https://primaklima.com/de/shop/ventilatoren-de/ec-ventilatoren/pk160ec-tc/
https://canfilters.com/products/filters/
All Likes and comments are highly appreciated!!!
don't forget to check out my Instagram: budboutiquee
- Bud Boutique

Likes
1
Share
@JamrockGrows
Follow
02/07- Already in week 4 of veg, the plants are establishing their main bud sites well. I have topped twice and there are a total of 8 main sites. I will switch to flower in about another week or so just to let the other strain catch up. I also made a homemade scrog frame as I want to try this method as well later down the line.
04/07 - I watered both plants with just 1L of ph water. No nutes as I’m noticing a few burnt tips.
Hope you have a great day!
Peace

Likes
31
Share
@DudeGrowsWeed
Follow
This Green Crack was my 3rd round of started seeds in my perpetual garden of auto's. I decided to get a little experimental and try topping and bending this girl at the beginning of the flowering stretch (about a week ago). So far she has not missed a beat, she just keeps stretching and growing. Starting to see the bud sites develop. One branch did take a little damage from the bending, but I put some blue painters tape on it and expect a full recovery.
Growing in organic composted 'super soil'. Have not added any additional nutrients yet. Looks great to me so far.
Setup:
24x48x72 grow tent
1 Viparspectra V300 300w LED fixture
1 Viparspectra R300 300w LED fixture
1 CFL 100w (26w actual)
4” exhaust fan w/carbon filter 190cfm
6” clip on fan
Electric oil filled radiator behind air intake
Processing
Likes
20
Share
@Silverback_Guerilla
Follow
2/10:
I watered today with about 3/4 gallon each, plus cal-mag, signal, bembe, armor si, a little open sesame, and their final dose of endoboost.
The short one is budding up nicely, but the taller one is still stretching. The short one looks to be considerably more indica than the other.
2/11:
Wife home sick today....postponing construction project to raise the lights.
2/12:
Today, I tackled the project to raise my ceiling another foot. In addition to that project, I installed and hooked up my new AC Infinity 6" intake fan. It's pulling in fresh air from the soffit vent on the eave of the attic, and currently feeding the garden with 46f fresh air. I'm able to easily maintain daytime temps in the lower 70f's now. I am able to drive the nighttime temps as low as I want. The only issue is that the outdoor RH varies quite a bit, so I ordered a 30-pint dehumidifier to put in the top of the closet.
I sprayed everybody with boomboom spray to try and mitigate the light burn damage that is likely to ensue.
2/13:
The taller one is still stretching a little bit, but the 2-footer is just budding up.
2/14:
I fed them today with about 3/4 gallon each including grow big, big bloom, tiger bloom, cal-mag, signal, bembe, humic acid, and I switched over from Open Sesame to Beastie Bloomz. Raised the lights another couple of inches. I did some training on them and defo'd a little bit.
2/15:
Installed the new dehumidifier and rigged the continuous drain on it...works great.
2/16:
I rotated the edge plants and removed some old leaves. I added another 22w 3000k 4' bar light under the canopy.
2/17:
I rearranged the garden and defoliated a little bit. That's it for week 8-

Likes
14
Share
@Mr_Dior21
Follow
Man this week has been taking forever, my theory is it will only get slower relative to harvest just because my excitement.
I top dressed with about 2 inches of worm castings with an eyeballed mix of 2tbps of bone meal (3-14-0, bloom fert.), 1.5-2tbps of Gaia green all purp.(4-4-4, I don’t have an actual potassium fert. Like leingbenite So I use this), 3tbps of dr earth kelp meal (1-.05-2 has many different vitamins, amino acids, carbohydrates) and 2tbps of mykos (for microbiology inoculation and nutrient uptake/upkeep).
So I every time I water I have this old 2gallon water tin that I usually fill up about a quarter to half way full. Using this amount of water and the 5 gallon bucket of my soil mix makes my watering schedule once every 3 days (on average). I do use bottle nutrients but it’s mainly for the supplementing. For feeding I use 2-3ml to half a gallon for all bottle nutrients, I have never gone over, and I have never had deficiency’s that can hinder plant development.
Deficiency's: PSA: Now if anyone happens to read and actually look at my plants please do look closely and maybe let me know if you see something that I have missed since I’m still very new. I noticed my plant was having a cal mag issue so that’s why I top dressed with worm castings, I also top dressed with about 3tbps of azomite (I feel using azomite it may help with all those unnoticeable deficiency’s that a new grower might miss). I’ve been noticing on some of the leaves the very tips are showing discoloring, since the color is still so vibrant mostly I can rule out nitrogen, phosphorus, Iron, manganese, and sulphuric. It’s still very early stage so I did an extremely light foliage feeding (in the dark to prevent UV damage) of 2ml of big bud, big bloom, and tiger bloom, mixed into half a liter of water, I then emptied the spray bottle and sprayed with tap water just to make sure there’s no nute burning. Today I fed the plant through water amendments with 3ml of big bud, 3ml of bud candy, 3ml of big bloom, and 2ml of tiger bloom;(my theory is hopefully the nutrient deficiency’s will go away)
My soil mix is pretty basic. 40% coco, 10% perlite, 10% well composted chicken manure, 20% black gold compost, 20% worm castings. I’m not going to put the fertilizer amendment percentage to be honest I eye ball it but there’s a rough general measurements that I do.

Likes
41
Share
@TheBulldozerSicily
Follow
Dopo 2 giorni che non le vedevo ho notato un grande cambiamento, contento di come stanno crescendo gia si iniziano a vedere i primi fiorellini!
Mercoledì 17/07 ho aggiunto 50 lt di acqua osmosi inversa e i nutrienti, per livello acqua bassa,

Likes
32
Share
@LapsekiliTayfur
Follow
Day in and exit fan 15 min off 15 min on Van is full on
Night in and exit fan 30 min off 15 min on Van is off
Lst tranings return
Nutrients started 0.5gr/1L at day 21 400ML Per Pot
Day 24 Grow powder 0.75gr/1L Short Flowering 0.5gr/1L 400ML Per Pot
Day 26 Grow Powder 1.5gr/1L Short Flowering 1gr/1L 600ML Per Pot
Day 28 Grow Powder 1.5gr/1L Short Flowering 1gr/1L 600ML Per Pot


Likes
26
Share
@pifflestikkz
Follow
Day 17
17/07/24 Wednesday
De-chlorinated tap water pH 6 with calmag 5ml -5L.
Very humid week, noticed a green turning colour on top of soils where the humidity has been far to high.
I have installed door netting and recently left open all day and night now so they can condition over night in colder temps.
All are doing well, one overdose slightly behind and looking ABIT swifted. But she'll come around 💪💚
Day 19
19/07/24 Friday
Lite Feed today, 250ml each pot small run off.
Seeing excellent start to these babies. Let's get it 👌💚
Day 21
21/07/24 Sunday
De-chlorinated tap water pH 6 with calmag 5ml to 5L.
Watering in 1L each day from now.
Updated video
