


Processing
Likes
49
Share


@Guerilla_Jack
Follow
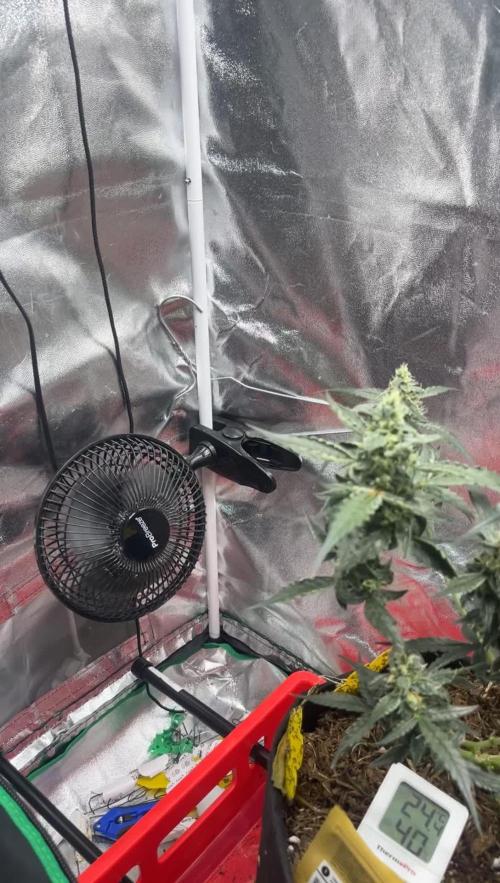
Hello to all you growers!its end of second week of flowering.the plants straching nicely.i remove some new branches and leaves from the bootom,and branches witch ones will not fit too the light..Soma sacred seeds Somango its a littlebit behind other three.watering every second day.have a nice day to all of you!!😃


Likes
8
Share


@Donwon310
Follow
266 grams out of all 4 plants, roughly over half elbow. Went with grove bags. Did 5 day dry then put into totes for few days and bagged after trimmed. Sticky buds with the piney nose to it with heavy gas .
Likes
29
Share


@GrownwithLED
Follow
The MAC from TROPICAL TREES Seeds was the smallest plant in the tent, but harvested a surprisingly good 60,5 gram of dried bud. She was healthy all thru the cycle and had a BEAUTIFUL PURPLE FADE during flowering. The head-bud was insanely frosty and glistening with trichomes....VERY BEAUTIFUL! Her nugs are very compact and dense....simply DANK!


Likes
5
Share

@AlphaVortex
Follow
Tag 73, Lollipopping wurde sehr gut aufgenommen. War jetzt knapp 1 Woche im Urlaub, die Buds haben gut zugelegt.

Likes
27
Share


@blackwidow
Follow
The plant has returned to life thanks to the old proven fertilizer GHE Flora Series. According to my observations, due to stress transferred due to poor-quality organic fertilizer in the early stages of growth, the plant lags in growth for 3 days. I draw this conclusion based on my previous grow reports. 3 days - not so much.
Растение вернулось к жизни благодаря старым проверенным удобрениям GHE Flora Series. По моим наблюдениям, из-за стресса, перенесенного из-за некачественного органического удобрения, на ранних этапах роста, растение отстаёт в росте на 3 дня. Этот вывод я делаю основываясь на своих предыдущих гроу репортах. 3 дня - не так уж и много.
Likes
Comments
Share

@Topshelf_only
Follow
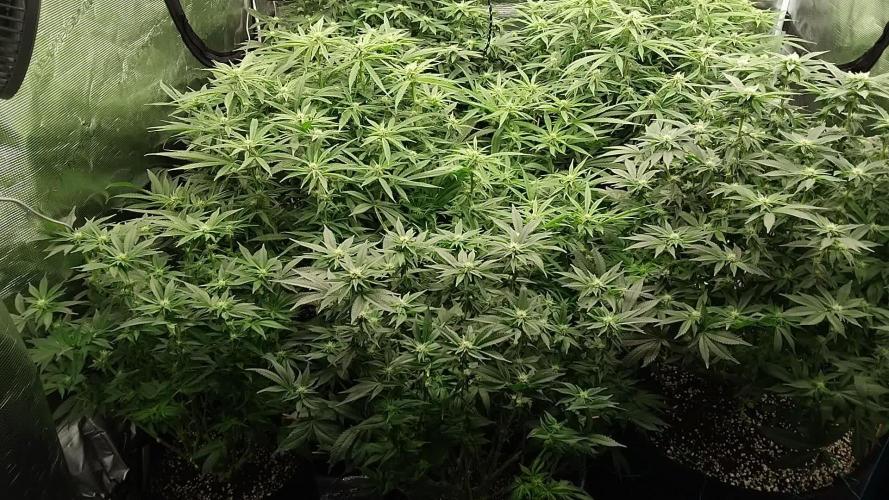
Remove a lot of the lower branches this week . Everything looking pretty good at the moment.snapped two tops of the bigger blue gelato defoliating at the end of week 😡


Likes
123
Share

@yan402
Follow
06.07.25 FW1 TriPart Micro: 50→ 30ml
TriPart Bloom: 0 → 20ml
Home-made FFJ/FPJ (Watermelon + Pumpkin): 10 → 30ml
12.07.25 FW1 GreenBuzzBloom 60 →40ml, TriPart Bloom: 20 → 40ml, fpj 30→60ml
22.07.25 FW3 TriPartMicro 30→20ml , TriPartBloom 60→80ml , GreenBuzzBloom 40→50ml
24.07.25 FW3 Cal-Mag 60→40ml
26.07.25 got thrips but handled them with extra airflow and defoliation.
29.07.25 FW4 GreenBuzzBloom 50→20ml, Home-made FFJ/FPJ (new batch) 60→120ml
🌱💦🌱💦🌱💦🌱💦🌱💦🌱
🌿 Day to day tasks & actions 🌿
🌱💦🌱💦🌱💦🌱💦🌱💦🌱
26.07.25 FW3 – Fed 3l of #1 50% strength→ 2l runoff
27.07.25 FW34 – Fed 3l of #1 → 1.5l runoff
28.07.25 FW34 – Fed 3l of #1 → 2l runoff
29.07.25 FW34 – Fed 3l of #1 → 2l runoff
(*RUNOFF reused for tomato plants)
🍶💧🍶💧🍶💧🍶💧🍶
💧 Nutrients in 30L #1
🍶💧🍶💧🍶💧🍶💧🍶
💧 TriPart Micro:
10 → 15 → 20 → 30 → 40 → 50 → 30 → 20ml
= 0.67ml/L
🍶 TriPart Grow:
0ml
= 0.00ml/L
💧 TriPart Bloom:
0 → 20 → 60 → 80ml
= 2.67ml/L
🍶 GreenBuzz Bloom:
10 → 15 → 20 → 30 → 60 → 40 → 50 → 20ml
= 0.67ml/L
💧 Cal-Mag:
60 → 40ml
= 1.33ml/L
🍶 Home-made FFJ/FPJ (new batch):
10 → 30 → 60 → 120ml
= 4.00ml/L
💧 pH Down:
Citric acid (BuxXtrade) — adjust to ~pH 6.0
📦 TOTAL:
280ml per 30L
🔬 9.33ml/L
🍶💧🍶💧🍶💧🍶💧🍶
Likes
5
Share


@Mo_Powers
Follow
it's very changeable weather again in germany. so far she's coping quite well. i've started to make a funny LST. I wonder what will come out of it ? :)
Likes
11
Share


@m0use
Follow
Memes for the fastbuds meme contest
Memes for the fastbuds meme contest
Memes for the fastbuds meme contest
Memes for the fastbuds meme contest
Likes
3
Share


@DrewZenRox
Follow
Into 2nd day of week 3.
Jealousy/Green Poison inside the Epic Attic Tent 1.2x1.2x1.6. Growing Under 'Karma EVO 3'
SkyWalker OG Inside unbranded 60x60x120 Tent. Growing under 'Karma Stealth 1000'


Likes
22
Share


@Njaak
Follow
One out of two germinated seeds have now sprouted. Started the seedling nutrient diet. As you can see, I've moved the rockwool cube to the hydro setup. The tap root was showing so it was time.
My nutrient schedule is in the pictures. For reference, I'm using a total volume of 24 L between the two buckets.
For now we're enjoying the summer harvest. Well, we are harvesting. A lot. I'm questioning my sanity growing yet more, lol. I do it for the fun and glory. Also, yay pot!
Likes
5
Share


@alafmalaf
Follow
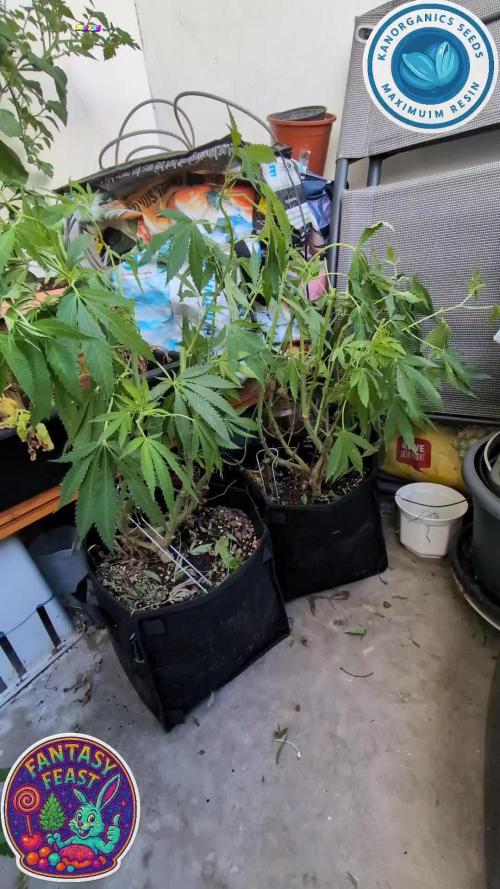
first day after a 12h night cycle, still have a big gnat problem. gonna go buy new bacteria, stickies and DT Earth. the grow shop just let me know that they got it back in stock but i haven't been able to find nematóides. doesn't seem to be a common practice here. i haven't watered them in a few days. the top soil is bone dry but the plants don't look like they're requesting water just yet so i think it's a good time to lay down the new dt earth and new yellow traps to see if we can kill the remainder. gonna grab some flowering ferts too while I'm at it.
Update:
got a bigger pot and some supergrow soil, only had time to transplant one of them today. but I decided to after them one more cycle before i do the DT earth.
update:
dt earth added, seems to be alright but not quite dry enough


Likes
92
Share


@DogDoctorOfficial
Follow
Week 18 (Week 10 Flower) Grow Diaries Report – Part One: Wrapping Up the Journey
🌱 Pre-Harvest Reflections
This week has been a mix of emotions as we approach the final chapter of this grow. Let’s talk about why we made the decision to pre-harvest portions of the Gorilla Melon and Papaya Zoap. While both plants have been incredible performers, a few buds on each started showing early signs of bud rot. This is an unfortunate but natural challenge when growing such dense and resin-packed colas. The decision to harvest those sections early was made to protect the rest of the crop and ensure quality and integrity for the remaining flowers. Vigilance is key in a packed garden like ours, and careful monitoring ensured the rest of the room remained safe and thriving.
🌈 A Symphony of Colors and Frost
The grow room is a visual masterpiece this week, with shades of deep purples, vibrant greens, and golden hues taking over. The fading is absolutely breathtaking, showcasing the natural progression of the plants as they near the end. Combine this with the insane level of frost blanketing the buds, and it’s safe to say this is one of the most beautiful gardens I’ve ever cultivated.
✨ Spectrum Management: The Secret to Stunning Results
The current lighting setup is a game-changer:
• 50% whites to maintain overall balance and structure.
• 100% reds for enhanced ripening and color development.
• 100% UVs to boost resin production and amplify those trichome levels.
The ThinkGrow LEDs paired with the TrolMaster spectrum control system have truly unlocked the garden’s full potential. Watching the plants sparkle under this setup feels like seeing stars on a clear night—magical and unforgettable.
🌟 Quick Recap: The Journey So Far
From seed to this incredible moment, this grow has been a testament to precision and passion. From germination to veg and through flowering, every detail was carefully tuned, every decision made with intention. Along the way, we navigated challenges like pests, mold, and environmental shifts, proving that adaptability and dedication are essential. And here we are, ready to bring this journey to a close with nothing short of perfection.
Week 18 (Week 10 Flower) Grow Diaries Report – Part Two: The Tools That Made It Possible
💡 ThinkGrow LEDs: These lights have been the heartbeat of the grow, delivering unparalleled spectrum control and efficiency. The ability to fine-tune every stage of the plant’s life cycle has been a game-changer.
🌬️ AeroFan System: Consistently circulating air while keeping the environment balanced and mold-free. The AeroFan’s role in preventing hotspots and ensuring even coverage cannot be overstated.
📱 TrolMaster System: The brain behind the operation, the TrolMaster system has provided unmatched control and precision. From monitoring temperature and humidity to dialing in lighting and CO2, it has truly transformed how I grow.
🏕️ Tent-X Setup: The foundation of the grow, this tent provided the perfect space for controlled cultivation. Its design maximized efficiency while keeping everything neat and manageable.
🌡️ Sensors and Monitors: Every parameter was tracked with pinpoint accuracy. From VPD to soil moisture, the sensors ensured every need of the plants was met in real-time.
Each tool, piece of gear, and setup component has worked seamlessly together, creating a true ecosystem of excellence. This grow wouldn’t have been the same without them.
Ending with Gratitude and Excitement
To the community: thank you for joining me on this incredible journey. Whether you’ve been here since the beginning or just tuned in, your support has been everything. From the lovers to the critics, you all push me to grow (pun intended).
To the sponsors: ThinkGrow LED, TrolMaster, Aptus Holland, Pro-Mix Soil, and everyone else involved—your products are not just tools; they’re inspirations.
And finally, to these plants: you’ve taught me patience, resilience, and the beauty of the process.
🔥 Next Up: Stay tuned for the epic harvest and a deep dive into the final results, from trichomes to yields and beyond. The end is just the beginning of the next adventure. 🌟
Let’s finish this grow strong! 🌱✨ Growers Love.
Discount Codes so you can save big on your next check out 💚💚💚
Kannabia - DOGDOCTOR 30% off
SeedsmanSeeds - DOGDOCTOR 10% off
CannaKan- DOGDOCTOR 15% off
terpyz.eu - DOCTOR 15% off
The Neutralizer - PORKIT5-DOG 15% off
Fast Buds - DOGDOCT 15% off
As always thank you all for stopping by, for the love and for it all , this journey of mine wold just not be the same without you guys, the love and support is very much appreciated and i fell honored and so joyful with you all in my life 🙏
With true love comes happiness 💚🙏 Always believe in your self and always do things expecting nothing and with an open heart , be a giver and the universe will give back to you in ways you could not even imagine so 💚
Friendly reminder all you see here is pure research and for educational purposes only
Growers Love to you all 💚💚💚


Likes
11
Share


@StonedandSteady
Follow
Hang Drying 7-14 days before the #TotalDryYields $ #SmokeSesh's! 63rd Day #HarvestTime 9th week of Flower Update of my Fastbuds 2fast4buds.com Genetics looking Great, Gorgeous, Magnificent, Phat and Finishing out Super Strong! I Applied the #AncientArtofStemSplitting for more #FrostedTerpyBuds on 3/19/22 #Trichomes are Ripened and Ready for Steady! #ChopCity is underway! #FadeTime I Can't wait to Blaze Up these Beauties! I started thier #FlushingPhase on 2/23/2022 with Declorinated Tap Water Ph'd-6.0! I #Lollipopped the Lowers on Sunday 2/6/22 after posting to #GrowDiaries They received thier 5th #Feeding of #DivineSeeds #DivineGrow but this is thier 1st #Feed of #LongFlowering 3.0G. Mixed into a Gallon of water, Ph'd to 6.5 on 2/20/22! #BudzForming into Frosted #ChronicColas w/ #PistilsPoppin everywhere looking Pristine!!! I've been implementing some #LSTtraining at the beginning of 10 week's back by bending them over with #PipeCleaners to the sides of thier pots, pulling down thier side branching and #LeafTuckin the Biggest leaves under each other to Expose the Bud site's and Branches to more lighting w/ some #LiteDefoliation 9 weeks back as well! I introduced the #SpinningStemzStrengthing technique a few weeks ago to thier main Stocks and Side branching to make them Stronger and more Sturdy! They popped in under 24hrs in the wet paper towel method and now that they've busted out of thier ProMix potting mix medium, I've been watering them when dry with around 4 cups or 32 fluid ounces 64 Tbsp 192 tsp 948ml of Declorinated Tap water that's Ph'd to around a 6.4-6.3 using TNB ph Up$Down and watering thier whole pots these past couple of weeks! They're Growing under our Bodacious #BloomPlus1500w with the 150w Done driver in our 2×4.5×7ft. GrowTank Grow Closet with the 18/6 lighting schedule cause Everything needs a little rest! Team #Fastbuds recommends the 20/4 schedule as well!!! Our Grows also get Enhanced with #TNBNaturals The Enhancer with my Special Steady'z mix in their bottles!
Yo!!! Top-Notch and The Finest in AutoFlowers indeed! Let's Grow and Get it In from Team #Fastbuds @fastbuds_genetics on Instagram!!! Check it Out my fellow Growmies and Growmets! I'm very Thankful, Grateful and Appreciate these Fantastic, Famous, Fast-Growing, Flavorful and Fiery genetics! Spectacular and Superb Sponsorship package from my Broski Sir #Santi as I like call him and thier Award-Winning Company full of Great Growers, Bodacious Breeders and Pleasant People from All over the World! Your Strains are Phenomenally Pristine and Perfectly Priced! I Can't wait to Try, Test and Review these Crafted Cannabis Cup strains!!! Thanks Again Everyone and Everybody! I've also learned All sorts of Growing Tipz, Tricks, Techniques and Methods from you and your Detailed- How to Grow Instructional categories on your Website SeedBank! Your a Fantabulous Family and Terrific Team!!! It's my Pleasure and I'll do my Best!!! With the Help of my Broski #GallowGlas420 making my original Masterpiece's! I Made, Perfected and Hope Everyone Enjoys these New Introductions, Mail Call and Outros! I also Hope that Everyone will and Go Spread That Love to you Guys on your other social media's! I'll most definitely have their Link's posted Below⬇️! BudBrothers4-L!!! Cheers Famz!!! Much Props, Topz and Much Love!💯
https://youtube.com/c/FastBudsGenetics
https://instagram.com/fastbuds_genetics?utm_medium=copy_link
https://www.facebook.com/FastBudsMedia/
https://mobile.twitter.com/fast_buds
https://www.reddit.com/r/FastBuds_Family/
https://t.me/fast_buds_genetics
https://es.linkedin.com/company/420fastbuds
Remember "it's 4:20 Somewhere"!!! Bloom Plus BP-4000
CA:https://www.amazon.ca/dp/B08DTDP5FF/ref=cm_sw_r_cp_awdb_imm_86Q7H2D5BGFYB9B6PR9K
US:https://www.amazon.com/dp/B08DTN3B84/ref=cm_sw_r_cp_awdb_imm_4B7XWCAS09M4V3W0AFJH
Bloom Plus BP-2500
CA:https://www.amazon.ca/dp/B08DTCYV9Y/ref=cm_sw_r_cp_awdb_imm_YDNA8G16PH3TB002VKGE
US:https://www.amazon.com/dp/B08DS53THM/ref=cm_sw_r_cp_awdb_imm_SX3AEDKRVAYQECF32BE4
Bloom Plus BP-1500
CA:https://www.amazon.ca/dp/B082XYLHRJ/ref=cm_sw_r_cp_awdb_imm_XEBFV7790EHT53B2J9B5
US:https://www.amazon.com/dp/B082XYLHRJ/ref=cm_sw_r_cp_awdb_imm_MB3PYZEVSQRZY096AB79
BloomPlus Instagram Link:
https://instagram.com/bloomplusled?utm_medium=copy_link
Thanks Again Broski #SmokinPlantaz for Hosting your Bright and Tight Amazon Prime Day #BloomPlus-1500w Giveaway! I'm still Blinded by the Light!!! Lol (Song Pun) it's Ultimately Lit, Extremely Powerful and Brilliantly Bright! I also Love and Appreciate Everyone out here! Please! Go Over and Spread That Love to my Bro's YouTube Channel and Team #BloomPlus on their Instagram! I'll have thier Links posted ⬆️⬇️! BudBrothers4-L!!! Cheers Famz!!! Much Props and Much Pars!💯
SmokinPlantaz YouTube Channel Link: https://youtube.com/channel/UCDKJthWoS6-miAhq_lLb_-w


Likes
Comments
Share

@eg0ouh
Follow
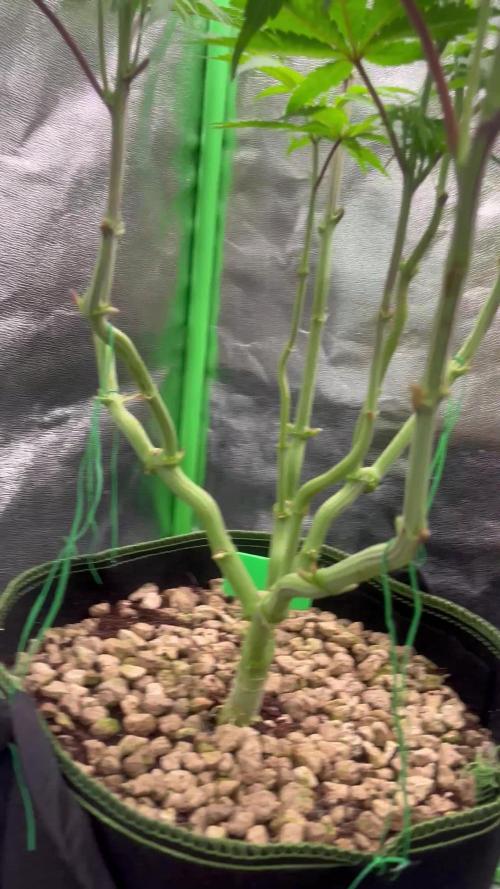
4 days ago last cut and huge stressing, now i sent them on 12/12 Bloom time, i Like how they grow and think everything Looks good so far.
Any thoughts?

Likes
52
Share


@BudXs
Follow
Do you have the Xs Factor? email [email protected] for open apprenticeship spots. Open to Canada and USA (no cost)
MARS HYDRO LIGHTS: https://www.mars-hydro.com/mars-tsw-2000-led-full-spectrum-hydroponic-led-grow-light
DISCOUNT CODE FOR LIGHT: BudXs
CULTIVAR: BudXs2
GROWER: @PsGrowers
________________________________________________________________________________________________________________________________________________________
Notes: @PsGrowers - How much longer???? Im sure this is what you are saying. Its been a long journey, and typically autos will finish sooner. But this is an XL version as you can tell by their monstrous size. You will have a lot of bud, however you will have a lot of larf due to the penetration shortcomings of LED vs HPS, tit for tat. This will be a pleasure of a smoke, and well worth the wait I promise. Continue your excellence through the grow, I really look forward to your harvest
Likes
31
Share


@Wicked_Stix
Follow
We back with some buckets! Time to fire up the pumps and get this show on the road. If you haven't seen sugar cane then you need to crawl out from under the rock you're hiding in. Soaked this beautiful little gem of a bean in some water until it cracked then threw it into the bucket with 100% perlite. Started them on a low dose of maxigro on day 3. Doing these diy Dutch Bucket style as always. Going to be running 8 in house genetics strains on the system with constant 24 hour a day irrigation. Not much exciting going on yet, but with a little luck that may change pretty soon.
