
Likes
Comments
Share


Processing
Likes
49
Share


@AsNoriu
Follow
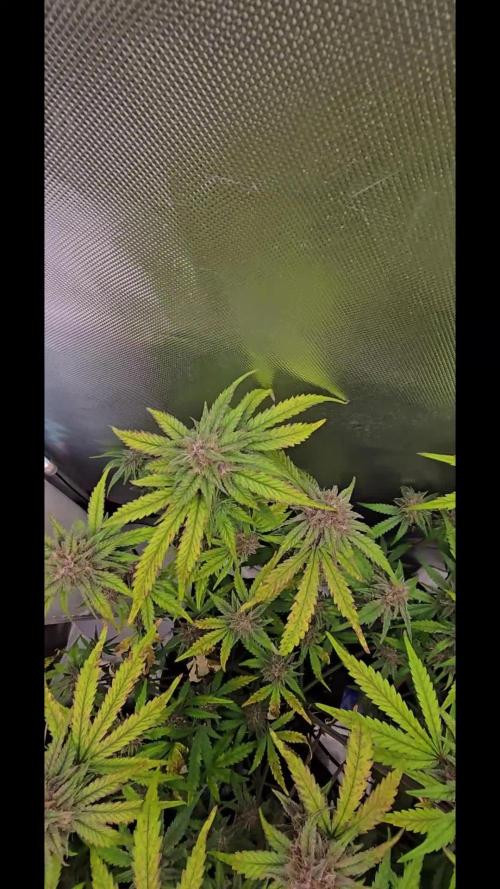
Day 15. All girls will get either first or second feed. Upside down Kush was left in original pot, newwaver Kush was ripped with fingers from soil and transplanted to new pot, never will i have two plants in same pot ever again !!! And just couldn't throw out one ;)))
Kushes got middle of the tent, think i will top them only, it will be too bushy with 11 heavily LST'ed plants.
Think day 18 - first training day for 8 girls ;)
Day 16. Girls are loving life - thats fact !. Now i have to rethink LST plan, thought to train them on day 18, but they grow so compact, that i have two options :
A. Top them on 5 or 6 nod and train from there.
B. Lift lights and induce vertical grow. But its such a tricky move, usually they repeate that overstreched patern even if you bombard them with light after ...
C. Postpone LST to day 24-26. Never i did it so late, stem becomes very stiff, hard to bend her heavily ...
Next few days will show ...
Day 18. Girls are real beauty, they started to strech a bit, will give couple more days and will train them hard on monday.
Day 20. Dice was rolled !!!
LST !!! Girls are very compact, will be fun to veg them will have to plan well how to flatten up them.
Kushes are behind, but i had to keep tent as dry as possible, need plants dry, otherwise stems crack from such heavy training. Put couple soft wires to lift leaves from soil ..
Pure ph water and loads of spray now !!!
Next few days will show ...
Happy growing !!!

Processing
Likes
1
Share


@BloodBath
Follow
Sour wiz came out amazing. Not many problems during her grow. Each pheno came out really different but that’s from my doing. I trained each plant differently to see what the difference would be. Responds really well to stress and training. I can’t tell you in words how great the flowers are. They’re literally coated in trichomes and smell and taste so damn good. Fruity sweet gasoline. Enjoy and thanks everyone who looks and follows.0


Likes
49
Share


@Roberts
Follow
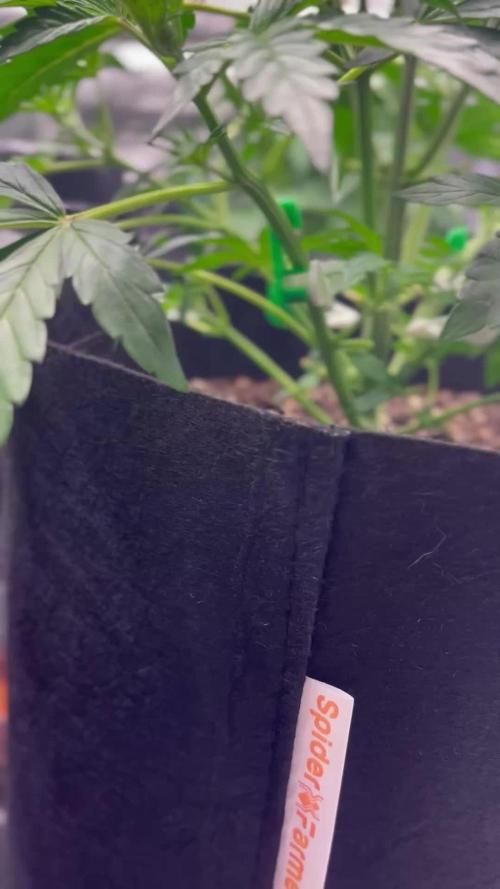
RSV11 is still making progress. She had a second neem oil treatment on last update. I dunno if the pests are gone. If not. I will try a Insecticide soap. Most critters can't survive neem oil or keep reproducing. Why I never spray it in flowering. So I gotta make sure it's resolved before flowering. She should be reaching maturity soon. Thank you Terpyz Mutant Genetics, and Spider Farmer. 🤜🏻🤛🏻🌱🌱🌱
Thank you grow diaries community for the 👇likes👇, follows, comments, and subscriptions on my YouTube channel👇.
❄️🌱🍻 Happy Growing 🌱🌱🌱
https://youtube.com/channel/UCAhN7yRzWLpcaRHhMIQ7X4g


Likes
21
Share


@ChameleonsCannabis
Follow
The grow went well I didn't feed right I messed up on ph for a while but she grew she smells great she did better than I would have thought with how bad I did personally and I am gonna be happily smoking for a while.

Likes
7
Share

@NSABND
Follow
Day 64 the queens got some fertilizer 💪😃👍
Day 65 that massive smell and these juicy buds 😃👌
Day 66 that massive smell 😍👌
Day 67 i think the results are near 😍👍
Likes
16
Share


@Prop207
Follow
30 grow
20 Micro
10 bloom
15 cm
15 sb
Heavy growth, robust stems, great plant all around so far, considering it emerged from its shell with a snapped stem

Likes
18
Share

@Northfork
Follow
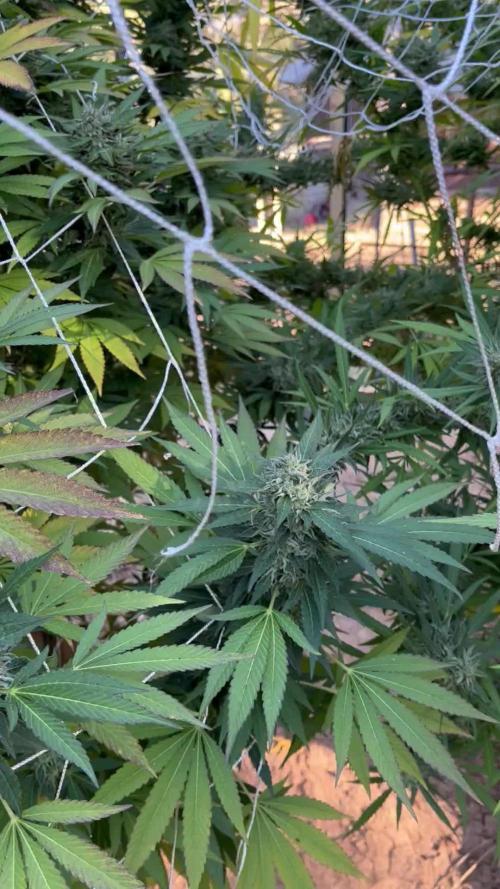
10-5-25 last week for the dos si dos 33 she is looking heavy and ripe going to pull her in the next couple of days. The rest of the girls still have a a week or two left.next week we will have a harvest.

Likes
10
Share


@Rob691
Follow
D-63 : everything is ko untill now ! A litle stress is visible on the leaves of the Lemon Kix that are abit too yellow. Then I set the Ph a litle bit lower with 6.3 couple of days ago. New leaves are looking ok.
I think there still 2-3 weeks for the lemon kix, 1-2 weeks for the others. I'm checking the trichomes every days. Nothing much to do but removing the leaves that obstruct the light, watering and wait !
D-68 :
Mokum's Tulip is gone for 48h of darkness. Harvest is coming on wednesday.
Lemon Kix : is ok. A bit thirsty.
Pinapple Express Young : Going great. Watching the trichomes everyday. I think the harvest could be next week-end.
Pinapple Express Old : Look at this faxtailed beauty !!! She's bigger than my fist with alooooot of thricomes. She's the oldest, but she could be the last to harvest ! She's amazing.
Likes
15
Share


@Nvchods3
Follow
se nota la diferencia de genetica, unas mas avanzadas que otras.
green punch

Likes
4
Share


@eldruida_lamota
Follow
Venga familia que ya viene la cosecha de estas Runtz de ZamnesiaSeeds, que ganas que tenia ya de darles machetazo.
No veas que pinta que tienen estas plantas.
Las flores aparte de prietas se ven bien resinosas.
a sido una genética con la que disfruté bastante cultivarla, no es a mi parecer complicada cultivarla y merece la pena si eres cultivador con o sin experiencia que busque sabores exóticos de genéticas calis
Agrobeta:
https://www.agrobeta.com/agrobetatiendaonline/36-abonos-canamo
Hasta aquí es todo

Likes
34
Share


@Mr_Gezeta
Follow
Día 67. 6 de Noviembre de 2020.
Las riego con 0.70 litros de agua cada una
-5.5ml/l de TNT
-5.5ml/l complejo de floración
-3.5ml Hesi boost
-3ml de fósforo plus
-Todas están en floración. Hay 2 que están empezando pero la mayoría están totalmente floreciendo.
-Voy a colocarles tutores porque espero que engorden mucho así.
-Me preocupa que haya mucha humedad. Si el deshumidificador se llena y no estoy atento se dispara al 80% y eso es un problema en esta estapa.
-Una de las plantas mide 1 metro mientras otra no llega a los 50 centímetros. Misma luz, mismos nutrientes y misma LST
-He comprado un nuevo foco de 300w. Se que es un poco tarde pero srguro que slgo ayuda y voy a seguir cultivando así que ya se queda para el siguiente cultivo
Día 69. 8 de Noviembre de 2020.
Las riego con 0.70 litros de agua cada una
-5.5ml/l de TNT
-5.5ml/l complejo de floración
-2ml Hesi boost
-3ml de fósforo plus
Día 71. 10 de Noviembre de 2020.
-Las riego todas con 1L de agua cada una y los siguientes nutes:
-5ml de Hesi Boost.
Lo hago para que reciban más agua. Creo que no he explotado todo lo posible estas plantas. Están sanas pero no han sido llevadas a todo su potencial

Likes
11
Share


@Genussmittel420
Follow
day 0 - gave this seed a dark place in my room to germinate and also used a little Ph down to get from 7,5 down to 6. 230PPM
after about 17 hours of soaking in the glass i gave the seed into a jiffy.
day 1 - because i had still 2 more of those seeds i think its better to just use them now and germinate them all together and then choose the strongest for myself. thats why we are at day 1. i just need one of them to germinate right now and the seeds are already 3 years old. i think one or maybe even 2 might not germinate because i just stored them in room temperature. we will see!
day 5 - the seed wich has beed touching water 22 hours early has now shown his first sings of life above the soil, so i am trusting into the other 2 that they might also still follow so i can share a plant :)
day 6 - she has a sister! she has grown 2cm+ and the seed has been stuck in the jiffy so everything perfect for the first one.
day 7 - the seedling on the right is now also not growing only inside the soil anymore. the third seed was sadly a fail but i am happy with 2/3 after wrong storage.
Likes
10
Share


@Dunk_Junk
Follow
Not long now! Trichomes turning milky. I would think within the next week she will be harvested.

Likes
1
Share

@Robertgrowsit86
Follow
We think one of these lady’s are being thrown in to flower by me stressing it. I topped it and I think I shouldnt have , They originally got stunted due to environment technicality difficulties / grower error. Humdifier died , power outages the works , all sorts of obstacles have taken place . But we will see this through to the end for, learning and journal purposes. Happy grows
Likes
10
Share


@Happydays58
Follow
01/17 - DAY 78ish
- Box A empty, refilled
01/18 - DAY 79ish
- Box B empty, refilled. More cloudy than clear heads now.
01/19 - DAY 80ish
- Box A empty, refilled
- Clover crop coming up
01/21 - DAY 82ish
- Top water w/ 4 Cups of Q & 🥥 (1tsp)
- Box B empty, refilled
01/22 - DAY 83ish
- Box A empty, refilled

Likes
12
Share


@Kinghaze
Follow
- Week 3 of flower
Unfortunately, one of the collie man kush got hermies. So I sadly had to remove that one from the grow tent.
The 4 remaining plants do have more space now.
I still have some deficiencies
I calibrated my ph and ec meter, and they where of by - 0.3 ec and + 0.1 ph.
I gave them advanced nutrients revive from the top, also to check the run off.
The run of was 1.4 ec and 6.5 ph, so i adjusted it now in the water tank to 1.6 ec.
Hope they will respond good to it and the grow can continue.

Processing
Likes
8
Share


@Buck5050
Follow
All growth on track at the begging of the week so I defoliated the fan leaves and left the growth shoots. Everything took the haircut in stride and now is moving forward and on track for clones to be taken on schedule.The temperature is on the rise at times for a few hours. With the new humidifier installed the plants don't seem to stress with the increase.Plenty of good VEG growth this week. I have already inspected for healthy growth shoots for clones. A few more days and they will get a good trim.