
Likes
Comments
Share


@fabialien071
Follow
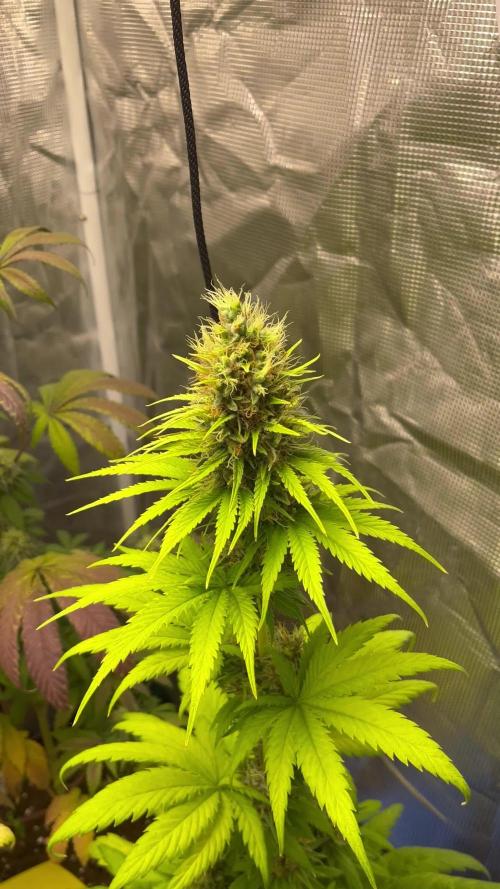
Semana del 9 al 15 de septiembre 2024.
Las Positronics auto aun no Entran a Floración, y ya van bastante avanzadas, mientras las otras, unas van muy flacas y otras si van bastante gordillas.


Likes
19
Share

@eldruida_lamota
Follow
Que pasa familia, vamos con la sexta semana de floración de estas Green Gelato feminizadas de RoyalQueenSeeds.
Vamos al lío ,se trasplantaron en macetas de 7 litros definitivamente.
El ph se controla en 6.0 , la temperatura la tenemos entre 24/20 grados y la humedad ronda el 50%.
El ciclo de floración puse 12h de luz, el foco está al 80% de potencia.
De momento van creciendo a buen ritmo y tienen un buen color.
La flor también va formándose y engordando, también empieza a producir tricomas, estaban muy bien enraizadas al realizarle el trasplante se notaba la abundancia radicular.
Agradecer Agrobeta por el envío del kit gold series en cuestión, unos maestros 🙏
- os dejo por aquí un CÓDIGO: Eldruida
Descuento para la tienda de MARS HYDRO.
https://www.mars-hydro.com
Hasta aquí todo, Buenos humos 💨💨💨

Likes
5
Share


@StonedandSteady
Follow
@humboldtcountysown LLC for Veg&Bloom Thanks Again Phil&Gail! @rocket_seeds Newest Seed Sponsor!!! @vivosun.official VIVOSUN®️ VS2000w & VS1000w Grow-Thank You so Much J Bro! I'm Honored and Very Proud to be apart of your Family/Team! I #FlippedToFlower on Friday 6/24/22 ShoutOut to our Bro @soillife420_2 for Gifting us this VS®️ VS1000w LED Grow Light! Sponsored VS®️ VS2000w LED Grow Light with Samsung LM301 Diodes & Sosen Brand Driver, Dimmable Lights, Sunlike Full Spectrum with Grow Room Glasses for Seedling Veg & Bloom Plant Growing Lamps for 4x2 Veg & 3x3 Flower Grow Tent or Grow space! Lower Cost & High Efficiency: VS®️ VS2000w LED grow lights use the latest LED plant light technology including Samsung LM301 Diodes, high-energy efficiency with 2.9μmol/J; Extremely high output but consumes only 200W of electricity, making it more efficient than traditional HID lamps and other plant lamps on the market! It comes equipped with 3000k Warm white Diodes that Boosts Bloom, 5000k Cool white lights that Promotes Germination and 660nm Red lights for Higher Yields! Thier attached to a Durable, Waterproof Aluminum Heat Sink with Low Noise and only weights 9.03lbs. with a 5 year Warranty! SuperCropped3rdTime #TransPlanted into 3GallonPots from 1GallonPots #Lollipopped ToppedThe3rdTime #LeafTucked Transferred into our 6×5ft. #ChronicCave BasementFlowerArea and Growing under our Brilliantly Bright VIVOSUN®️ VS2000w-VS1000w with the 12/12 lighting schedule, Dimmed⬇️=50% around 30" Over Canopy's We Love to use Team @tnbnaturals @tnb_naturals #TNBNaturals #TheEnhancer #Co2DispersalCanister for Vigorous and Great Growth for our Grows! ShoutOut to Bro @dr._weedman I'm Growing from Team @ilovegrowingmarijuana_strains #HeroMixpack #ILGM #SkywalkerOG-Fem #BruceBanner-Fem #BlackWidow-Fem and started Up a New phenoz of those, my Team @nirvana_seeds nirvanashop.com #Zkittlez-Fem and a New pheno, Team @nukeheads.nutrients #CheetahPiss-Fem clone and from my Wonderful Wife's @juicyjj85 plant, I've taken two Clones from our Bro @goliathgrowshow #GoliathGrower #MacBerries-reg Thanks Again Everyone!!! #BudBrothers4-L Happy Growing! Cheers Famz!!! Much Props and Much Pars!💯VS®️💡's+⛺'s=🏆's
#LoveWhatYouGrow
#BringGreenToYourLife
#vivosun #vs1000 #vivosungrowlight #vivosungrowtent #vs2000 #vs3000 #vs4000 #vs1000e #vsf4300 #hcf1600 #hcf3200
https://linktr.ee/vivosun.official
https://www.linkedin.com/uas/login?session_redirect=%2Fcompany%2F77743591%2F
https://youtube.com/c/VIVOSUN
https://instagram.com/vivosun.official?igshid=YmMyMTA2M2Y=
https://www.facebook.com/198734887125319/posts/1724749361190523/?extid=a&mibextid=baczqb
https://mobile.twitter.com/VIVOSUN/header_photo
https://pin.it/2uORZDs
https://www.tiktok.com/@vivosunglobal?lang=en&is_from_webapp=1&sender_device=mobile&sender_web_id=7110614037704197678
https://www.amazon.com/stores/page/A2F7F49B-7130-4423-BF67-59CE3EC5A44F?maas=maas_adg_01A961034EF443FE5006848DB5A6C70B_afap_abs&ref_=aa_maas&tag=maas&ingress=3&visitId=3e0468ed-290c-4c15-9d06-7a22afdff345&mc_cid=e5417eb03f&mc_eid=69bad0aef8
https://www.amazon.com/stores/page/3EDD8CEC-742A-44F6-90C4-0930E78DD730?ingress=2&visitId=6cfb6992-f86f-4c85-a5ad-4cb5d1c06d07&ref_=ast_bln
Limited-time deal: VIVOSUN 6-Pair 1/8 Inch Adjustable Grow Light Hanger, Heavy Duty Rope Hanger with Reinforced Metal Gears, 8-Ft Long and 150 lbs Weight Capacity Rope Rachet for Grow Light, Inline Fan https://a.co/d/1WezHcI

Processing
Likes
4
Share


@vilahaze
Follow
tiene un olor muy fuerte y agradable que te cautiva y noquea al mismo tiempo
Likes
48
Share


@DogDoctorOfficial
Follow
Gather 'round, because it's time for the grand finale of my Tropicana Cookies Auto journey. Week 10 has arrived, and boy, oh boy, this gal has been an absolute delight from start to finish. Let's dive into the final chapter of this epic adventure!
I harvested my lovely lady at day 69 from seed, and let me tell you, it was a celebration of beauty and abundance. Picture this: a majestic all-girl harvest, suspended upside down for a glorious two-week drying extravaganza. At a temperature of 60 degrees Fahrenheit (15 degrees Celsius) and a relative humidity of 60%, the drying process unfolded like a symphony of perfection.
Now, let's talk trichomes, shall we? Oh, those glorious little resin factories! This Tropicana Cookies Auto has blown my mind with the sheer amount of trichomes it boasts. It's like a frosty wonderland, sparkling like a million tiny diamonds. I've never seen trichomes in such numbers, shapes, and colors before. It's a trichome party, and everyone's invited!
But let's not forget the benefits of the drying process. By allowing our precious buds to dry slowly and evenly, we're enhancing their flavors, aromas, and overall quality. It's like fine wine, my friends, getting better with age. Patience is the name of the game, and trust me, the reward is worth every second of anticipation.
Now, let me take a moment to give a big shout-out to @Fast_Buds. They've truly outdone themselves with this Tropicana Cookies Auto. It's like they sprinkled magical trichome dust all over these seeds, ensuring a frosty experience like no other. They've got the genetics game on lock!
So, my fellow cannabis enthusiasts, as we bid farewell to this remarkable journey, let's cherish the memories, the lessons learned, and the joy shared. From seed to harvest, this Tropicana Cookies Auto has captured our hearts and ignited our passion for the green wonders of the world.
May your drying process be smooth, your trichomes plentiful, and your buds burst with flavor. Thank you, Tropicana Cookies Auto, for gracing my garden with your extraordinary presence. You've left an indelible mark in my cannabis-growing adventures.
Keep cultivating with love, spreading the joy of this amazing and holy plant we all love so much, and remember, my friends, trichomes are like the glitter of the cannabis world—bright, beautiful, and absolutely fabulous!
As always thank you all for stopping by and for supporting me on this journey, i am super passion about growing and fell blessed to have you all with me on this new journey <3 <3 <3
Genetics - Fast Buds Tropicana Cookies Auto
Ligth - LUMATEK ZEUS 465 COMPACT PRO
Food - APTUS HOLLAND
Tent - MARS HYDRO
All info and full product details can be find in can find @
https://2fast4buds.com/
https://aptus-holland.com/
https://autopot.co.uk/
https://lumatek-lighting.com/
<3 <3 <3 Growers love to you all <3 <3 <3
Tropicana Cookies Auto is the perfect variety for growers of all levels, especially beginners as this strain performs very well outdoors and indoors, and can produce up to 500gr/m2 in 56-63 days without needing extra maintenance. Reaching up to 110cm, this strain grows fairly tall with medium-sized branching, showing its mixed heritage. Definitely the right choice for those with a high tolerance looking to get their hands on the strongest autoflowers out there. Thanks to the 27% THC, you can expect an extremely powerful and long-lasting high that’ll boost your mood and give you that extra push you need to start your days on the right foot. This variety offers the whole range of citrusy and woody flavors with a strong candy-sweet background that will keep you coming back for more and more.
Bud description
Tropicana Cookies Auto produces gorgeous dark purple flowers, so expect really dark buds with gorgeous hues of pink, purple and blue, and thick dark-orange hairs that get completely covered in resin by harvest time, giving them an almost shiny-white appearance.
This variety develops a typical Indica-like structure and very few sugar leaves that will make your trimming sessions a breeze. But make sure to store your trimmings as the gorgeous flowers reek of a mouth-watering blend of lemon peels, orange juice, and sandalwood that gives it almost a citrus candy-like flavor that makes for the most aromatic hash and extractions.Smoke report
Thanks to the 27% THC, Tropicana Cookies Auto’s effect starts with an energizing head rush that gets your mind up and running while leaving you in a nice calm state. As the Indica-dominant side kicks in, the powerful cerebral effect gradually moves downwards and hits your whole body with a deep relaxation that leaves you with a joyful stoney sensation that alleviates chronic pain while leaving you in an overall happy and positive state of mind.
It’s the perfect daytime and nighttime strain as it can boost your mood and enhance a night out with friends but can also quiet your mind as you get ready for a good night of sleep. No matter the scenario, expect a powerful high that lasts for hours on end.Plant appearance
Tropicana Cookies Auto reaches up to 110cm and develops a tall main cola with shorter side branches, typical of hybrid strains. You can expect a stocky yet tall main cola with medium-sized side branches and thin fan leaves that fade into a yellowish hue with a beautiful dark purple tint. Thanks to the excellent selection, this variety develops a short internodal spacing that makes the medium-sized flowers look like they’re growing stacked on top of each other. It’s the ideal choice for growers who want to get big yields without having to deal with huge plants, as this monster yielder can produce up to 150g per plant while growing relatively short.
Grow tips
This variety grows super dense buds so make sure to space out the branches by tying them down, this way you improve airflow which helps prevent mold and other pests. Tropicana Cookies auto reek of a delicious sweet and sour smell so make sure to flush thoroughly to enhance the aromas even more. This terpene heavyweight finishes with lots of resinous sugar leaves that make for fantastic hash and extractions so remember to have your trim bucket ready!Flavor
Tropicana Cookies Auto boasts remarkably sweet flavors that resemble a blend of lemon peels and fresh orange juice, with subtle floral undertones that make it the perfect choice for extractors looking for unique terpene profiles.
Expect an overall citrusy zest that’ll coat your whole mouth and leave a delicious tropical candy-like flavor aftertaste. The sweet and sour flavors get balanced out with a herbal background that gets stronger as you exhale and gradually opens up, bringing out the whole range of woody, floral, and spicy flavors, making it the perfect choice for the most flavorful extracts


Likes
2
Share


@Atalant
Follow
9.7
D85
Harvest day✂️
Last flush
10L Water
PH 6.5 EC 0.3
Return
PH 5.9 EC 3.4
Very high EC of soil.
Above 15% amber. Triochoms at top cola start degradation.
Defoliation&wet trim.
23inch tall. No training.
121g wet (but now freaking stems and leafs like people do 😂)
32.2g (73% return)


Likes
7
Share

Likes
112
Share


@Dunk_Junk
Follow
She actually grew ANOTHER 31cm this week!
She is totally out of headroom now, her top cola will be above the lights in a couple of days 😂
Fastbuds do say it can reach 1.4M... 😁
She is also looking quite bushy, I'm guessing this is a result of the earlier FIMing/topping on multiple sites. This may also have lengthened her veg time, but that's ok. I like to grow monsters 😁 😜
Nothing else to the report as I'm just letting her do her own thing.
For nutrients I'm using 15g of 20-20-20 mixed with 10L of water. Also added 4ml/L of both Cannazym and Terpinator. This brings it to around 1600ppm including ~300ppm for my clean water.
Timelapse Sequence:
*** Pineapple Express ***
Blue Dream
Auto Jack (Not in shot)
*** Pineapple Express ***
CBD Compassion
Likes
6
Share


@Lazuli
Follow
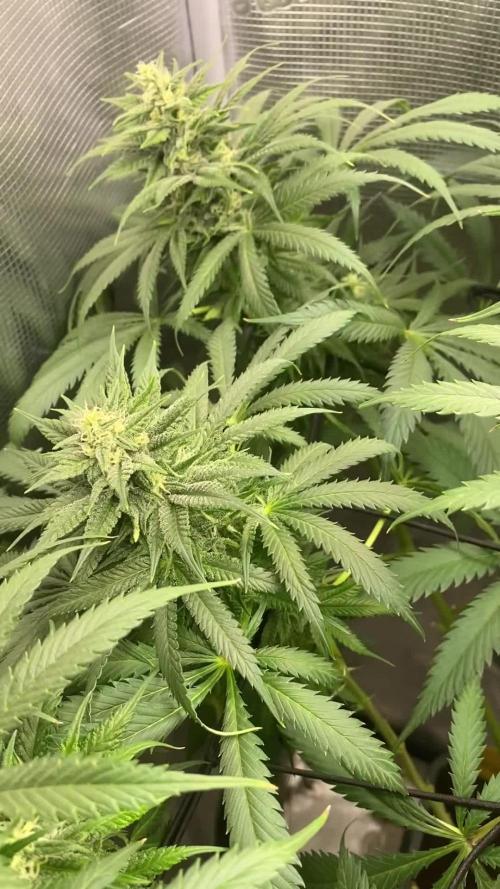
Its ripening, final week before harvest
I love the fade this plant has so purple/yellow/blue


Processing
Likes
159
Share


@BarrieGrower
Follow
The weather has continued to be hot and now it is cooling at night. Lows have been 11 degrees.
Plants were fine and getting bushy and a bit taller.
The sizes are as follows; #4 the shortest is still the shortest at 49", next is #3 at 53" and the second tallest #2 is now the tallest and biggest at 69" and the biggest before #1 (which took the beatdown) is 67". All look good. #1 is starting to bud out and looks like it has been budding for over a week. Happy days! All smell strong and great. I can smell them from my car. Love it.
The rest do not look like they are budding yet. I guess they may be shorty behind.
Fed the one in bud bloom nutes and the others got veg nutes. I will be back in two weeks and may adjust at that time.
The three plants all look nice and bushy with lots of branches. Hopefully good producers. The other will be limited.
Hope weather holds up.
Cheers.

Likes
8
Share


@banditman1200
Follow
my bad luck cops doing door to door inquiry's about an accident in street,smelled a bong and got busted.crap but looking forward to next


Likes
11
Share


@Bread_n_Buds
Follow
It's time to harvest the crops, today was the day of the first Green Crack F1 Hybrid Automatic by Zamnesia.
** Remember that for all strains we have at least two plants, one left to grow straight and one worked with the techniques.
Technique Used // In this case we see the plant worked with the MAINLINING technique: we waited for the third internode and did TOPPING (you can also do it at the second to lengthen the vegetative phase in autoflowering plants, it's better); from this topping a MAINFOLDING was carried out by cleaning everything that was underneath in the underlying internodes and leaving only the two mini branches growing as a result of the first topping, the Mainfold precisely. We stole the two branches with the arches up to the third internode of each respective branch and we did TOPPING once again, from here the plant was left to grow directing it with LST as best we could.
Better with the techniques or normal? It is a plant with a medium-low distance between internodes, this technique is not recommended, the plant is not very big but it has produced well anyway, let's wait to compare the results with the one without techniques but it is very big, the other one, in this case I tend towards the straight solution. Look instead at the Ghost Train Haze for example which has a wide distance between internodes, what did it do to me... immense.
Flower quality // The plant has resined very well anyway, there is a very mellow smell, I think sweet/strawberries, I have to go deeper, the consistency is exceptional, I washed the buds as recommended on Zamnesia, do not underestimate this practice, I who look at the plants in , acre give away a lot of hair and a lot of waste of other nature, washing makes your grass better and more competitive even for contests and cups.
Check the article in your language // https://www.zamnesia.io/it/guida-coltivare-cannabis/333-lavaggio-delle-ceme
Feertilizers// I am very happy with how I managed to unload the plant that at a certain point before going flush was fed a few days only with additives and then went flush and we are discolored sufficiency.
All the fertilizers and additives of Plagron in the green version / 100% organic have fully satisfied me. Choose your soil based on your style and calculate the sheet on the site www.plagron.com
You can instead find the fertilizers in convenient all-inclusive packs on the Zamnesia site.
Try a seed of this strain that drives us crazy..
---- https://www.zamnesia.io/en/10677-zamnesia-seeds-green-crack-f1-automatic.html
Zamnesia Description // Forget what you think you know about cannabis. Green Crack F1 Automatic by Zamnesia Seeds is here to shake up the entire industry. Using F1 genetics, growing cannabis has never been easier. These plants offer uniform and abundant yields. Get ready to harvest high-quality buds, full of flavor and amazing effects.
Music and Frequencies // For about 4/6 hours a day my plants listen to 432Hz frequencies made especially for their well-being and sometimes a bit of black music to give them those vibrations that only music can give. www.radionula.com
All the best that mother nature has to offer is at ---- www.zamnesia.com

Likes
3
Share


@Mr_nugs_lover_David
Follow
She has become a beautiful little bush full of fat dense nuggets completely covered in fruity and sweet resin glands with some purple no tones in the buds. Love It!

Likes
6
Share


@Moss420
Follow
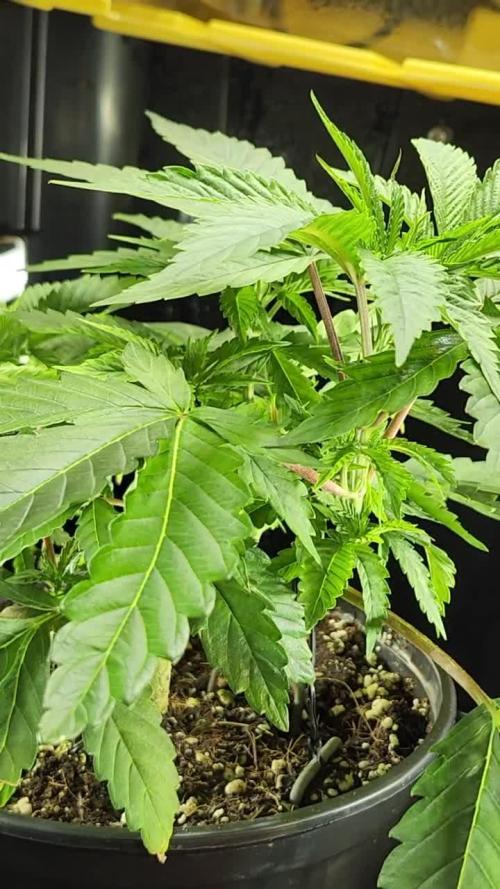
END OF WEEK 4 FLOWER
Seems to be going well, nice to be able to sit back and watch these girls grow :D
Had some bleaching on a few of the nugs, so I dimmed the light slightly and managed to raise it an extra 5cm. I also bent a few of the taller stems out from directly underneath.
Big Mumma is killing it, some real nice and dense little nugs on her.

Likes
2
Share

@GREENPHOENIX6262
Follow
11/03 - Mother moved into her own 17 gallon tote - running lights on dome and in tote - super topped - running high humidity and high temps - nute feeds are the same - tied down all 4 coles thus far.
11/06 - tote dome is holding up nicely - transplanting into 7 gallons and 2x2 tent swap.
11/09 - Opened up the lid more to give her space to blow out from the sides - Blitz humidity for about a week (90%) - Temps running 89F - Clean water feed for the week.

Likes
34
Share


@LockDownGrow
Follow
This will be the last week for this girl , she has stopped feeding now and is in her second week of flush ,
She is looking too be finnished this week and looking and smelling amazing ,
Update , 80% pistels are lovely and golden , the tricombs are not quite ready so I would say just a few more days too go then chop chop
