The Grow Awards 2026 🏆 


Likes
52
Share
@DogDoctorOfficial
Follow
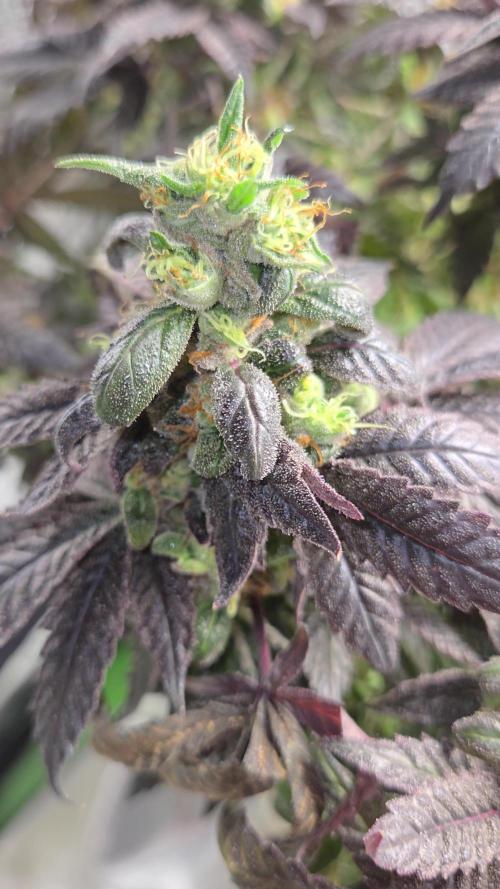
Let's realign our cosmic compass and embark on a harvest report for our magnificent Cosmos F1, a pure CBD strain that has taken us on an extraordinary journey. Brace yourself for cosmic revelations and interstellar delights!
After an impressive 11 weeks from seed and 7 weeks of flowering, the time has come to witness the cosmic culmination of our efforts. I carefully hung the entire Cosmos F1 plant to dry, allowing the cosmic energy to infuse every inch of this botanical marvel. It's a sight to behold, with majestic branches reaching for the cosmos, reminiscent of a cosmic dancer frozen in time.
As our cosmic queen gracefully dries, her vibrant hues continue to amaze. The shades of green, intertwined with delicate hints of purple and gold, are a testament to her genetic splendor. It's as if she has absorbed the cosmic essence of the universe, transforming it into a visually stunning spectacle.
Now, let's talk about the cosmic power of CBD. Our pure CBD strain holds the key to a transformative experience. With minimal psychoactive effects, this cosmic treasure offers a realm of therapeutic benefits. It's like a cosmic massage for the mind and body, soothing and relaxing, allowing us to explore the depths of cosmic tranquility.
The decision to hang the entire plant for drying is a testament to our dedication to preserving the cosmic integrity of our harvest. By allowing the branches to hang freely, we encourage a slow and controlled drying process, ensuring that the cosmic essence remains intact. It's a ritual that honors the plant's journey, preserving its cosmic magic for us to enjoy.
As we eagerly await the cosmic transformation, let us express our gratitude to the celestial forces that have guided us on this cosmic odyssey. The cosmos has aligned to bring us the extraordinary Cosmos F1, a gift from the cosmic garden gods themselves. We extend our heartfelt appreciation to the cosmic harmony orchestrated by @James and Royal Queen Seeds.
In the coming days, our dried cosmic buds will be ready for the next stage of our journey. From cosmic concoctions to cosmic culinary delights, the possibilities are infinite. Imagine infusing the cosmic power of CBD into soothing teas, cosmic creams, or cosmic confections. The universe is our canvas, and with our cosmic harvest, we can create cosmic masterpieces.
As we bid farewell to our Cosmos F1, let us cherish the cosmic memories we've shared. The vibrant colors, the pure CBD power, and the cosmic connection we've established with the universe. May our future endeavors be as cosmic and awe-inspiring as this one.
Until we meet again, my cosmic friends, lets keep exploring the cosmic wonders, nurturing our cosmic gardens, and let the cosmic energy guide our cosmic creations. May our harvest be abundant, our cosmic experiences be enlightening, and our cosmic journey be filled with celestial blessings.
As always thank you all for stopping by and for supporting me on this journey, i am super passion about growing and fell blessed to have you all with me on

Likes
15
Share
@JungleGym
Follow
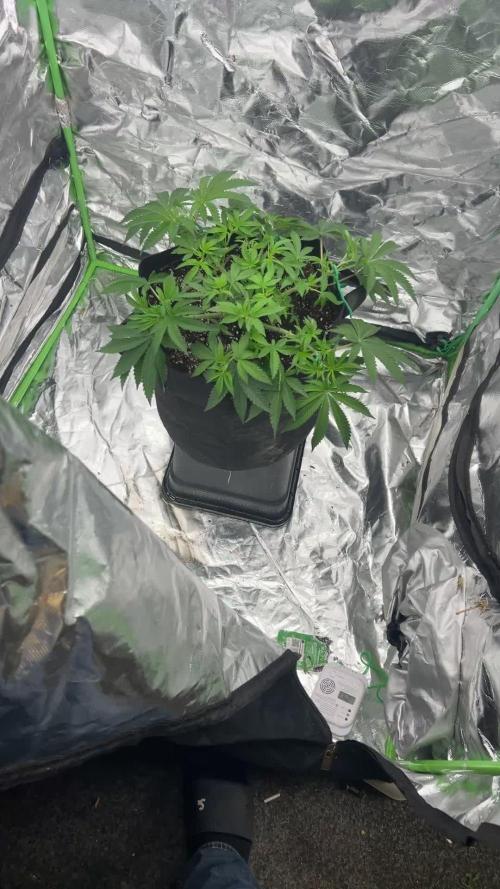
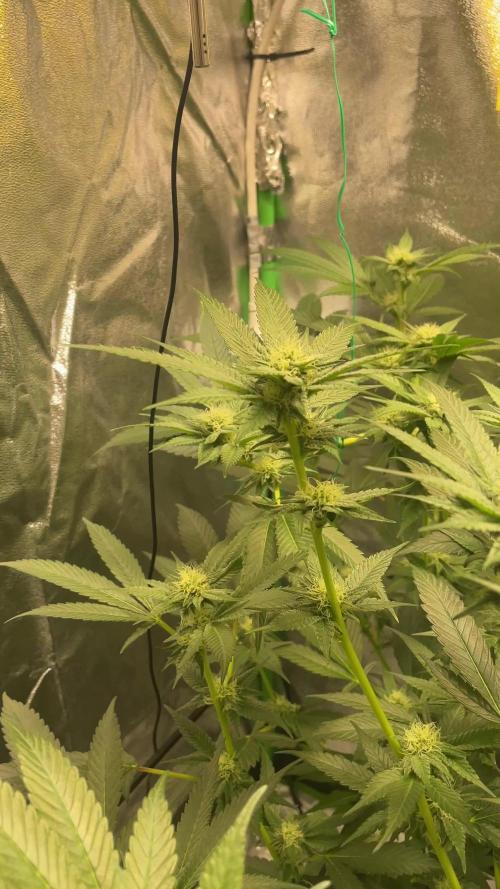
Fair amount of LST going on in there. They've been bent over and seem to be liking it. Just before pics were taken they were given some phd cal/mag water due to what I Believe was a slight mag def. starting. Ph is still remaining perfect in FFOF ( Big up dolomite ). PPM's coming out have dropped from 2000 to 1000 in one week so I'm gonna keep an eye on that. I'm watering every 3 days right now as well not every day as the drop down made me choose per day. They seem pretty happy though. I have a feeling they're about to explode. Update: I was right they needed a lil cal / mag and in 2 days yellowing has cleared up and they are absolutely exploding almost doubled in size in 2 days. Also two have started to flower.

Likes
8
Share
@GermanGrow182
Follow
War eine gute Woche. Schönes Wetter mit viel Sonnenschein. Überall vorblüten. Larry og ist am weitesten.
Die Nächte werden kühler, auch schon mal unter 10 grad. AK zeigt erste fadings ins violette.
Es läuft gut 👍 bis nächste Woche ✌️
Likes
75
Share
@Natrona
Follow
🍬Divine Seeds Auto Contest Candy 🍬Outside Grow
👉Sponsored Grow👈
W8F4
7/20-26
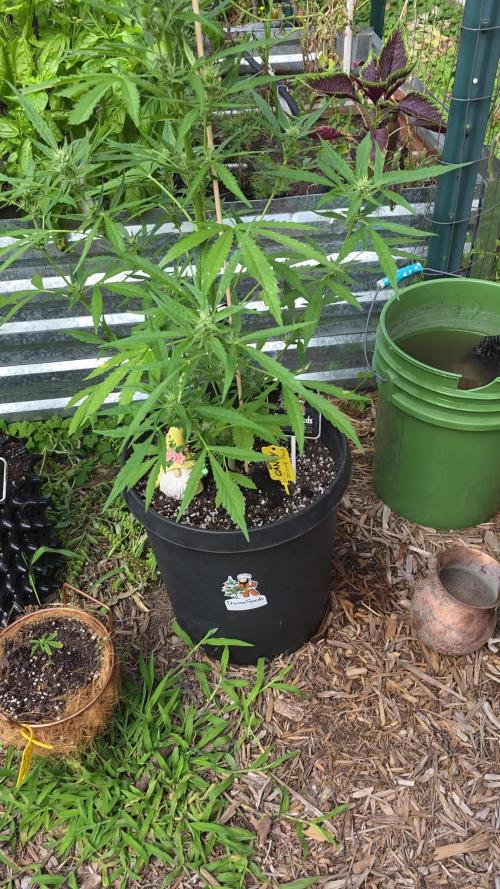
The hot weather returned with humidity and days of scattered thunderstorms. I fertilized once this week with I49 and top dressed with worm castings. No deficiencies so far 😊. Thankfully with all the rain we’ve had this month she doesn’t show any deficiencies or bud or root rot. I fertilized with I49 grow 1 tbsp/gal & 2 tbsp I49 Flower.
With the extreme heat and rain, my auto Candy grew 2 more inches and is now 41 inches. Those inches are mostly buds puffing up with more hairs.
She has some minor bug damage but demonstrates resistance to fungal diseases.
As always, thank you all for stopping by, for the likes and most of all growers love and support.
Stay green, growers love 💚🌿
💫Natrona💫

Processing
Likes
15
Share
@AK1210
Follow
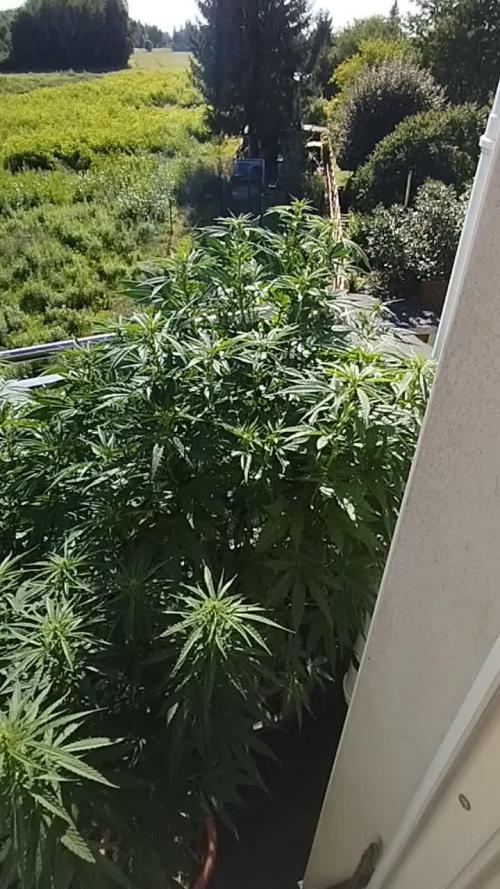
This week has been a good one all round. The sun has been beaming down all day for days and I still due to continue for a while. The gorilla 🦍 has now started to get to a nice bushy size, unfortunately outgrowing the original tent position. After the mistake I made with the Rhino Ryder I grew by taking the bold move to leave permanently in the elements, the cold temps at night really slowed bud production. I have had to improvise and make a shoddy attempt at lifting the tent to allow the room needed.

Likes
17
Share
@Right2Flower
Follow
Day 120 - Getting closer to harvest day for this lady. She's huge and full of buds towards the top, smaller somewhat fat buds in the middle, and larfy buds at the bottom. I should have lollipopped her 1 or 2 more nodes up, especially for the colas that did not end up stretching as far as the others. Fed the lady water amended per this week's diary. Still seeing white pistils on her main colas so still 2 weeks away or so from harvest. I think this will be her last full nutrient feeding and for her next watering she'll get her last Cal-Mag feeding. I'll probably do 2 more plain water feedings from there and harvest once the soil is dried out after her last plain water feeding. I'm seeing a few of the lower buds of the lowest colas show some spots on the leaves so I just cut those parts off and hung to begin drying. It doesn't appear to be spreading but I'll keep an eye out these next few days.
Day 123 - Fed the lady her last Cal-Mag amended feeding. Trichomes are looking more cloudy now on the middle buds. Will give 1 more plain water feeding instead of 2, I want to see how this bud will smoke with minimal flush versus the first lady harvested that was flushed more.
Day 127 - Decided to skip completely flushing her to compare versus an over flushed plant. Harvested her today with the soil nice and dry.

Likes
45
Share
@chapadux420r
Follow
Wassuuuup my dudes
21 days into flowering and the results from the lst and defoliation are showing up. Multiple healthy tops and even the small nodes under the canopy are growing bigger, if all goes well I won’t have many popcorn nugs but I’ll have just big buds (let’s hope)
I guess this also means they won’t stretch much more but I think some more height would be good for yield, anyway, can’t complain for the 1st grow and this is a process, there are no perfect grows!
This week was also a week to add some more nutrients (the plagron) and it’s working very well for now!
Let’s wait for the next few weeks, can’t wait to see the fatty buds 😂
Tell me what you think!


Likes
12
Share
@Miguels_Fuego
Follow
Starting to fatten up. Will decrease maxibloom and liquid koolbloom and add dry koolbloom for bulking and hardening. She is a beast. So far the 2nd tallest auto I have grown, the first being a sour diesel.

Processing
Likes
Comments
Share
@mojogrow
Follow
It was my first grow and I really screwed it up a lot, but it resisted all my beginner mistakes, pests, stress, being without irrigation, irrigation without measuring PH, revegetation, etc.
I love her, really, in love with this strain.
It is a genetics with a very relaxing effect, recommended for those who cannot sleep at night.
shoutout for trimix, very good prices for begginers> https://www.trimix-pro.com/
Likes
7
Share
@GrownyStark
Follow
It's hard to see any upward growth but the buds are getting thicker and ripening. The smell is getting more pungent. The smell eminates and tries to escape the tent when open. The more fresh air she gets the more smell comes out. Idk if I'm burning my trichromes but I have my light at 100 this week but still keeping temps low.
Likes
5
Share
@SouthernStyle_Kronics
Follow
2 weeks remaining according to the fastbuds beginning to harvest chart. Both plants are looking great and smelling strong. I just wish it would be more of a yield and hoping for heavy dense buds. Cant wait to try these strains.


Likes
1
Share
@jdean88
Follow
For first part of this grow check auto grow..week 5 of veg my aim is to fill the whole tent before I flip I know this strain can yeild well and have some amazing flavour can’t wait to see how it turns out
Likes
63
Share
@SlowpokeFuegobud
Follow
Loved the whole grow, the plant was growing a loooot every day, smelling wonderful, love the weed she gave me, thank you @Seedstockers!! 🧡 😘
Thank you for having witnessed the career of Terp&Tonic Auto! 💚 💨
Genetics: (Freakum Zkittlez X Ghost Tonic) X Panty Punch Auto
Love this one! 😍 Smells like Bitter Lemon.. and look at her go!! 🚀
Thanks @SeedstockersOfficial for trusting me with this!! 🙏 ❤️ I already love the Terp&Tonic Auto!
Everybody please if you like, check out the other Seedstockers new variety of my current grow here:
https://growdiaries.com/diaries/178022-grow-journal-by-slowpokefuegobud
Thanks Aptus Holland for providing me with those badass nutrients! 💚 🥦
____________________________________________________
Strain description:
When we decided to cross two genetics as attractive as Freakum Zkittlez and Ghost Tonic to create our Terp & Tonic, we knew that the culmination of our work would be to provide this stunner with the autoflowering genes of the flawless Panty Punch Auto, so that she could be available to all growers. Mission accomplished!
This plant produces buds with a surprisingly refreshing aroma of summer citrus fruits, whilst the flavour of her smoke maintains that mix of lemonade and strawberries that will make you lick your lips non-stop. And if we add to this a happy and stimulating effect that takes you to a world of fantasy, then we can say that this strain is the perfect companion for those wanting to feel active and creative.
You can get all of this in a plant that can grow as tall as 1.5 m thanks to her 60% sativa dominance, rewarding you with up to 800 grams of buds which will be ready for you to sink your teeth into after only 65 days. Could you ask for more? Yes, another round of Terp & Tonic Auto, please!
___________________________________________________________________
SETUP:
80x80x180 cm Zelsius
Medic Grow MINI SUN-2
240W Full Spectrum LED
Built-in Timer
LCD Display
high PPFD of 2300μmol/m2/s
@ 6 ’’ in height, efficacy is up to 2.8μmol/J, and PPF is up to 672μmol/s
built in controller with timer and dimmer
www.medicgrow.com
Nutrients by Aptus Holland
https://aptus-holland.com/
Biobizz Lightmix
custom exhaust fan 320/270cm³/h
Carbon Active Granulate 240cm³/h
tab water pH 8 - EC 0,25