


Likes
132
Share


@rhodes68
Follow
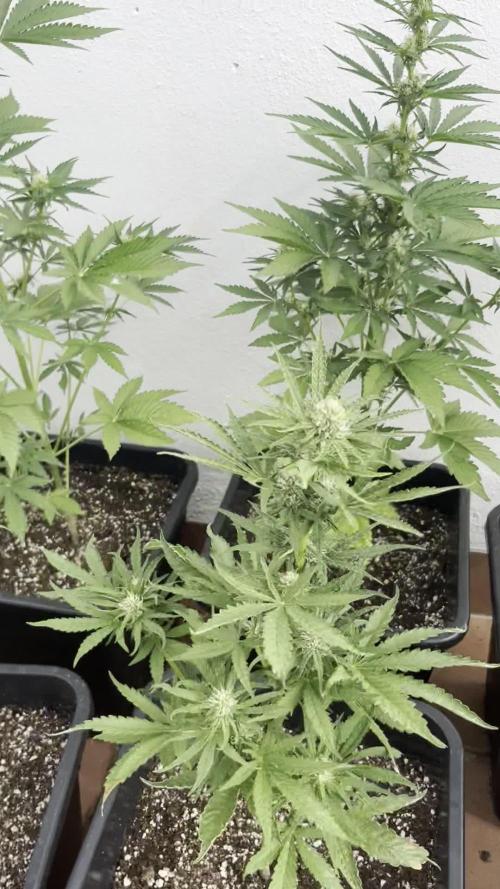
12/13
Continuing to leaf tuck and play with the sticks to bring out the tips
Love how its growing as it may be here longer than planned so nuets are now at half grow half bloom early in attempt to keep em in veg longer.
They had zero stress or deficiency in their little lives so far and that's showing in a longer veg period were it not for a new dry and grow coming up I might be tempted to let one finish under the LEDS, liking the new lights loving the coco and Coco-Tek (sole nuet atm)looking for ways to cut my work load 😁
See if I can buy the Stardawg another week or so
Feed set to 825-ish ppm 20% runoff at 2.0 quarts 5.9PH
Almost forgot, getting one of these reptile heat lamps for every tent they are loving the 24hr IR, an island paradise in the frozen north
12/14 Foliar feeding mainly just because I had it made up used as a preventative.
RO water, wetting agent, 1ml CalMag/quart, both plants at lights out.
12/15 Defoliation day - opened them up cleaned up lower end pics later maybe tons going on
12/16 Feed reduced 100ppm to 725ppm due to white tips on new growth, 30% runoff just to be sure.
12/17 Feed was good the white tips seem to be diminishing at least none on new stuff overnight
Removing Bloom nuets so all Grow , see if she flowers now, beginning to think there is something to this as never had an auto go this long in veg.
Foliar of Cal-Mag 1ml/qt +wetting solution as a preventative as seeing some "ghost" signs in some leaves, cant hurt as you really have to look close.
12/18 Guess who is going into flower 24 hrs after removing bloom nuets?
Not completely but its beginning fast, this last week of veg. Folded back in 2ml Bloom
Going to try that seriously on our next auto run but that's months away as two photo grows are on tap.

Likes
30
Share


@Mosquito_Haarlem
Follow
Oogsttijd 🌲
Werkelijk waar boven verwachting, dikke vette keiharde wiettoppen.
Zamnesia strains blijven me verbazen.
Dit is zijn harde toppen zoals een indica, maar met de lange lengte van een sativa, heerlijk.
Ze vertoont paars, roze en oranje tinten en ruikt zoet.
Ik heb de plant in zijn geheel opgehangen en zal de resultaten delen wanneer de wiettoppen droog zijn.
Wordt vervolgd

Processing
Likes
19
Share


@creichs
Follow
been doing some topping as the plant grows trying to spread the canopy along with trimming off the large fan leaves near the bottom not get much light.
power flower is about 5 inch tall
I've been letting the plants grow to the lights and haven't been seeing any issues so far.
Power Flower has the 1000W @ 15" away from the top
Holy Punch has the 600W @ 6" away from the top


Likes
Comments
Share


Likes
5
Share


@Lazuli
Follow
The best photoperiod strain ive grown, its not too stretchy and put on insane amount of weight. 10/10


Likes
19
Share


@Sato_Growing
Follow
Sorry for not uploading i had some ups and downs in my life, and with the college is really hard to work all those things together. But now i am back and going to hustle really hard.


Processing
Likes
11
Share


@Newbie5648
Follow
Day 57. Nutes increased for more growth hopefully.
Day 58 notice alot what looks like thc from leaves and hairs.
Day 59 to 63 see more orange hairs and trychomes. See videos
Average 200ml water everyday.
Likes
18
Share


@Nune2021
Follow
Hey Leute ich hab bei den Pflanzen Ungeziefer bemerkt kann nur aus der plagron Erde vom Grow Shop sein Trauermücken thripse bei zwei Pflanzen außert sich das Schon negativ die Pflanze sieht kränklich aus gelb Stich von oben nach unten überdüngung ausgeschlossen, hab die Pflanzen mit combo neem behandelt 4 Tage gewartet und wieder behandelt das Pflanzbild der Zustand kann auch davon kommen !!! sobald die Pflanzen sich erholt haben schick ich die endlich in die Blüte

Likes
47
Share


@SirDillton
Follow
Day 66 - Day 21 of flower - Master kush
First indoor grow.
Lights 12-12/ PAR 900/ Day temp 23-27/ Night temp 19-22/ RH45%/ Co2 500ppm/ water Ph 6.5/ water ppm 1400 with technaflora nutes/ organic soil/ 7 gal pots/ 4-5l per 3 days for watering.
Week 3 is done. The power went out for a day due to a hurricane. Kept the light cycle going with flashlights lol. Defoliated one final time on day 18. There hasn't been any stretch in 4 days. Looking frosty already. I also included a video of my setup this week!


Likes
7
Share


@SkunkleDamo
Follow
She's doing ok. Looking forward to this.
I have topped her at the third node and remove the first so I will have 4 tops in a fashion. These will each be topped and node 2 removed so she should end up with 16 equal tops in size and location.... hopefully

Likes
49
Share


@AsNoriu
Follow
Day 43. Girls will get heavy training later today. They grow ... and because of that i had to move 3 Kushes to other tent and i will make separate diary for theirs flowering time.
3 Auto Blue Tooth by Real Gorilla Seeds took theirs place.
After todays training i will give them 4-5 days to recover and will send them to flower hopefully on sunday after 24 hours of darkness.
Skunks grow bigger plants, than Cheeses, despite theirs quickest germination and obvious lead in first 3 weeks or so ...
Day 46. 3 days left to flower, finally made heavy training, way too busy for LST grows... but result is good, girls hopefully will show off in bloom !
Day 47. Girls loved training, 2 more days, 24 hours darkness and tuesday latest flowering starts. Got full feed of Biobizz, feed charts updated. Next feed = water + silica.
Happy Growing !!!

Likes
25
Share


@Grower_Of_Persia
Follow
week intel:
we getting close to end of ripening , this week i raised drought , Nitrogen and E.C stress by feeding them 2 times per week and raised e.c to 3 to cause real stress that will help increase terpenes production
stresses :
Nitrogen deficiency Stress by removing the fertilizers that has N in them
Drought stress via removing one meal in week
high E.C stress around 1.7 and the other feeding day 3.0 , 2 times a week
feeding:
no more Nitrogen
i feed them 2 times this week with this order :
day 1 : i feed them high with Bio-Bizz Top-Max + Feeding Booster about 850 ppm - 1.7 e.c to cause a medium e.c stress.
day 3 : no more feeding this day
day 5 : i feed them very high dose of Bio-Bizz Top-Max + Feeding Booster around 1500 ppm - 3 e.c to cause high e.c stress
guide of the week :
be patient in the last weeks, never hurry for harvest because its the time of ripening in last 2 weeks you should let plants to do their work
last weeks of ripening is the time to break the limits we should cause 3 stresses as i said above Nitrogen stress , Drought Stress , E.C Stress
Likes
13
Share


@Reudiger_Grower
Follow
Dei meisten buds sind jetz schon so ziemlich reif. Vorraussichtlich wird in ein paar Tagen geerntet. Ansonsten wird zumindest teilgeerntet. Aktuell wird noch täglich gespült. Mittlerweile immerhin bei einem ec wert von 1,5 angekommen. Vor der Ernte wird noch mit Terra Aquatica FlashClean gespült damit alle Salz Rückstande rausgespült werden.


Likes
4
Share

@Ribemarti
Follow
VEREMOS UNAS PLANTAS PEQUEÑAS,
PERO CON ILUSION YA QUE SON LAS ULTIMAS AUTOMATICAS, HACE 40 GRADOS AFUERA
HUELEN MUY BIEN Y LAS ESTOY REGANDO CON 3 lLITROS DE SOLUCIÓN CADA PLANTA