The Grow Awards 2026 🏆
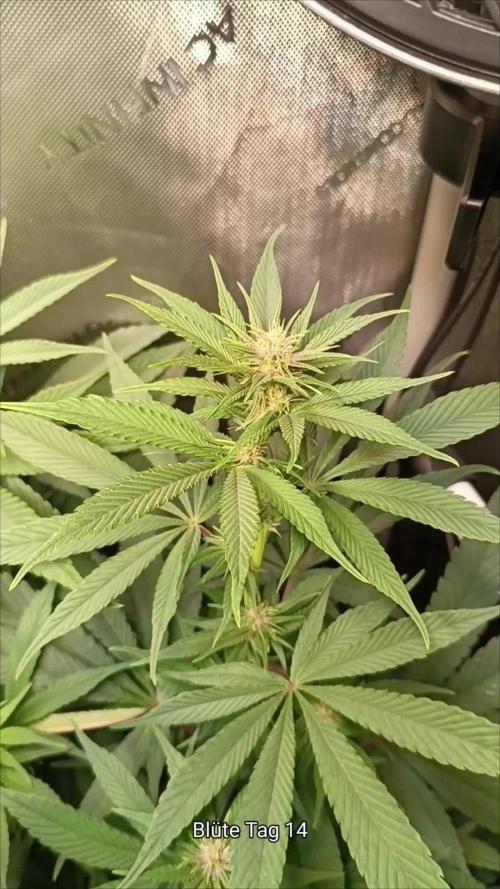
Likes
Comments
Share
Likes
9
Share
Our Blue Dream by Zamnesia is a truly exceptional beauty, now in advanced flowering it is showing all its beauty. ** Remember that we are growing a plant worked with the techniques indicated and another left to grow without pruning to preserve its speed; in the previous/next diary you will find the other plant of the same variety. Here the plant has let itself go straight and free and is thanking us very well by giving us some very very beautiful flowers. We are in a 100% organic configuration, the soil is recycled Promix + 1/3 fresh soil + 10% Perlite + RQS Mycorrhizae Mix (4 g in the mix, 1 g under the small fiber pot). We switched to the advanced flowering program a couple of days ago but last week we still did not give green sensation. We fertilize with: // 1 ml/l Sugar Royal - 2 ml/l Alga Bloom - 1 ml/l Power Buds - 1ml/l Green Sensation We sprayed 5 ml/l Vita Race Foliare once a week. For all the info https://plagron.com/ All nutrients are available from Zamnesia: https://www.zamnesia.io/it/531-growshop/476-fertilizers We always have the excellent mycorrhizae from RQS that run in the soil. https://www.zamnesia.io/5778-mix-micorrhiza-easy-roots.html Try this strain it promises more than good ---- // https://www.zamnesia.io/en/3271-zamnesia-seeds-blue-dream-feminized.html Short Description Zamnesia // Exceptionally tasty and potent, Blue Dream by Zamnesia Seeds is a hybrid with a distinctive and sophisticated character. A blend of Haze and Blueberry strains that manages to bring out the best of both worlds. Its short flowering time of just 9 weeks far surpasses other Haze strains! The whole world of growing and much more is at Zamnesia: just take a look at the site and you will find "all the best that nature has to offer" in various shapes and colors. The new strains are fantastic and the old ones are no exception... -- // www.zamnesia.com
Likes
15
Share
Can't wait to blazeeee Feeding💪 10/17 Water30L+Cleanse80ml+calmag@190ppm Ph6.3 Ebb 10.42/11.32/12.26/13 Clone 11.35/12.21/13.05/14 Average runoff ec1.5 Keeper 300ml per pot 10/18 Water26L+Flawless90ml+calmag@300ppm Ph6.3 Ebb 11.38/12.24/13.17 Average runoff ec1.2 ph6.5 Clone 12.38/13.56/15.20/16.10 Average runoff ec1.5 ppm750 10/19 Water26L+Cleanse80ml+calmag@200ppm Ph6.3 Ebb 11.12/11.48/12.24 Average runoff ec1.4 Clone 11.50/12.12/12.37/13.37/14.40 Average runoff ec1.3 ph6.6 10/20 Water30L+Cleanse30ml+Calmag@190ppm Ph6.4 Ebb11.42/12.22/13.20/14 Clone 12.40/13.20/14.20/14.45/15.15 Average runoff 1.2ec ph6.4-6.7 10/22 last light day 10/23 2 Pm Cut and hang Plan 21day at 23temp 55rh
Likes
13
Share
@GrowerGaz
Follow
Easy week the autopots are doing the hard work. I have been foliar feeding with my KNF collection LAB, FAA, WCAP. I also went foraging to make some IMO , have added pictures if anyone is interested.
Likes
170
Share
Bonjour à tous les padawans et les maîtres jedis Jour42 ma plante entre bien en floraison je pratique sur elle une defolliation pour permettre aux têtes de prendre la lumière La floraison des plantes de cannabis La plante de cannabis passe par différentes étapes de vie avant de parvenir à la récolte. Ces étapes sont : la germination, la pré-croissance, la croissance et la floraison. Pour les autofloraisons il n'est pas nécessaire d'avoir de changer le cycle de lumière elle entre en floraison automatiquement voilà d'où elle tient son nom "d'autofloraison" L'origine de l'auto-floraison vient de la sous-espèce "cannabis sativa ruderalis" , qui à l'origine produit de très faibles niveaux de THC. C'est en croisant cette variété de marijuana avec d'autres qui produisent des niveaux de THC plus élevés qu'à vu le jour ce magnifique compromis que sont les variétés auto-fleurissantes avec des taux de THC très satisfaisants. En parallèle, cela a permis d'améliorer la production de ces variétés, qui initialement étaient exceptionnellement basse. Pour des résultats optimaux, en culture Outdoor (extérieur), je recommande que la germination des graines de marijuanaAuto-flo se fasse entre avril et août. En culture Indoor(intérieur), la photopériode idéale que ce soit pour la croissance comme pour la floraison est de 20h de lumière. N'oubliez pas que ces graines ne sont pas tributaires de la photopériode pour passer en floraison. Il est préférable d'utiliser des pots d'une capacité de 10 à 20L dès le début, étant donné que leur cycle de vie est réduit, les auto-flo n'ent pas besoin de plus de volume pour se développer. Vu sa petite taille (et la discrétion) elle fait l'objet d'un bon choix pour la culture de cannabis sur balcons. La première variété de Lowryder auto-floraison a été créé à partir de cannabis indica sativa croisé avec des génétiques de cannabis sativa rudelaris par la banque de graines de marijuana "The Joint Doctor". Puis vinrent la White Dwarf de "Buddha Seeds", la Roadrunnerde "Dinafem", l' Auto Stoned d' "Autofem", la Speed Devil de "Sweet Seeds" , la Maxi Gom de "Grassomatic", la Flash, la Gnomo de Kannabiaet bien d'autres. Jour42 defolliation (video) Avant toute chose n'oublions pas de bien désinfecter ses outils et bien ce laver les mains. Quesque la defolliation ? LES CULTIVATEURS AMATEURS, PRENEZ GARDE, MAIS NE PRENEZ PAS PEUR La défoliation consiste à retirer les feuilles des plants de cannabis en intérieur afin d'accroître le rendementfinal. Le cultivateur amateur doit faire preuve de vigilance lorsqu'il commence à appliquer cette technique de taille. Malgré le débat sans fin entre ceux qui prônent cette technique et ceux qui la dénigre, il n'y aucune raison pour qu'un amateur ne s'y essaie pas afin de voir si ça lui convient ou non. COMMENT DÉFOLIER Que vous tailliez les feuilles ou les branches des plants de cannabis, il vaut mieux utiliser un sécateur stérile qui est confortable en main. Arracher des feuilles à la main manque de finesse et engendre souvent par accident, l'arrachement des couches d'une tige en plus de la feuille. L'objectif principal de la défoliation est de permettre une meilleure pénétration de la lumière et de promouvoir la production de plus grosses têtes. Les feuilles éventails qui font de l'ombre doivent être retirées. Tailler la tige principale et/ou les pousses secondaires n'est pas de la défoliation. La règle d'or lorsque vous donnez à vos plantes un rafraîchissement est de commencer avec les feuilles nourricières les plus grandes et les plus larges, en taillant du bas vers le haut. Il est important de retirer les feuilles stratégiquement et non pas au hasard. Pensez également qu'il vous faut limiter votre rafraîchissement à approximativement 10 à 20 % des feuilles totales de votre pied. Il est très facile de s'emporter durant la taille et de se retrouver avec des plantes chauves. Un excès de taille de feuilles empêchera la photosynthèse et paralysera vos plants. QUAND FAUT-IL DÉFOLIER Il est assez rare d'appliquer la défoliation comme seule technique pour obtenir un fort rendement. La taille des feuilles est généralement associée à d'autres méthodes de tailles et de palissage pour un meilleur rendement telles que le topping ou étêtage, le FIMming, le LST, le manifolding, le supercropping et le ScrOG. Les cultivateurs utilisant la méthode ScrOG auront besoin de retirer toutes les croissances inférieures ainsi que les feuilles et les tiges se trouvant sous le filet. Les plants de cannabis peuvent être défoliés dès lors qu'ils sont passés de la phase de plantule vers la phase de croissance végétative. Cependant, il est recommandé aux cultivateurs amateurs de laisser aux plantes 1 à 2 semaines de croissance végétative avant de s'attaquer à la défoliation de celles-ci. De plus, certaines variétés sont plus sensibles à la taille que d'autres et de ce fait, seront plus stressées par la taille des feuilles. Surveillez minutieusement le comportement de vos plants après la taille. Une période de convalescence de minimum 3 à 7 jours avant de recommencer la défoliation est fortement recommandée pour éviter trop de stress aux plants. Les cultivateurs peuvent également défolier pendant la phase de floraison, ce qui permettra à l'énergie de la plante d'être concentrée vers la production de têtes tout en limitant l'ombre et l'excès d'humidité. Néanmoins, il est important de ne pas défolier trop tard sous peine de simplement blesser ses plants inutilement. LES AVANTAGES DE LA DÉFOLIATION Évidemment, l'avantage numéro un de la défoliation, c'est l'augmentation du potentiel de rendement de cette technique de taille pour tous types de cannabis allant de la photopériode aux variétés autofloraison. Ce n'est pas un secret que les fleurs qui reçoivent plus de lumières deviennent plus grandes et larges que celles dissimulées dans l'ombre des feuilles. De plus, retirer les feuilles intérieures des plants touffus aide à prévenir toutes menaces de moisissure. Les plants très feuillus avec un feuillage intérieur dense produiront une quantité importante de têtes pop-corn. Dans le pire des cas, les branches de têtes et les têtes qui sont denses succomberont au pourrissement. Si vous observez des gouttes d'eau se former sur la surface des feuilles, il est grand temps de penser à faire de la défoliation. Libérer la zone inférieure et médiane des feuilles est un excellent moyen d'améliorer la circulation de l'air. LES DÉSAVANTAGES DE LA DÉFOLIATION Les plants de cannabis en intérieur bénéficient de la défoliation pour deux raisons. La première est parce qu'ils reçoivent la lumière d'une source stationnaire au-dessus d'eux, et la deuxième est parce que les conditions environnementales sont contrôlées par le cultivateur et non Mère Nature. Les plants d'extérieurs eux, n'y gagnent pas beaucoup, car les cas échéants se vérifient pour eux. Le soleil traverse le ciel, illuminant sur sa route, différentes portions de la plante de son lever à son coucher. Les cultivateurs en extérieur n'ont pas besoin de manipuler les plantes afin qu'elles se développent en adoptant une structure plate puisque le soleil est infiniment plus puissant que n'importe quelle lampe de culture et qui plus est, il est toujours en mouvement. Tailler les feuilles des plants extérieurs les rend également plus vulnérables aux conditions humides et brise leurs barrières naturelles contres les nuisibles. De nombreux cultivateurs d'intérieur peuvent, et malheureusement, c'est souvent le cas, réduire le rendement final à cause d'une défoliation faite au mauvais moment et/ou excessive. Tailler les plantules n'est pas conseillé et engendre souvent des plants nains. Scalper les plants matures est encore pire, et au lieu d'obtenir de longues branches de têtes, vous obtiendrez probablement encore moins de fleurs. De même, tailler des plants malades ou en mauvaise santé à n'importe quelle période de la croissance risque de paralyser la croissance plutôt que d'encourager la formation de fleurs denses. Jour44 Arrosage une fois sur 2 topmax de biobizz Jour46 arrosage avec de l'eau ph6.3 à laquelle j'ajoute 0.8g par litre d'eau de feeding enhancer greenhouse. Jour47 léger arrosage. Jour48 léger arrosage
Likes
19
Share
📆 Semana 3: Esta variedad sera un cultivo mixto, interior y exterior para ver todo su poderio em ambos lugares. Ha sido una buena semana en la que han dado un gran cambio en sus lugares definitivo 😎. Se le ha aplicado un tratamiento insecticida con agua + tierra de diatomeas ( 1 cucharadita por litro de agua), también se le aplica un tratamiento fungicida con una infusión de cola de caballo para evitar futuro moho. A partir de ahora se aplica riego por goteo, 1/3 de la dosis recomendada por el fabricante ya que al estar en exterior y en buena tierra tiene bastante comida. En interior seguira el mismo plan nutricional que el resto, ajustando sus dosis de nutrientes segun sean requeridos. Potencia de la lámpara: 60% , se conecta el Marshydro TS-1000 para dar apoyo en la carpa de 1.50 x 1.50 x 1.50
Likes
1
Share
@Kushfarm1
Follow
Some plants getting near to harvest, some can't even hold the weight auf they own buds anymore.
Likes
2
Share
Ich war sehr zufrieden mit dem Ergebnis der Pflanzen. Sie waren gut zu formen. Leicht zu beschneiden und zu trainieren. Diesmal konnten wir den Platz perfekt ausnutzen ohne Verbrennungen von oben zu riskieren.
Likes
2
Share
She was a pleasure to grow from start to finish. Took well to topping and lst. Would recommend this exotic strain to anyone... rock hard covered colourful frosty nugs And gassy af
Likes
39
Share
Day 57. Watering with clean water. The light schedule has been changed (12x12). Replaced lamp. Day 58. Watering with fertilizers. Day 59. Watering with clean water. Day 60. Watering with fertilizers. Day 61. Watering with clean water. Day 62. Watering with fertilizers. Day 63. Watering with clean water.
Likes
3
Share
Likes
38
Share
Utopia Haze is a rare heavily sativa dominant hybrid (90% sativa/10% indica) strain created through back crossing Brazilian Sativa strains. This tasty little bud took home 1st Place for Best Sativa in the 2008 High Times’ Cannabis Cup and for good reason – with its potent 18-22% average THC level and long lasting cerebral effects, Utopia Haze is one powerhouse smoke. The Utopia Haze high comes on soon after you finish your first toke, hitting you with a strong cerebral lift that infuses you with a sense of hazy relaxation. Type: Feminised/Photoperiod Cultivation: Indoor/Outdoor Flowering Time (days): 70-75 Indoor Yield (g): Up to 650 Feminised Outdoor Harvest Month: October Feminised Outdoor Harvest Month Week: 3rd-4th week Aroma: Citrus, Woody, Pungent, Mint Effect: Cerebral Lift, Hazy Relaxation, Sleepy Welcome Everyone to the Final Entry of my Utopia Haze Grow ! There is so much to discuss ! I have been extremely busy as of late trying to get this Harvest together, but i am happy to have it here for you now ! I Seriously under estimated the amount of time, help from others, and my own necessary skills to pull this off.. and i still kind of screwed it up lol ! But its worth noting i have never actually done this before and trying to document it during....was extremely hard. It is next to impossible to work an iPhone with rubber gloves on ! First I want to discuss everything step by step so before you jump straight into the comments on how the end product is so small in "quantity" Rest assured i am happy with its"quality"...and thats all that matters to me because Life is a journey not a destination! and i have learned so much from this grow that I couldn't be any happy even if i messed some things up :) But at the very least I hope you read through this entry in its entirety with an open mind and focus more on the process, rather than just the outcome! I ran out of Ice & i was only able to wash three times..(normally I've heard you should go sometimes 5-6 washes) Preparation is Key & things will be much better next round :) Photos 1-22 These are pretty self explanatory but for those of you just tuning in now.. this is what happens to a very happy plant when you don't have the necessary tools to monitor key components of growing cannabis.. Ph, as well as EC levels play a very key role in the outcome of your grow lol that being said I was just able to save this plant by purchasing both tools but that doesn't mean the plant didn't suffer because of the prior events.. This was a Huge reason behind me choosing to turn this harvest into what i would consider "Solventless Hash Rosin" from "Ice water extracted Bubble hash". Pictures 23 The idea here is the process of using "fresh Frozen Cannabis" this has been discussed many a time online on such sites as instagram and here on grow diaries as well.. I personally have Never tried the process so i decided to try it out and make a judgement for myself.. Video 24 The Cannabis has now been in the freezer for 72 hours making it very well frozen.. as you can tell i struggled getting it all into the 25u Screen Wash Bag. One thing of note i would do differently is i will de-stem my next batch as i also believe this played a part in the amount of plant matter that escaped through the sieves. Photo/Video's 25-28 The idea here is "ice water Seiving" & especially with the bags that I am using here that are only have screen material on the bottom portion of the bag it is very important to have spaces in-between the screens to allow the water to pass directly through the screens into the bottom bucket with the least amount of resistance.. because the hash is so extremely temperature dependant if it gets warm on the side of the bag.. it will stick there and not make it to the bottom to become use able product.. 29 You do not need to use as much Ice as i used here lol... the idea is to keep everything very cold..i certainly achieved that but at the sacrifice of using so much that i ended up grinding product and producing "contaminants" but in the end they are just plant matter that i would be smoking when i rolled up my joint either way so.. I'm not super disappointed.. But it should be noted that what you want to achieve here is a Layering effect where you have the wash bag between two small layers of ice while the "water current" washes the Trichomes away allowing them to be separated by the screens setup below :) Before Starting the machine you should allow some time (i.e.;10-12minutes pre soak to allow the product to become saturated) before the first cycle. By video 32 I have just ran out of ice lol.. Video 33-34 Here I have a tip for you.. to separate the screens that you sieve through.. cut 5 gallon buckets to stretch them across nice and tight.. it'll make scooping your Bubble that much easier ! i learned this from the many "Frenchy" videos I have watched :) Picture 35 Here in lays the problem for most people.. drying your hash without loosing vast amounts of "Terpenes" whilst also stay ever vigilant against mold ! Thanks to all those videos I've watched on youtube.. id like to think this was one of my most successful parts of this process.. Things to Note; Terpenes start to seriously evaporate at temperatures 68F or 20C you need to stay as cold as possible whilst bringing the Relative Humidity in the space down into the 40-30% to stay away from that nasty mold ! I used my cold storage room in the basement.. with a dehumidifier running to keep the space at 45% RH & staying at a constant 15c. All while spreading the hash as thin as possible across parchment paper, on top of the white screens with a fan moving air across both sides of the paper. Pictures 36-38 These are some macros i took in the middle of my drying session I fell in love with the colour. Yes i know the black spots are plant material but they will get caught when i bag the hash & squish the oil out. Thing to Note; at this stage it is important to ensure you 'micro plane" the hash down as fine as you can whilst staying weary of the temperature... any "chunks" will hold pockets of moisture.. that lead to potential problems..ie; mold ... Picture/Video 39-41 Successfully planed bubble hash ready to be bagged and Squished ! Picture 42 Ive decided to follow Pedro.. from Pedros Grow Room and double bag to be on the safe side so i don't have any blow outs. So thats One 25u bag inside one 160u bag ! :) Pictures 43 This is almost 3 grams of the bubble hash from above, already melting in the bag.. this is where i ran into trouble again lol things started getting to warm in the house and i was only able to get one of the three squish's i did on video :( things started getting sticky. Picture 44 This is basically just a photo of the equipment I'm using; 3x5 LowTemp Cage in the frame I built myself, with a 20Ton bottle jack. Something to note here is this is an older Lowtemp model with only a single heating zone which is which i have it closed here heating Both sides of the press :) As well as the importance of having adequate pressure on your plates.. my rig is very overkill for the size of hash bags..lol Video 45 Here is the lovely press video.. its didn't quite work the way i wanted either lol my directional folding wasn't quite tight enough for a big "drip" :) &the Press was set to 65°c Photo's 46-50 are pretty self explanatory :) I had a blow out.. but still managed to pull an 80% return from the hash once squished...& yes it tasted amazing :) Was it worth it in the end... that could be debated.. for some..i understand..its not your thing, but for those of us that are interested in making our own concentrates.. free from Solvents... I wouldn't make it any other way :) If even ONE of you reading this diary finds it helpful to reference for ANYTHING.....even if its "what not to do" ill consider it a success ! Thanks again for tagging along on this garden adventure.. its been one heck of a journey ! Much Love from B.C. Canada, Until Next time, Cariboo
Likes
6
Share
Missing a lot of footage. This is set to be a full seed to harvest video on YouTube so I don't always remember to capture content for grow diaries smh I'm still learning. This was just a feeding for the week. Everything is running smoothly. Thanks for stopping by.
Likes
9
Share
@Rizik86
Follow
Day 79 - Added 7 mL of CalMag Micro Grow and Bloom. Added 7 mL of each additive. PPM is 706. Day 81- Using noticeably less water now. Checked PPM 475. In moving the plant to water, a small branch broke. Trichomes are mostly clear. Started to dry it as a tester for rest of the plant. It takes 7 days for me to dry the tester at 70F and 40RH. Not ideal temp but that is how it goes. Day 82 - Might have seen first amber trichs Day 83 - Added 10 mL of Overdrive. PPM is 430. Trichs are mostly cloudy. Hairs are 80% orange. Branches are leaning from the weight. Day 86 - Added 5 mL of CalMag Micro Grow and Bloom. Added 5 mL of each additive. PPM is 588.
Likes
22
Share
D83 F36: Hello everyone! I apologize for the quality of the photos, I really have a shitty phone! Apart from that everything is going well! The plants are growing very well, still no signs of deficiency. I started cooling the box at night 2 days ago and the colors are already appearing! I upgraded my LED panel to 600w F33, I was sure I was correct with 400 but I noticed that the flowers were not developing correctly The smells are really incredible, more and more marked! I have a little crush on the code red #1, a smell of strawberry candy, cream and syrup. the white runtz x Hollywood is very very special too! a very runtz smell, with a very marked smell of marinated ginger and lemongrass! very special, it's also the one that makes the biggest heads, incredible I did a big defoliation (schwazzing) a few days ago and they recovered very well. I moved the plants again, I'll put the locations below. I will apply tco F40 in my flowering TCO, I put: - kelp hydrolysate - epsom salt - bat guano - mealworm guana - castor bean shell ash - palm ash - vermicompost - blackstrap molasses - elycitor -Yeasts Saccharomyces Cerevisiae Bottom right: Papaya Bang Bang #1 Bottom middle: LA Vanilla cake #2 Bottom left: Papaya bang bang #2 middle right: cherry gar see ya #4 clone middle: white runtz x Hollywood middle left: code red #2 Top right: Code red #1 Top middle: B-45 Top left: LA Vanilla Cake #1