Processing
Likes
Comments
Share


@Ferenc
Follow
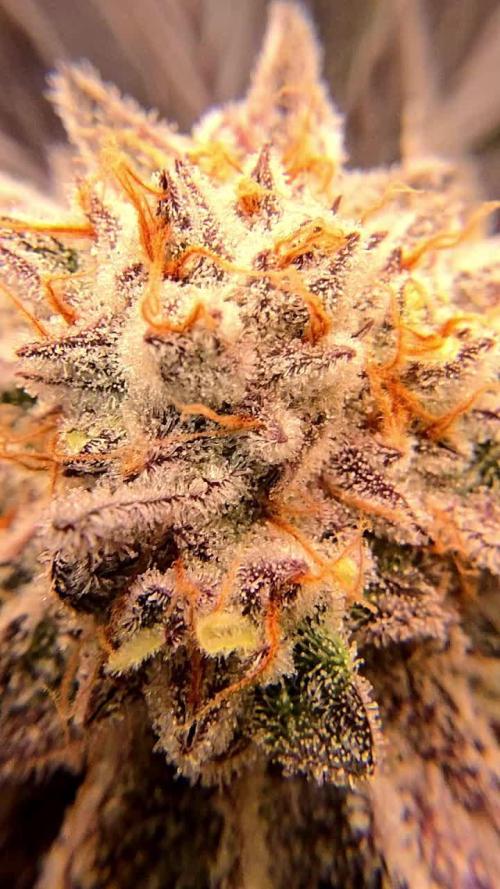
It was easy to harvest she was very small jut cut it quickly without stalks the wet weight is 17 g of the buds, nicely coated with THC and it was approx 70% milky and 40% amber trichomes. Hopefully good time to be harvested. This site has changed can not update and edit the comment section. The smoke is nice it is kind of relax and strong high. Not the best but not bad at all. I like it.

Likes
1
Share


@SzkolaZiola
Follow
Yet another beautiful creation from Humboldt Seed Company. Huge trichome heads, amazing, complex aroma.
Oh and did I mention magnificent leaf and bud colouration? They are purple AF 💪
I love them sooo much 😍😍😍


Processing
Likes
12
Share


@BigBudWolf
Follow
BLUE CUSH (Seedsman)
28 Days from sprout.
Easy with the nutrient feed at about quarter strength recommended.
She is small but seems to be doing well.
Likes
1
Share


@TheBulldozerSicily
Follow
Passaggio a fioritura, dopo aver completamente riempito i box, fin ora soddisfatto del risultato


Likes
23
Share


@GermGrowFox
Follow
1. März
Die Bilder sind vom gießen gestern. Die AK hatte gestern nach dem gießen mal wieder Sauerstoffmangel. Habe zusätzlich noch einiges an Blättern und Trieben entfernt. Dachte zuerst ich war mal wieder zu grob mit allem und hab overcearing betrieben. Heute Morgen steht sie wie eine Eins! Keine Spuren mehr vom Sauerstoffmangel. So fit war sie noch nie seitdem da Leben drinnen steckt 😂 daher bin ich jetzt im Nachhinein sehr zufrieden mit meinen Schritten die ich unternommen habe.
Die Purple Punch macht seit Tag eins sensationelle Arbeit. Sie sieht fit und vital aus, ist halt gefühlten Baby. Sie riecht jetzt schon ordentlich für das bisschen Blütenstempel. Mit ihr bin ich ebenfalls sehr zufrieden:)
Nächstes Gießen habe ich vor, er wir etwas florganics oben auf die Erde zu streuen. Schauen wir mal was wird.

Likes
80
Share


@RickJames_Mcdank
Follow
Everything is going fine now in week 2. I gave her only 2ml / 700 ml once. And after that just plain water. She started to stretch now. But she has recovered very well after the slow start. So finally she has a even canopy and thats what I wanted to achieve. For now she will get plain water till the Batmix runs out and I need to start give her Alga Blome. next week I will start giving her Green Sensation.

Likes
3
Share


@Ogbangbang2981
Follow
YEA!!!! That's what comes to mind every time I check out my grow space and see such beautiful plants growing especially my C4 Auto from fastbuds she coming along so beautifully it brings joy to my heart all I do is give her light and bat turd water mix and raw bat turd and let her take off I planted her sister on the outdoors to see the difference between the two indoor is looking a lot better to me . That's all I gotta say for this Thursday see you next week. Comment on my Ak48 Autoflower I got from persific seed bank
Likes
8
Share


@GrowNugzCanada
Follow
The week has been strong. She was put in dirt on the 29th and are peeking out today oct 1. Very strong growth and so far impressed.
Oct 3 end of first week and well, still impressed. She is standing on her own stock with no support. And showing good growth
Likes
20
Share


@SensimillaP
Follow
I'm not a big fan of gelato strech, she's a tall girl, had to supercrop a few more tops.


Processing
Likes
91
Share


@CANNASIM
Follow
GENERAL COMMENT. WEEK 5 OF FLOWER.
Ok guys, this week ran ok for one girl and less for her sister, so i will go on details individually.
RQS STRESS KILLER AUTOMATIC COMMENT.
Beautiful girl getting bigger everyday, i’m very satisfied overall, she is fast and have lots of terpenes, and started heavy resin production. Super strong, absolutely no issue at all for now. I’m imagining to start flushing this week or the next will decide this days to come, but this grow will be max 12 weeks.
Not reading the runoff on this girl as everything is just amazing. Maybe will backbuild some colas to compare.
EC at 2.2, released a lot of N now, but still did a good feeding, it might be the last, or max one more before the flush.
Will be flushing with flawless finish in the last week.
Likes
63
Share


@Targona
Follow
Targona: 57 days since my little girl sprouted from seeds🌱
Eighth week of growing my Apple Fritter Automatic 🍎🍏🍎
Nutrients:
As I mentioned last time, I switched to mostly organic nutrients from Plagron and Biobizz💓 -
Plagron Alga Bloom - is a complete fertilizer designed exclusively for the flowering phase. It contains all the important substances that the plant easily absorbs 🌸🌾
----------------------------------------------------------------------------------------------------------------
Plagron Sugar Royal - Sugar Royal is a supporting enzymatic fertilizer designed exclusively for the flowering phase. It contains hormones, enzymes, vitamins and trace elements necessary for proper flower development🍭🍭🍭
----------------------------------------------------------------------------------------------------------------
Plagron Green Sensation - Green Sensation is a professional flower stimulator and activator. It contains all the necessary ingredients to support flowering and also the formation of sugars, and thus the overall yield 🌊🌿
--------------------------------------------------------------------------------------------------------------------------------------------
JUNGLE X Environ is a highly effective complex preparation for stimulating flower formation. 🌸🏵️
---------------------------------------------------------------- -------------------------------------------------
BioBizz Bio pH - is an organic pH regulator. An aqueous solution of citric acid, which is naturally found in citrus fruits 🍋🍋 - I didn't use it this time, because the pH of the dressing was 6.5 +
---------------------------------------------------------------- -------------------------------------------------
BioBizz Calmag - 100% vegan and certified product Calmag is made from calcium carbonate and magnesium sulfate, supplemented with humic acid. Unlike other products, the all-natural Biobizz CalMag does not contain any nitric acid and therefore does not affect the NPK values or EC of the solution 💩💩
------------------------------------------------------------------------------------------------
Terra Aquatica pH test kit - Very reliable, easy to use and inexpensive. The pH Test Kit conveniently replaces expensive pH meters. It includes a wide range from 4.0 to 8.5. 🌈
General:
Apple Fritter Automatic 🍎🍏🍎 - The plant is getting more and more beautiful, its buds are getting thicker, they are really all white, as if they are covered in sticky resin. The stem, leaves and buds have turned a little pink. I wondered if it was a lack of phosphorus, but based on the nutrients I give them and the overall pH, which is 6.5, I assume that this is the classic coloration of the plant during maturation. 🌱🏵️💚Nevertheless, I preferred to add Calmag to the watering yesterday and also feed it with Alga Bloom in case it lacks important elements.
Training:
The plant is very tall. Sometimes I turn it all over so that the light also shines on the side branches on the side of the tent. Otherwise, I don't do any training, I just cut off some excess leaves in the classic way. Plus, this girl doesn't have many leaves, she's a beautiful genetics as usual with strains by Zamnesia 💚🌞🌞
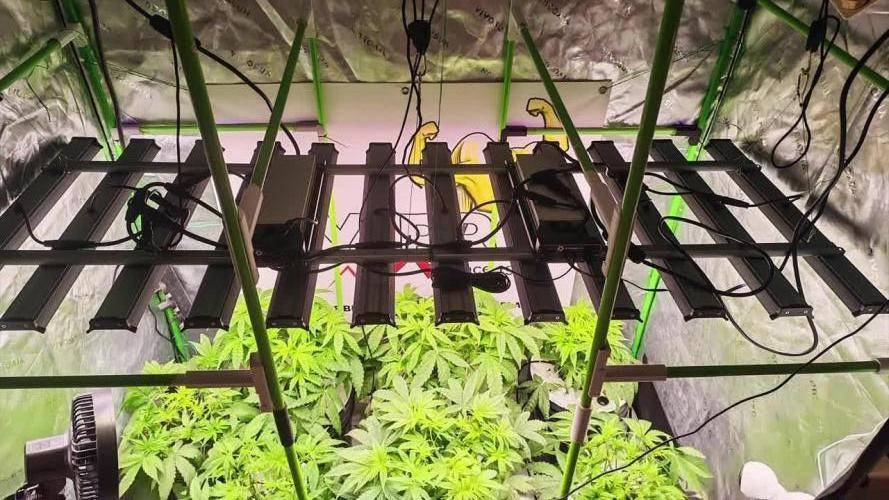
Light: Mars Hydro TS1000
The plants respond effectively and the light is technically very well managed - I try to have 18 cm between the light and the plants, so I move it up regularly 💡💡💡
Thanks for the likes :)
See you soon 😍😍

Processing
Likes
6
Share


@Purplekushkat
Follow
This week has been pretty smooth sailing. Since all 4 of the testers are being watered at the same time splitting a gal of water ph to 6.1 with products listed. Started some LST on them this week and seems like all the babies are doing well. Tester 01/#1 by far grown the most at this point but time will only tell how they will all turn out. Enjoying this grow quite alot and am super excited to see how it goes.
Processing
Likes
20
Share


@No_Clout
Follow
Still looking smaller than usual but I think it could be down to the genetics I’m not sure, I saw a little brownish/orange burn spot on the tips of Grapey Walter #2, it dosent look like nute burn but not to sure it’s an issue at the moment.
Did the first bit of LST of these girls tonight and hopefully they will respond well and start bushing out letting the dident branches catch up.

Likes
2
Share

@Grower_Boris
Follow
Wir sind heute in der 5ten Wochen, 2 Pflanzen wollen irgendwie nicht, ansonsten läuft es recht gut denke ich mal, da es mein erster DWC Grow ist( HYDRO ). Werde die Tage die Heads Bud´s Schneiden und Stecklinge davon machen.

Likes
4
Share