The Grow Awards 2026 🏆 


Likes
Comments
Share
@Hix57
Follow
Le 42e jour ce passe très bien.
Les plantes sont au milieu de la prefloraison et ne vont pas tarder à arrêter leurs croissance pour se concentrer sur les bourgeons ainsi j'adapte l'alimentation au circonstances.
J'ai rattrapé l'erreur de pH même si cela reste précaire les plantes se portent dans l'ensemble très bien 🌱🙏

Likes
13
Share
@russrahl
Follow
This girl is looking delicious! She’s not packing it on quite as much as the Obi-wan’s are, but they are so beautiful looking. Just covered in tricombs everywhere. She is starting to show signs of pk deficiency, older leaves are starting to yellow and we are now seeing the hairs starting to recede and some turning red. Probably be harvesting her first before the other 3 obi-wan girls as she looks to be slowing down faster...if that makes any sense...lol I’m not planning on doing a lengthy flush on her so I’m thinking we will wait till we see all cloudy tricombs and then give her a week or so flush till we start seeing about 20% amber. Well that’s it for this week! Cheers 💨


Likes
19
Share
@India_Calcoen
Follow
5-10-2025
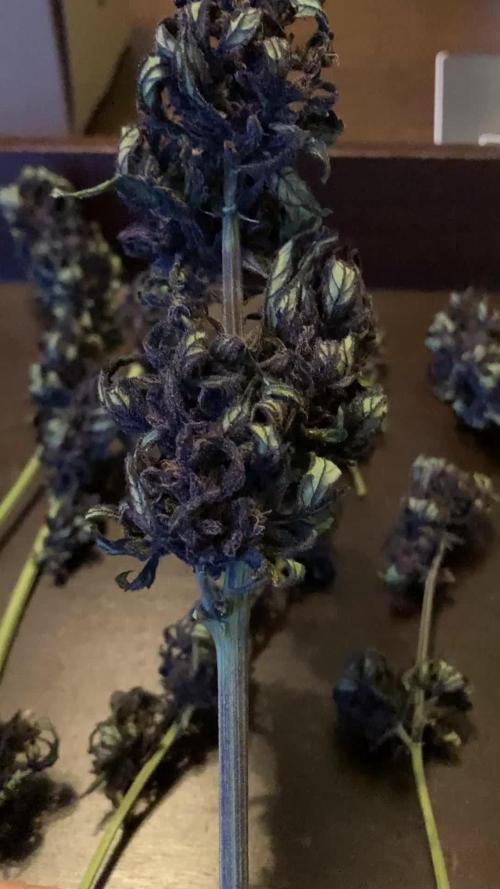
I harvested my Purplematic CBD and washed the buds with a mixture of baking soda and lemon juice. Some caterpillars 🐛 came out of the buds 😱!! I hung the branches up to dry in a spare dark room with a ventilator. After 10 days of drying the branches still wouldn’t snip. I think the room was too cold and too humid. Next time I’m using a dehumidifier.


Likes
2
Share
@RebelSeedBank
Follow
Week 7 il phenohunting procede bene
35piante tra cui #1 e #15 stanno mostrando una vigorosita esplosiva 5/5
N4 e 6 4/5
N23 3/5
Ma non scarto le altre...
Profili terpenici e flawor sono la mia priorità
Likes
23
Share
@Horseluisweed
Follow
Esta semana más de lo mismo aunque aún no ha terminado...jeje, le tuve que quitar el poso de café xq se le puso una pelusilla un tanto sospechosa(y mejor prevenir que curar ☝️)voy a hacerle un té de hummus, al volver el último fin de semana la he visto con los colores ligeramente más claros en algunas hojas(no sé si falta de nitrógeno o si es un problema de Ph)🤔, estoy planteandome poner mas luz y poner ventilación,🧐 al final de esta semana además quizá empiece a oler a ortiga en la habitación (ojalá 🎃☝️🕺)
🙌👌Quiero que crezca como la levadura!!!!🌵😋

Likes
19
Share
@Flavors
Follow
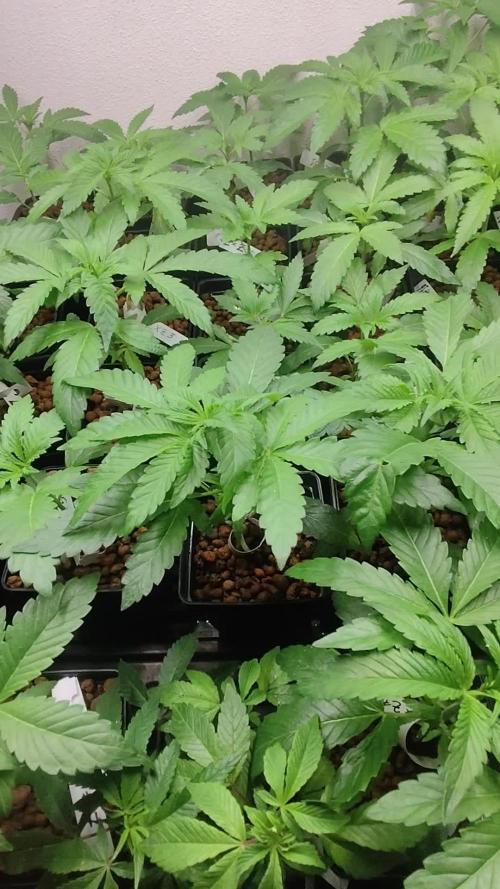
🌱 Week 17 Update (Veg)
The girls are looking amazing 💪🌿 — tall, full, and ready to make the big move into flower 🔜🌸🔥. Canopy is thick and even 🌳✨ with strong branching and vibrant color 🌞🍃.
Thrips are basically gone

Likes
4
Share
@FastBro
Follow
Vasca nutriculture 80x80
5x5 piante - 25cloni
2 giorni veg
Studio 54 Deep East Farms x Doja
the keeper ZOAP X RS11 *1 & *2 @Wizard Trees
@Cookies RS11 X HOLLIWOOD *1 *4 *6
nine weeks harvest -Frenzy -
Gogoggogogo 4semana go


Likes
1
Share
@kingra3737
Follow
BLUE DREAM ALL ORGANIC NO PESTICIDES, NO CHEMICALS, ALL NATURAL SMOKES & SMELLS AMAZING! I HIGHLY RECOMMEND THESES SEEDS AND THIS STRAIN FOR ALL GROWERS!
HWN🍄

Processing
Likes
4
Share
@Skillgrower
Follow
Começamos a 3° semana no domingo está agora com 18 dias a correr bem, vou dar continuidade ao lst ate à 5 ou 6 semana e mudar o ciclo pra floração
As mais pequenas no vídeo uma tem agora 12 dias e a outra está com 15 no fim da segunda semana começou hj o lst


Likes
38
Share
@MadeInGermany
Follow
Info:
Unfortunately, I had to find out that my account is used for fake pages in social media.
I am only active here on growdiaries.
I am not on facebook instagram twitter etc All accounts except this one are fake.
Have fun with the update.
Hey everyone 😃.
Every day is a joy when I take the lid down and see how the lady comes to life 😊.
She is developing great :-)
It only had to be poured once with 300 ml because it is under the hood with a very high humidity :-).
The hood was sprayed every day.
I think I'll start training this week :-).
Otherwise, as always, the humidifier was refilled and the entire tent was cleaned.
I wish you a lot of fun with the update :-).
Stay healthy 🙏🏻 and let it grow 👍.
You can buy this Strain at :
https://www.zamnesia.com/de/4532-zamnesia-seeds-gorilla-glue-feminisiert.html
Type:
Gorilla Glue
☝️🏼
Genetics:
Chem's Sister x Chocolate Diesel
50% Sativa/50% Indica
👍
Vega lamp:
2 x Todogrow Led
Quantum Board 100 W
💡
Bloom Lamp :
2 x Todogrow Led
Cxb 3590 COB 3500 K 205W
💡💡☝️🏼
Soil :
Canna Coco Professional +
☝️🏼
Fertilizer:
Green House Powder Feeding
☝️🏼🌱
Water:
Osmosis water mixed with normal water (24 hours stale that the chlorine evaporates) to 0.2 EC. Add Cal / Mag to 0.4 Ec Ph with Organic Ph - to 5.5 - 5.8 .

Processing
Likes
7
Share


Likes
8
Share
@RootsandBudsGrow
Follow
This Is not a 55 days strain like the package and BSF's web claims, they should change this información because is wrong, it seems to be a 90 days strain.

Likes
8
Share
@SEGA_Y_Griega
Follow
Genetics: O.G. Kush x Afghani
Yield: 300 – 400 g/m2 (600 W)
Flowering time: 8-9 weeks
Height: 100 cm
THC - Very very high
equipment used:
awning - Mars Hydro 4✖️4
light - Mars Hydro FC E 4800
fan - Secret Jardin 20w monkey fan
ventilation - Soler&Palau TD-350 Silent with temperature and humidity sensor
I am satisfied with the growth and development, the only negative is that it is impossible to keep the necessary humidity and temperature at the same time as the heater is on.

Likes
2
Share
@Bluemels
Follow
Tag 39: Leider ist die Pflanze größer geworden als erwartet.. Kaum genug Platz zur Lampe. Ich befürchte Verbrennung.


Likes
6
Share
@Arcadium
Follow
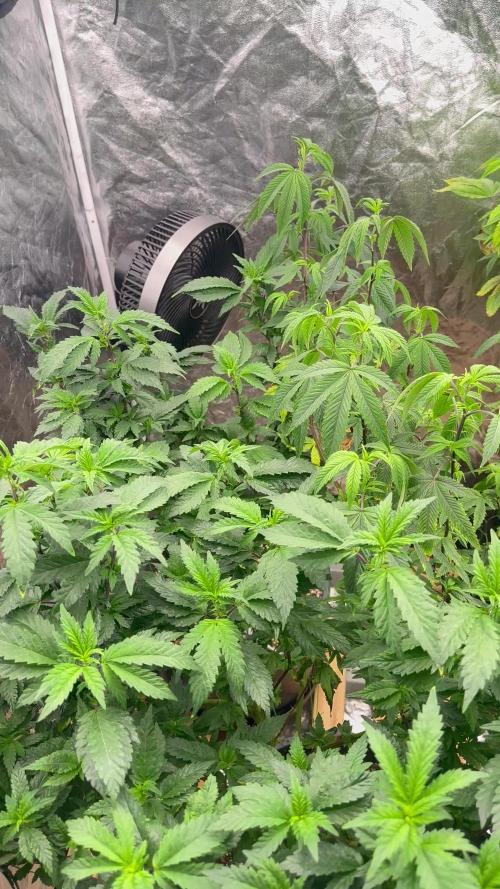
Had a heat wave blow through, 32c days, plants blasted all day. Growing much quicker, easy week, didn't do much, may start scrog net next week. Final topping has recovered, even canopy forming, no issues at all.
Weekly lost coast spray and 2hr 15min of drip was it for this week, top dress feeding next week.
