The Grow Awards 2026 🏆 


Likes
41
Share
@TheBulldozerSicily
Follow
Sabato 6 luglio Aggiungo 50 lt acqua per livello basso
Venerdì 20 luglio Aggiungo 50 lt acqua e il doppio dei nutrienti, vediamo che succede. Ho dato anche una bella defogliazione e pulizia rami inferiori
Martedì 23 luglio
Inizio controllo ec 3999 ph7
Cambio soluzione parto da 75 lt acqua osmosi inversa + 5lt acqua rubinetto ottenendo ec 473 ph 8.4
Aggiungo tutti I nutrienti ottenendo ec 1489 ph 6.5


Likes
1
Share
@Ninjabuds
Follow
My Soaptini plant is still on the smaller side, but it's finally starting to take off. I think it's going to stay pretty short and stocky, which will be interesting to see.
It's been a challenging week with the constant rain and ridiculously high humidity. Keeping things dry indoors has been a real struggle. Despite the weather, I managed to flip all my feminized photoperiod plants to flower this week. I'm hoping the switch will go smoothly, but with this humidity, it's going to be tough.
Likes
9
Share
@DreamIT
Follow
Sponsored by:
🦎THE HIGH CHAMELEON🦎-💡VIPARSPECTRA💡-💐GREEN BUZZ LIQUIDS💐-🛠️WEDRYER🛠️
🏁 10/8 New sponsor at DreamIT. I am delighted to warmly welcome The High Chameleon to my journals and growboxes. The shipping was fast and the package was anonymous. Instead of the usual plastic to keep the seeds in place, I found a nice bag of chopped hemp, a smart and ecological choice. In addition, a very practical grass holder with attached grinder, really practical and comfortable. I will open a diary for each seed that I will try to grow with different types of training techniques, I will decide which ones along the way. let's begin !!
12/8 open seed without help. super yeah!
18/8 everything is OK
__________________________________________
Personal advertising (contains affiliate links)
__________________________________________
🦄 Check out The High Chamaleon website, their first selection criterion is the strong signature of terpenes by taking rare strains while being 100% organic and respecting nature. Safe anonymous shipping!
✅ https://bit.ly/TheHighChameleon
__________________________________________
Did you know that Green Buzz Liquids fertilizers are 100% vegan? A complete line of products ready to give the best to each of your plants! Visit the site and see my journals to see how they work 🦄
🤯 And with the code "dreamit" you will immediately receive a 15% discount on your purchases
✅https: //bit.ly/GreenBuzzLiquidsPro
__________________________________________
👀 Are you looking for a good lamp to start with? 👀
🌞Viparspectra has something more than the others, take a look at their site.
⏩ Use "GDVIP" for an extra discount or "DREAMIT3" for an extra 5 %% discount
👀 Search for it on Amazon
✅Amazon USA: https://amzn.to/30xSTVq
✅Amazon Canada: https://amzn.to/38udUVe
✅Viparspectra UE: bit.ly/ViparspectraUE
✅Viparspectra USA: bit.ly/ViparspectraUS
______________________________________________
🌈 Tired of blowing on your weed hoping it dries quickly? Check out the Wedryer website! You will find a well-made accessory that will help your weed dry in just 8-10 days without the annoying risk of finding mold or other annoyances! (no affiliate links)
✅https: //bit.ly/Wedryer_
______________________________________________
📷🥇Follow the best photos on Instagram 🥇📷
https://www.instagram.com/dreamit420/
Backup
https://www.instagram.com/dreamit4200/
🔻🔻Leave a comment with your opinion if you pass by here🔻🔻
🤟🦄💚 Thank you and good growth 💚🦄🤟

Likes
47
Share
@ChachoGreenCrown
Follow
Llegamos al final! Ya con todo seco vamos a ir catando cada variedad a su debido tiempo. Esta cepa concretamente ha salido brutal! Unos niveles de thc superiores...


Likes
59
Share
@JeyGanesha
Follow
Un altra settimana è passata e tutto procede bene.per fortuna non ho più trovato nessun nanners 🙏✌️💪..belle piantine mie, continuate così che farete delle belle pannocchie....
30/8/24 gente ho combinato una bella cazzata.pur avendo esperienza, mannaggia a me,mi sono portato a casa dentro il box, il cazzo di ragnetto rosso... fanculo...
Ho già iniziato a ripulire tutto, box e piante con Neem...li sterminerò tutti 😂..


Likes
14
Share
@GoldenWeedGrower
Follow
D43/V39 - 13/05/23 - Changed water , added nutes until EC=0.9
D44/V40 - 14/05/23 - Defolation - Added water EC= 1.1 pH 6.5
D45/F01 - 15/05/23 - Start flowering. Monitoring water from maximum to above, for the week out
D46/F02 - 16/05/23 - Continuing LST. Flowering stage is now clear
D47/F03 - 17/05/23 - EC= 0.9, Added nutes until EC 1.1. pH 6.4 (added some drops of pH-)
D48/F04 - 18/05/23 - Added water and nutes EC=1.1, pH 6.5
D49/F05 - 19/05/23 - Nothing to report
Likes
33
Share
@GrowmieDeLaStreet
Follow
First week of plain water but the fading occurred much sooner than that. The chop is set on the 15th of September so very close! Almost all of the trichomes have turned to milky.
I plucked a couple more seeds to see the stage and they're pretty much all ready. I decided to separate them in different bags depending on what plant they grew on. I believe the ones that only had the hermie's genetic should logically be worst than the others so it's better to keep them seperate.
We'll see each other again on the 15th :)
____________________________________________________________________________
Edit:
I realized that I miscalculated a lot of things and that my diary is not as accurate as I wanted it to be. The correct chop date would be the 12th of September. The trichomes that are still clear still have a bit of time to turn white. I switch to 48hrs of darkness on the 10th.
Likes
20
Share
@Bakeryguy420
Follow
Never afraid to show people the truth and bounce back on these autos. I was absent 5 days. You can the coco went bone dry as dick. Within 7 hours the girl back to her healthy glow. Unfazed I'm so keen for this one. So much purple like my c4. Tall as fuck and nugs are slowly filling in her gapes. All the little ones are so happy. I'm one happy grower :) will update with more photos later today.
A nice beautiful update on 3/13 holy fuck just realized today friday the 13th haha. Night queen starting to fill in nicely as the weeks go by. About to hit her with another strong feed. ^_^
Another update on 3/16 before the end of the week bud sites are really starting to fill in now 3 more weeks to go ^_^. Strong feeds all week then going be regular water for about 2 weeks. Give it a nice fade :). Thank you to everyone who watched this beautiful plant grow.
Processing
Likes
31
Share
@GanjaFarmerGrow
Follow
Going very strong💪
and very PURPLE !!!...
she is already very nice and dark purple...
Have to had it to fast buds they kept their promise...
fingers crossed it keeps on like this🙏

Likes
7
Share
@HardNuggGrow
Follow
Tops have grown above other foliage I may have experienced a slight burn with nutes but nothing too noticable Im going to flush today since she is officially flowering want a clean start, then resume feeding about two to three days from now.


Processing
Likes
43
Share
@DKBJJ
Follow
They are exploding right now. Week 2 Flower Begins. The drank 34 Liters in 6 days from the Autopot Reservoir.
Airdomes are all on full blast during lights off.....contemplating one more LST Training over the next day or so.....we shall see.
Nov 3rd Update....Holy shit....They have gone through 35 litres of Nutrients since Wed...3 days ago.
I have hung up the second Scrog net and will start to guide the tops through over the next few days.
I have also added a little supplemental lighting to get them in the mood: 3 Bloom LED strips...I can probably hang them a little lower...

Likes
3
Share
@jimifarmer
Follow
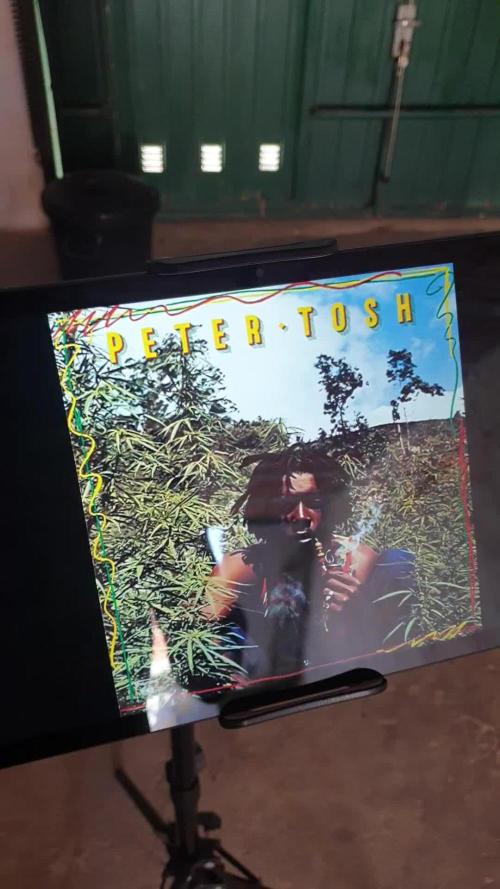
This week it was time to transplant the plant into a 50L pot. On Sunday, I prepared the soil while listening to Peter Tosh and then transplanted the little one. It didn't even feel the effects of the transplant and is now looking beautiful in the sun. I plan to mainline this plant, so I'll do the apical pruning later this week to make the process as quick as possible.

Likes
74
Share
@Ferenc
Follow
Day 64, 22nd of November 2021:
Hi there! Here we go..... so basically pistils are appearing stronger this is the 2nd weeks since they started producing pre flowers.
The plants getting a bit light might be some air circulation problem? However they look good and of course closer to the end the gettin' older so the leaves also die.
Set up and timing is the same since flower season started.
ViparSpectra XS2000 is on full power which is 240W so 100% capacity.
Ventilation: 12 hours period when the lamp is on it switches 1 hour on and after one hour off mostly to keep the temperature and of course because of fresh air flow. When the lamp is off it switches on in every 2 hours for 15 min at the same time with the extraction fan.
The extraction fan is on 12 hours when the lamp is, and then it switches on in every 2 hours for 30 min.
That's all a bit more water for them from today also. Humidity quite the same approx 50%, temperature as well approx 26-27 Celsius.
Fertilization remains the same since last week, the BioBizz family raised up to be 2ml/L each so it is like 2ml/L of BioGrow, 2ml/L of BioBloom, 2ml/L of TopMax... see the ratio above.
The schedule of the fertilization has not changed happnes 2x a week except epsom salt just 1x a week.


Likes
2
Share
@KGS-SEED
Follow
the temperature has risen to 32 degrees.. but flowering continues without problems.I have no way to lower the temperatures, just over a month and they should be ready.
I made a mistake by adding the top dress, thinking it would help during the flowering stage. But since the plants only spent one week in supersoil before I switched to flowering, I added a tablespoon per 7 liters during the third week of 12/12 light. Given how short the vegetative phase was, I’ve realized that the top dress wasn’t necessary.
waiting until the end of September for the next run
the height of only 150 cm of the growbox does not help in counteracting the heat.
Tropicana Banana make a nice top
Likes
19
Share
@GoldenWeedGrower
Follow
Legend
Timestamp: 📅
EC - pH: ⚗️
Temp - Hum: 🌡️
Water: 🌊
Food: 🍗
pH Correction: 💧
Actions: 💼
Thoughts: 🧠
Events: 🚀
Media: 🎬
D: DAY, G: GERMINATION, V: VEGETATIVE, B: BLOOMING, R: RIPENING, D: DRYING, C: CURING
________________________________
📅 D70/B08 - 24/01/24
⚗️
🌡️
🌊
🍗
💼
🧠 pH is finally stable on the lower side (hopefully)
🚀 The Tent-X is on its way, I can't wait to get it..
🎬 Added Timelapse video
________________________________
📅 D71/B09 - 25/01/24
⚗️ EC: 1.2 pH: 5.6
🌡️ T: 23 °C H: 45%
🌊
🍗
💧
💼 I put T-H Sensor of TrolMaster on the SCroG net
🧠
🚀Tent-X from TrolMaster received, I'm going to set it up tomorrow
🎬 Added Timelapse video
________________________________
📅 D72/B10 - 26/01/24
⚗️ EC: 1.2 pH: 6
🌡️ T: 23 °C H: 40%
🌊 Added 6L
🍗 Added Bloom A-B - CalMag - Big Bud - Bud Candy - B52
💼 Tent-X set up done !
🧠 It works perfectly and as I just see so far, from now on, I'm going to experiment a new way to grow !
🚀
🎬 Added Timelapse video and Set-Up videos and pics
________________________________
📅 D73/B11 - 27/01/24
⚗️ EC: 1 pH: 5.5
🌡️ T: 23 °C H: 40%
🌊
🍗
💧 Added a little of pH-
💼
🧠
🚀
🎬 Added Timelapse video
________________________________
📅 D74/B12 - 28/01/24
⚗️ EC: 1 pH: 5.5
🌡️ T: 23 °C H: 35%
🌊 Added 4L
🍗 Added CalMag - Bloom A-B - B52 - Bud Candy - Big Bud
💧 Added some pH-
💼
🧠
🚀
🎬 Added Timelapse video and 4 pics
________________________________
📅 D75/B13 - 29/01/24
⚗️ EC: 1 pH: 6.0
🌡️ T: 23 °C H: 50%
🌊
🍗
💧
💼
🧠
🚀
🎬 Added Timelapse video and "TM+ Pro" App screenshots. This is the app used to monotoring the Tent-X controller
________________________________
📅 D76/B14 - 30/01/24
⚗️ EC: 1.2 pH 6.1
🌡️ T: 18-26 °C H: 30-55% (from now on, I'll put the Min-Max values of T-H as I can easily read them from the app.)
🌊 4L
🍗 CalMag - Bloom A-B - Bud Candy - Big Bud - B52
💧
💼 I added a Humidifier as the H falls down to 30%
🧠 With the help of Humidifier, according with "TM+ Pro" app, I got the perfect VPD (Vapor Pressure Deficit) rate !! (see screenshots)
🚀 I have to face a very low rate humidity of the external enviroment
🎬 Added Timelapse video and T-H values daily graph, and perfect VPD from the Tent-X controller
________________________________

Processing
Likes
2
Share
@FolloMiSensi
Follow
Res is still 3/4 full at around 650 ppm and 5.6 ph. Decided to leave for this week then change next week.
Both shooting out hairs, some of the old leaves are dying off.
Just pulled off dead leaves, or almost dead leaves. Did minor lst adjustments and quick tucking.


