The Grow Awards 2026 🏆 


Likes
Comments
Share
@StarLorr
Follow
Welcome to my autø Øpium Diary.
In this Diary:
Seeds: Sponsored by Ðivine Seeðs
Media: Pro~Mix HP *•ns
Nutrients: Remo Supercharged Kit *•ns
*•not sponsored
___________________________
Feeding:
Tue 22Oct: 2L Remo/Recharge pH'd 6.5
Thu 24Oct: 2L Remo/Recharge pH'd 6.5
Sun 27Oct: 2L Remo/Recharge pH'd 6.5
___________________________
Things are going smoothly, had to put her on a pedestal as her roomie moon rock2 is hugging all the lights😄
___________________________
Thanks for stopping by, likes and comments are appreciated!👊🏻😎
Keep on growin!
Keep on tokin!!!
😙💨💨💨💨💨

Processing
Likes
34
Share
@rhodes68
Follow
10/31 Week 11 Still building
The clones have done well their strength builds
Heh no changes to nuets at this time like where they are
11/1
Shifting their light turn on time one hour due to the silly time change so extra hour dark tonight.
11/2
Took the time change just fine on a 7-7 schedule.
Looking at two weeks till first finish on the FF9 followed by the FF11 the next week and finish with FF10 following.
More a question of dry space cant dry more than a couple safely at a time given humidity is unstable this time of year swinging from 30% to 90% depending on weather.
Not sure how we will handle the finish, will tell more after we see what happens with the Green Poison grow that harvests a week earlier.
Removed Soul Peak PK for the time being using up the last of some koolbloom and it really wont matter much till next week.
They are drinking more so buds are being built hard, good sign.
11/5
All seems well
FFT-11 is maturing on one clone much faster than the other looks like they will be ready about the same time as the FFT-9 in a week or so
Moving the 11 to the middle the 10 to the back of the tent as it will be last.
So looks like over the next two weeks the 11 and nine come out so will be shifting feed to organic beginning with PK.
So Ending Koolbloom restarting Soul Peak and Fish Shit


Likes
65
Share
@Dendegrow
Follow
The harvest is in! 🌿✨ The buds have turned out absolutely stunning – dense, frosty, and bursting with trichomes. The aroma and flavor are something truly special: a delicate blend of cherries with a refreshing hint of mint 🍒🍃.
The high is incredibly potent, deeply relaxing, and body-focused – the perfect companion for unwinding in the evening 🌌💤. These cuttings have truly delivered, and despite the challenges along the way, the results are impressive. I harvested them at the perfect moment, with fully milky trichomes, ensuring peak potency and a balanced effect 💎✨.
Thanks to everyone who followed this journey – stay tuned for more updates and new adventures. Until then, enjoy the vibes and happy growing! 🌺📸
---
Die Ernte ist da! 🌿✨ Die Buds sind einfach wunderschön geworden – dicht, frostig und voller Trichome. Das Aroma und der Geschmack sind etwas ganz Besonderes: ein leichter Hauch von Kirschen, kombiniert mit einer erfrischenden Minznote 🍒🍃.
Das High ist unglaublich stark, tief entspannend und vor allem körperbetont – perfekt, um den Abend ausklingen zu lassen 🌌💤. Diese Stecklinge haben wirklich abgeliefert, und trotz der Herausforderungen unterwegs bin ich mit dem Ergebnis sehr zufrieden. Ich habe sie genau zum richtigen Zeitpunkt geerntet, bei vollständig milchigen Trichomen, um maximale Potenz und eine ausgewogene Wirkung zu gewährleisten 💎✨.
Vielen Dank an alle, die diesen Grow begleitet haben – bleibt dran für weitere Updates und neue Abenteuer. Bis dahin, genießt die Vibes und happy growing! 🌺📸

Likes
7
Share
@anillus
Follow
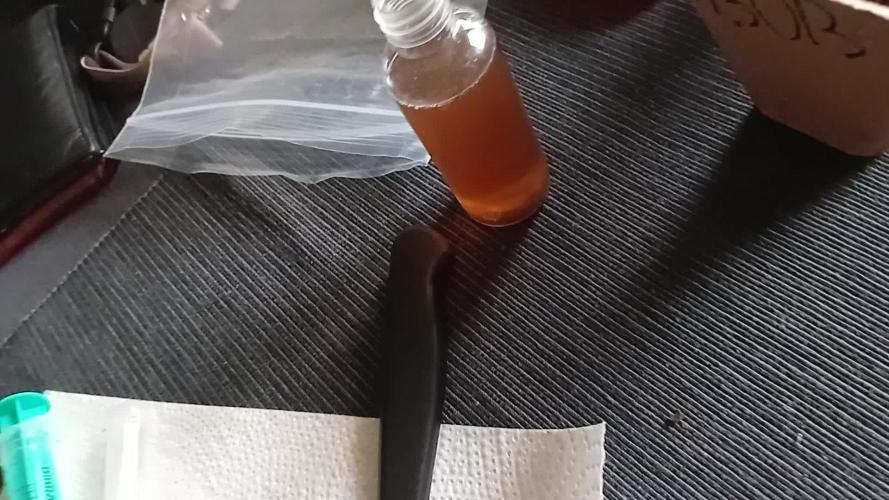
esta semana fue de lavado de raiz, sumando el super stress de 3-4 dias sin agua, despues 2 dias con insiciones en los tallos unos 10 aprox por planta y 2 dias de oscuridad antes del corte espero les guste la tech.

Likes
7
Share
@XoticGROW666
Follow
🍬 she finicky to dail in hope in the future I can really dail her in and get pheno a buds of the gushers cake lookin perfect pheno b of the gushers cake looks good tho

Processing
Likes
18
Share
@eldruida_lamota
Follow
QUE gran variedad, buen porte, bien frondosa, pide a gritos trasplante y esta sera la última semana en esta semana macetas, pronto trasplantamos a 7L

Processing
Likes
12
Share
@therivernile
Follow
Temps were hard to control this week due to a heat wave and the fact I'm in a basement with no AC. I put the fans in the tent on too high a setting pointed right at the plants and they ended up with some wind stress which can be seen in the pics affecting the new growth. Bought a 6 inch inline fan to beef up the exhaust for the tent and this seems to have helped a lot.
I moved the tent to its final location to allow access to ventilation so I can pipe the smell outside when the flowering starts.
I started low stress training on both plants this week. I decided not to top either plant but I will for the next grow to see how it affects yields.
I also fixed the other viovsun tent that had a broken zipper track and only one slider. Hopefully I can use it in the future for flowering photoperiod plants.

Likes
19
Share
@JoeGrowsGas
Follow
These buds were hands down the best out the whole harvest all the buds from the top to the bottom were fully developed without popcorn nugs with amazing purple hues while also being quite dense very impressed !!!!


Likes
65
Share
@Dendegrow
Follow
Week 4 update! 🌱 Week 3 is done, and the ladies are now three weeks into their flowering phase. So far, everything has gone really well. However, one bud and the plants in the front showed slight signs of potassium overfertilization, which likely caused a calcium uptake issue and led to minor necrosis.
No worries, though – today I completely flushed the entire system and replaced it with a fresh solution. With this reset, everything should be back on track 💪💧.
On top of that, I decided to bring out an old Cree& Osram LED lamp as a booster. This will provide the two smaller front plants with more light intensity so they can metabolize the higher nutrient levels more effectively 💡🌿.
Everything is looking great so far! Stay tuned, follow along, and let’s see how this journey continues 🌺📸.
Woche 4-Update! 🌱 Woche 3 ist geschafft, und die Ladies sind jetzt drei Wochen in der Blütephase. Bis jetzt lief alles super. Eine Bud und die Pflanzen vorne zeigten jedoch leichte Anzeichen von Kalium-Überdüngung, was wahrscheinlich zu einer Kalzium-Aufnahmehemmung geführt und leichte Nekrosen verursacht hat.
Kein Grund zur Sorge – heute habe ich das komplette System gründlich durchgespült und die Lösung durch eine frische ersetzt. Mit diesem Reset sollte jetzt wieder alles reibungslos laufen 💪💧.
Außerdem habe ich beschlossen, eine alte Cree& Osram LED-Lampe als Booster herauszuholen. Damit bekommen die beiden kleineren Pflanzen vorne eine stärkere Lichtintensität, damit sie die höheren Nährstoffwerte besser verstoffwechseln können 💡🌿.
Es sieht alles richtig gut aus! Bleibt dran, folgt mir, und lasst uns schauen, wie sich die Reise weiterentwickelt 🌺📸.
Likes
23
Share
@MadeInGermany
Follow
Hey guys :-)
She is developing great.
This week was poured 2 times with 1 l each (nutrients see table above)
Otherwise, everything was cleaned and the lady sprayed with Fast Plant Spray.
Since there are still 2 weeks left until there is space in the bloom tent, the topping was made again 😃
have fun with the update and stay healthy 💚🙏🏻
👇🏼👇🏼👇🏼👇🏼👇🏼👇🏼👇🏼👇🏼👇🏼👇🏼👇🏼👇🏼
You can buy this Nutrients at :
https://greenbuzzliquids.com/en/shop/
With the discount code: Made_in_Germany you get a discount of 15% on all products from an order value of 100 euros.
👇🏼👇🏼👇🏼👇🏼👇🏼👇🏼👇🏼👇🏼👇🏼👇🏼👇🏼👇🏼
You can buy this strain at :
https://www.thegratefulseeds.com/shop/feminized-seeds/limited-edition/blue-javaz/
Water 💧 💧💧
Osmosis water mixed with normal water (24 hours stale that the chlorine evaporates) to 0.2 EC. Add Cal / Mag to 0.4 Ec Ph with Organic Ph - to 5.8 - 6.4
MadeInGermany


Likes
9
Share
@DoctorCannas
Follow
As you can see, they are growing incredibly.
They are strong, healthy and resistant, which I can immediately iron the branches.
Bionova nutrients alternating with Bio canna are doing a great job.
This week if the growth continues like this I will already be able to cut between the 4th and 5th nodes.
And start mounting the net for the scrog
We'll see how it goes.
No rush, no stress.
Just so much love and professionalism for plants and they will grow lush.
Likes
25
Share
@PrairieFrostGrow
Follow
***** Week 6 Veg - January 9/21 to 15/21 *****
This week the girls saw lots of change! They have seen a light change and now they have been transplanted and topped. Push the girls harder and see how they react😃 They have been in very good shape and healthy so they have been reacting well to the stress. These two girls have been strong growers from the start and its not stopping yet. The side branching is doing well and pulling up nicely👍
Topped all of the ETS girls and left them with 4 sets of branches on each. If the lowest set of branches were tiny, I have stripped them off already. Not sure if I am going to SCROG or not.....I don’t really want to but it is the best way to fill the canopy and test out the light spread......will see. These girls seem to be growing strong and may need to be tied down or stretch could be a bitch😂
They have continued to be fed once a week roughly and supplemented with calmag and microbes.
Little more detail.......
Jan 9/21, Day 36 Veg
- Transplant day today!!!!!! Both girls into 5 gal pots.
- Root mass was much better than in the solo cups......not as strong as Gorilla Girl for comparison but just about perfect and didn’t need to prune them.
- 1.5L watering of the pots after transplant with CalMag @ 2ml, Microbial Mass @ 3ml, Piranha @ 2ml (effectively microbes, fungi and CalMag watering)
Jan 10/21, Day 37 Veg
- 1.5L Feed with full strength week 2 nutrients
- added CalMag @ 1ml as well. New coco in the pots that have not been buffered so added a little more.
- 1,300ppm and 5.9pH.......feeling it might be a little high.....target was 1150ppm.
- no run off water from the pots. Didn’t want to “soak” the pots, jet wet them.
- New light in the tent today. 650watt but dialled down so the girls have roughly 10,500 LUX.
- Topped the girls today as well😃
- left 4 sets of branches on each girl. Topped them up high on the node above to help avoid splitting the main stem.
Jan 11/21, Day 38 Veg
- Dry out day
- girls reacting well to the high ppm feed from yesterday.
Jan 12/21, Day 39 Veg
- 1.5L watering with CalMag @ 1ml
- 200ppm and 5.9pH
Jan 13/21, Day 40 Veg
- Dry out day
Jan 14/21, Day 41 Veg
- 2L watering with CalMag @ 2ml
- 250ppm and 5.9pH (actually added 1ml of Micro as pH was a little high)
- IPM spray tonight with Lost Coast Plant Therapy @ 3ml/L. Done at lights out.
- This product been working well and nothing has been a set back so not going to stop now😃👍
Jan 15/21, Day 42 Veg
- Dry out day.
- Girls doing well. Still have some strong purple in the fan leaves coming off the main stem.
- Not too worried about it.....keeping an eye ono the main stem.

Likes
6
Share
@daythemn
Follow
-Happy with how the plants look. I have used zero nutrients so far, but I did change the soil through transplantation.
-Applied topping, for the second time ever. I think I did a sloppy job, but they'll be ok.
- My 2k Bestva Pro LED broke down. Using this smaller light (Mars Hydro) until I find a fix.
-Set up a DIY watering system to feed the plants while I'm on holiday!
Likes
90
Share
@CRiSPrGrow
Follow
I'm really digging the Chem OG, squat plants with those trademark thick thick thick indica leaves, clearly it's gonna be a heavy smoke lol Wasnt able to get the juices flowing this week, hopefully next week i'll get the smart protein into feed. Started training some of these, did two more defoliations (total of three light defos so far) ... and then flipped them 4 days ago. the f-ing landlord has been attempting to enter the lab according to my security cameras lol, motherfucker !!!! anyway i have to pack up the lab, hopefully i'll be able to complete the grow cycle , but for sure i'll have to move the grow op ... that's my problem, sure but it also means that i'll have to wait in order to set up my perpetual cycle... and of course i cant really take cuttings if i'm moving the lab... why must people be so curious? really wish there would be at least a bit more tolerance around this hobby just so i can sleep peacefully at night... in the mean time , I lowered my lights to 22cm, i heard from someone (forgot who) that it's a good thing to get the lights closer when you flip so that the plant gets that extra energy for the stretch. I'll let know how that works out ! Any comments or suggestions are welcome , veg is over so it's gonna get interesting - drop me a message if you want ! that's it 🚀

Likes
Comments
Share
@AmniZombie
Follow
Plants almost doubled their height. So i did some lst on them for the last time.
Was hoping to use the scrognet, but i will wait with that till week 4 of flower.
Plants are very bushy and grow good till now on.
Feeding them with 2ml/l fishmix and 4ml/l bloom from biobizz.
Also i spray fishmix as foliar spray and the ladies love it.
Im growing in a 1.2x1.2x2m tent and it is a little tight with 2 50l buckets in here but i wanted to fill out the tent. So hopefully after this last time lst the 2 plants will almost cover the entire tent

Likes
1
Share
@Ttone25
Follow
Starting to really fill out smell is 6/10 so far very sweet some pine as well
Likes
10
Share
@StoneJackson
Follow
I’ve lost two of the four arms I was trying to save 😢 one snapped clean and the other is standing dead. No worries cause there is plenty left to take care of!
I’ve built a 4.8m x 4.8m x 3.0m enclosure and now that I’ve splayed everything out there’s barely any room to move again haha absolutely loving it 🌴
I’ve stripped a good 1.5m of bottom plant material clean of side branches and foliage partially for energy distribution and airflow but also partially to bring the obvious foliage above the neighbouring properties tree line now if anyone peeks over they should see a bunch of sticks instead of a forest of sticky :p
They are definitely in flower I think I’m at the end of pre-flower stretch. They’ve reached the top of the enclosure so I’ve pulled most of the tall arms over and I think they’ve stopped reaching meaning the next few weeks should produce some fun material to post up
Thanks everyone for following along
Likes
52
Share
@Kushycat
Follow
Giving up is not an option!
24 hours in Bio Tabs Seed Plug + water then transplanted into a mixture of coffee grounds + soil + vermiculite.
Lessgo 😉
23.07.20258 Looks like one seed isn't germinating.
Probably my own fault, as I didn't notice that the water had leaked out.
The shell is open, but nothing else is happening. I'll give it another chance, otherwise unfortunately RIP.