Likes
Comments
Share
@blockxs
Follow
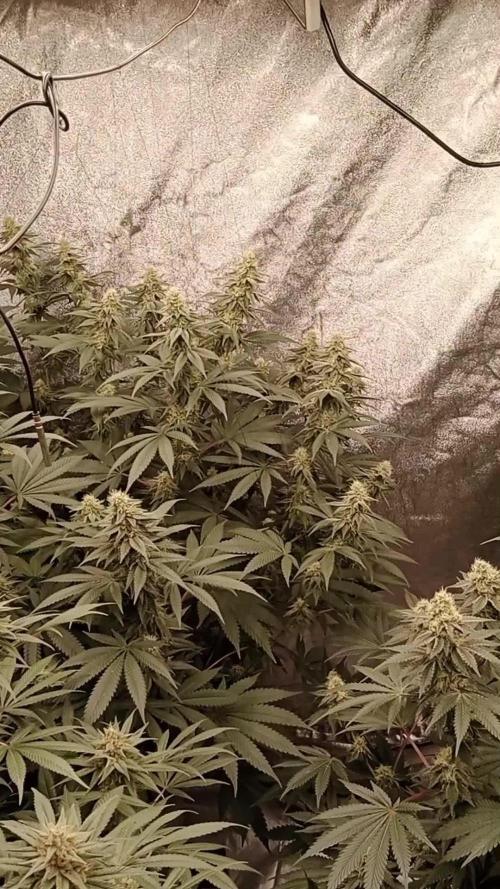
Bulking quite well, she has a very strong haze smell as already mentioned she is handling everything like a champ, could not wished for a better plant :) From now on I will only give her PH 6.3 water without any additives. I believe its about 2 weeks until chop chop :)
Likes
13
Share
@Sadhus
Follow
2 ème topping effectué et j'en profite pour faire 8 clones et tester ma boutureuse par la même occasion,pour l'instant tout ce porte a merveille, sain , vigoureux, très beau vert
Likes
149
Share
Hi all the happy people here in GrowDiaries. This is my second cultivation ever and it will be fun to try a bigger space than my closet grow. First, I'm just going to say I'm done with the construction of my new growroom. I put some pictures on the construction here in week one. The room is 2.14 meters by 1.7 meters and has a ceiling height of 2 meters. It provides a floor area of ​​3.6 square meters. I use a 54 Watt Lightwawe T5 for germination and 2 Pcs 400 Watt HPS lamps. I have a channel fan that replaces the room air about 40 times an hour to get a comfortable theme in the room, the air enters a fresh air intake from the outside. The air is purified through a carbon filter to then leave the room to the rest of the basement. Then I use that heat to heat the rest of the basement. I will use 8 pcs 15 liter Autopots to grow with and a 100 liter water tank that supplies the pots of water and nutrition. I will grow completely organically in soil and will watercure my buds to get the best possible medicine for me. But there are no cultivation rooms to be displayed here, so I continue with what is most important. Today I have put my seeds in my moisture dome and hope the seeds have germinated within a few days. I am very excited to see how the new growroom will work and how this Blue cheese Auto from Royal queen seeds will turn out. Blue Cheese automatic cannabis seeds are a cross of Blueberry Automatic and Cheese Automatic that has been perfected over five years of breeding and careful selection. The result is a feminized, autoflowering strain with superior yield, flavor, and effects to either of its distinguished parent strains. THC: 16% CBD: Low Yield Indoor : 325 - 375 gr/m2 Yield Outdoor: 60 - 110 gr/plant Height Indoor: 40 - 70 cm Height Outdoor: 60 - 110 cm Flowering: 7 - 8 weeks Harvest month: 9-10 weeks after planting Genetic Background: Blueberry x Cheese x Ruderalis Type: Sa 35% In 40% Ru 25% Effect: Cerebral and uplifting Climate: Mild .............................................................................................................................................................................................................................................................................................................................................. Update 2017-08-15. All 4 seeds have germinated and planted in small pots inside the humidity dome. I'm so glad it worked so well and now it's just hoping they'll start growing and become 4 big healthy girls :) ............................................................................................................................................................................................................................................................................................................................................... Update 2017-08-16. I have mixed my own soil today. Its 40% sieved peat harrow H2-H4 0-30 mm, 45% sieved peat harrow H4-H6 0-30 mm. 5% sand and 10% of compost soil. And i use 15% of perilite and mix it all together. ................................................................................................................................................................................................................................................................................................................................................ Update 2017-08.20. Nr1 and 2 grow and thrive. Number 3 just got rid of the seedpod and is folding out the sheets. Number 4 is a bit shy and can only be seen if you look carefully into the soil. ......................................................................................................................................................................................................................................................................................................................................... Update 2017-08-21. Nr 1 and 2 is doing well. Nr3 is trying to catch up and Nr4 is still shy. -------------------------------------------------------------------------------------------------------------------------------------------------------------------------------------------------------- 2017-08-23. Transplanted 2 girls from humidity dome and the small germinating pots to 15 liter autopots. The other 2 girls have to wait a little more before transplant to the autopots. ................................................................................................................................................................................................................................................................................................................................................................................ 2017-08-27. The girls have settled in to there new home of the 15 liters autopot after a little transplant chock. Now the real week 1 starts for me and the girls. -------------------------------------------------------------------------------------------------------------------------------------------------------------------------------------------------------- 2017-08-28. New pic and movies. --------------------------------------------------------------------------------------------------------------------------------------------------------------------------------------- 2017-08-28. Nr3 is transplanted in 15 liter autopot. ------------------------------------------------------------------------------------------------------------------------------------------------------------------------------- 2017-08-29. New movie of the girls. Its no water for 3 days now for Nr1 and 2 so the roots develop more and match the plant above the soil. The temp controlled fan is awesome, its easy to set what temp you like to have in the room. Right now its 28 celcius. And humidity is 56%. ------------------------------------------------------------------------------------------------------------------------------------------------------------------------------------------ 2017-08-29. Hello to you who read my diary, I just want to say that I am pleased that you have chosen to check in with me and in my diary. I just want to say that I do this for myself and for a steady flow of my medicine. Everything you read and see in my diary is 100% honest and I will never distort or beautify anything here. I document my crops so that I can learn from my mistakes and also to look back at those different crops. I try to update with pictures every day and with text if something special has happened in the garden. This is my strainhunt for the best medicine and the beginning of my journey with cannabis and the cultivation of it. ----------------------------------------------------------------------------------------------------------------------------------------------------------------------- 2017-08-30. Cleaned the room this morning, just vacuuming and cleaning with chlorine solution. Im testing the fan to control temp and humidity, it works great. Added some pics with measurements and movie. Everything is looking great right now. --------------------------------------------------------------------------------------------------------------------------------------------------------------------------- 2017-08-31. New pics and videos. --------------------------------------------------------------------------------------------------------------------------------------------------------------------------------- 2017-09-01. New pics and videos. Gave each of the girls with 2 ml Alg-A-Mic, 4ml Bio-Grow, 4ml Bio-Heaven and 10 ml Formulex mixed in 2 liters of water. I hope they like it :) ------------------------------------------------------------------------------------------------------------------------------------------------------------------------------------------------------------------------------------------- 2017-09-02. New pics and the girls liked the water and nutrients yesterday. ------------------------------------------------------------------------------------------------------------- 2017-09-03. New videos of the girls this morning. Nr1 and 3 looks great and nr 2 is looking a little funny, maby a little stressed. Kl. 16.00. Did some defoliation on the girls. Added video. Kl.. 23.00. New videos, defoliation and leaftucking. -----------------------------------------------------------------------------------------------------------------
Likes
19
Share
Likes
26
Share
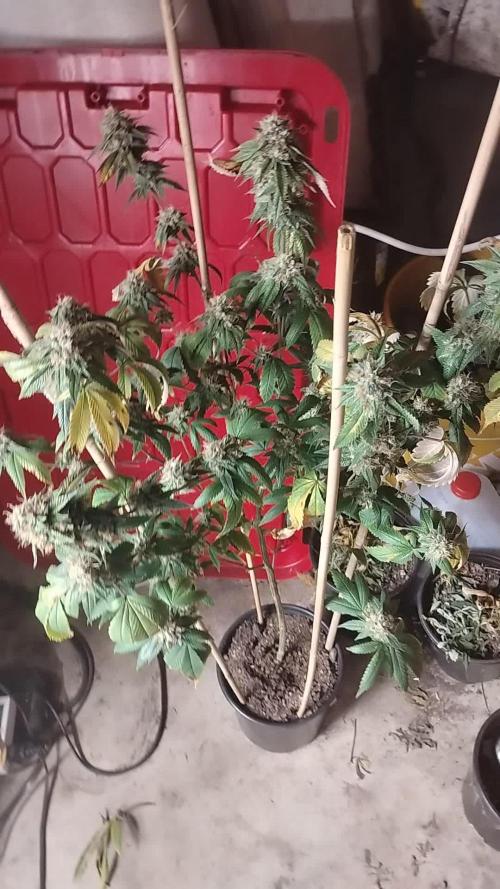
2024-08-31 They may have stopped to stretch, iam not sure, but i think so, you can see how the buds are forming, and they are already purple, thats fun leaves are changing color thats the tribute to the last 2 days where it was very hot and sunny, and tehy needed lots drinks and the big growth costed some leaves too. but anyways, not a Problem at all the Girl in the garden has more yellow leaves. BREEDER INFORMATION The cross of Frisian Dew with DucksFoot created Frisian Duck. It has such name due its characteristic leaf shape that looks like a duck's traces. The plant has a good growth in greenhouses and outdoors and also indoors. The strain is easy to grow and suit for begginers. It is harvested at the start of October outdoor and after 8 weeks of flowering indoor. The plant reaches 1.5 m indoor or 2.5 m in height outdoor. It demonstrates purple colors during a blooming and looks like a christmas tree. Frisian Duck develops compact buds. The strain has spicy aromas and tastes of pine, citrus and fresh wood.
Likes
41
Share
This week the weather is better. The buds are getting fat and it is developing well. Smells like baked sweet.
Likes
35
Share
@Da420Andi
Follow
Howdy it is day 63 and in 2 days it is time to harvest. Since 2 weeks i feed clear Walter only. They get 16 hours darkness before harvest. All the plants are reallyšŸ”„ My favourites are still 3G and Wedding Gelato. The smell and Look is crazy. You will see i guess Also North Thunderfuck and Hulkberry is good looking. The weight of North Thunderfuck for the dice is insane. I wish everyone a nice Day and good time. Stay safe šŸ’š
Processing
Likes
3
Share
Likes
4
Share
Die Sour-Diesel könnte am Zwittern sein ich bin mir aber nicht sicher und werde noch eine Woche abwarten. Purple-Queen geht es gut sie blüht aber die Seitentriebe werden wohl klein bleiben.
Likes
4
Share
@Ensign420
Follow
|»» LOG DISCLAIMER: Not intended as a grow guide. Grow log entries are usually posted 3 weeks later and are for my learning reference. ««| Introduction - Week 16 Summary - Ensign's log, stardate 17547.8, Wow what a great week in the garden! By the end of the week, the main tent has pretty much doubled in size! Upgraded the scrog frame and now have a second layer of netting about 14in above the original netting which is already filling in and looking incredible! The tent’s floor slightly flooded, but fixed it. Also trying Stash Blend for the first time! As for the veg tent. To preserve the genetics, started the mother plant cycling process and took more clone cuttings (which were rooting in Coco Coins by the end of the week). To make more room, also bonsaied all mother plants. The stretch is starting to slowing down and next week begins the first week of bloom! Ca-Caw! Let’s go! Onwards Ensign! [START OF WEEK 16] ========================================================== ---------- [ 4x4 MAIN TENT ] ---------- Heady OG BX1 #1 [Round4 ~Wk9] - WEEK 16 - Pre-Bloom [Stretch Wk2] TKO [Round2 ~Wk14] - WEEK 16 - Pre-Bloom [Stretch Wk2] ----------- [ 3x3 VEG TENT ] ------------ Garlic Budder OG#1 - WEEK 09 - Full Veg Garlic Budder OG#2 - WEEK 09 - Full Veg Gorilla Goat #1 - WEEK 09 - Full Veg Gorilla Goat #2 - WEEK 09 - Full Veg 08/04/25 → 08/10/25 This Week's Estimated Goals ---------------------------------------------------------------------------------------------- DLI: ~13 mol/m²/d PPFD: ~300 μmol/m²/s VPD: ~1.0 kPa This Week's Meter Readings & Averages ---------------------------------------------------------------------------------------------- Light On/Off: 19:00 - 07:00 | Wattage: ~326.5W [LV04] Distance From Canopy: ~31ā€, 27ā€ DLI: ~15.60 mol/m²/d PPFD: ~361 μmol/m²/s VPD: ~0.69 kPa Soil %: [40.7, 47.0, 38.1, 56.6, 41.9, 42.7, 42.9, 43.9] ========================================================== Day 01 - Monday - 08/04/25 - Total Days: 113 ----------------------------------- Daily Averages ~[+01:00] - Temps: 83.6°F [28.7°C] - Humidity: 83.6% - VPD: 0.66 kPa - Soil %: [49, 37, 45, 60, 44, 43, 43, 45] ----------------------------------- - [+00:14]: Night check on the 4x4 tent. --- Holy Cannoli! Wow! These girls are in full stretch! --- Both cultivars have grown beyond the netting and have stretched beyond the (green) Vivosun’s CFM bars! Heady is a bit low on the left, but the canopy is pretty even and perky! --- Ca-Caw! Let’s go cuddies! --- Heady OG (BX1 #1) is starting off shorter than TKO, but am pretty confident that she’ll catch up. --- TKO is looking incredibly healthy! She’s the larger plant, but also in the smaller 20-gallon pot. Well she is 5 weeks older than Heady OG so makes sense. Regardless of the growth difference, absolutely stoked for this grow cycle!! - [+12:19]: Checked the Ecowitt soil moisture sensor data: ------------------ [ 4x4 MAIN TENT ] --------------- ------ 46% - [CH01 FT Ā» G30 - Heady OG BX1 #1] ------ 37% - [CH02 FB Ā» G30 - Heady OG BX1 #1] ------ 48% - [CH03 BT Ā» G20 - TKO] ------ 62% - [CH04 BB Ā» G20 - TKO] ------------------ [ 3x3 VEG TENT ] ---------------- ------ 41% - [CH05 BL Ā» GR7 - Garlic Budder OG#1] ------ 44% - [CH06 BR Ā» GR7 - Garlic Budder OG#2] ------ 40% - [CH07 FL Ā» GR7 - Gorilla Goat #1] ------ 50% - [CH08 FR Ā» GR7 - Gorilla Goat #2] --------- Veg: 38% - 45% | Flower: 45% - 55% --------- General: 30% [Dry] Ā«| 45 - 60% [Moist] |Ā» 70% [Wet] - [+00:14]: Checked the 3x3 veg tent. --- Ooo yea! The veg garden is looking incredible! --- All mamma plants are looking bushed out and beautiful! - [+00:37]: Super-cropped and bend the canopy down a bit. --- Lowered the canopy down a few inches. Really need to defoliate soon. The top growth is bushing out and getting really thick! --- Clones are also looking incredible and both are rotting along beautifully! Heady is going to make it and she is looking great! - [+00:38]: The cuttings are looking good for the most part. One is looking pretty droopy (damnit Ensign). --- Misted the cups with RO water. --- Think the RH may not be consistent enough and the cups might be drying out too quickly. - [+00:41]: Checked the humidifiers. --- Tanks are still full and no leaks found. --- Another day done! --- Okay! Since growth is raging upwards, decided to upgrade the scrog frame and plan to add a second layer tomorrow. --- Ahh yea! This grow is turning out to be an epic one! Day 02 - Tuesday - 08/05/25 - Total Days: 114 ----------------------------------- Daily Averages ~[+01:00] - Temps: 83.3°F [28.5°C] - Humidity: 83.3% - VPD: 0.67 kPa - Soil %: [49, 38, 47, 62, 41, 43, 43, 45] ----------------------------------- - [16:25]: Evening check on the 3x3 veg tent. --- Ooo yea! The clones are looking incredible! --- The cuttings still seem to be struggling. --- Hmm. - [16:27]: Misted the cups with RO water. --- Made a slight modification and wrapped the top of both cups with plastic wrap. --- Cut a slit from the middle to the edge. Misted the cup through the slit with RO water (2-3 sprays each). --- Then gently slipped the cups over each cutting. --- Also slightly misted each Coco Coin with RO water. --- Great! This should hopefully make a better seal and will keep the RH higher. I think. --- Anyways! --- The mother garden is vegging along beautifully! --- Growth is getting really bushy and need to do a heavy defoliation soon. - [16:56]: Checked the Ecowitt soil moisture sensor data: ------------------ [ 4x4 MAIN TENT ] --------------- ------ 48% - [CH01 FT Ā» G30 - Heady OG BX1 #1] ------ 36% - [CH02 FB Ā» G30 - Heady OG BX1 #1] ------ 47% - [CH03 BT Ā» G20 - TKO] ------ 61% - [CH04 BB Ā» G20 - TKO] ------------------ [ 3x3 VEG TENT ] ---------------- ------ 41% - [CH05 BL Ā» GR7 - Garlic Budder OG#1] ------ 43% - [CH06 BR Ā» GR7 - Garlic Budder OG#2] ------ 41% - [CH07 FL Ā» GR7 - Gorilla Goat #1] ------ 49% - [CH08 FR Ā» GR7 - Gorilla Goat #2] --------- Veg: 38% - 45% | Flower: 45% - 55% --------- General: 30% [Dry] Ā«| 45 - 60% [Moist] |Ā» 70% [Wet] - [19:03]: Night check on the 4x4 tent. --- Ooo yea! Wow these girls are stretching! --- Growth has clearly grown since the last checkup and getting taller! --- Ca-Caw! Let’s go ladies! - [19:14]: Wait. Uh-Oh! --- The tent seemed to have flooded slightly.. DAMNIT ENSIGN! ------ [Ā» A FEW HOURS LATER.. Ā«] --- Okay! Think I figured out why the tent flooded and how to fix it. --- The main reason was the new soil sensor which was probably not in proper contact with the soil. --- Fixed this by re-seating the unit. Also adjusted the drip ring a bit. --- Also poured about a cup of water straight onto new sensor. This should make the surrounding soil wetter and will hopefully fix the dry pocket. I think. --- For added redundancy, added additional trigger conditions to both Ecowitt WittFlows (TKO and Heady OG). - [23:45]: Adjusted the watering triggers for the auto-watering system for TKO. --- Changed the ON trigger from: --------- When CH3 soil moisture is under 45% ------------ Updated to: --------------- When CH3 soil moisture is UNDER 45% --------------- AND When CH4 soil moisture is UNDER 50% --- Changed the OFF trigger from: --------- When CH3 soil moisture is OVER 50% ------------ Updated to: --------------- When CH3 soil moisture is OVER 50% --------------- OR When CH3 soil moisture is OVER 50% --- Applied similar watering triggers for Heady OG. --- Changed the ON trigger from: --------- When CH1 soil moisture is under 45% ------------ Updated to: --------------- When CH1 soil moisture is UNDER 45% --------------- AND When CH2 soil moisture is UNDER 50% --- Changed the OFF trigger from: --------- When CH1 soil moisture is OVER 50% ------------ Updated to: --------------- When CH1 soil moisture is OVER 50% --------------- OR When CH2 soil moisture is OVER 50% --- Will check back daily to make sure the flooding has completely stopped. --- Well that pushed everything back a bit. --- Okay! Anyways, - [23:57]: Time to both build and install the second frame and netting. Let’s go! --- Got four 1in PVC corner fittings (local Lowes) along with four 1in PVC pipes (10ft long each). Also got more self-tapping screws. --- For the netting, using mason string. Usually use the braided nylon, but the twisted variant is a lot cheaper. --- To build the frame, I cut the 1in PVC pipes down to two different lengths: ------ [Ā» x2 @ 42.5in Ā«] – Front / Back ------ [Ā» x2 @ 44in Ā«] – Left / Right --- This makes the frame slightly thinner from left to right. --- Saving the extra piping for future projects. - [+04:04]: Okay! The new frame is built and looking sturdy! --- Did not use any glue and simply dry fitted each component. --- For easier fitting, smoothed the ends of each pipe with sand paper. --- Also marked each pipe to indicate the front, back, left, and right sides. --- For the fittings, used corner fittings and have open slot facing downwards. This way I can add the legs. --- After the frame was built, marked and drilled screws about 3in apart (self-tapping). Made sure to mirror the screw spacing on the opposite side. --- Time to weave the netting! - [+04:06]: Using some mason string, --- Started at one corner and strung all the horizontal lines. --- Double-wrapped each screw. --- After the horizontal lines were strung, continued and wrapped the vertical lines. - [+04:44]: Now that the frame is built and the netting fully weaved, time to install the frame! --- First the support poles. Cut and sanded more 1in PVC piping. ------ [Ā» x4 @ 14in Ā«] – Vertical Support - [17:56]: Installed the back support poles before the front ones. --- Temporarily removed the front CFM bar and had to raise the fan up a bit (was not easy, but got it done). --- Once the support poles were installed, gently set the new frame on top. - [+06:07]: Done and wow she’s a beauty! --- Well that took a bit longer than anticipated (also the flooding did not help), but glad the frame fit perfectly and the netting looks great! - [+06:12]: Checked the humidifiers. --- Tanks are still full and no leaks found. --- Ooo yea! What a day! Day 03 - Wednesday - 08/06/25 - Total Days: 115 ----------------------------------- Daily Averages ~[+01:00] - Temps: 83.9°F [28.8°C] - Humidity: 83.1% - VPD: 0.69 kPa - Soil %: [42, 54, 43, 60, 42, 43, 43, 45] ----------------------------------- - [+00:17]: Night check on the 4x4 tent. --- Ca-Caw!! Let’s go cuddies! Growth is looking beautiful and green! --- The second layer of scrog netting was not the easiest to install, but wow the garden is looking incredible! --- Both Heady OG and TKO are still stretching upwards with new nodes branching out everywhere! --- The canopy hasn’t reached the top net yet but hoping a few will make it. --- Regardless, absolutely hyped for this flower cycle! - [+00:23]: Checked the 3x3 veg tent. --- Looking beautiful in the veg garden! --- Wow the mothers have bushed out and have reached the grow light! - [+00:32]: Super-cropped and lowered the canopy --- The canopy is getting really thick! Plan to do a pretty heavy defoliation tomorrow. --- Clones look great and stoked that both Heady OG and TKO seem to be rooting along in the cups. Need to check the weights. Let’s go! - [+00:37]: Here are the starting initial watering ranges: ------ Heady OG BX1 Ā» 261.4g → 301.2g ------ TKO Ā» 240.9g → 301.4g --------- General Solo Range: [Dry] Ā«| [Initial Cup Weight] + ~55-100g |Ā» [Wet] --- All cups were last watered 5 days ago. - [+00:37]: Took the starting weight of both clones before watering, ------ Heady OG BX1 weighed 250.4g ------ TKO weighed 240.9g --- Oops! Probably should have watered earlier, sorry ladies! --- Stoked that Heady OG is clearly going to make it! Also good to know the soil dryback can be at least 10g from the initial pre-saturated weight. --- Anyways! --- While on a scale, --- Gently misted the straw mulch of both cups with RO water. --- Focused on the straw and sprayed as evenly as possible. --- Misted 10-20 sprays. Waited a moment, then misted again. --- Made sure to reference the watering weights. --- Repeated this process for both cups. --- There was no runoff. - [+01:08]: Took the saturated weight of both clones after watering, ------ Heady OG BX1 Ā» 335.5g ------ TKO Ā» 345.1g --- Marked the final wet weight on the back of each cup. Also marked the watering date on the front. --- Placed both phenos back into the tent. --- Cuttings are looking better! --- Glad that the slight modification to the cups helped to keep the moisture in (covered both with plastic wrap). --- Gently removed both cups and re-misted each with RO water (~2 mists). --- Carefully placed the cups back onto the cuttings. - [+01:21]: Checked the Ecowitt soil moisture sensor data: ------------------ [ 4x4 MAIN TENT ] --------------- ------ 34% - [CH01 FT Ā» G30 - Heady OG BX1 #1] ------ 52% - [CH02 FB Ā» G30 - Heady OG BX1 #1] ------ 39% - [CH03 BT Ā» G20 - TKO] ------ 58% - [CH04 BB Ā» G20 - TKO] ------------------ [ 3x3 VEG TENT ] ---------------- ------ 44% - [CH05 BL Ā» GR7 - Garlic Budder OG#1] ------ 47% - [CH06 BR Ā» GR7 - Garlic Budder OG#2] ------ 41% - [CH07 FL Ā» GR7 - Gorilla Goat #1] ------ 46% - [CH08 FR Ā» GR7 - Gorilla Goat #2] --------- Veg: 38% - 45% | Flower: 45% - 55% --------- General: 30% [Dry] Ā«| 45 - 60% [Moist] |Ā» 70% [Wet] - [+01:23]: Checked the humidifiers. --- Tanks are still full and no leaks found. Day 04 - Thursday - 08/07/25 - Total Days: 116 ----------------------------------- Daily Averages ~[+01:00] - Temps: 84.9°F [29.4°C] - Humidity: 82.0% - VPD: 0.75 kPa - Soil %: [32, 51, 37, 57, 42, 43, 43, 45] ----------------------------------- - [09:42]: Quickly checked on the propagation dome (in the 3x3 veg tent). --- Nice! Clones are both looking great! --- Heady OG is clearly recovering and looking better! --- Wow! TKO is looking incredibly healthy! Top growth has perky leaves with a few nodal growth sites starting to stretch. As far as cloning, she has been healthiest with no issues the entire way! --- Both Heady OG cuttings are looking beautiful and should be rooting. Plan to check for roots in a few days. --- Plan to do a pretty heave defoliation today. --- Also going to start the mother plant cloning process. - [17:12]: Evening check on the 3x3 veg tent. --- Mother garden is looking beautiful and the canopy is bushy with growth! --- Both Heady OG and TKO clones also look green and healthy! --- My main focus for today is the veg garden and the preservation of the genetics . --- Lots of work to do and time to also start the mother cycling process! --- This time, going to do a pretty heavy defoliation! --- Going to pretty much bonsai each mother while taking a few clones to preserve the genetics. --- Let’s go Ensign! - [17:58]: Filled a measuring cup with 1.5 cups of RO water. ------ Added 1/8tsp of Horticultural Aloe --- Mixed the solution and poured it straight into a clear solo cup. --- Repeated this process until 4 cups were filled. - [18:05]: Also marked each cup with the corresponding mother plant name. --- Time to defoliate and take the clone cuttings! - [18:07]: Using a pair of trimmers (AC Infinity), --- Bonsaied each mother plant. Removed over 75% of overall growth leaving several branches and nodes. - [19:44]: Done and wow what a difference! --- Pretty much removed all growth leaving a few nodal growth sites to heal. --- This is my first time going this heavy and am hoping that they recover. --- If this bonsai defoliation heals up with healthy growth, this can also be an alternative to a full plant cycling. --- Anyways! - [19:46]: To preserve the genetics, made sure to cut clone cuttings from each mother plant. --- To ensure successful rooting, took several cuttings. --- Made sure to clean each cutting by trimming most of the branches off leaving the top one or two nodes. --- Did not cut any leaf fingers and made sure to cut the tip of the stalk (about 45°) before placing into the cup of aloe solution. - [19:55]: Placed the fresh cuttings into the 3x3 veg tent. --- Have each cup resting on top of the corresponding mother plant. --- Okay! Let the two-day soak begin! - [20:00]: Mulched the trimmings in a paper bag. --- Since the bottom of the paper bags tend to decompose, have the bag in a used BuildASoil soil bag which should not decompose (these are meant for soil). --- Also added a bit of Kashi Blend and worm castings to the bottom of the bag. --- Back to the Heady OG cuttings! --- Gently removed the cups and misted the inside of each with RO water (~2 mists each). - [20:02]: Carefully placed the new cups onto the cuttings. --- Great! Plan to check for roots soon. - [20:08]: Checked the Ecowitt soil moisture sensor data: ------------------ [ 4x4 MAIN TENT ] --------------- ------ 31% - [CH01 FT Ā» G30 - Heady OG BX1 #1] ------ 51% - [CH02 FB Ā» G30 - Heady OG BX1 #1] ------ 35% - [CH03 BT Ā» G20 - TKO] ------ 56% - [CH04 BB Ā» G20 - TKO] ------------------ [ 3x3 VEG TENT ] ---------------- ------ 41% - [CH05 BL Ā» GR7 - Garlic Budder OG#1] ------ 40% - [CH06 BR Ā» GR7 - Garlic Budder OG#2] ------ 42% - [CH07 FL Ā» GR7 - Gorilla Goat #1] ------ 44% - [CH08 FR Ā» GR7 - Gorilla Goat #2] --------- Veg: 38% - 45% | Flower: 45% - 55% --------- General: 30% [Dry] Ā«| 45 - 60% [Moist] |Ā» 70% [Wet] - [20:12]: Checked the 4x4 tent. --- Ca-Caw! Ah yea! The garden is looking incredible and wow growth is raging! --- The tallest growth is just barely under the netting! --- Not much to do in the main tent now but to wait until the stretch slows down. --- Time to relax and let the grass grow! Let’s go! - [21:34]: Have an extra stainless steel rack and thought of a better way to hold the solo cups in the veg tent. --- The cups are balancing on the edge of the pots am concerned that they may tip over. --- Carefully too each cup out of the tent. - [21:36]: Placed the rack upside-down in the middle of the tent. --- Have the rack positioned on top of all 4 pots just above the center floor fan. - [21:39]: Gently placed each cutting cup onto the rack. --- The floor fan can easily still blow through the grid of the rack. Great! --- This should be way more stable while still allowing decent airflow. - [21:40]: Checked the humidifiers. --- Tanks are still full and no leaks found. Day 05 - Friday - 08/08/25 - Total Days: 117 ----------------------------------- Daily Averages ~[+01:00] - Temps: 84.5°F [29.2°C] - Humidity: 82.5% - VPD: 0.72 kPa - Soil %: [32, 50, 30, 53, 40, 42, 41, 42] ----------------------------------- - [23:02]: Night check on the 4x4 tent. --- Ahh yea! The garden is thriving! --- Both Heady OG and TKO are still stretching upwards and the canopy is getting dense! --- Wow! TKO has reached the top netting! Heady OG is just under the top netting. --- Ca-Caw! Let’s go ladies! - [23:11]: Checked the 3x3 veg tent. --- The veg garden is looking great! --- The bonsaied mother plants are still recovering from the heavy defoliation. But growth is looking a lot better than I would expect from such a large biomass reduction. Nice! --- Cuttings are looking great as well! - [23:13]: Time to swap the aloe water out! --- Replaced each solo cup with a clean one filled with fresh RO water (1.5cups). --- Plan to start using the propagation dome soon! --- Going to let these soak for another day before transplanting into Coco Coins for rooting. - [+02:05]: Quickly checked on the auto-watering system. --- System is still charged and no leaks or kinks found in the tubing. - [+02:08]: Checked the humidifiers. --- Tanks are still full and no leaks found. Day 06 - Saturday - 08/09/25 - Total Days: 118 ----------------------------------- Daily Averages ~[+01:00] - Temps: 83.4°F [28.6°C] - Humidity: 83.3% - VPD: 0.67 kPa - Soil %: [32, 50, 35, 52, 41, 40, 41, 41] ----------------------------------- - [07:55]: Quickly checked on the 3x3 veg tent. --- Looking great in the veg garden! --- Mothers are all recovering nicely from the bonsai defoliation. Great! --- Cuttings also look healthy and ready for transplanting! --- Both Heady OG and TKO clones are looking perky and getting bigger! --- Heady OG cuttings also looking green and rooting! I think. Will check for roots in a few days. - [20:58]: Night check on the 4x4 tent. --- Ca-Caw! This is why we grow! Wow! --- Also hyped that the canopy is getting dense with nodal growth! --- TKO has more tops stretching through the top scrog netting! Heady OG has not reached the net yet. --- Stoked the 14in space in between the netting is filling quite nicely and just going to let everything grow! - [21:01]: Checked the Ecowitt soil moisture sensor data: ------------------ [ 4x4 MAIN TENT ] --------------- ------ 29% - [CH01 FT Ā» G30 - Heady OG BX1 #1] ------ 50% - [CH02 FB Ā» G30 - Heady OG BX1 #1] ------ 34% - [CH03 BT Ā» G20 - TKO] ------ 53% - [CH04 BB Ā» G20 - TKO] ------------------ [ 3x3 VEG TENT ] ---------------- ------ 40% - [CH05 BL Ā» GR7 - Garlic Budder OG#1] ------ 40% - [CH06 BR Ā» GR7 - Garlic Budder OG#2] ------ 40% - [CH07 FL Ā» GR7 - Gorilla Goat #1] ------ 40% - [CH08 FR Ā» GR7 - Gorilla Goat #2] --------- Veg: 38% - 45% | Flower: 45% - 55% --------- General: 30% [Dry] Ā«| 45 - 60% [Moist] |Ā» 70% [Wet] - [21:05]: Checked the 3x3 veg tent. --- Growth is still recovering quite nicely! This may be my solution to maintain mother plants longer between cycles. --- Mother clone cuttings are also looking healthy and ready to be rooted! --- Was originally planning on rooting all of the cuttings, but since the mother plants are recovering better than anticipated, just going to plant one of each pheno. --- Let’s go! - [21:23]: Filled a measuring cup with 1.5 cups of RO water. ------ Added a pinch of Quillaja Saponaria Extract [60] ------ Added 1/64tsp of Horticultural Aloe ------ Added 1/32tsp of Mycrobe Complete --- Mixed the solution thoroughly. - [21:26]: Dropped 4 Coco Coins into the measuring cup. --- The coins immediately started to expand. ------ [Ā» ~10 MINUTES LATER Ā«] --- Placed each fully saturated Coco Coin into half-cut solo cups. - [21:41]: Using a squeeze bottle filled with Clonex, --- Gently filled each pre-made hole with Clonex rooting gel. - [21:43]: Time to plant the cuttings! --- Using a pair of clean trimmers, made a final 45° cut. --- Also stripped and scrapped some of the stem’s outer membrane. --- To help with planting, gave each Coco Coin a squeeze to loosen the coco. --- Made sure to insert each stem straight and snug with the tip about a 1/4 inch from the bottom of the Coco Coin. --- Also secured the stem by pinching and pressing in the top of the Coco Coin. --- Once each cutting was planted, - [22:11]: Placed each pheno into the propagation dome’s tray. --- Made sure to keep each clone properly tagged. --- Added 1/4 cup of RO water to the bottom of the tray. --- Placed the side extensions onto the tray. - [22:15]: Misted the top of the propagation dome before covering the cuttings. --- Vents are fully closed. --- Also lowered the intensity from 5 to 1. --- At the current light intensity (LV1), the PPFD is around 110 μmol/m²/s which gives a DLI of 7.13 mol/m²/d under an 18/6 light cycle --- Will check back daily to cycle the air under the dome. - [22:17]: Placed the extra mother cuttings back on the rack. Will try to keep these cuttings alive until the planted ones root. --- Will need to change the water every day or two. --- Also need to water the Heady OG and TKO clones. --- Ca-Caw! Let’s go! - [11:33]: Here are the starting initial watering ranges: ------ Heady OG BX1 Ā» 261.4g → 301.2g ------ TKO Ā» 240.9g → 301.4g --------- General Solo Range: [Dry] Ā«| [Initial Cup Weight] + ~55-100g |Ā» [Wet] --- All cups were last watered 3 days ago. --- Took the starting weight of both clones before watering, ------ Heady OG BX1 weighed 257.0g ------ TKO weighed 259.7g --- While on a scale, --- Gently misted the straw mulch of both cups with RO water. --- Focused on the straw and sprayed as evenly as possible. --- Misted 10-20 sprays. Waited a moment, then misted again. --- Made sure to reference the watering weights. --- Repeated this process for both cups. --- There was no runoff. --- Also defoliated and removed the lowest growth on both clones. - [23:03]: Took the saturated weight of both clones after watering, ------ Heady OG BX1 Ā» 345.3g ------ TKO Ā» 355.4g --- Marked the final wet weight on the back of each cup. Also marked the watering date on the front. --- Placed both phenos back into the tent. Have them now resting on the rack (on drip trays). - [23:14]: Checked the humidifiers. --- Tanks are still full and no leaks found. Day 07 - Sunday - 08/10/25 - Total Days: 119 ----------------------------------- Daily Averages ~[+01:00] - Temps: 83.9°F [28.8°C] - Humidity: 83.6% - VPD: 0.66 kPa - Soil %: [49, 49, 30, 52, 43, 45, 46, 44] ----------------------------------- - [08:02]: Quickly checked on the 3x3 veg tent. --- Ooo yea! Looking great in the veg garden! --- All mothers are still green and recovering. New growth is starting to develop and growth is looking healthy! --- Quickly checked on the propagation dome. --- All clone cuttings are looking green and healthy! - [19:04]: Night check on the 4x4 tent. --- Ca-Caw! Ah yea! Heady OG has reached the top scrog net! --- TKO has several tops above the netting and she is raging with healthy! --- Canopy is also showing more signs of pistil crowning and vertical growth seems to be slowing down. I think. - [19:07]: Checked the Ecowitt soil moisture sensor data: ------------------ [ 4x4 MAIN TENT ] --------------- ------ 48% - [CH01 FT Ā» G30 - Heady OG BX1 #1] ------ 49% - [CH02 FB Ā» G30 - Heady OG BX1 #1] ------ 36% - [CH03 BT Ā» G20 - TKO] ------ 55% - [CH04 BB Ā» G20 - TKO] ------------------ [ 3x3 VEG TENT ] ---------------- ------ 41% - [CH05 BL Ā» GR7 - Garlic Budder OG#1] ------ 43% - [CH06 BR Ā» GR7 - Garlic Budder OG#2] ------ 43% - [CH07 FL Ā» GR7 - Gorilla Goat #1] ------ 43% - [CH08 FR Ā» GR7 - Gorilla Goat #2] --------- Veg: 38% - 45% | Flower: 45% - 55% --------- General: 30% [Dry] Ā«| 45 - 60% [Moist] |Ā» 70% [Wet] - [19:10]: Checked the 3x3 veg tent. --- The veg garden is recovering beautifully! --- Since the stretch seems to be slowing down in the main tent, going to give these ladies a little extra. - [19:17]: Going to feed some Stash Blend for the first time. --- This blend of beneficial microbes and mycorrhizal fungi also includes a bit of silica which should help during the bloom phase. --- Also shout out to Mr. Grow It, Rob (from CLTV), and Pigeons420! Stay lifted! - [19:19]: Filled a pitcher with 16 cups (1gal) of RO water. ------ Added 1/8tsp of Quillaja Saponaria Extract [60] ------ Added 1tsp of Stash Blend --- Mixed the solution before pouring 6 cups straight into a pump sprayer. --- Gave the sprayer a good shake before spraying the entire solution onto Heady OG’s straw mulch. - [19:52]: Repeated this process again for TKO. --- Depending on how growth develops, may start feeding these ladies weekly. --- From personal experience, the veg phase can easily be grown with straight RO water. --- Flower is probably the most important time to feed because there are more roots and the plants are trying to produce more biomass. I think. --- Anyways! - [20:10]: In the veg tent, repeated the watering process for all mothers (1 cup + 1 cup RO each). --- Focused mainly on the straw (2 cups each). - [20:13]: Checked the humidifiers. --- Tanks are still full and no leaks found. --- Wow what a grow week! --- The difference in growth from Monday until now has been incredible! [END OF WEEK 16]
Likes
5
Share
[ Introduction ] Welcome to my first ever grow journal! I have been growing medically for the past couple years, documenting some of my grows on my Facebook and Instagram (@OnlyTomatoes) pages, as well as several cannabis cultivation subreddits. I've found that I do a lot of things differently than other growers, so I'd like to share a full cycle publicly in case I have the answers to somebody's questions. [ Updates ] Day 4 - Lights have been lowered to 18 inches off canopy, dimmed to 25%. They've recovered from both their transplant and their topping, new growth looks almost perfect. I'm going to keep the accidental sunflowers for a few more days and see if there's any significant difference between plants. They all received a foliar spray of neem, kelp, and a bit of calmag before lights off yesterday. I expect to be able to remove the remaining damaged leaves by the end of this week. Day 7 - Lights increased to 30%, C02 increased to 800ppm, getting ready for week 2 of veg. Fed today, fairly low EC (<1.5) blend of Silica, Calcium, Kelp, Molasses, and Tribus Grow in a mixture of R/O and tap water. Very little runoff at 1gal per pot. Will most likely foliar again before lights off with a light fish hydrolysate mixture to help with any nitrogen issues. Any dead or dying leaves you see are from pre-transplant, I'm just waiting a few days longer for the existing rootballs' ph levels to swing back to a healthy range before removing all that unsightly growth. I'm really not sure when I'm going to remove the sunflowers growing in some of the pots, I've seen no negative effects yet. I could flip group 1 into flower if I wanted, the canopy is level and beautiful, however group 2 will take a while longer to fill a canopy. [ Grow Details ] Plant Count: 64 (Clones) Mother Age: 17 Months Strain: Gelat.OG (Phenotype 5) Breeder: Seedsman Hunter: OnlyTomatoes Veg Time: 3-5 Weeks Flower Time: 65 Days Training: Multiple Toppings Final Pot Size: 5 gal (Fabric) [ Room Details ] Room Size: 21'x9'x11' (190sqft, 2100cuft) Canopy Size: 10'x9' and 5'x9' (135sqft) Lighting: Grower's Choice ROI-E720 x6 (dimmed to 25% power during veg) Cooling: Cooper&Hunter 36k BTU Minisplit Dehumidification: Quest 225 Equipment Controllers: TrolMaster (Lighting, Cooling, and Dehumidification controls), AutoPilot (C02 Controls) Watering System: Manually controlled drip irrigation, x2 1gph drip emitters per pot [ Pre-Veg ] These poor clones have lived an abused life during 2021, sitting around in solo cups for over 2 months waiting for a new home. Normally I would never allow pre-veg plants to have such obvious deficiencies, but constant hand watering led to some poor nutrient decisions on my part. They've been in their final pots for a few days now and were topped on day 0 of veg. I plan on lowering the lights to 18"-24" within canopy around day 3, I'm just allowing some extra time for the roots to really dig in. I've found that a batch of dirt that was used had sunflower seeds in it, possibly winter food storage from an outside rodent, so I'm debating how long I will let these sunflower seedlings grow alongside my plants. They do make a good cover crop with amazing root systems, I just don't think that really applies in pots of this size where plants can choke each other out.
Processing
Likes
14
Share
(Log date week 7, day 49) So this week was a mixed bag, Tuesday started off with me finding a spider web on one of the lower fan leaves on my Hulkberry plant and noticed some bite marks on some of Fat Banana. In my haste to give rid of the spider mites, i caused some minor wind damage to some of the fan leaves on Hulkberry which caused some copper spotting and a stunted Fat banana cola. After i correctly treated both plants for spider mites and wind damage, they both bounced back and started to recover quite nicely. I also noticed a difference between topping these plants at different times; i topped fat banana when it had 4 cola's but i waited until hulkberry's roots reached to the bottom of my 5gal bucket and she had 8 cola's. A BIG difference in their recovery and overall structure, where fat banana jump out the gate with explosive veg growth and hulkberry struggled for two weeks just to develop it's first set of fan leaves. To now whereas hulkberry is much bigger, greener and bushier than fat banana. Hulkberry has responded much better to the additional stress whereas fat banana has struggled or stalled due to the stressful conditions. All in all wasn't too bad of a week, except for the power going out for a couple of hours on Saturday which raised my grow-room temperature to 90f, i was able to put out a couple of fires this week without any adverse long term effects. I also topped hulkberry on the last day of the week and I'm going to continue to feed them Technfloa at the full recommended strength since they have both responded very well to last week's formula. as always my pic are in chronological order Mr. O.G.T
Likes
23
Share
@nonick123
Follow
DĆ­a 20 (13/05) Todas las plantas muestran las preflores! DĆ­a 21 (14/05) BaƱo de sol de 2 horas! DĆ­a 22 (15/05) NYC Sour D Auto empieza a mostrar algo de clorosis intervenal... El gran @Thecannalife420 me diagnostica deficiencia de Mg Aplico foliarmente Sales de Epson DĆ­a 23 (16/05) Las plantas han reaccionado muy bien a las sales de Epson! Riego 750 ml H2O + Regulator 0,15 ml/l + CaMg-Boost 0,25 ml/l + Startbooster 0,25 ml/l - pH 6.2 DĆ­a 24 (17/05) Las plantas salen al exterior! šŸ˜ Les aplico heno como mulch (acolchado) DĆ­a 25 (18/05) Riego 250 ml solo agua todas las plantas DĆ­a 26 (19/05) Riego 250 ml H2O + Regulator 0,15 ml/l + CaMg-Boost 0,25 ml/l + Startbooster 0,25 ml/l + TopBooster 0,2 ml/l- pH 6.2 šŸ’¦Nutrients by Aptus Holland - www.aptus-holland.com 🌱Substrate PRO-MIX HP BACILLUS + MYCORRHIZAE - www.pthorticulture.com/en/products/pro-mix-hp-biostimulant-plus-mycorrhizae
Likes
12
Share
@Naujas
Follow
49 dienos!!!! Mergaitės žiedai pradėjo sparčiai augti:) kas mane labai džiugina:) kadangi mano spintoje auga dvi skirtingos veislės, kvapas tikrai skanus, spėju, kad abi nuostabios:) 49 dieną paÅ”alinau žiedkočių lapus, kurie jau buvo pageltę:) Taip pat daviau jiems 6,3 pH su @Plagron maistinėmis medžiagomis:) sėkmės visiems :).
Likes
20
Share
@Naujas
Follow
it still holds :) I was very afraid that I could do it, but the further I go, the more I start to believe it :)
Processing
Likes
28
Share
She popped through the soil in 5 days and is doing great so far. Stretched a little more than I prefer, but it may help with the LST bending I have planned. Just getting water so far.
Processing
Likes
10
Share
Nice colas popping up showing to see the hard work pays off