


Likes
2
Share


@PrinceOfHerbs
Follow
The plants are growing very well and the flowers and resin are now clearly visible.
The Strawberry Gorilla is already slightly purple in color.

Likes
18
Share


@cheetah844
Follow
Growing nicely, I'm excited for a high CBD and THC strain combination. It's supposed to be a good strain well-balanced medical strain with less stoney effects but still a pain & mood management, hopeful it'll work for me.

Likes
12
Share


@thonhash
Follow
Subimos algo más los ml de terranabis,buena asimilación y engorde,gracias a enzynabis que busca el equilibrio de todo.


Likes
7
Share


@Naujas
Follow
To be honest, I was very surprised by this girl :) I didn't expect her to grow so much, so far everything looks good :) to be honest, I don't even know how she grows so much, where there is minimal sun :).

Likes
13
Share


@Slurpy_Terpy
Follow
==> Decreased the base nutrients for less Nitrogen
She is doing great!
Smelling stronger and with more personality than last week :D
There are not many calyxes but they are swelling slowly and nicely :)
Starting to get some purple colors in the buds already :D
Her branches are thin and buds are gaining in weight so she is starting to fall! I will tie her up soon :D

Likes
14
Share


@stonerflowgarden
Follow
Well almost hitting 5th week of Bloom!! Theyre getting frost everyday im very happy with this strain


Likes
65
Share


@Dendegrow
Follow
Week 4 of the flowering phase has arrived, and last week flew by 🌬️🌱. The ladies are thriving, and the buds are now clearly visible! ✨ The flowers are starting to turn darker, which is an exciting sign 🍒.
The first trichomes are already forming, hinting at a very potent strain 💎🔥. While the cherry aroma hasn’t come through yet, removing some leaves revealed an intense, waxy scent – very intriguing! 🌿👃
I’ll keep you updated with daily posts. Drop a like and stay tuned to see how the ladies develop 🌺📸. See you next week!
Woche 4 der Blütephase ist da, und die letzte Woche ist wirklich wie im Flug vergangen 🌬️🌱. Die Ladies haben sich prächtig entwickelt, und jetzt kann man die Buds schon richtig gut erkennen! ✨ Die Blüten beginnen langsam, sich dunkel zu verfärben – ein vielversprechendes Zeichen 🍒.
Auch die ersten Trichome sind schon sichtbar, was definitiv auf einen sehr potenten Strain hindeutet 💎🔥. Das Kirscharoma ist zwar noch nicht zu erkennen, aber beim Entfernen der Blätter wurde ein intensiver, wachsähnlicher Duft wahrgenommen – super spannend! 🌿👃
Ich halte euch weiterhin mit täglichen Updates auf dem Laufenden. Lasst ein Like da und bleibt dran, um zu sehen, wie sich die Mädels entwickeln 🌺📸. Bis nächste Woche!

Processing
Likes
4
Share


@Serenityjane420
Follow
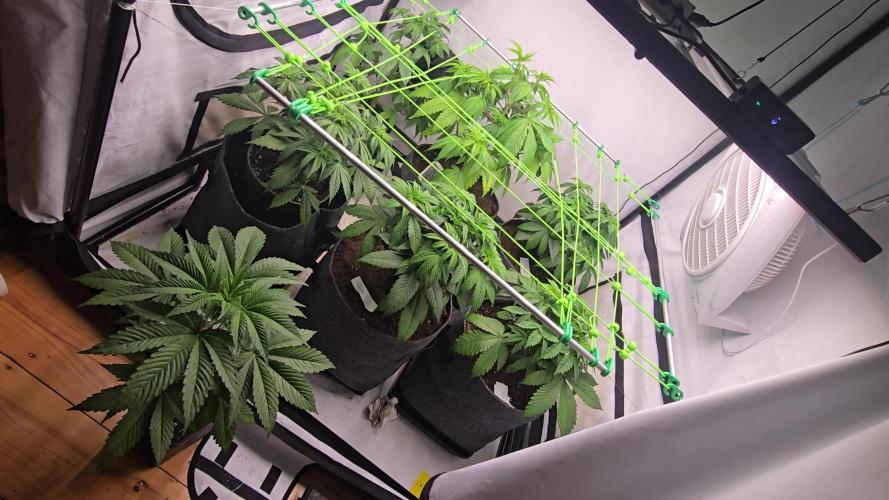
More defoliation and training although her stretch is pretty much complete now. Buds are starting to stack and thicken. Continuing with 2 gal water every 4 days with 1tbsp molasses every other watering.
Processing
Likes
28
Share


@GanjaFarmar
Follow
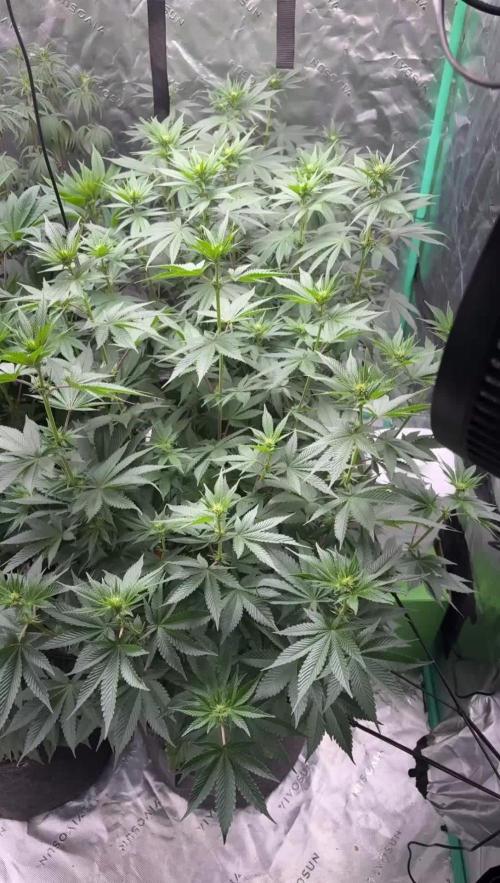
Day 43 and for a plant this age they’re looking well. All other Plants looking all healthy too. Now looking into it i should of done some low stress training. Im having abit of temperature problems but its all good. The max it gets is 29 degrees Celsius.
Likes
1
Share

@Eniiamrej_01
Follow
Nachdem die 2 wochen lang im 7 liter Topf waren und die eigenkreation angefangen hat wieder hunger zu haben, habe ich diese kurzerhand in den 20Liter endtopf gesteckt.
Kurz abwarten und der Mangel ist weg.
Dannach noch das Netz aufgespannt. Das war zwar für ein 80x80 zelt aber man kann ja noch improvisieren.

Likes
9
Share


@Chupadeos
Follow
Se hace muy difícil el control de la temperatura y ellas se hacen algunos centímetros más altas de lo que deberían,por lo demás va perfecto están floreciendo muy bien ,ellas quieren más y más abono se abona dos veces en semana y una con agua,ya que en dos días o tres de han consumido el agua de la maceta,ya se empieza a distinguir algún fenotipo en su forma distinto ,la verdad que estoy muy contento @sweetseeds nunca falla.

Likes
24
Share


@DeepRootsGrowTrees
Follow
SWISS DREAM ROSE 🌹 CBD AUTO
KANNABIA SEEDS
Week #4 Overall June 16th-23rd
Week #1 Flower
This week she started to flower good thing she stretched to about 13 inches hopefully she'll stretch more to make room for buds. No issues this week.
Stay Growing!!
Kannabia.com
SWISS DREAM ROSE 🌹 CBD AUTO
Likes
1
Share

@TTerpz
Follow
Start of week two of flower
Fed with nutrients 8/10
Fed with plain water 8/12
As of 8/15: 7 more days till lollipop and defoliation.. need to feed all 3 with nutrients TODAY!
Processing
Likes
20
Share


@Excalibur
Follow
17 Jul
Day 22 -
Heat stress showing on leaves
Day 23 -
Fresh water and everything g cleaned.
Day 27 -
Pandora looking very bushy and in need of a trim.
Day 28 -
Darkened leaves, recovery going well.

Processing
Likes
15
Share


@No_Clout
Follow
06/03/19 - These plants have grown so fast, normally at this stage my previous plants have been much smaller, only 14 days old and got a 8-9 wingspan on the fan leaves, I’m really happy I’ve turned to mills as I’ve had no faults with them yet, I did see a slight cal defiency on one of them but this was my own fault not the nutrients, I heard I dident have to add cal mag as their A&B had extra in it, but as I’m in coco I made a mistake but I’m hopeing that it’s gonna be a quick fix and they will be back to normal in the next few days 🤞🏻
09/03/19 - the gelatos seem like their doing fine, had a few brown specs but nothing progressed and it looks like their doing good.
12/03/19 - started to LST/leaf braid today as their already big enough for it and should be switching to flower at the end of next week

Likes
15
Share


@AllieO
Follow
Honestly, I didnt think this plant would amount to much, but, jokes on me! Will update after drying


