Likes
Comments
Share
@AustinRon
Follow
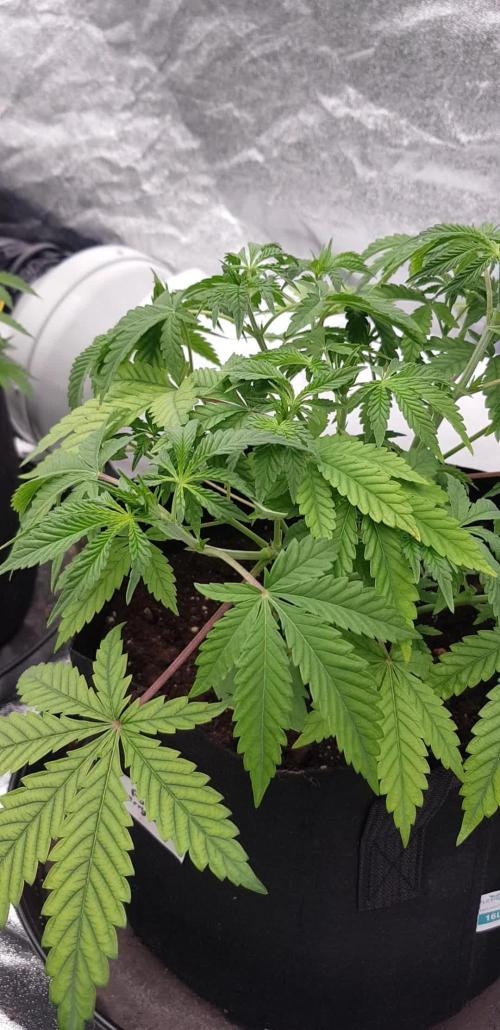
GG 4Q24 Week 6 - Bolt III Start of Week: [Tue Nov 16, 2024 GG 4Q24 43:B:6:1] End of Week: [Mon Nov 22, 2024 GG 4Q24 49:B:6:7] __ Sat Nov 16, 2024 GG 4Q24 43:F:6:1 __ Sun Nov 17, 2024 GG 4Q24 44:F:6:2 __ Mon Nov 18, 2024 GG 4Q24 45:F:6:3 __ Tue Nov 19, 2024 GG 4Q24 46:F:6:4 __ Wed Nov 20, 2024 GG 4Q24 47:F:6:5 Plant Happy (other than โ€˜Nailsโ€™) - DRY Pot, BluMats kicked off ~ Noon? - [x] Do we have moisture? (MM:) ๏ฟผ ๏ฟผ __ Thu Nov 21, 2024 GG 4Q24 48:F:6:6 - Had to kick of BluiMats - Ran to ~ 40mBar. (Moisture Meter @ Periphery, Carrot in Low Center. __ Fri Nov 22, 2024 GG 4Q24 49:F:6:7 - Sittinโ€™ Happy ๏ฟผ ๏ฟผ
Likes
226
Share
@HighTV
Follow
| ๐Ÿ“… Week 0 | | ๐ŸŽช 4ft x 4ft | | ๐Ÿƒ 201 CFM | 11/06: Soaked 6 blocks of rockwool and the hydroton in 5.8 PH water to stabilize before contact with seedlings, 11/07: The germination of the seeds were started directly inside the rockwool that's lightly damp with 5.8 PH | ๐Ÿ“… Week 1 | Days 1 - 7 | ๐Ÿ’ก 450w ๐Ÿ“48' | | ๐ŸŒก๏ธ๏ธ๐ŸŒž 77 - 86 | | ๐ŸŒก๏ธ๏ธ๐ŸŒ‘ 70 - 77 | 11/09: After 2-3 days of germination 4 seedlings have sprouted and the last 2 have cracked their shells and are making the climb to the light! Were going to let them stretch a little to better fit into their final netpots. 11/10: Plants placed in temporary net pot for more space under dome. Added water + air-stone to increase humidity from under the net pot. 11/11: Added water the the seedling with a dropper at 5.8 PH. Lowered the light to stop the stretching. 11/12: Added 5.8 water to the seedlings/rockwool with a dropper. 11/13: Adjusted Light some more. Added 5.6 PH water to seedlings with a dropper. 11/14: Added 5.6 PH water to rockwool through a dropper. Removed humidity dome for temperature. 11/15: Hydroton for final netpots soaking in 5.8 PH water. Added 5.8 PH water to seedlings. This Diary will be a little bit different. While the comments will include the whole tent and all the tasks done in it, the timelapse and vast majority of the pictures will only be about the focus plant for a better lapse experience. ๐Ÿ˜Ž
Likes
5
Share
And here we have the harvest, drying is the worst part for me as it is the most important and risky part. I struggle to get the temps down to 60ish, but in the end I ended with a well dried and cured product. Everything I wanted to achieve. Now on to the next run, I have 4 plants going now, 4 strains Super silver Super lemon Lemon orange Tropicana cherry. Watch this space ๐Ÿค™๐Ÿฝ๐Ÿ˜Ž and happy growing ๐Ÿฝ
Likes
7
Share
11/7/2022: decided to lower my scrog net 2 inches. Was probably a little late, so I had to do some super cropping to get the plants under the net. A little concerned since they are autos, but the plants are all still very healthy, so hopefully thete won't be any issues. Watered with the coconut powder and added some BuildASoil BuildABloom for the first time today. Also dropped the humidity down to 55% now that flowers are starting to develop. Puts my VPD at about 1.45. 11/9/2022: watered about 1.3 liters each, with Fish Shit, Bio-Phos, ThermX 70, and coconut powder. The snapped branch and supper cropping seem to be doing well. Looks like all three plants are near the end of stretch. The Strawberry Gushers continues to stack, and a few hairs are starting to brown. The tricomes are starting to develop as well. She smells funky. Almost sweet and sour. Something really unique. Excited for it to continue to develop. The Newberry and Orange Bubblegum aren't smelling as much yet, but they are a week or two behind. The Newberry has a bit more of a musky smell, but pretty faint still. 11/12/2022: fed all three a compost tea yesterday and they loved it . Been praying all day. The Strawberry Gushers has a minor purple stem, so I thought the tea might help. This may just also be the genetics, since this strain tend to turn purple in late flower. Figured the tea couldn't hurt and the girls are all reacting positively. Otherwise, thay all remain healthy. 11/13/2022: made a sprouted seed tea today using corn and watered about 1.3 liters to each plant. Avg. VPD:1.45 PPFD: 700 DLI: 45
Likes
26
Share
Tutto procede bene, ultima settimana per le ultime 2: gorilla skittles e gorilla punch. Ho tagliato la prima g. Skittles ed รจ a seccare, flush flush flush.
Processing
Likes
12
Share
Starting 6th week , pre-flowers have been seen on top nodes so no more lst training for the girls we want all the power they have into making buds . Roots are looking very healty and now reaching the bottom of the tank. Plant is showing nice colors ! Looking foward to flowering . Gave the girls a final haircut to let light to new shoots .
Likes
38
Share
Utopia Haze is a rare heavily sativa dominant hybrid (90% sativa/10% indica) strain created through back crossing Brazilian Sativa strains. This tasty little bud took home 1st Place for Best Sativa in the 2008 High Timesโ€™ Cannabis Cup and for good reason โ€“ with its potent 18-22% average THC level and long lasting cerebral effects, Utopia Haze is one powerhouse smoke. The Utopia Haze high comes on soon after you finish your first toke, hitting you with a strong cerebral lift that infuses you with a sense of hazy relaxation. Type: Feminised/Photoperiod Cultivation: Indoor/Outdoor Flowering Time (days): 70-75 Indoor Yield (g): Up to 650 Feminised Outdoor Harvest Month: October Feminised Outdoor Harvest Month Week: 3rd-4th week Aroma: Citrus, Woody, Pungent, Mint Effect: Cerebral Lift, Hazy Relaxation, Sleepy Welcome Everyone to the Final Entry of my Utopia Haze Grow ! There is so much to discuss ! I have been extremely busy as of late trying to get this Harvest together, but i am happy to have it here for you now ! I Seriously under estimated the amount of time, help from others, and my own necessary skills to pull this off.. and i still kind of screwed it up lol ! But its worth noting i have never actually done this before and trying to document it during....was extremely hard. It is next to impossible to work an iPhone with rubber gloves on ! First I want to discuss everything step by step so before you jump straight into the comments on how the end product is so small in "quantity" Rest assured i am happy with its"quality"...and thats all that matters to me because Life is a journey not a destination! and i have learned so much from this grow that I couldn't be any happy even if i messed some things up :) But at the very least I hope you read through this entry in its entirety with an open mind and focus more on the process, rather than just the outcome! I ran out of Ice & i was only able to wash three times..(normally I've heard you should go sometimes 5-6 washes) Preparation is Key & things will be much better next round :) Photos 1-22 These are pretty self explanatory but for those of you just tuning in now.. this is what happens to a very happy plant when you don't have the necessary tools to monitor key components of growing cannabis.. Ph, as well as EC levels play a very key role in the outcome of your grow lol that being said I was just able to save this plant by purchasing both tools but that doesn't mean the plant didn't suffer because of the prior events.. This was a Huge reason behind me choosing to turn this harvest into what i would consider "Solventless Hash Rosin" from "Ice water extracted Bubble hash". Pictures 23 The idea here is the process of using "fresh Frozen Cannabis" this has been discussed many a time online on such sites as instagram and here on grow diaries as well.. I personally have Never tried the process so i decided to try it out and make a judgement for myself.. Video 24 The Cannabis has now been in the freezer for 72 hours making it very well frozen.. as you can tell i struggled getting it all into the 25u Screen Wash Bag. One thing of note i would do differently is i will de-stem my next batch as i also believe this played a part in the amount of plant matter that escaped through the sieves. Photo/Video's 25-28 The idea here is "ice water Seiving" & especially with the bags that I am using here that are only have screen material on the bottom portion of the bag it is very important to have spaces in-between the screens to allow the water to pass directly through the screens into the bottom bucket with the least amount of resistance.. because the hash is so extremely temperature dependant if it gets warm on the side of the bag.. it will stick there and not make it to the bottom to become use able product.. 29 You do not need to use as much Ice as i used here lol... the idea is to keep everything very cold..i certainly achieved that but at the sacrifice of using so much that i ended up grinding product and producing "contaminants" but in the end they are just plant matter that i would be smoking when i rolled up my joint either way so.. I'm not super disappointed.. But it should be noted that what you want to achieve here is a Layering effect where you have the wash bag between two small layers of ice while the "water current" washes the Trichomes away allowing them to be separated by the screens setup below :) Before Starting the machine you should allow some time (i.e.;10-12minutes pre soak to allow the product to become saturated) before the first cycle. By video 32 I have just ran out of ice lol.. Video 33-34 Here I have a tip for you.. to separate the screens that you sieve through.. cut 5 gallon buckets to stretch them across nice and tight.. it'll make scooping your Bubble that much easier ! i learned this from the many "Frenchy" videos I have watched :) Picture 35 Here in lays the problem for most people.. drying your hash without loosing vast amounts of "Terpenes" whilst also stay ever vigilant against mold ! Thanks to all those videos I've watched on youtube.. id like to think this was one of my most successful parts of this process.. Things to Note; Terpenes start to seriously evaporate at temperatures 68F or 20C you need to stay as cold as possible whilst bringing the Relative Humidity in the space down into the 40-30% to stay away from that nasty mold ! I used my cold storage room in the basement.. with a dehumidifier running to keep the space at 45% RH & staying at a constant 15c. All while spreading the hash as thin as possible across parchment paper, on top of the white screens with a fan moving air across both sides of the paper. Pictures 36-38 These are some macros i took in the middle of my drying session I fell in love with the colour. Yes i know the black spots are plant material but they will get caught when i bag the hash & squish the oil out. Thing to Note; at this stage it is important to ensure you 'micro plane" the hash down as fine as you can whilst staying weary of the temperature... any "chunks" will hold pockets of moisture.. that lead to potential problems..ie; mold ... Picture/Video 39-41 Successfully planed bubble hash ready to be bagged and Squished ! Picture 42 Ive decided to follow Pedro.. from Pedros Grow Room and double bag to be on the safe side so i don't have any blow outs. So thats One 25u bag inside one 160u bag ! :) Pictures 43 This is almost 3 grams of the bubble hash from above, already melting in the bag.. this is where i ran into trouble again lol things started getting to warm in the house and i was only able to get one of the three squish's i did on video :( things started getting sticky. Picture 44 This is basically just a photo of the equipment I'm using; 3x5 LowTemp Cage in the frame I built myself, with a 20Ton bottle jack. Something to note here is this is an older Lowtemp model with only a single heating zone which is which i have it closed here heating Both sides of the press :) As well as the importance of having adequate pressure on your plates.. my rig is very overkill for the size of hash bags..lol Video 45 Here is the lovely press video.. its didn't quite work the way i wanted either lol my directional folding wasn't quite tight enough for a big "drip" :) &the Press was set to 65ยฐc Photo's 46-50 are pretty self explanatory :) I had a blow out.. but still managed to pull an 80% return from the hash once squished...& yes it tasted amazing :) Was it worth it in the end... that could be debated.. for some..i understand..its not your thing, but for those of us that are interested in making our own concentrates.. free from Solvents... I wouldn't make it any other way :) If even ONE of you reading this diary finds it helpful to reference for ANYTHING.....even if its "what not to do" ill consider it a success ! Thanks again for tagging along on this garden adventure.. its been one heck of a journey ! Much Love from B.C. Canada, Until Next time, Cariboo
Likes
30
Share
~ FASTBUDS TESTER #2203 ~ Well friends, here we go on another 'canna-venture' together! The grow room has had a complete remodel and some upgrades done to it including brand spanking new 4x8 and 4x4 tents and a Trolmaster Hydro X controller along with a new Control Panel. This tester strain is one of six tester strains that FastBuds has graciously provided me with and I'm looking forward to seeing what this girl has to offer when she's grown to her full potential! One drawback of 'testers' is I have little to no information on it other than its number and that it's an autoflower... ๐Ÿคช But, it's ALWAYS a blast growing them for me because not knowing a lot allows me to just concentrate on the essentials: Light, Environment, Water, Nutrients and possibly a bit of LST... not complicated, just basics like keeping a constant temperature and RH in the tent at a level that gives a good VPD, watering when almost dry and maintaining proper light levels according to their stage of growth. ____________________________________________________________________________________________________________________________________________________________________________________________________________________________________________________________________________________________________________________________________________________________________________________________________________________________________________________ ~THE SETUP~ ~Initially seeds were lightly scuffed, then soaked for 3 hours in 78โ„‰ distilled water after which they were transferred to moist paper towels laid out in a Jiffy Pellet plastic starter tray with lid. Underneath the tray was placed a Mars Hydro Heat Mat with Controller that was set to 78โ„‰ where they stayed until their tap roots emerged. ~Planted into Jiffy Peat Pellets that were hydrated with distilled water warmed to 78โ„‰ with a 7.0 ph. ~Once roots emerge from the Jiffy Pellet they're transferred to their fabric pots. ~Grown 100% organic in a 4g Gronest fabric pot and a 3g fabric pot by Wraxly filled with Mother Earth 70/30 Coco/Perlite medium and initially amended with Dr. Earth 4-4-4 / Earthworm Castings / Dr. Earth Flower Girl 3-9-4 and Coast of Maine Stonington Blend Organic Plant Food 5-2-4. ~19/5 light cycle for the entire run with supplemental UVA added during flower. Lights are controlled by a Trolmaster Hydro X controller set for a 15min Sunrise/Sunset simulation. ~Top dressing every 3-4 weeks with slow release dry amendments and Earthworm castings. ~Straight water ph'd @ 6.2-6.8 when needed and bi-weekly Compost Tea's. ____________________________________________________________________________________________________________________________________________________________________________________________________________________________________________________________________________________________________________________________________________________________________________________________________________________________________________________ Weekly Updates: 12/1- I soaked both seeds for 3 hours in 78โ„‰ distilled water after which they were transferred to moist paper towels laid out in a Jiffy Pellet plastic starter tray with lid. Underneath the tray was placed a Vivosun Heat Mat with Controller that was set to 78โ„‰ where they stayed until their tap roots emerged roughly 24 hours later. 12/3- Today their tap roots were about 1/4 to 3/8" so at 11 am I transferred them into Jiffy Peat Pellets that were hydrated with distilled water warmed to 78โ„‰ with a 7.0 ph using a tine off of a plastic fork as a 'mini trowel' to make a hole in the pellet and to gently cover the tap root, leaving only the seed head slightly exposed. This method accomplishes most of the initial work the seed has to do by eliminating having to orientate itself, push it's root down and head up. By 10pm the #1 seed had her cotyledon leaves opened ...waiting on the #2. ๐Ÿง 12/5- Well this is Day ONE for the #1 FBT #2203 and I anticipate seeing her sister poking her head out real soon! I'll keep them in the covered/heated Jiffy tray until I see their roots beginning to emerge from the peat pellet, then I'll transfer them gently into their respective fabric pots. The #1 will be going into the 4g Gronest pot from FastBuds and the #2 will reside in a 3g pot by Wraxly, which I'm trying out for the first time. 12/7- Yesterday I checked the #1 tester and she had roots starting to emerge from her pellet so tomorrow I'll transfer her into her 4g Gronest pot. The #2 tester has finally made an appearance and this will be Day One for her! She looks great and I'm confident that she should be ready to transfer into her fabric pot in the next couple of days! ๐Ÿ˜Ž๐Ÿ’š Thank you for checking out my passion in life! Please visit as often as you wish and I hope you enjoy this journey as much as I know I will! Grow Strong! ๐Ÿ’ช๐Ÿ˜Ž๐Ÿค™
Likes
19
Share
So it's Harvest Day 68 Buds are heavy I cut the scrog net and the plants could not carry the heavy Buds. Buds are not that Big but verry Sticky and have dozen of trichomes. And also an amazing smell let's see how the finished flowers are going to be after Curing. Last post I'm going to do on trim Day when they can go inside the Bags.
Likes
Comments
Share
08.06.26 Hubbabubba Haze bleibt die kleinste auf dem Balkon, die ich mit Ungeduld beobachte. Nach einem anstrengenden Start bei hohen Temperaturen beschleunigt sich das Wachstum nun sichtbar und meine Sorge, das mein Substrat fรผr Automatiks (und Haze) รผberladen ist scheint unbegrรผndet. Bereits in diesem frรผhen Stadium zeigen sich Ansรคtze von Seitentriebe und die Sรคmlinge wirken insgesamt vital. Wahrscheinlich wird es in zwei Wochen soweit sein, das die automatische Bewรคsserung, welche alle Pflanzen versorgt installiert werden kann. Aktuell ist der Wasser Bedarf noch zu gering gegenรผber den fast viermal so groรŸen photoperiodischen Pflanzen.
Likes
Comments
Share
Likes
22
Share
I will be growing her again, as I feel like I let her down, by letting her PH drift so low.. Other than that, she grew beautifully, and fumes of potency as you gaze at her! She yielded more than I expected! She's not that far below my previously lowest yielding plant! :)
Likes
Comments
Share
Week 6 sheโ€™s looking great! Put on a lot of weight in the last week, buds are looking nice and fat. Main colas are big and the bottoms look like nice golf ball sized nugs. Not a veteran so I donโ€™t know for sure but the node spacing is looking pretty good to me. Got a very nice gassy vanilla smell going on and i get hit with it when i open the tent ๐Ÿคฉ Still on Athena bloom for a couple waterings then switching to fade. Next big purchase is a fancy camera lol Drop a follow!
Likes
38
Share
Flowering day 30 since time change to 12 / 12 h Hey guys :-) Every day when I look into the tent, the sight and the smell are a dream ๐Ÿ’š. They are all developing very well. There is no tip of the leaf that looks funny at the bottom or at the top ๐Ÿ˜ƒ. They were watered every 2 days with 1.3 l each (nutrients see table above). They were all checked and checked for their health. Stay healthy ๐Ÿ’š๐Ÿ™๐Ÿป ๐Ÿ‘‡๐Ÿผ๐Ÿ‘‡๐Ÿผ๐Ÿ‘‡๐Ÿผ๐Ÿ‘‡๐Ÿผ๐Ÿ‘‡๐Ÿผ๐Ÿ‘‡๐Ÿผ๐Ÿ‘‡๐Ÿผ๐Ÿ‘‡๐Ÿผ๐Ÿ‘‡๐Ÿผ๐Ÿ‘‡๐Ÿผ๐Ÿ‘‡๐Ÿผ๐Ÿ‘‡๐Ÿผ You can buy this Nutrients at : https://greenbuzzliquids.com/en/shop/ With the discount code: Made_in_Germany you get a discount of 15% on all products from an order value of 100 euros. ๐Ÿ‘‡๐Ÿผ๐Ÿ‘‡๐Ÿผ๐Ÿ‘‡๐Ÿผ๐Ÿ‘‡๐Ÿผ๐Ÿ‘‡๐Ÿผ๐Ÿ‘‡๐Ÿผ๐Ÿ‘‡๐Ÿผ๐Ÿ‘‡๐Ÿผ๐Ÿ‘‡๐Ÿผ๐Ÿ‘‡๐Ÿผ๐Ÿ‘‡๐Ÿผ๐Ÿ‘‡๐Ÿผ You can buy this strain at : https://www.exoticseed.eu/de/hanfsamen/hippie-therapy-cbd Water ๐Ÿ’ง ๐Ÿ’ง๐Ÿ’ง Osmosis water mixed with normal water (24 hours stale that the chlorine evaporates) to 0.2 EC. Add Cal / Mag to 0.4 Ec Ph with Organic Ph - to 5.8 - 6.5 MadeInGermany
Likes
19
Share
Lets focus on the remaining two. Toxy getting greener by day and looks bigโ€โ™‚๏ธ(Day 64) Toxy recovering from her nitrogen toxicity. She wants some nutrients๐Ÿคฉ Watered her 3L and her sister 1. Both with pinned nutrients. (Day 65) Toxy 1,5L Sticky 1L (Day 66) Toxy 1.3L Sticky 0.7L (Day 67) Unfortunately, the plants haven't been taken care of for the last 3 days because I was sick Today I decided to give it full nutrients because the leaves are already very yellow. I watered again with runoff water. Toxy 3.5L with 0.7L runoff. Sticky 2L with 0.2L runoff. (Day 69)
Likes
30
Share
week intel: we are going through slowly stresses : just a little E.C stress around 1.4 once a week feeding: i feed them 3 times this week with this order : day 1 : i feed them heavy with silicate +base nutrients(calcium & micros + Bloom) about 700 ppm - 1.4 e.c to cause a little stress. day 3 : i feed them low dose of Feeding Booster around 327 ppm - 0.64 e.c to let them recover a little but not fully recover still a little stress will caused. day 5 : i feed them with low dose of Top-Max + B-52 around 255 ppm - 0.5 e.c to let them recover the stresses to get ready for another stress next week. guide of the week : know your plant tolerance limit of E.C stress once you saw the very very little yellowing on tips of leaves , that's the sign to don't go further , never reach that limit if you want a high quality buds, in my case tolerance is 1.4 and i'll reach to that level only once a week to cause precision stress , love your plants and have a happy growing!
Likes
10
Share
@Dnutz
Follow
reduced light to 80% flushed with water for last week.
Likes
15
Share
Still busy weeks lol, The buds grew amazingly this week and Iโ€™m really happy with how dense the weed feels. Previous grown was under a Blurple 1000W (10W measured ๐Ÿ˜…) and vergeleken met de lamp die de dailyhighclub.nl aan mij heeft gegeven is dit 1000x beter. Dit licht komt gewoon zoals beschreven: DHCxAR1000 pro 110W Full Spectrum LED! Ja sowieso reclame hoort erbij en ik ben gewoon ontzettend tevreden met dit licht! Ik probeer een zo budget mogelijke grow te kweken zodat iedereen zn eigen weed kan kweken. Autoflowers zijn bijna zo simpel als goede aarde an goed opletten op hoe je water geeft, liever te weinig dan te veel. Nou das niet zo moeilijk, zeg ik als lui persoon. Maar DikkeToppenWilNietStoppen