The Grow Awards 2026 🏆 


Likes
Comments
Share
@Aleorla
Follow
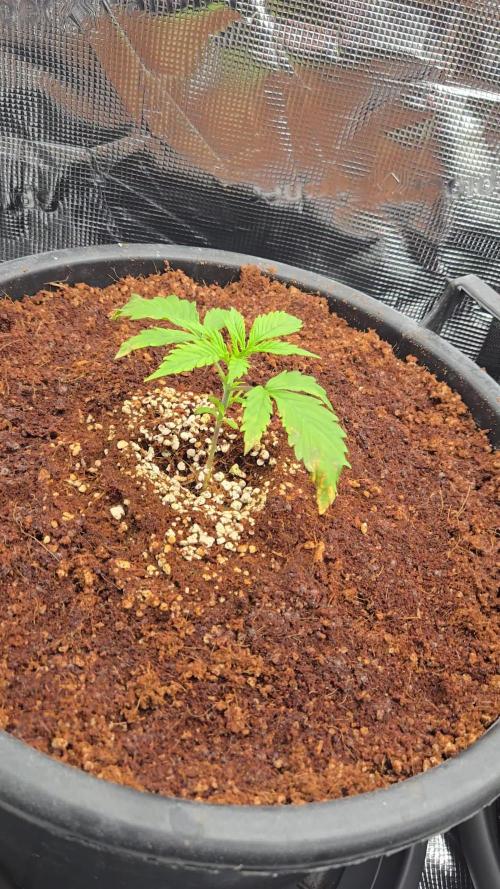
We germinated the seed on Wednesday, November 27th in the dark in a germination box, Sunday, December 1st we transferred the germinated seed into the grow box. LED set to 25% power and 50 cm away. The clay was washed with water at Ph 5.7 before being put in the pot.

Likes
31
Share
@DudeGrowsWeed
Follow
I think she's suffering from some light burn from my LED's, take a look at the pics of the top bud sites. I completely rearranged my tent and got the LED on her side up as far as it can go. I hope that helps. The buds themselves look completely fine but the sugar leaves are turning dark purple and yellow. This is only happening on the upper most bud sites. Any other feedback suggestions are welcome. Please comment away.🙏
I got some Fox Farms Organic Big Bloom this week and added it with Recharge in this weeks feeding. Looking forward to seeing the results.
Feb 5, 2018 update: Raised the LED light even more and removed most of the damaged leaves.

Likes
5
Share
@Bengrowerbr
Follow
this plant surprised me, its flowers became dense and heavy, much more than its mother's. The yield was much better than I imagined. I am really satisfied. I had never cloned an autoflowering plant and that sounds cool.
Likes
Comments
Share
@Growfather1
Follow
We are in the third week of veg and 3 plants are doing great.
2 amnesia plants of expert seeds are in good condition 1 is already topped and the other is to young for topping.
The amnesia fast from advanced seeds is doing excellent only 3 weeks old and already so big, she is topped 4 times and is transplanted in a 35 liter pot and needs at least 2 more weeks before switching from 24 hours light to 12/12.
The mac1 from expert seeds is still so little while she sprouted 3 weeks ago.


Likes
20
Share
@DaddyPrime2
Follow
5/29 plants are healthy.
6/2 they've definitely been stretching this week. Pistils have shown and the calyx of plant #2 are already showing definite purple. Its obvious even with how little of it showing. #2 was the first to show sex and progression of transitioning. Plant #1 has shown sex but only on half of her node? Plant #3 is still the tallest, with the most stretching happening. She's a lighter green than the rest and she hasn't quit shown a full pistil yet
Likes
30
Share
@Dr_Nowzaradan
Follow
Week 10
How did I miss in 3 months the part were autos can become hermi? 😢
Praying for the other 2 to be OK..

Processing
Likes
21
Share
@Siriuz
Follow
Started Week 9
Day 57
Very proud of being a Canna Grower
Very proud of planting the first seeds
Now look what we have after almost 60 days, full of buds, crystal en resin coming deep in each flower!
Day 58
Time to feed them nutes
Going hard 1900ppm
This is my top and then going down
Then flushing so they get what they need and clean the extra for last 2 weeks
Day 59
Not bad after all, no nutrient burnt
All leaves looking good
All plants doing great
And getting closer to the harvest season!
Day 60
Probably gonna give them some tap water 143 ppm TDS reads
Ph 6 sounds good to me!
More pictures coming up soon...
Day 61.62.63
She's doing great didn't have the time to go crazy on pics lately so I owe you that guys
Sorry but for next week will have tons
Quick update
They're doing good but it was hot lately like 28/30 at night and 32 at day inside AC
Humidity lvl was 60/70%
Was Rainy outside some days
Not anymore tho

Likes
15
Share
@Mcdiggley420
Follow
Girlscout is doing great looks and smells perfect I reckon I can get another few days in before flush updates of others will be up later


Likes
13
Share
@Phaleg
Follow
Ok, week started with the 2 freshly potted plants growing a lot, from 20 to 38 cm despite the reduced sunlight due to rain here.
Smallest plant was still in the minor pot until Saturday 11 June when I swapped the pot with the 17L one, repeating the same steps I did last week for the other 2, including mycorrhizas rubbing and the rabbit poo fertilizer.
Yesterday I removed the lowest level of leaves and small growing that was starting very close to the ground. Personal choice related also to what I have seen in past growing.
As of today, June 14, I register the following:
plant 1 = 39cm tall, wider (more chubby) leaves up to 8-9 points leaves
plant 2 = 38cm tall, slightly narrow leaves, up to 7 points max
plant 3 = 19cm tall
(?) Are plants 1 and 2 showing 2 different phenotypes for the different width of the leaves and the 7 vs up to 8-9 pointed leaves?


Likes
9
Share
@Xabii
Follow
RH is a struggle, it is a hot and wet summer, the dehumidifier is on from time to time but it adds even more heat.
The ORP probe is not calibrated and values are to be taken with a grain of salt.
Values are average of the day.
DATE - °C - RH% (Tent Temp/RH)
20240829 25.9 63.0
20240830 24.3 65.0
20240831 23.1 66.7
20240901 23.7 68.3
20240902 25.4 69.8
20240903 24.4 72.4
20240904 23.5 73.6
DATE - PH
20240829 6.07
20240830 6.08
20240831 6.09
20240901 6.00
20240902 6.10
20240903 5.94
20240904 5.95
DATE - ORP (mV)
20240829 21
20240830 49
20240831 9
20240901 62
20240902 122
20240903 115
20240904 59
DATE - EC(us/cm)
20240829 2452
20240830 2396
20240831 2278
20240901 2340
20240902 2319
20240903 2339
20240904 2265
DATE - CF
20240829 24.52
20240830 23.96
20240831 22.78
20240901 23.40
20240902 23.19
20240903 23.39
20240904 22.65
DATE - °C (Reservoir)
20240829 22.6
20240830 21.9
20240831 20.2
20240901 21.3
20240902 22.9
20240903 22.2
20240904 21.8

Likes
10
Share
@oxieg3ngrows
Follow
This gorgeous beast is so damn heavy I've had to support every single branch with plant yoyo's. There are no joke about 15 of them on this one plant. Even the little branches need support because the flowers are so big and dense! Not to mention this girl smells so strong of gas, sour funk, and a little citrus!

Likes
7
Share
@pegas
Follow
Hice un riego con aceite de neem y jabón potasico debido a unas pocas moscas de sustrato que estaban rondando las plantas, espero haber matado los huevos que hayan puesto, si veo más lo repetiré la otra semana.


Likes
8
Share
@AestheticGenetix
Follow
2/22/26
She's naturally created 3 mains. Shes a weird one but she's healthy.
I transplanted into 1 gallon pots and put her in the flower tent


Likes
14
Share
@snzln2010
Follow
10/18, day 74
While only getting a tiny bit taller, the colas are bulking up, trichomes are developing, and the colors are amazing. She's so pretty! We're starting to take more stemmed leaves off in preparation for harvest, and they are ready to come off, with beautiful yellow fading. There are sooooo many reddish-orange hairs, and it seems most of the tops are being taken over by purples now.
10/21, day 77
Violet's leaves are turning brown and beginning to curl now. When looking at her trichomes, it seems there is not as much amber today as there was yesterday somehow. Every time we open the cabinet, it seems she has changed.
10/23 day 79
Violet has been exploding with trichomes the last couple of days, and I'm just like WOW!! Upon doing more research on trichomes and their development, I found an article that explains things so nicely
(Link: https://www.greencultured.co/cannabis-trichomes-overview/ )
In this article, I learned about the three different types of trichomes: bulbous, capitate sessile, and capitate stalked. The stalked being the tall pretty ones we like to see, which also contain the most resin. At a certain point, the short sessiles develop into the stalked, increasing from 30% to 80-90%. This is kind of far down the article in the section titled "Latest Cannabis Trichome Research." It also explains that the stalked trichomes contain 16 cells while sessile trichomes only contain 8, so the stalked trichome explosion Violet has been having is doubling her medicinal value. I believe that her increasingly strong smell is a sign that this is good information, so I encourage you to check it out. I do not know them, nor have any arrangements with them, I really did just find the article that helpful.
Oh, Violet, our time together is going to be over soon!!
Processing
Likes
6
Share
@LeylaGrowFantasy
Follow
She Is a beautiful babyyy. Growing so fast, and She love lst and topping. I think, She will give me some beautiful flowers 😍
Processing
Likes
3
Share
@Jamminbear
Follow
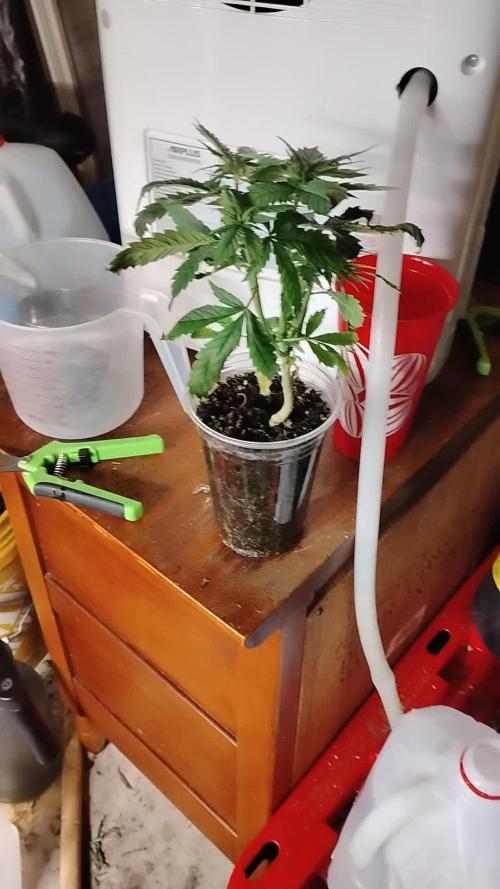
10/7/18- LST and preparing for topping # 3 for 8 colas. Everything looking healthy so far
10/10/18- Topped #3- probably should have waited maybe an extra day.
Water 1/2 gallon with urb and Aloe water.

Likes
10
Share
@Servietsky
Follow
Another good week getting ready.
They are all very well, as envisaged last week I will switch to Extreme mode of the table Aptus.
I hope not to make mistakes, my mixture is ready but I find it very busy, but I tell myself that I follow the guide Aptus.
We'll see 😥😱