


Likes
Comments
Share


@LetsGrowSome
Follow
The Holidays caused a little headache this past week. Was a few hours late on water schedule due to holiday commitments. Found the middle plant had sucked all the water out and went into underwater stage. A few of the giant fan leaves took a hit, but not too bad. Didn't change anything other than water schedule to every day now and the leaves had no further damage/discoloration. All leaves still praying and doing good. Trichromes starting to pick up on all the plants now. Had a situation in my other tent with a plant that shouldn't have been saved, that i saved, and seems to have slightly hermied and I didn't catch it. Not terrible, as out of a 6 oz plant, I found 42 seeds. Hoping that tent doesn't effect this room, but it's possible it has. Just gonna ride it out now and see how it goes.

Likes
65
Share


@Jayvo
Follow
Stretching has officially stopped as I haven’t seen any vertical growth the past few days, so all growth must be going into buds therefore I did some super cropping to even out the canopy.
I have some yellow marks on the leaves which I’m guessing it’s a nitrogen deficiency due to giving the girls only 700PPM throughout flower, I’m happy with the growth although I think the trichomes are less sticky compared to my last grow, I can only blame myself as I should have given her 1100PPM from Day 1 of flower.
Overall though there are bud sites everywhere, so many that I decided to buy a new light as I don’t think these buds will fulfil their full potential with mars hydro, with this new light my tent light spread is completely even so I have high hopes for this grow.
Some other phenos are purple at this stage so I will most definitely be buying more runtz muffin seeds until I find the purple pheno that I can clone.
Still currently feeding the girls 2 litres in the morning and 2 litres before the lights turn off. Considering adding molasses as a third feeding depending on how the growth goes.

Processing
Likes
7
Share


@Dralph87
Follow
08.03
Been slow week. RC#1 is pretty much there. Leaves are starting to yellow so I'm going to start flushing today. RC#2 is a little behind but has made up for that in overall size. Smell isn't as strong as I thought it would have been by now but i could be nose blind to it!
Other pots in the tent consist of, northern lights, royal cheese and royal haze. Its was too much effort to do a diary for 7 plants!
Likes
13
Share


@KingSalomonsWeed
Follow
Seit einer Nacht ist die supersüße watermelon zkittlez auf 12 12 rythmus.. Melde mich sobald sie un die Blüte geht. Ach ja bending beendet.
Habe die erde gewechselt, musste, waren kaum wurzeln da.
Hatte günstige erde genommen. Ab jetzt in bio bizz Light mix
Nach 2 Tagen in neuer Erde ist sie merklich gewachsen, sie dehnt sich, spreitzt ihre fächerblãtter und betet die greenception gc4 an.
Boah ich liebe es zu growen. Verschiedene Genetiken.
Dieselbe Gattung, so verschieden.
Barney Farm, White Label, Seedstockers, SensiSeeds, Fast buds.
Alles ganja lover.
Wurde vor 4 tagen die zeit auf 12 12 umgestellt..
Likes
69
Share


@GMSgrows
Follow
First off. I DO NOT USE TERRA AQUATICA NUTRIENTS. I USE FLORANOVA GROW AND FLORANOVA BLOOM
Breakup Cake is still growing strong and healthy. Did a little defoliation on her, with more to come.
She is a strong resistance plant. Tall and slim this one. Flowering time will happen soon. Once the the daylight hours hit 14 hours, these girls will start rockin.
Thanks for the looks and likes my friends.
Aug.14th
Close inspection of the bakers product, this Breakup Cake is in full on flower. Button sized buds have formed in the last couple days. Not even at 14 hours light yet...Nice. Thanks @Kannabia. Early flowering girls are always welcome here.


Likes
179
Share


@Tropicannibis_Todd
Follow
💩Holy Crap We Are Back At It And Loving It💩
Growmies we are at DAY 28 and she's just killing💀it👌
👉We are in the Preflower stretch 👈
So Shit , I gave them just a tad to much nutes on the last feeding 👈 But I have since fixed it
So I'm starting to pull her over and do some low stress training 🙃 and some defolation 😳
Lights being readjusted and chart updated .........👍rain water to be used entire growth👈
👉I used NutriNPK for nutrients for my grows and welcome anyone to give them a try .👈
👉 www.nutrinpk.com 👈
NutriNPK Cal MAG 14-0-14
NutriNPK Grow 28-14-14
NutriNPK Bloom 8-20-30
NutriNPK Bloom Booster 0-52-34
I GOT MULTIPLE DIARIES ON THE GO 😱 please check them out 😎
👉THANKS FOR TAKING THE TIME TO GO OVER MY DIARIES 👈


Likes
17
Share


@HowtoBubatz
Follow
We’re in the second week of flowering, and the plants are really starting to stretch! 🌿
They’ve gained good height, especially the one without LST, which has grown tall very quickly.
It’s been exciting to watch them reach upward as they prepare for the bud development phase.
Everything is looking good overall, and I’m happy with the progress so far. I’m really looking forward to seeing how the buds will start forming in the next few weeks! 😁✨
Likes
4
Share


@Artemis
Follow
I decided to mainline my plants this week. I've never done HST, but I felt confident and I'm extremely happy with the results.
I also gave each plant a litre of Multifeed because I noticed some leaf necrosis and yellowing which I believe is a bit of nutrient deficiency.

Likes
1
Share


@VirginiaGrownExotics
Follow
Last week she’s really packed on weigh the buds are nice and dense and she’s frosted up real nice time for 48 hours of darkness she’s 85% Milky 15% Amber chop coming soon


Likes
3
Share


@CalGonJim
Follow
8/31, 3:35 PM. I’m gonna get Rosetta Stone down this week for sure.👍👍👍
9/24 2PM Ok I got Dirty Burger today, so for sure Im starting over....STARTING NOW!!!!!!

Likes
11
Share


@kauilmayel1996
Follow
Me siento muy contento con estás auto...
Fast buds sorprendiendo con unos cogollos hermosos y un olor increíble...
No hice el mejor trabajo pero estoy feliz de haber hecho esto...
estoy enamorado con las ruderalis!
Auto de Fast buds un súper 10!
Likes
22
Share


@Dankbudz84
Follow
I’ve added VPD to my dashboard and have now dialed in my climate for a perfect VPD.
Home assitant dashboard controlling lamp, up/down humidity and cooling. Exhaust is going to be used to scrub the air and back into the tent. After adding C02 I’m now doing a sealed grow to take better control of the environment.
I was dealing with high temps I put a evaporative cooler just in case if I need to up the humidity or lower the temps.

Likes
1
Share

@kdifiori_
Follow
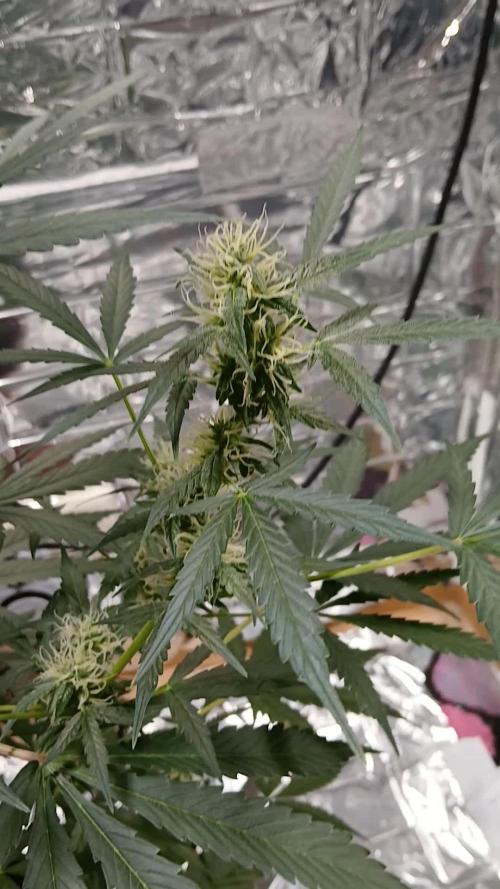
And two months have already passed. In the eighth week, I decided to cut Bloom A and B (my own personal test) and reintroduce Atami's Bcuzz. This week, it drank 3 liters of water with nutrients. The trichomes are already clearly visible and smell just like apricots. Amazing! It is about to begin its third month of life, and the flowers will start to form more and more calyxes. Are you ready?
Likes
14
Share


@Dunk_Junk
Follow
Wow she's doing great this week. Grew another 20cm. Totally out of headroom now.
She's going to yield a lot in a few weeks 😎

Likes
12
Share


@Cannibalgardens
Follow
Well a normal week growth was good those lower branches are starting to grow and she is getting taller .The internode gap or distance seems like it will be close which is good as my height is restricted a bit ... The genetics at seedstockers are awesome you guys if this one grows anything like the others i got then dam she will produce .can't wait to see where I am next week cheers canna family
Likes
7
Share

@Shivashamboom1
Follow
Oltima settimana di flush....lascio ancora qualche giorno per farla maturare una poco di più...preferisco raccogliere quando i fiori hanno più del 50%Di tricomi ambrati.....quindi microscopio alla mano e controllo delle nostre amate ghiandole magiche 😂😂😂💪❤️💛💚

Likes
27
Share


@RDWCGrowing
Follow
3/25/2023
Week 6- Day 1 of Veg (Day 52 overall)
Added my first between changes SILICA Top offs. Was worried that when you add it to pre mixed Nutes that it can make the whole thing turn into a gummy looking substance. I was ready to drain the system and start it over for the week if needed, but no issues adding it to the tank. the Silica going into the Res didn't gummy the system up, it did drop my PH by quit a bit causing me to have to bring it back in balance.
36 Gallons in the Tank
Silica
Add .5mil/Gal = 18Mil
I topped some that needed to be topped, I defoliated some that needs to be defoliated. Since I have moved into Week 6 I have increased the light intensity up to just over 500 maxing it out for Veg Cycle. Next increase will be Week 1 of Flower.
3/26/2023
Week 6- Day 2 of Veg (Day 53 overall)
All conditions looked great. Other than me not putting one of the humidifiers back right which means it didn't work last night so Humidity was lower than I like. But got the Humidifier back on it's stand correctly and it is now pumping away. With that I decided to give the plants a day off from any stresses, no topping, no FIMing, no Defoliation for today. Just some good old soaking up the light rays and the ability to get all the Nutes they would like..
3/27/2023
Week 6- Day 3 of Veg (Day 54 overall)
Looking kind of Bushy today, so I defoliated some, and topped some.
3/28/2023
Week 6- Day 4 of Veg (Day 55 overall)
PH was a little lower than I like 5.74 so I added a few Mil of PH UP and brought it back up to 5.94.
Not much else at this stage, just I topped a little and I defoliated a little.
3/29/2023
Week 6- Day 5 of Veg (Day 56 overall)
Topped a little, Defoliated a little Watched them grow!!
3/30/2023
Week 6- Day 6 of Veg (Day 57 Overall)
Main action today was breaking down my old tent and setting up a new tent and getting my second RDWC system setup and ready for clones. I Topped a little, I Defoliated some and started taking a good look at what I would like to take for clones in the coming days. I have a few bottom branches that look every promising for my clone material on each.
3/31/2023
Week 6- Day 7 of Veg (Day 58 overall)
#3 is at 16" Tall
#2 is at 13" Tall

Likes
4
Share


@Devon420
Follow
Left to flower for 56 days as advised on the seeds, buds grew dense early on which is down to the nutrients, 11 1/4 oz bone dry of 4 plants, happy with the outcome now into bigger and better things
