


Likes
6
Share


@Shadow_grower89
Follow
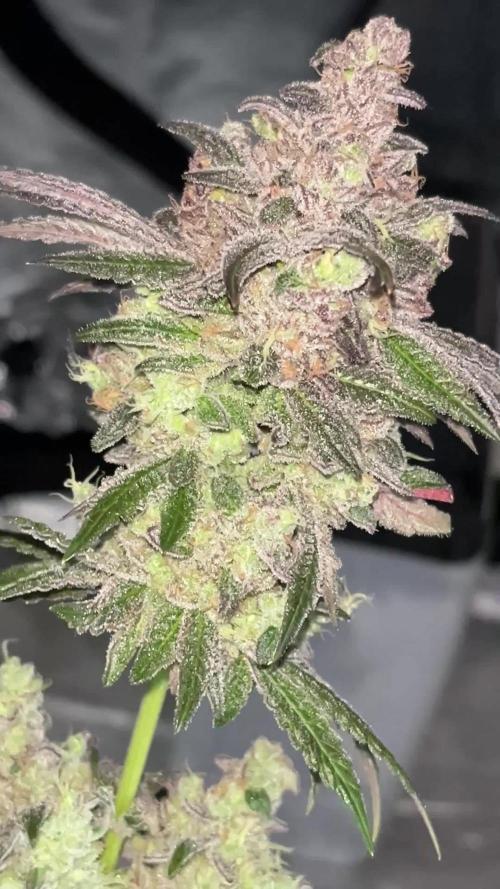
i harvested the top part of my grapefruit plant as i checked the trychones and they were 20% amber the lower half had mostly cloudy but no amber ro im going to give it a last feed then flush in about 5 days for 7 days should bd ok then
..
Ive raised thr grapefruit off the ground to stop fluids mixing between them as one gonna have a few more feeds where the other is on flush
My other plant the bushy banana blaze is foing ok had a good 2-3 weeks i rekkon till i even think about harvest

Likes
41
Share


@Reyden
Follow
Le FF di @Fast_Buds sono velocissime!!! In una settimana sono cresciute molto più delle normali Autofiorenti, ieri ho effettuato il travaso finale nei vasi in tessuto da 11L con tutta la miscela Dogma Super Soil e da ora in avanti only water 💦 vediamo come si sviluppano prossimamente! Le macchie bianche sulle foglie sono macchie di Zeolite Pure 10 micrometri sempre di Dogma Organics!
Likes
7
Share


@Ambz_1990
Follow
Just approaches week 7, I don't know when to initiate the dragon force, kill feed and then flush, iv gotta buy a camera lens this week to check trichomes but I'm nearing the end

Likes
7
Share


@Giovi
Follow
Hi guys! here is how my beautiful girls proceed! they had a nitrogen boost in the first few weeks of flowering, but are now stable, feeding well and having a beautiful streccing (x2 / x3). The pre-flower seems to be forming well and on day 22 from the change to 12/12 the first trichomes appeared! I'm curious about how it will go and very excited 💪🏻 good 4:20 and good cokttivation everyone !!


Likes
Comments
Share


@eldruida_lamota
Follow
Venga familia, cosecha de estas Frosty tooth de Seedstockers, que ganas que tenía.
No veas que pinta marcan estas plantas.
Las flores aparte se ven bien resinosas y prietas, aparte son aromáticas huelen bien fuerte.
En general es una genética con la que disfruté bastante cultivarla, la genética es perfecta para cultivos de floración corta con rangos entre los 20/25 grados en interior, es de dificultad media cultivarla y bien resistente, es excelente para cultivadores algo experimentados y con algo de conocimientos.
Hasta aquí es todo, espero que lo disfrutéis, buenos humos 💨💨.


Likes
10
Share


@ZombieNug
Follow
Week 4 of flower…gettin cheesy in here. Brought the nutrient strength from aggressive to medium as I started to see some tip burn. Amazing to see so many colas forming! Loving my first grow, such an addicting hobby!

Likes
3
Share

@Jardin33ro
Follow
Todo llego a su fin, aun no se cuanto es el peso final pero tieme muy buena pinta. En unos dias actualizamos con fotos del secado y resultado final


Likes
16
Share


@grow_nerd420
Follow
Do I've Start To add some Flowering nutrients. Girls looks happy as hell 🔥💪😁
Now Its all about genetic 👌💪✌️

Likes
6
Share


@Muravushka
Follow
Im still not using the PH meter, but i will use a Canna Aqua nutrients from now they ended 2019, but 5 years later i still have it, so ill use it
Likes
34
Share


@Ashbash
Follow
I believe #2 is ready to pull now. Gonna do that on Monday. #1 still has a while to go but is flowering faster than the true photoperiod plants. Maybe auto genetics speeds it up even though I had to flip to 12-12. Smells sweet and is very sticky to the touch.
Any advice for keeping its smell during drying and curing? Last few have always lost their smell before it's ready :(
Likes
28
Share


@DutchFarmer
Follow
Flipped the tent
Removed two male trop cherry
Replaced them with Cherry Gar see Ya from Ethos and Miami Madness and Strawneapple
Light intensity: 65%%
PPFD: approx. 2000 umol
Light distance: 35 cm
hours day/night: 18/12
Temperature day: approx. 31.5 degrees
RLF day: 78%
Temperature night: 25-27 degrees
RLF night: approx. 70%
VPD value: approx. 0.8-0.9
PH value water/fertilizer solution: 5.9
EC value: 4.5
ventilator oscillation: level 4
Humidifier: off
Dehumidifier: on
🌿 Check Out My Cannabis Community! 🌿
👇 Like, Follow, Comment, and Subscribe to My YouTube Channel 👇
❄️🌱🍻 DutchF4rmer on YouTube (https://www.youtube.com/@DutchF4rmer)
----------------------------------------------------------
🎁 Join Our Discord Community for Weekly Giveaways! 🎁
👉 Join Our Discord Server (https://discord.gg/VMu6rH4a7V)
----------------------------------------------------------
🌟 Get Exclusive Help, Advice, and Mentoring on Patreon! 🌟
👉 Join Our Patreon. (https://www.patreon.com/DutchFarmer)
----------------------------------------------------------
📸 Follow Me on Instagram 📸
👉 DutchFarmer1 on Instagram (https://www.instagram.com/dutchfarmer1)

Violet BAG · Robin Hood Seeds

Tropicana Cherry · Relentless Genetics

Miami Madness · Solfire Gardens

Cherry Gar-see-ya R1 · ETHOS Genetics

Strawneapple · Exotic Genetix
Black Valentine · LIT Farms (Lost In Translation)

Sugar Cane · In House Genetics

Gorilla Cookies Auto · Fast Buds
Banana Purple Punch Auto · Fast Buds

Cereal Milk · Cookies Seed Bank
Likes
11
Share


@Ninjabuds
Follow
The Blackberry Moonrocks have a really solid structure, they're looking super healthy. They're nice and big, but it does seem like they could be stretching a bit more. We might need to adjust the lighting or the nutrients to encourage them to grow taller.
Well, another year has come and gone. Yesterday was New Year's Eve, and I want to wish all of you a happy and healthy 2025. May this year bring you all the things you've been wishing for. Let's make this the best year yet!

Likes
4
Share


@Lazuli
Follow
She goes fast and good yield, mine was a bit bushy but still the buds underneath were still hard
Likes
2
Share


@SonGoku848
Follow
Germinati quasi tutti e 9 ne mancano 2 che sembra proprio stiano uscendo. Travasati nei vasi da 2 litri e dato 200 ml a vaso a ph 6,5
Likes
25
Share


@Highone420
Follow
really loved growing this strain!
it's fast and grows big with amazing tropical and sour smell, sweet taste with a lingering citrus touch!
don't flux much with PH and this gyall gon provide!
Likes
13
Share


@Oyziphar
Follow
This week wasn't as bad as last week 😊 Nights were cold 😰, but not to much rain 😿 and a few hours of sun 😍
Temperatures in the greenhouse were medium : during the day 20°C 💀; min temp 3.5°C ; max temp 31,7°C 😤
Cookies Gelato has turned completely purple 👍👍👍
I defoliated the plants 😙 and had to remove budrot (especially in the Cookies Gelatoes)😨
I took the prettiest Cookies Gelato outside for a photo session in my garden 😍
Probably these will be the last pictures of the plans, before harvesting ! 👍😄
