
Likes
Comments
Share


@Kevs_Best
Follow
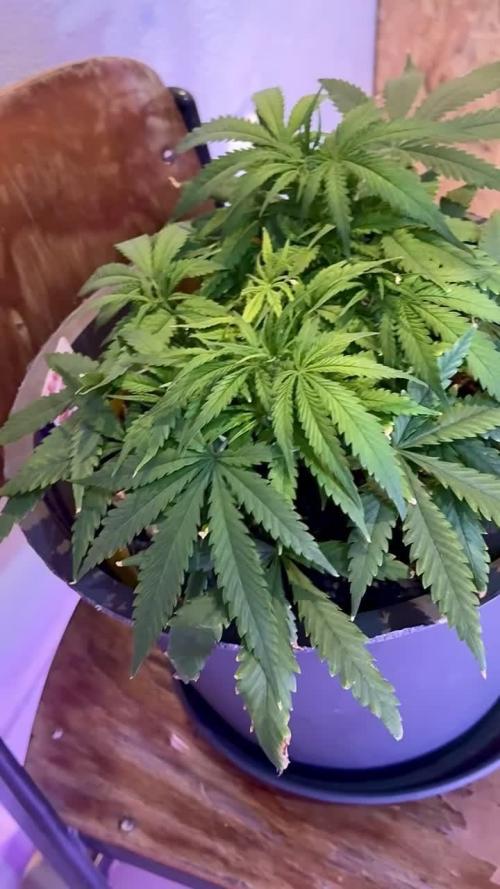
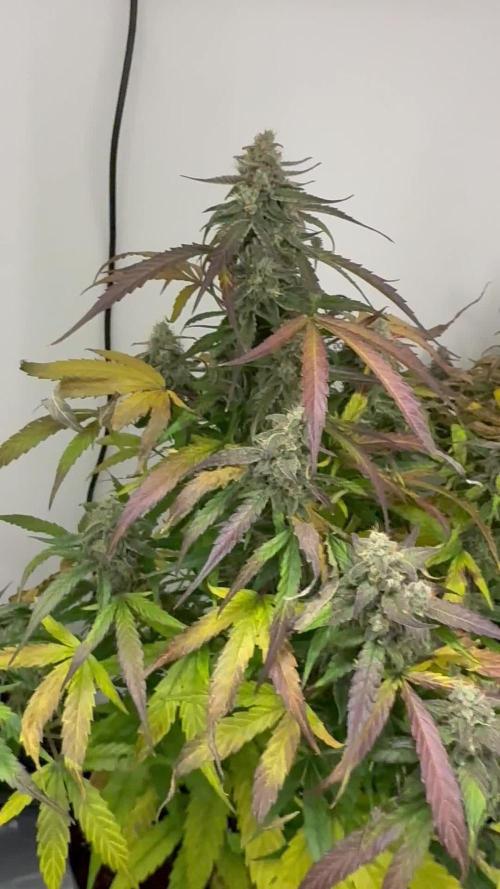
Woche 6 - Übergang zur Blütephase und erste Herausforderungen
Die sechste Woche markierte den Übergang von der Vegetations- in die Blütephase. Bis zum Wochenende wurde weiterhin der Terra Vega Dünger verwendet, mit einem Verhältnis von 30 ml pro 10 Liter Wasser. Am Samstag, dem ersten Tag der Blütephase, wurde jedoch deutlich, dass ein Wechsel auf den Blütedünger nötig war. Leider führte die verspätete Umstellung auf die Canna Terra Bloom Linie zu einem leichten Nährstoffmangel, der sich in den ersten Tagen der Blüte zeigte. Anfang der ersten vollen Blütewoche wurde dies korrigiert, indem vollständig auf Canna Bloom umgestellt wurde.
Die pH- und EC-Werte blieben stabil und optimal eingestellt. Die Temperaturen stiegen minimal an, blieben jedoch bei angenehmen 26 Grad. Mit Beginn der Blütephase startete der sogenannte Stretch, und die Pflanzen legten beeindruckende 2,5 cm pro Tag zu.
Während dieser Woche wurden die ersten unteren Blätter entfernt – ein leichtes Lollipopping, um die Energie auf die oberen Bereiche zu konzentrieren. Die entfernten Blätter wurden getrocknet und sogar laminiert, um den Fortschritt dieses besonderen Grows festzuhalten. Es wurden ebenfalls einige kleinere Zweige und Blätter im unteren Bereich entfernt, um die Belüftung zu verbessern. Das eigentliche, umfassendere Lollipopping wird jedoch erst in zwei bis drei Wochen erfolgen.
Trotz des anfänglichen Mangels aufgrund der zu späten Umstellung des Düngers blieben die Pflanzen insgesamt kräftig, gesund und wuchsen konstant weiter. Der Übergang in die Blütephase verlief somit erfolgreich, und die Pflanzen zeigten weiterhin ihr beeindruckendes Potenzial.
ENGLISH
Week 6 - Transition to Flowering and Initial Challenges
The sixth week marked the transition from the vegetative to the flowering phase. Until the weekend, the Terra Vega fertilizer was still used at a ratio of 30 ml per 10 liters of water. On Saturday, the first day of flowering, it became clear that switching to the flowering fertilizer was necessary. Unfortunately, the late transition to the Canna Terra Bloom line caused a slight nutrient deficiency that appeared in the first few days of flowering. This was corrected at the beginning of the first full flowering week by fully switching to Canna Bloom.
The pH and EC levels remained stable and optimally adjusted. Temperatures increased slightly but stayed at a comfortable 26 degrees. With the start of the flowering phase, the stretch began, with the plants growing an impressive 2.5 cm per day.
During this week, the first lower leaves were removed—a light lollipopping to focus the energy on the upper parts. The removed leaves were dried and even laminated to document the progress of this unique grow. Some smaller branches and leaves were also removed from the lower areas to improve ventilation. However, the main lollipopping will take place in about two to three weeks.
Despite the initial deficiency due to the late fertilizer switch, the plants remained overall strong, healthy, and continued to grow beautifully. The transition to the flowering phase was successful, and the plants continued to showcase their impressive potential.


Likes
4
Share

@Simba732
Follow
Week 4 over for wa girl.
Soil PH was off this week and the ppm levels was way too high after I tested my runoff.
So this week was mainly about flushing and trying to get the medium back to ideal conditions.
So far she’s recovered well and been cruising ever since.
There are a lot of new tops showing up so I need to lightly defoliate and tuck in some leaves to allow even light distribution on the canopy.
Temperatures have been assessed, I could see stress on a few of my plants already.
Really interesting plant though, the smell has started coming out and it’s lovely 😍
Let’s see how everything goes.
Take care beautiful people

Likes
17
Share


@RDWCGrowing
Follow
Week 1 Day 1 - 8/12/2023
1st Water change Day! Such a special time it is when you remove the little bit of Nutes that you gave them as an appetizer and you give them their first real meal.
Added
39 Gallons of Water to my system
SILICA= .5mil/Gal = 19.5 = 20mil
Root Drip = 1mil/Gal = 39mil
Cal Mag= .25mil/Gal = 9.75 = 10mil
FLoraMicro= 3.0mil/Gal = 114mil
FloraGro = 2.0mil/Gal = 78mil
FloraBloom = 2.0mil/Gal =78mil
ORCA= .5mil/Gal = 19.5 = 20mil
Week 1 Day 2 - 8/13/2023
Everything is looking good the roots are making their way to the water and the new grow is looking nice and green.
Week 1 Day 3- 8/14/2023
Everything is right on track, they are looking beautiful and in the praying position all leaves happily lifting towards the light.
Week 1 Day 4- 8/15/2023
A little worried today her birth Twin the BA I am growing out is looking great and is raised towards the light and this one is just slightly under.. Will keep an eye on Her.
Week 1 Day 5- 8/16/2023
Walked in and the humidity was under 60.... ohh noooooo.. So I added 2 humidifiers to the tent and attached them to my InkBird controller which is set to 62.
Also looking at the roots and she has some poking out the bottom but just not in the water yet.. Luckily we are set for 14 days before next water change so the system will stay stable and her sister already has roots in the water so she should only be a day or two behind.. we will just keep tracking but she is delayed.
Week 1 Day 6- 8/17/2023
Roots in the Water!!! Huston, we have a successful launch. This grow is on!
Humidity was a little low this morning so I refilled the humidifiers. Other than that the temp looks great, the PH looks good, the PPM looks good the plant is in the praying position and all damage from the little drowning from over filling the cloning machine seems to have been fixed. Happy Happy.
Week 1 Day 7- 8/18/2023
Yay.. week 1 in the books, roots in the water growth has started. Everything for growth and environment is looking good and on track, there are a couple of mutations with this Lady will keep an eye on those leaves.
IMO this grow is going A lot during this week 1 then week 1 of the last grow when I had them drowning.
Really excited on how this grow is going to come out.


Processing
Likes
6
Share


@ladyjane
Follow
7/18 - Transplanted all three ladies into 3 gallon pots. As I did I sprinkled Oregonism XL (mycorrhizae) to the root ball to assist the roots in adhering happily to the soil. Then I watered with RO water and CalMag.
7/20 - Fed with liquid nutrients
7/22 - Started the brew on Terp Tea Grow. Gave all a light water and a foliar spray of Extreme Serene.
7/24 - Top dressed with Elemental (calcium supplement) and watered with the Terp Tea Grow. Both ladies are looking healthy and strong. They are full and vibrant. Will be flipping to flower at the end of next week!
7/25 - Check out Struggling Jack! She is the biggest one of all three! You would never guess she ever struggled. It's my opinion that the struggle actually made her stronger. Go Jack!

Likes
6
Share


@LX1977
Follow
J-29 arrosages eau (pH 6.6)
J-31 arrosages avec engrais (pH 6.6)
J-33 arrosages eau + diamond sugar (pH 6.5)
J-35 arrosages eau + nématodes bénéfiques (2eme phase du traitement contre les larves de mouches de terreau)
Processing
Likes
13
Share


@GrowGuy97
Follow
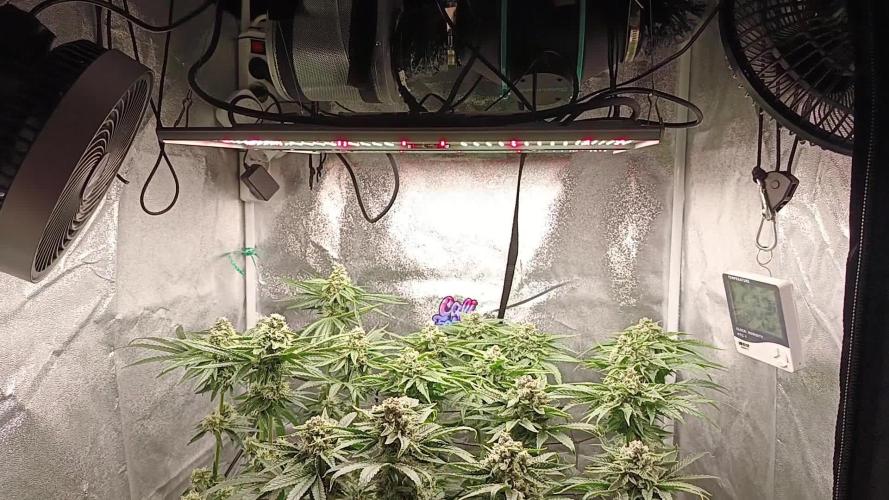
Flower day 10 - Everything is going great so far, currently trying to find a bigger dehumidifier cause RH is staying a little higher than I would like! Thanks for following & happy growing friends!🌱✌️🏼
Flower day 11 - Finally got the last 2 plants from the first run cut down & now these ladies have much more room! Watering tonight with just PH water. Happy growing friends!✌️🏼🌱
Flower day 12- Buds are starting to show, can’t wait to see how different they all look😍😍
Flower day 16 - End of Week 8, all the plants are coming along beautifully! Definitely will not have 10 In my next flower run though the tent is way to packed lol! Thanks for following & happy growing friends!✌️🏼🌱


Likes
22
Share


@Targona
Follow
10/10/2022 - 64 days since my little girl sprouted from seeds🌱
The fifth week of flowering of my Mandarine XL 🍊🍊🍊
Nutrients:
Jungle Indabox - this week I keep serving and adding Jungle Indabox Environ X - bud stimulator 🌼🌸🌼
Advanced Nutrients - Big Bud - I canceled the bud stimulator mix and stayed with Jungle Indabox because the girls got a little burnt, the classic brown color appeared on the tips of the leaves 🍃🍂
I stuck with Bud Candy, all my girls need plenty of carbs 🍭🍭
Atami - ATA Calmag - when growing under LED lights it is recommended to use Calmag and Atami is an excellent brand
Training:
With Mandarine XL, I did not defoliate as much as with BCN, it was not necessary, I mainly cut off the large leaves that shade the light 🍃🍃
Light: Believe - the best light of sponsor Mars Hydro TS 1000 💡💡
In general:
The plant is strong, manages nutrients well, absorbs as needed.
Its buds form mainly at the ends of the branches and are dense.
She Is in full bloom, I expect her to bloom for at least another two weeks 🏵️💮
It smells really wonderful, she revealed her strongly fruity scent 🍋🍊
Thanks for the likes and you can follow me on Twitter 🐦: @ Targona666
See you soon 😍

Likes
26
Share

@Targona
Follow
02.10.2022 - 56 days since my little girl sprouted from seeds🌱
Fourth week of flowering for my Bruce Lemon Diesel 🍋⛽🌻
Nutrients:
Jungle Indabox - I serve the same as last week
Advanced Nutrientiens - Bud Candy - carbohydrates for my plants 🍭🍭
Building Stimulators 🌼🌼🌼:
Jungle Indabox Environ X
Advanced Nutrientiens - Big Bud - I applied this week for the last time
ATAMI - ATA CALMAG - When growing under LED lights it is recommended to use Calmag and Atami is an excellent brand
The plants tolerate the nutrients well, some of the lower leaves showed slight signs of burning, they turned a little yellow and the tips of the leaves were brown 🍃🍃
Therefore, I will continue to use only one Bud Stimulator and that - Jungle Indabox Environ X, I will leave Big Bud from Advanced Nutrientiens for other plants.
Training:
Defoliation: I still remove the large and lower leaves so that they do not shade themselves 🌞🌞
I'm not planning a bigger defoliation until next week, the girls are a little leafy, but not enough to need more trimming 🌴🌴
General: The girl is already blooming strongly, dense buds are forming 🌸🌸, the branches reach the same height, exactly as I wanted 👍 At the moment it has more leaves than I would like, but I will do more defoliation later, as I wrote 🍃
I will adjust the nutrients from the next watering, I will leave the only bud stimulator 🏵️
🏵️
The girl no longer grows tall, she puts all her strength and energy into her buds 🌸
Light: Believe - the best light of sponsor Mars Hydro TS 1000 💡💡
Smell: The whole box already smells a lot, the smells mix and flow out of the box, when I open the tent, I get a strong smell of flowering cannabis 🍇⛽🍬
Thanks for your opinions, smile and fun with my diary, you can follow me on Twitter 🐦: @targona666
See you soon 😍

Likes
2
Share

@Pecci
Follow
Pestíky začínají tmavnout , šišky získávají z na objemu a tvrdnou 🤟 Vůně borovice se prolíná s lehce mátovou a podtóny pepře 😋
Likes
43
Share


@Legendaryseedthumb
Follow
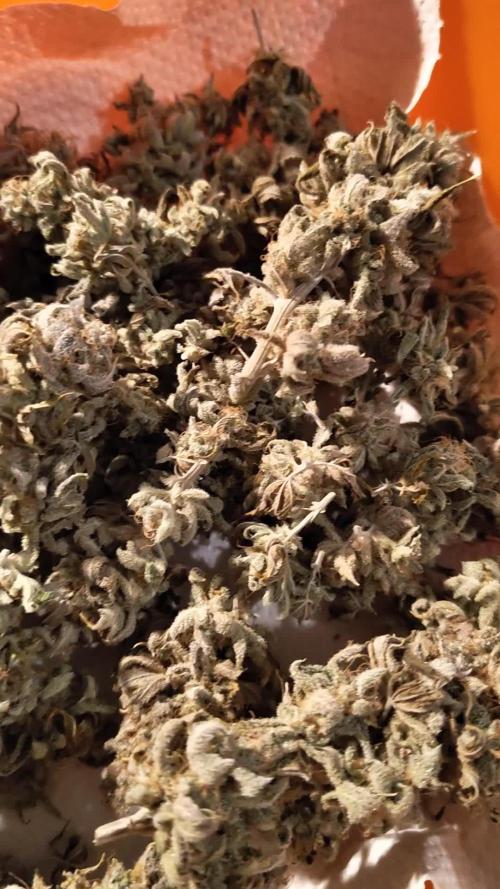
Amazing!. The big plant smells so good
Drying day 6: they are still moist! A very good drying session is going on over here. The longer the better!
Trimmed today after 10 days. Ended up with 80grams pure buds! Super nice chunky buds smells amazing and 8grams of sift from the leaves.
I’ll filter the leaves again with my bubble bags
Likes
4
Share


@DrewbieDoobieNoobie
Follow
Hello Folks, 17 days from spraying the CS on MILF A we got Lots of nanners. I have a theory that the stronger the Colloidal silver PPM the more it will affect the plant I have been told that 30 to 50 ppm is good. The stuff I have clocked in at 158 PPM with my meter the bottle said 500 ppm so either way it did its job but I only sprayed 2 nodes and 95% of the plant started growing balls. there was 1 branch that had all girl parts on it see the pic above. Today was the day I hacked her up as she started to pop in the tent and I will find out how many buds got knocked up in 2 months or so, I did do a few on purpose with a paint brush and marked then with a loose Zip tie around the branch. I have been reading that the way to tell if a bud has been pollenated that the hairs will turn brown as a first sign and then the calyx will swell with the seed. this is my first time as a "pollen chucker" I really hope these will makes feminized seeds for this strain it looks like its worth keeping around. heat and stress resistant and I am seeing minimal tip burn, they are heavy drinkers. I will have to watch the 5 gallon pots closely every day. They look promising lets see what happens. Stay safe y'all Cheers and don't forget our fallen Hero's this Memorial Day
Likes
161
Share


@DogDoctorOfficial
Follow
Pow Pow Pow what can i say, i mean even the frogs here were hypnotized with this monstrosity size Mama she is all one can ask and so much more, wen harvesting these cutie pie beast Lady i felt the need to break her in small peaces , or smaller that the them baseball bats collas hihihi OMG them colas OMG .
She rested for 2 weeks in the rack with temps and RH at 60/60% and she was ready for trimming, trimming her was super easy since her frutes are compact and dense , end up with great trim that i will do extractions asap, have the felling she will give me great returns <3 <3 <3
A true pleasure and delight all the way from seed to harvest , now will came the big and final test and with it the smoke review hehehe, thank you SSSC for the opportunity and for everything and also big shout out to GD without the platform nothing of this wold have been possible <3 <3 <3
l
As always thank you all for stopping by, for the love and for it all , this journey of mine wold just not be the same without you guys, the love and support is very much appreciated and i fell honored and blessed with you all in my life <3 <3 <3
#aptus #aptusplanttech #aptusgang #aptusfamily #aptustrueplantscience #inbalancewithnature #trueplantscience #sssc #monstergirl #dogdoctorofficial #growerslove
With true love comes happiness <3 <3 <3 Always believe in your self and always do things expecting nothing and with an open heart , be a giver and the universe will give back to you in ways you could not even imagine so <3 <3 <3
Friendly reminder all you see here is pure research and for educational purposes only
<3 <3 <3 Growers Love To you All <3 <3 <3
Strain info :
About Auto Purple OG Punch cannabis seeds
To create Auto Purple OG Punch we crossed our feminized Purple Punch with an autoflower OG Kush. The original Purple Punch is a cross between Larry OG and Grandaddy Purple, illustrious and stable indica dominant THC-rich heavyweights!
The total grow cycle from autoflower seed to harvest is a short 9 weeks. You will be rewarded with a large yield of sticky resinous buds, up to 600g/m2 indoors. If you’re looking to grow a high quality indica auto made with cannabis cup winning genetics you will love Auto Purple OG Punch. THC content is always up-to/around 20%. Auto Purple OG Punch effects are intense, euphoric and relaxed. She also contains around 1% CDB which contributes to the very smooth, chilled smoke. Expect a mouthwatering blend of sweet tasting candy, dark fruit and hints of spice. A real connoisseur cocktail with powerful effects!
She normally reaches around 1m tall. But in optimized conditions with LED grow lights you can see occasional monster plants up to 2m tall with XXL yields. Auto Purple OG Punch is easy, potent and heavy yielding indoors. She also delivers well outdoors - such as the balcony or garden.
Auto Purple OG Punch is a perfect, powerful strain for a quiet relaxed day. The calming indica body effect is very satisfying and de-stressing


Likes
16
Share


@DeepRootsGrowTrees
Follow
Fast Buds White Widow is a strain that is easy to grow she can handle some stress if you have issues. She makes a massive bud on the main stem mine was 80 grams freshly trimmed!! She doesn't stretch much if your growing in a confined space. I'll repost what the total is dried and cured and smoke report as well.
Smoke Report Update she's Earthy, Piney, with sweat citrus flavors, smooth pull, earthy, piney up front then then that sweat citrus when you exhale, really clean and smooth enjoyably smoke hits you quickly and then mellows out she has the ability to change your motivation level but not put you on the couch the rest of the day or night for the most part!!! 70% Indica 30% sativa. The total weight of the grow of 535 grams wet weight, when dried out to it was a total of 178 grams dry. That's a loss of 67% of the weight.
She's a plant with thricomes that cover the fat, stinky, and sticky buds. I didn't have any problems with her. She can take some nuts for a autoflower as she never showed any signs of nutrition stress. Easy grow, strong plant, dense sticky buds, she smells sweat with a earthy note. I would recommend to any grower new grower you really can't mess her up, advanced grower she will give you a great harvest.
Continue to grow your own medicine if you can or grow for someone you know that can't continue to make a difference in lives!!! Growdiaries is a great place to learn and connect with other like minded individuals!! Stay growing my friends!!!
Thank you for looking at the diary!!!
Likes
4
Share


@CalGonJim
Follow
3/4 👍
3/5🍓🦍Z🍓🍑CBD they are all responding well to the watering yesterday and I used great white soil inoculant that seems to make the biggest difference. The leaves are growing huge almost too big. I can see these are going to be much larger than the space, even though I only used 2 gallon pots. i’m going to have to top them all in order to fit them in one tent. They are just beautiful and healthy and perfect in every way except for the CBD because I dropped her when I was doing the transplant. 👍.
3/6 I mixed up 3 mL of silica into a gallon three separate times. I did a heavy watering of all the plants today.💦
3/7🍓🍑👍
3/9 🍓🍑💦💦💦
3/10🍑🍓👍
Likes
Comments
Share

@Philipp420
Follow
Herstellerangaben: Ernte an BT 56-63
Ernte hier: BT 71
Lampe Leistungsverlauf in % (von 190W) über den Grow und dazugehörige PPFD Werte:
BW1-3: 40-60%, langsamer Anstieg von ca 400 auf 650 PPFD
BW 4: 60%, ca 650 PPFD
BW 5: 65% ca 700 PPFD
BW 6-8: 75%, ca 800 PPFD
BW 9: 70%, ca 750 PPFD
BW 10: 60%, ca 600 PPFD
Trichome:
Ernte bei circa 80% Milchig, 10% Klar und 10% Bernstein


Likes
3
Share

@Nikki78
Follow
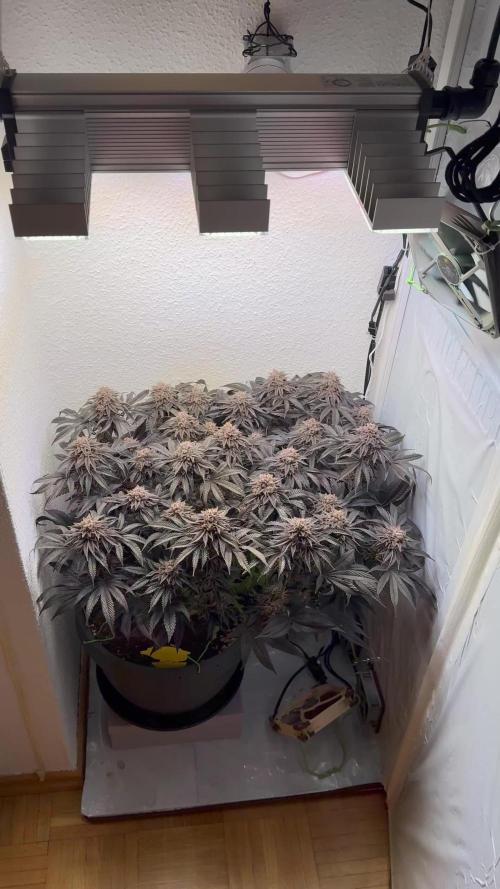
Das wars. :) Habe nun geerntet und die Pflanzen 8 Tage in der Hazelbox getrocknet. Ich habe mit den Titan Samen am 5. Oktober (Seeding) angefangen und bin praktisch am 1. Januar mit Trocknung fertig. Das ist wirklich super schnell. Die Pflanzen hatten zum Schluss ca. 60-65 cm Höhe. Die Pflanzen hatten richtig, richtig viele Blätter, was man auch beim Schneiden nochmal gemerkt hat. ;) Ich habe getrocknet 176 Gramm aus den 3 Pflanzen insgesamt. Die Buds sind richtig fest und klebrig.
Es riecht sehr süßlich (bisschen in eine Bubble Gum Richtung) und die Buds glitzern sehr stark. Eine tolle Genetik. Für diesen Grow habe ich wenig Zeit und Arbeit reingesteckt. Die Erde ist vorgedüngt, das Bewässerungssystem funktioniert, die Box macht die Programme automatisch. Ich musste also nur maximal 2 mal die Woche den Tank auffüllen und ein bisschen extra gießen. Kaum Arbeit, aber ein echt solides Ergebnis in der kurzen Zeit auf so kleinen Pflanzen
