
Likes
Comments
Share


@Growshh
Follow
Chop Day Today....66 days and I feel the runts and Mac could have gone longer but the godfather is crossings 30% ambs and the stash is almost empty!


Likes
6
Share


@Budking420
Follow
These girls are throwing some gigantic buds already! I'm very excited for this run of strawberry banana. There is already some trichomes building up as well. I had to use a little neem oil to control mildew on mostly the right plant as the left one had hardly any. I'm very pleased with the size shape & overall vigor with these ladies. Check back next week to see just how fast she buds! And dont forget its 4:20 somewhere!!!!!

Likes
24
Share

@GermanGrow182
Follow
Woche 6 begann mit einem Schrecken. Zuviel Stickstoff hat die Blattspitzen leicht verbrannt, daher danach etwas weniger biogrow gegeben.
Ansonsten Strecken sie sich und bilden budsites.
Ich habe einen entfeuchter installiert, um die Luftfeuchtigkeit im Zelt auf 55%zu reduzieren.
Das Video ist von Tag 45
Es läuft gut 👍
Bis nächste Woche ✌️


Likes
2
Share


@Ninjabuds
Follow
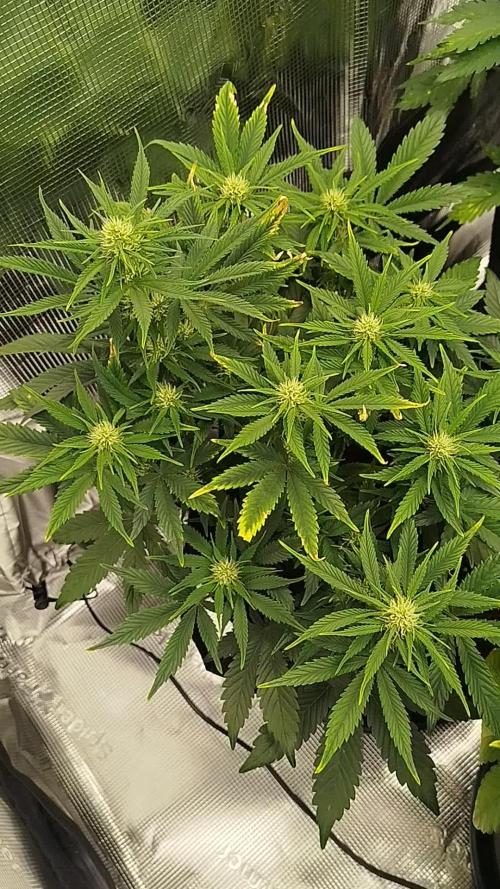
My Skunk Apple Run plant is still a bit young, but I can see those buds starting to form. It's a bit of a slow starter, with buds popping up all over the place instead of a nice even line. We'll see if adjusting the light cycle or its food might help it along. I'll keep you posted on any changes.
The past few weeks have been so beautiful, watching the plants grow and change. It's amazing how something so small and fragile can turn into something so strong and vibrant. Now that they're getting ready to bloom, it feels a little bittersweet. I'm so excited to see the finished product, but I'll definitely miss having them around while they're growing.
Likes
27
Share


@Lordshiva83
Follow
Esta semana abri a porta do armário e parece que tinha entrado numa loja de doces e gomas 🤩 maravilhoso, continuam muito bem as minhas rainhas a engordar e a crescer muito bem, a runtz muffin já está cheia de THC 😍 e está muito gordinha, a shiskaberry tem um cheiro realmente muito doce, faz lembrar compota de morango 🍓, BlueBerry OG igualmente muito doce com toque a mirtilos e amoras. Até para a semana companheiros de cultivo ✌️

Likes
Comments
Share


@eldruida_lamota
Follow
Vamos familia, actualizamos la tercera semana de vida de esta Amaretto Tarmac de Seedstockers.
Empezamos abonando ya con varios productos de la gama Agrobeta.
Temperatura y humedad dentro de los rangos correctos, 18 horas luz, 6 oscuridad.
Una lástima que de todas solo aguanto una, aún así seguiremos con el diario hasta el final.
Ya trasplanté a sus 7 litros definitivos.
Agrobeta:
https://www.agrobeta.com/agrobetatiendaonline/36-abonos-canamo
Hasta aquí todo, Buenos humos 💨💨💨

Likes
28
Share


@Go4Gav
Follow
Had to trim a little early because of a last minute holiday but got her done .. 16 hours of it 🤦 ..
Some massive long buds on them .. rather easy to trim because effort was put in before hand deleafing an tidying up
Time will tel now 🤗😁
Likes
52
Share


@GrowZex
Follow
Hello beautifull people!
Final week of feeding. Im already feeding nutes and water on and off. After this week will start a 2 week flush.
The fall colours are setting in which is pretty nice. Other than that frosty and smelly.
You can tell the end is near. Leafes yellowing a lil, hairs turning brown.
Recorded the grills to this time.
Likes
30
Share


@CanadianFillmore
Follow
Welcome growfessors to my outdoor 2021 grow! It's been 4 years since my last outdoor grow.
We've got LSD and Green Crack outside, each one in half a 55 gallon container, in pro-mix HP, with Gaia Green 4-4-4 all purpose powder nutrients.
Thanks for stopping by growfessors 👽🌳💚

Likes
6
Share


@sanibelisl
Follow
Girls have settled into summer camp nicely. Worries about not taking the transplant diminish more each day and I am gaining more confidence in strong roots with each passing day as well. I had to build a supplemental lighting system for the greenhouse. Here at home we are experiencing a wetter than usual summer so far and with that brings clouds. So I needed to do something. So I built a new greenhouse light. It cranks out some light. Currently at canopy I’m measuring around 600 PPFD. Plants are loving it.
All three plants sexed and all are females. Didn’t think otherwise.
So the formula 707 is performing better than expected. Water retention is crazy. Watered the plants on Sunday with a gallon each , today is Thursday and no water needed. Going to try and get to Sunday for a whole week between watering.

Likes
5
Share

@KannaGrowing
Follow
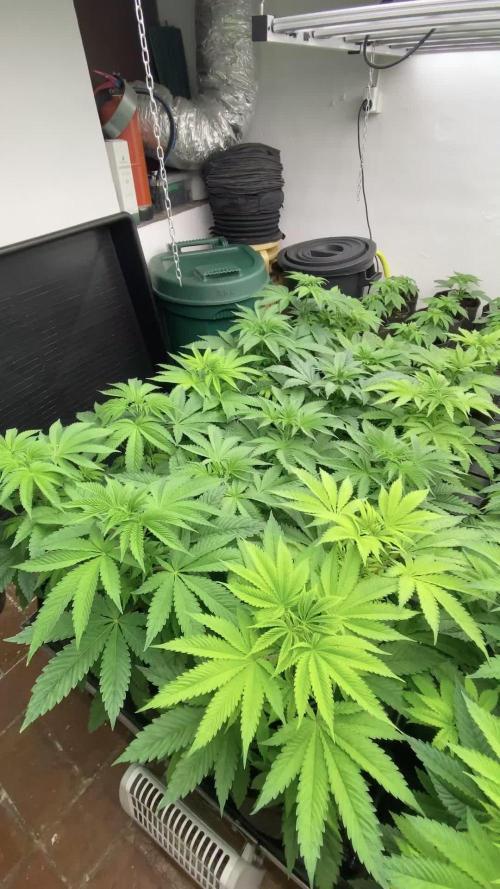
Ha llegado el momento de pasar a la fase floración.
Ajustamos nuestras luminarias LazerLite Pro 720w a 12 horas y subimos la potencia al 50%.
Seguimos con riegos alternos de fertilizante y agua.

Likes
9
Share


@SilverBud
Follow
I had to defoliate major part of the leaves, due to week lights that I have.
She wasn't getting light at the bottom down.
Hope she recover
Likes
16
Share


@MadeInGermany
Follow
Info:
Unfortunately, I had to find out that my account is used for fake pages in social media.
I am only active here on growdiaries.
I am not on facebook instagram twitter etc All accounts except this one are fake.
Have fun with the update.
Hi everyone :-) .
This week she has continued to develop very well.
She reacts very well to the training :-).
It was poured twice with 1.2 liters each this week.
Everything was cleaned and refilled.
Stay healthy 🙏🏻
You can buy this Strain at
https://www.barneysfarm.com/blue-cheese-34
Type:
Blue Cheese
☝️🏼
Genetics:
Blueberry
X
Original Cheese
👍
Vega lamp:
2 x Todogrow Led
Quantum Board 100 W
💡
Bloom Lamp :
2 x Todogrow Led
Cxb 3590 COB 3500 K 205W
💡💡☝️🏼
Soil :
Bio Bizz Coco
☝️🏼
Fertilizer:
Green House Powder Feeding
☝️🏼🌱
Water:
Osmosis water mixed with normal water (24 hours stale that the chlorine evaporates) to 0.2 EC. Add Cal / Mag to 0.4 Ec Ph with Organic Ph - to 5.5 - 5.8
Likes
2
Share


@DrBud420
Follow
02.11.'24
After 5 days of drying, this little girl who was a little bigger than a meter gave 950 grams and a little bit of popcorn...this picking was 870 and a little bit of popcorn, and 4-5 weeks ago during a storm, one branch broke, which yielded about 100, but let's say 80 for sure, a total of 950 grams of beautiful, huge, potent buds
Likes
23
Share


@Chubbs
Follow
420 Fastbuds Week 4
Gorilla Zkittlez Auto
What up what up. Hope all is well with everyone's grows. This week's update is exciting especially being that the girls transitioned into flower. Showing preflower sites all over. It's a beautiful site. I did add a little GH Calimagic to the feeding to stop the rust spots from getting any worse. Seemed to do the trick. All in all Happy Growing
Likes
19
Share


@berserker1
Follow
Gave her a big dose of GO bloom and GO bio bud, and molasses. I just feed her once a week, 16L is what I take down .

Likes
3
Share
@eldruida_lamota
Follow
Que pasa familia, vamos con la séptima semana de floración de estas Barcelona Puff feminizadas de Seedstockers.
Vamos al lío ,se trasplantaron en macetas de 7 litros definitivamente.
El ph se controla en 6.0 , la temperatura la tenemos entre 25/21 grados y la humedad ronda el 50%.
El ciclo de floración puse 12h de luz, el foco está al 100% de potencia.
De momento van creciendo a buen ritmo y tienen un buen color, la flor ya empezó a engordar y a tricomar, por el momento todo bien.
Agradecer a Agrobeta por el envío del kit gold series para la temporada 🙏.
- os dejo por aquí un CÓDIGO: Eldruida
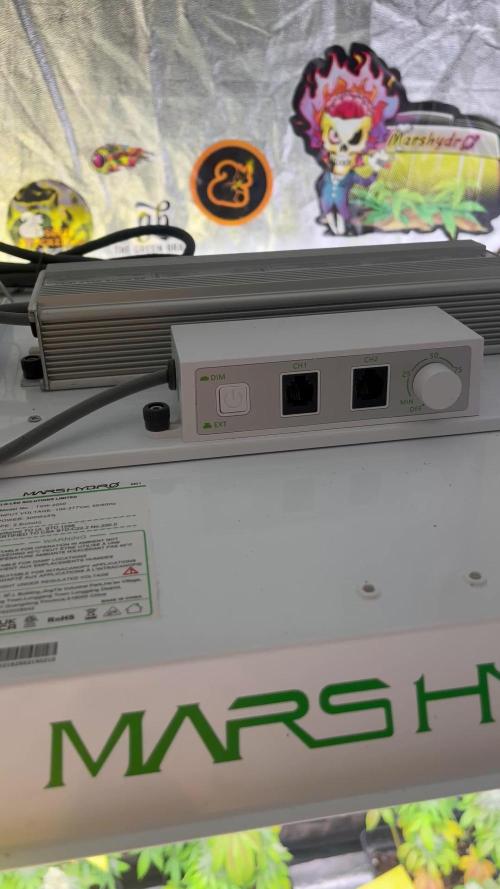
Descuento para la tienda de MARS HYDRO.
https://www.mars-hydro.com
Hasta aquí todo, Buenos humos 💨💨💨


Likes
34
Share


@AshBrand
Follow
Welcome!
In this grow we have:
2x Platinum Wedding Crasher
2x Gelato 41
1x Sour OG
2x Lemon Kush
Germination/Rooting - 14 Days
9/17/21 - The clones look good in solo cups of soil. We will transplant into 5 gallon pots in the grow tent after they fully root in the cups.
9/18/21 - Looks like the clones are doing well in soil! We are so excited to grow these out. The clones came from a very highly respected grower.
9/19/21 - No ugly growth. All clones look amazing! We upgraded the light to a Mars TSW 2000.
9/20/21 - They are looking good and most likely rooting throughout the cups. I’ll give them a little bit of water today. I want the roots to go looking for the water so I’ve kept them slightly dry.
9/21/21 - They look happy. I will let them just do their thing… We are waiting on our Mars TSW 2000 light to show up anyways. No roots visible from the drainage holes in the cups.
9/22/21 - Looking really healthy and growing nicely. I’m excited for them to fully root in the cups so we can transplant them into the tent. The Mars TSW 2000 should be here in the next few days.
9/23/21 - Looking so good! We can’t wait to get these under the Mars TSW 2000 in the tent. They smell and look great.
9/24/21 - The clones look really good except for one Sour OG. It wilted and died, roots did not take unfortunately. I have a Lemon Kush started from seed we will grow in place of the dead Sour OG. Today we got our Mars Hydro TSW 2000 light. We will be hanging it and updating with pics/videos.
9/25/21 - They look amazing. Lots of growth while rooting.
9/26/21 - So far so good. Watering when the cups get light in weight. In just a few days we will be transplanting. See the video for today, we hung the Mars Hydro TSW 2000!
9/27/21 - Watered them yesterday, they look healthy. The Lemon Kush isn’t a clone, it is from seed. It’s the smallest girl but it’ll perk up quickly.
9/28/21 - Transplant day!! The clones are looking really good and it’s time to transplant into the 4x4 under that Mars Hydro TSW 2000 at 50% intensity. Check out the pictures and videos from today!

Likes
74
Share


@RockoCalenberg
Follow
🌸 Blütetag 59 / 📅 Gesamttag 119
🌡️ Klima
Draußen merkt man inzwischen deutlich, dass Frühling ist.
Im Zelt läuft das Klima weiterhin ruhig und stabil und die VPD-Werte bewegen sich konstant im grünen Bereich. Insgesamt also sehr ähnliche Bedingungen wie in der letzten Woche.
🌱 Pflanzenstatus
Die Ziellinie kommt langsam in Sicht, auch wenn noch ein kleines Stück Strecke vor uns liegt.
Die beiden Pflanzen zeigen inzwischen deutlich unterschiedliche Reifestadien.
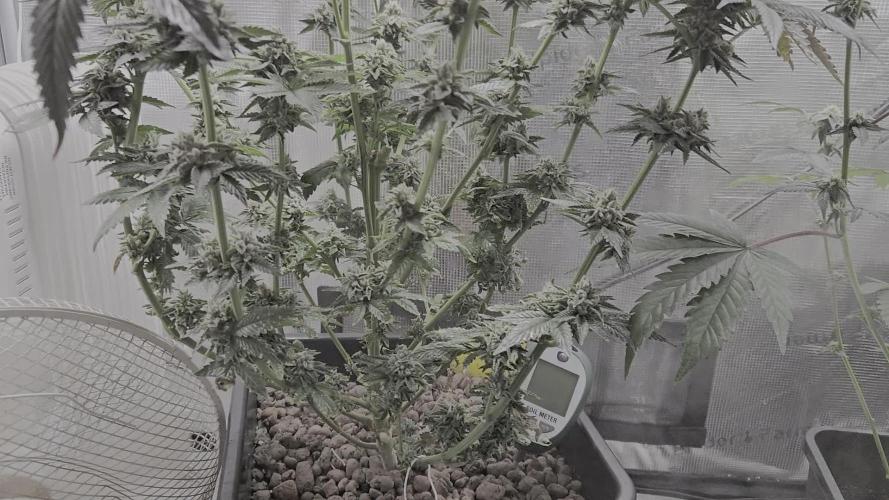
Die Triangle Sherbet Kush wirkt schon ziemlich weit: kaum noch neue weiße Härchen, stark angeschwollene Buds und insgesamt deutlich mehr Harzproduktion.
Die White Gushers 33 arbeitet dagegen weiter an neuen Blüten. Besonders an den Tops sind noch frische Pistillen zu sehen und die Buds legen weiter an Masse zu.
Interessant ist auch die Entwicklung innerhalb der Pflanze:
Die drei höchsten und kräftigsten Triebe foxtailen leicht, während einige der tieferen Seitentriebe bereits weiter wirken und teilweise deutlich weniger weiße Härchen zeigen.
🌼 Blütenentwicklung / Reife
Bei der Triangle Sherbet Kush zeigen sich inzwischen klare Reifezeichen. Unter dem Mikroskop sind bereits die ersten bernsteinfarbenen
Trichome zu erkennen 🔬.
Außerdem stehen einige Blätter bereits kanuartig nach oben, und die Pflanze beginnt sichtbar, Nährstoffe und Farbe aus den Blättern in die Blüten zu ziehen.
Die White Gushers 33 verfärbt sich ebenfalls zunehmend, wirkt aber insgesamt noch etwas später im Reifeprozess. Hier sind die Trichome überwiegend milchig, teilweise noch nicht ganz trüb.
👃 Aroma
Beim Öffnen des Zeltes entwickelt sich inzwischen eine schöne würzig-fruchtige Gesamtmelange.
Die Triangle Sherbet Kush bringt zunächst klar die würzige Kush-Komponente mit. Wenn man die Buds leicht berührt, kommt aber deutlich die bananige Note 🍌 aus der Sherbet-Abstammung durch – also ebenfalls fruchtig, aber eher cremig-bananig als süß.
Die White Gushers 33 geht aromatisch eher in eine gasigere Richtung ⛽, mit etwas Funk und Frucht darunter. Also keine Candy-Süße, sondern eher ein Mix aus Gas, leichter Frucht und einem kleinen funky Twist.
📊 Fazit
Aktuell zeigt sich immer deutlicher, wie unterschiedlich sich die beiden Genetiken in der Endphase entwickeln.
Die Triangle Sherbet Kush wirkt klar weiter und reifer, während die White Gushers 33 oben noch weiter Blüten nachschiebt, in den tieferen Bereichen aber teilweise schon erstaunlich weit ist.
🔭 Ausblick
Rein vom Eindruck her könnte die Triangle Sherbet Kush bald fallen, während die White Gushers 33 vermutlich noch etwas mehr Zeit gebrauchen kann. Da eine Teilernte hier nicht ganz unkompliziert wäre, bekommen beide vorerst noch etwas Zeit.
Mich würde aber interessieren, wie ihr das handhaben würdet:
Würdet ihr in so einer Situation schon separat die Kush ernten oder beide Pflanzen noch zusammen stehen lassen?
Und wie macht ihr das generell in der letzten Phase vor der Ernte – gebt ihr euren Pflanzen noch eine Trockenphase 🌵 oder Dunkelphase 🌑, oder lasst ihr alles einfach normal weiterlaufen?
Auch spannend: Zu welcher Tageszeit erntet ihr am liebsten? ⏰
Bis nächste Woche – bleibt sauber und gesund! 🌿
🌸 Flower Day 59 / 📅 Day 119 Overall
🌡️ Climate
Outside you can clearly feel that spring has arrived.
Inside the tent the climate remains calm and stable and the VPD values stay consistently in the optimal range. Overall the conditions are very similar to last week.
🌱 Plant Status
The finish line is slowly coming into view, even though there is still a little bit of track left.
The two plants now clearly show different stages of maturity.
The Triangle Sherbet Kush already looks quite far along: almost no new white pistils, heavily swollen buds and overall a lot more resin production.
The White Gushers 33 on the other hand is still working on producing new flowers. Especially on the tops fresh pistils are still appearing and the buds continue to gain mass.
An interesting observation inside the plant structure:
The three tallest and strongest tops are slightly foxtailing, while some of the lower side branches actually seem further along and already show far fewer white pistils.
🌼 Flower Development / Ripeness
The Triangle Sherbet Kush already shows clear signs of maturity. Under the microscope the first amber trichomes can already be spotted 🔬.
Some leaves are also starting to canoe upwards, and the plant visibly begins to pull nutrients and color from the leaves into the buds.
The White Gushers 33 is also starting to fade, but overall it still seems slightly behind in the ripening process. Here the trichomes are mostly milky, with a few still not fully cloudy yet.
👃 Aroma
When opening the tent a nice spicy–fruity blend fills the air.
The Triangle Sherbet Kush first presents a spicy kush profile, but when the buds are lightly touched a distinct banana note 🍌 from the Sherbet lineage becomes noticeable — fruity as well, but more creamy banana-like than sweet.
The White Gushers 33 goes into a different direction aromatically. It leans more toward a gassy profile ⛽, with some funk and fruit underneath. So not candy sweet, but more a mix of gas, light fruit and a slight funky twist.
📊 Summary
At this point it becomes increasingly clear how differently the two genetics behave in the final phase.
The Triangle Sherbet Kush clearly appears more mature already, while the White Gushers 33 is still pushing new flowers on the tops, even though some lower parts already look surprisingly advanced.
🔭 Outlook
From the current impression the Triangle Sherbet Kush might be ready quite soon, while the White Gushers 33 could probably use a bit more time. Since doing a partial harvest here would not be the easiest option, both plants will likely stay a little longer for now.
I’d be curious how you guys would handle this situation:
Would you already harvest the Kush separately, or leave both plants a bit longer and harvest them together?
Also interested to hear how you approach the final phase before harvest. Do you give your plants a dry period 🌵 or a dark period 🌑, or do you simply let everything run normally until harvest?
And one more thing that always comes up in discussions: what time of day do you prefer to harvest? ⏰
See you next week — stay safe and healthy! 🌿
