The Grow Awards 2026 🏆 


Likes
Comments
Share
@Gram_Solo
Follow
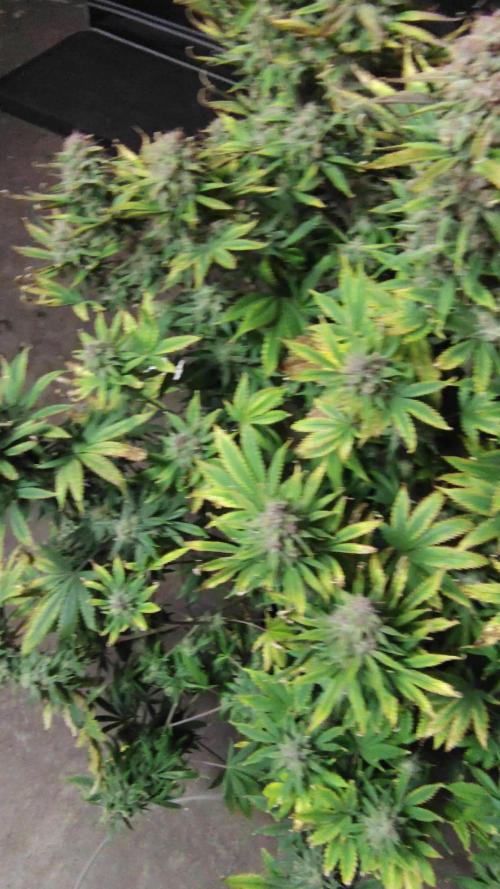
Can't believe these now absolutley smashing it. Think it's another week of Overdrive for a few of them and then flushing. There is one that developed some black spots which I think is potassium deficiency. Other than that the rest are doing amazing under the Spider Farmer and Advanced Nutrients.
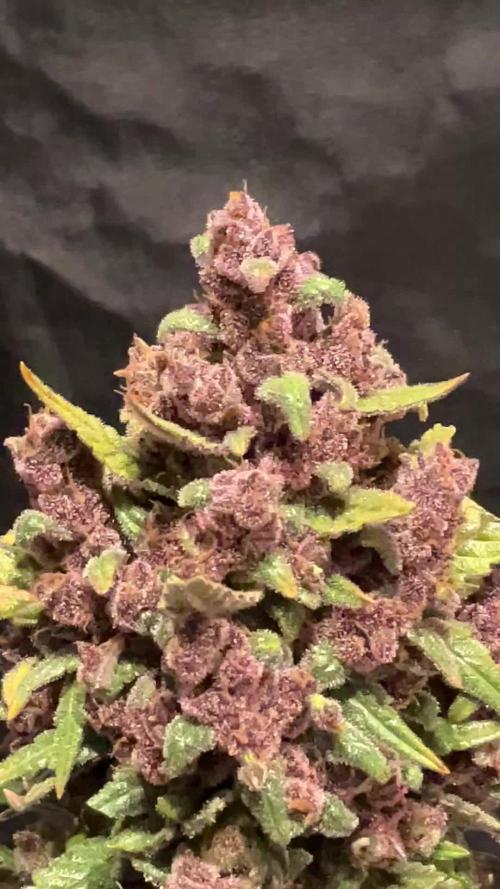
The Purple is crazy really don't wanna chop it down become attached haha
Smells like blackcurrant fruit punch omg
Unreal . One smells like giant bag of skittles fruity as hell man!
2 weeks maybe and she done
💪👽

Likes
15
Share
@Chubbs
Follow
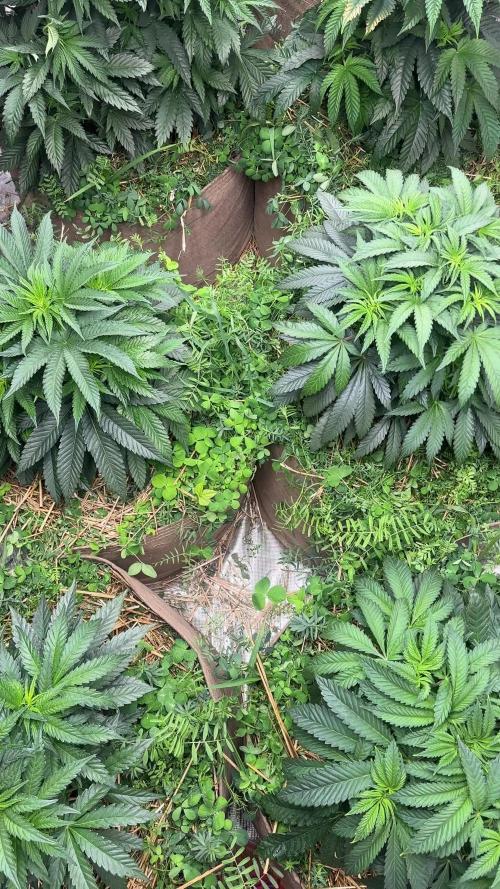
Week 5 on these amazing girls. They're full into the flower stage and the smells are starting to come through super strong. I've switched over to bloom nutes and they seemed to never skip a beat. All in all excited to see what the coming weeks have in store.
Happy Growing.
Processing
Likes
15
Share
@420Consinc
Follow
- WEEK 8 -
----- Day 50 -----
Woo hoo. End is in sight and the plants are still PACKING the pounds on.
Big Bertha is 11 inches long, 2 inches wide.
The hidden massive Gertha is 8 inches in circumference in the middle in just bud alone and isn't even the largest part of this 8 inch long nug...
Fed 1150ppm 13L 6.4pH
5-15+ days left.
2-4 days till I start looking into trichome finish period.
Forgot to take a regular full shot and shots of tropicanna glookies. oh well. Later tonight if I remember.
I stopped bud candy cause I'm using a lot more molasses and its literally a sugar in itself so why put in bud candy which is just sugars... seems redundant.
----- Day 51 -----
Easy day of watching.
Some nice bud shots today. The whole basement smells of weed candy. Back right Tropicanna is pineapple gummy bear, front right is just gummy bear.
Wedding Cake is like sweet weed, you get the regular smell of pot but instead of skunky its sweet but that Tropicanna is just alllll candy no weed smell at all.
I did the first 60x shot today. 5% cloudy 95% clear on the Tropicanna. Long ways to go.
I'll be doing the Wedding Cake later tonight, got side tracked.
----- Day 52 -----
Fed 1200ppm 6.4ph 12 Liters
Tropicanna Glookies is going full blown purple. Should be covered in dark purple coloration within the week.
Wedding Cake is just fat. Super fat large nugs.
Easy day. Forgot to take trichome pics of Wedding Cake will do that later today probably.
Well, the largest bud is 1 foot in circumference now... rofl
----- Day 53 -----
Easy day. Fed some water, they're getting thirsty again.
I'm going to do a 13L feeding , then next day 5L water. So that's what I did today.
I'll be dropping the Kool Bloom Powder & CaliMagic by day 56 and only feed 1/2 strength molasses only.
Will pick the buds off as they finish, not gonna do 1 big chop unless it manages to turn out that way.
Colors are going wild.
Will check Wedding Cake & Tropicanna trichomes before lights out will update pics then.
----- Day 54 -----
1300ppm 13L 6.4ph fed
Here's some pics.
Wedding Cake is nowhere near ready by the trichomes. Barely any cloudy, no amber.
----- Day 55 -----
Tropicanna really turning purple now starting to infect the leaves at top of canopy.
Can't wait for what Day 63 holds for all these ladies.
Not going to check trichomes till probably day 58
Easy day, last fert feed with chemical nutrients tomorrow, after that its just molasses.
----- Day 56 -----
Didnt even bother with ppm/pH.
Molasses. roughly 30-50ml in 13-15 Liters.
Smoked a tester of the Tropicana Glookies (Sativa)
God daaaamn. Shits fire. Extremely strong. Very Cerebral and its not even at its peak yet...
I've chosen Tuesday as Harvest day for both Tropicana Glookies plants (they're clones of each other)
A single Wedding Cake testing nug is drying right now, I'll judge when it gets harvested based on the high, and if not sufficiently near my level i'll give it 2 days before drying another nug and trying again. I want heavy ass couch-lock.
6 days for Tropicana.
Probably 8 for Wedding Cake.
Will send samples off to Canvas Labs for testing like I've done in the past and will be making both edibles and bubble hash and will post those here as they happen.
Once thats done I will see if I can restart veg mode in this grow, and if so I will keep this going until the plants die (and just make side diaries for each individual plant variety grow).
Should be interesting.
*** update ***
Where'd the 1.5 Liter water bottle go?
rofl


Likes
4
Share
@pzwags420
Follow
Week 2 starting with gsc putting out begging of pistils with others shortly behind I'm sure as it is day 10 since 12/12. on day 11 flower pistis are visable on blueberry and girlscout cookies. On day 13 OG Kush has pre flowers just waiting on blueberry muffin which were planted more recently than the others.


Likes
5
Share
@Ninefold
Follow
Transplanted to her final pot this week, I covered the stem up till the cotyledons. Mixed in 75 grams of Monster Bud Mix from Zamnesia and upped the nutes. Fixed the timelapse schedule as well.


Likes
7
Share
@Mr_nugs_lover_David
Follow
This plant has developed very nicely without any issues and so I decided to transplant the 10 plants I'll be growing with the complete biotabs organic line, I Transplanted this lady on day 39 since seed and I've prepared the 50L pot using 5 Slow release tabs, using 25g for every 5L of soil of startrex and sprinkled mycotrex in the transplant hole just a couple of grams maybe 3, and then I watered the soil once the transplant was done, I watered applying to the water 1ml per liter of orgatrex and 1g per liter of bactrex
Likes
Comments
Share
@BruWeed
Follow
01/11 - Comenzo su octava semana en etapa de floracion.
Se encuentra muy potente, fuerte y sobre todo muy resinosa.
Su olor es fuerte y dulce.
Ya empece con el lavado de raiz, estoy utilizando de la marca Advance Nutrients el fertilizante Flawless Finish, para poder barrer un poco mas rápido.
Voy a estar lavando sus raices durante 1 semana aprox.
Por el momento viene bien.
En estos dias estaré publicando mas imagenes de como viene.
Podes seguirme en instagram como @bruweed_arg

Likes
9
Share
@Ze1ro
Follow
Had no issues germinating with my setup. I have a grow mat with temp probe set to 78f and they popped within 24 hours. I'll begin a light feeding at 0.4EC and by the end of the week I'll have it up to 1.0 EC and a pH range of 5.9-6.2.
I've drilled several holes in the bottom of the cup and repurposed the copper cloth mat from the Autopots setup. That keeps the roots from leaving the container and naturally pruning them *I hope* .... but either way this should be a lot of fun as this is my first time growing in such a small container! I hope the drain to waste style of fertigation holds up well in this scenario.
Also, this strain is a promo strain which is a mix of Snowcaine and The Spice! which both have been on my watch list for a while now.

Likes
14
Share
@Green_claws
Follow
ADDED:Last grow video.... Frosty Gelato . growers choice.
ADDED: These gorilla-cookies-auto seeds were a freebie from fast bud when purchasing a few packs of the newly released mix pack photoperiod ..which is the none Auto in the pot behind the pot of this diary.. if she turns out to have good genetics il mother her and that's the next grow sorted
Links
https://2fast4buds.com/seeds/mix-pack
https://2fast4buds.com/seeds/gorilla-cookies-auto
The seed went from glass of water o a coco coir plug after 36hrs (had a 6mm taproot) then straight into the finishing pot just incase the prepared medium is to hot for seedling after I have been buffering the coco and also added a spoon of guano about a 1/4 way down the pot...
The mycorrhizol with the guano is a mix for the perfect start I won't water much and by the time my roots get down there will be a thriving ecosystem waiting to welcome them.
Thanks for reading
Happy growing 💚


Likes
4
Share
@Growverse420
Follow
Week 7: 5x9 Main Stage
Week 7 saw the four Chicken ‘n Wafflez, three Jelly Donutz and one Vanilla Frosting (all from Humboldt Seed Co.) really start coming into their own; soon it’s going to be a straight up jungle in the 5x9. Good news! The beneficial nematodes have worked wonders against the fungus gnat infestation; they knocked it down in a week, DONE! If you’re in living soil and haven’t invested in beneficial nematodes to prevent/combat fungus gnats, I’d say it is a must. I ordered from naturesgoodguys.com, received 5 million for total (shipping was the highest cost, so if you can order some other beneficial insects for your grow at the same time, do it, so you only pay for shipping once!)
I’m thinking at the end of week 8 I’m going to flip to flower. That means I will need to take clones from each of the plants in the 5x9 this week, in case, later, any of them turn out to be keepers.
As far as watering was concerned, they are definitely drinking more as they fill out these 30-gallon pots. Generally, the rule is 5-10% water by volume for living soil. I water every other day, generally, and for the most recent watering, I went ahead and gave a little over 2 gallons per plant. To make it easier to prep the water I just use 5-gallon buckets and do all my measurements accordingly for each bucket. I want to get in a better habit of filling the buckets for my next watering before I leave the grow, so the chlorine has at least 24 hours to off-gas, but sometimes I’m lazy and forgetful. It is supposed to be better for the microbes to let any chlorine off-gas… but like I said, it doesn’t always happen that way lol. I imagine if your water has more chlorine it could cause more of a problem for your microbes, in which case letting the water sit out for 12-24 hours would probably be more beneficial.
Most Recent Watering:
-Quillaja (¼ tsp/gal)
-Rootwise Mycrobe Complete (½ tsp/gal)
-Rootwise Enzyme Elixir (3 ml/gal)
Happy Growing!
Likes
72
Share
@Green_Mountains
Follow
The girls had a great week!! Starting to smell already... incredible!! I watered them 3 times with .75 cup and the last watering was 1 cup.
They have sprouted up amazingly!! The environment has been stable.. starting this next week I'll start to add a little bit of Fox Farms nutes.
Otherwise, just trying to keep the plants happy!!
Thanks for stopping by!!

Likes
52
Share
@Santica_Garden
Follow
So this is how the ladies are looking at the end of Week 2 from Seed. Successful Germination, 1st 2 weeks completed and now time for transplanting. I have added a video with better explanation. Happy Growing guys, any questions just ask away. 👍🏾🌱💚😎

Likes
25
Share
@Aleks555
Follow
Chimera Cut from Anesia Seeds has grown to 44 cm and looks fantastic! The foliage is dense and bright green, and the plant has taken on a beautiful spherical shape. 🚀 We're using nutrients from @xpertnutrients for maximum results. Stay tuned for updates! 🌸 #ChimeraCut #AnesiaSeeds #GrowDiaries #XpertNutrients #IndoorGrowing #CannabisCommunity

Likes
3
Share
@AKGorillaGrow
Follow
Well it is time to see what all my work will produce dry. 10 days in dry room then into the mason jars with a vivi cure can't wait. This grow I changed a lot from my water source from fox Alaska natural water to RO. Man was this a challenge. Not a single person I watched said anything about how unstable it is. To some research and problem solving to figure out how to stabilize it. Well if your wondering I added air to my AC infinity self wicking basin and set a timer to run 5 minutes on and 10 minutes off. I also went constant feed after week three. Will need to do some adjustments but it seems to be viable. More to come. See you next post
Likes
21
Share
@Jays_Not_Here_Man
Follow
A-Day 53 (into week 8) B&C-Day 49 (end of week 7)
A - She is stacking well, and feeling greasy! The smell is coming on stronger everyday, frost is just starting to build up. There is a distinct transition as the leaves go through veg to early flower to late flower. Uniform all around, not very tall, but she is hardy and thiccc!
B- Full flower now, so many tops! She has shown to be a slower flower developer than A, but the flowers she are developing are almost completely uniform all across the 🌱! I assume because there are so many they will be a little slower. I put her ties back on, and the middle shoots exploded with new stretch and growth, so she is still in that stretch/flower stage.
C- what can I say, patience is a virtue. She is looking lush and vigorous. With this being a slightly longer to finish auto strain, she has had time to recover from a) being a runt, B) having slow growth, c) having almost no training and lighter nutrient feeds her whole existence. This is also my control for Topping, she was not, A and B were. This strain is clearly hardy and able to withstand multiple techniques, we’ll see what the end the result is compared to her sisters.
All three plants received a full nutrient feed x2 this week. That was: 3 gallons dechlorinated water mixed with 12 ml Micro, 12 ml Bud, 20 ml Grow, and 6 ml Sensi Extra CalMag, PH’d to 6.2. And another very low feeding of 1/3 that mixture mixed into 3 gallons of water. Ive heard many growers who instead of just watering, they will do a much lower strength of nutrients included in their watering, and ultimately never not feed their plants nutrients until flush. Thoughts?

Likes
7
Share
@logangrowgan2020
Follow
Topped soil with layer of aquarium rock. Treated rather dry pot to 3:1 tap water:hydrogen peroxide mix, two quarts. sprayed 3:1 mix around/in plant, doused areas of activity in rock/soil with vinegar. Classic overwatering-led-to-fungus-gnats!
pot placed on riser, towel sitting underneath to capture/monitor runoff. two days after 3:1 fed pot two quarts of water with added general hydroponics 1/2/3. kept tent dry with towel replacements, idea was to saturate soil with nutrient rich water after the peroxide flush. brutal. plant is not happy.

Likes
98
Share
@Tropicannibis_Todd
Follow
💩Holy Crap We Are Back At It And Loving It💩
Growmies we are at DAY 21 and she's just killing💀it👌
So Shit , I gave them just a tad to much nutes 👈 But I have since fixed it
So I'm starting to pull her over and do some low stress training 🙃
Lights being readjusted and chart updated .........👍rain water to be used entire growth👈
👉I used NutriNPK for nutrients for my grows and welcome anyone to give them a try .👈
👉 www.nutrinpk.com 👈
NutriNPK Cal MAG 14-0-14
NutriNPK Grow 28-14-14
NutriNPK Bloom 8-20-30
NutriNPK Bloom Booster 0-52-34
I GOT MULTIPLE DIARIES ON THE GO 😱 please check them out 😎
👉THANKS FOR TAKING THE TIME TO GO OVER MY DIARIES 👈


