
Likes
Comments
Share


@TyRun
Follow
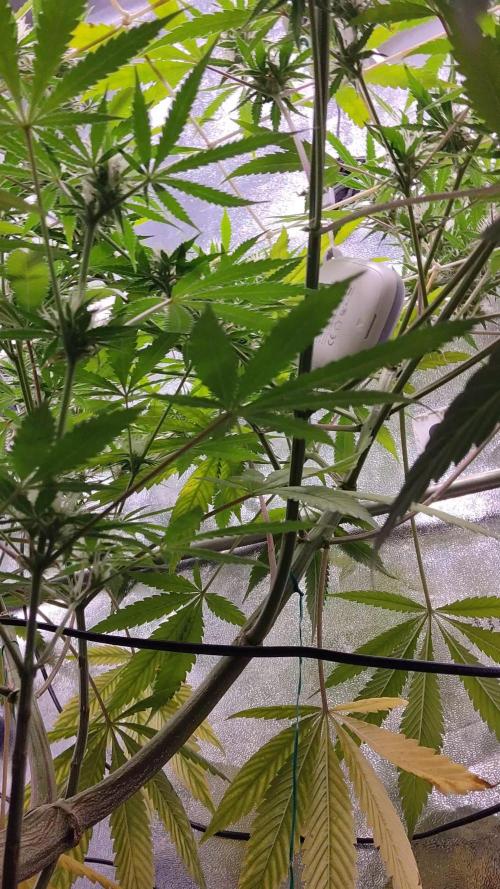
Intermediate Results
Overview
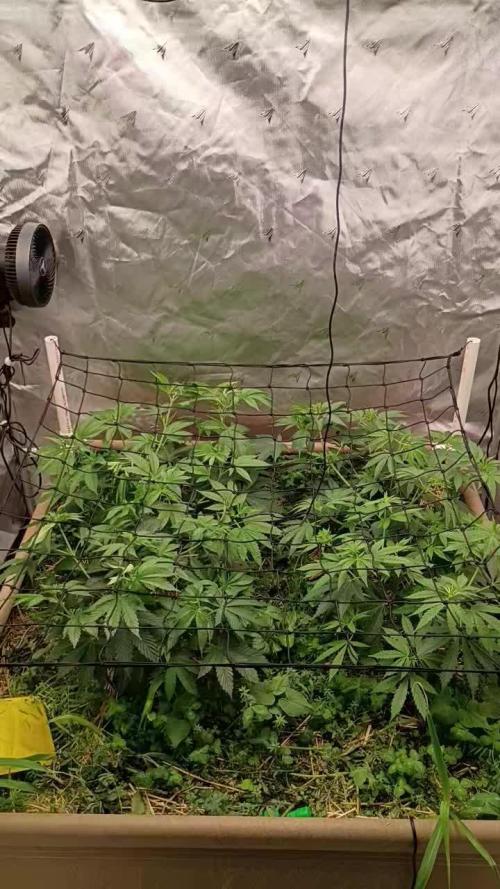
This grow was intense! Setting up the grow consumed so much of my time and focus that I started slacking at work, and it took me a month to get back on track. But hey, what’s the point of a job if it gets in the way of growing? 😉 In the end, everything worked out, and I gained invaluable experience.
This was my first grow using coco coir. At first, I didn’t get it, but then it just clicked! Now I’m hooked: "I’m here to stay." Coco is more controlled than soil, flushes easily, and you can introduce beneficial microbes, which thrive in it. My main takeaway from this grow? If you buy coco, don’t forget CalMag!
Next time, I’ll definitely install HEPA filters at the intake. The amount of dust was insane, and the grow box pulls air like a vacuum cleaner. Watching the timelapse, you can see the box sucking in every bit of dust. I vacuumed the intake filters weekly. The plant was incredibly sticky, but that also meant it caught a lot of lint and fibers between trichomes, especially visible under a microscope. Smoking microplastics? No, thank you!
---
On CO2
CO2 only works if everything else is dialed in. If the plant experiences stress from deficiencies or overfeeding, you can forget about it. Since CO2 supplementation requires turning off the exhaust fan, it’s hard to manage temperature and humidity. The plant releases so much moisture that RH jumps to 80% within minutes. It’s doable, but definitely a challenge.
---
On Magnetic Fields
No clue what’s happening here yet, but it’s fascinating! I’ll test again with a control sample.
---
Nutrients
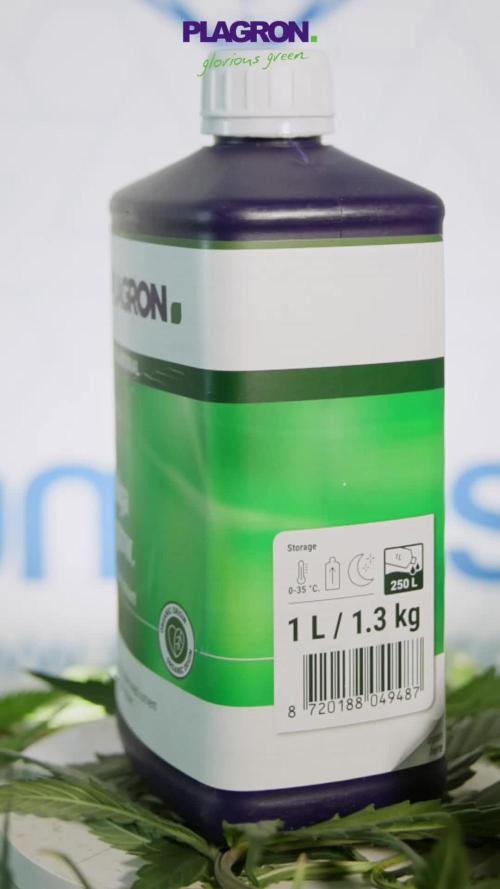
Dreams do come true—I’ve tested almost everything Advanced Nutrients offers. It wasn’t all smooth sailing; their feeding charts need adjustments for your conditions, and you usually need to feed less than recommended. Overall, I’d say the nutrients performed 100%, and I see no reason to switch. I’ll stick with them for future grows.
---
Strain
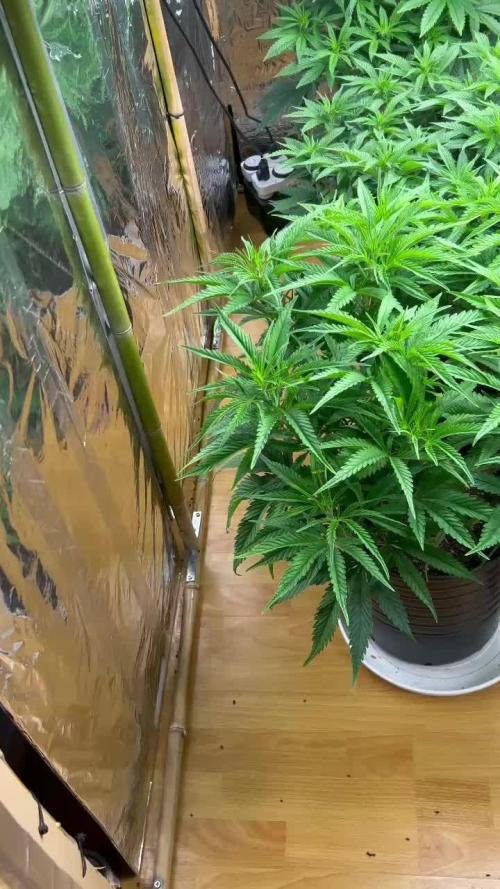
This strain is reliable, though not the most productive. It flowered exactly as advertised and delivered a frosty finish. It tolerated all my mistakes like a champ—especially mold. Despite an abandoned SCROG plan turning the plant into a bouquet, there wasn’t a single mold spot, even in the densely packed lower buds that got almost no light. Zero mold issues!
---
Aroma
As advertised: pine, wood, and citrus. At first, I thought it smelled like grapefruit, but now I’m leaning toward bergamot. Bergamot with a classic weed aroma—a recognizable twist on the usual scent. During the grow, the smell was strong, but the carbon filter handled it perfectly.
---
Flavor
It’s too early to say, but the flavor is definitely there! Embarrassingly, all my past harvests tasted the same—like nothing. Just smoke. This one has a distinct sour taste. I’m excited to see how it develops after curing.
---
Effect
Too early for a full review, but I love what I’ve tried so far. The high lasts about three hours, with euphoria and relaxation. It’s the perfect evening strain. I’ve smoked a lot over the years, but I’ve never experienced true euphoria—until now. Guess I’ve been stuck with garbage and ditch weed before. 😅 It’s not a strain for productivity or chores, but it’s perfect for chilling, watching something, or chatting. No anxiety, just great vibes. It feels like having a beer after a long day: you relax, and life feels good again.
---
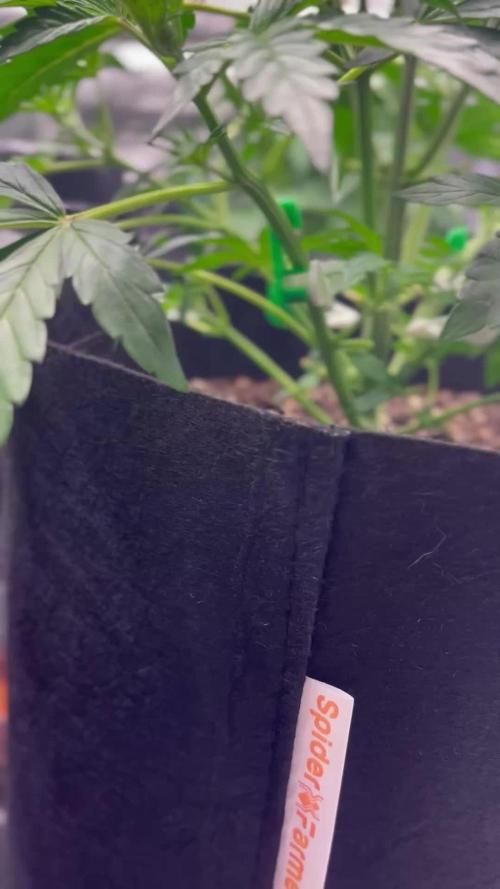
Roots
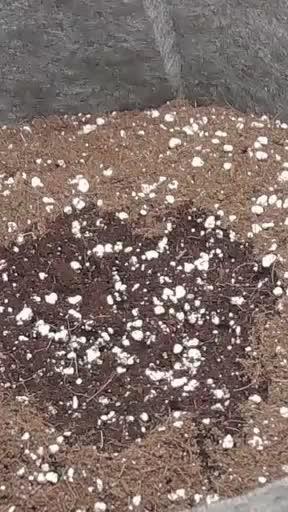
The roots were healthy—maybe too healthy! While the AirPot (20L) prevented root circling, it didn’t eliminate it entirely. There were dead zones at the bottom where roots circled around the perimeter. A dense root mat formed at the bottom (so dense you couldn’t poke a finger through it), which likely contributed to salt buildup. Breaking through that mat required more water, and I suspect this caused EC to spike 1.5x the next day if there was no runoff. Next time, I’ll mix some pumice with the substrate at the bottom, about 3–4 cm deep.
---
Timelapse
I only got the timelapse running after the switch to flowering, so it’s not from the beginning. Still, it’s an incredibly useful tool for understanding growth rates. I’ll definitely use it for future grows. Comparing yesterday to today is one thing, but rewinding a week to see how things were is game-changing. I recommend it! You can even use an old phone with a timelapse app if your camera doesn’t support it by default.
---
What’s Next
I’ve grown fat buds before, but I’ve always neglected curing. This time, I’m doing it by the book with full control. Drying in the grow box with RH controlled at 50–60% (averaging 55%) for a slow, even dry. Temps are kept between 20–23°C, with frequent venting to keep it below 21°C for terpene preservation. After 7–10 days, when small stems snap with a characteristic sound, I’ll trim and jar them with humidity sensors. For the first two weeks, I’ll burp the jars twice daily, then reduce to once daily for the next two weeks. After that, I’ll monitor the RH sensors and adjust as needed. I’ll share the details after curing is complete.
After drying, I’ll weigh the buds, take photos, and share another post in a month or two after curing to report on the flavor and aroma.
For now, I’m taking a breather, fine-tuning my setup, and preparing for my next grow: Wizard Trees - Zangria S1.

Likes
138
Share


@DogDoctorOfficial
Follow
So its time for a second run with the MARSHYDRO TSW-2000, for this run i will be running 2 clones from Gorilla Blue that came out out off a test seed i did and kind a love it so much that its time for round 2 out of it 😆 , i will be running APTUSHOLLAND nutrient line, something I'm doing for a couple of years now, but now with they're support, with for me was amazing since i already believe 101% on all of the APTUSHOLAND line 🙌🙌🙌🙏🙏🙏💚💚💚 shout out to AptusHolland 💚💚💚🙌🙌🙌🙏🙏🙏✊✊✊
I am reusing my soil from previous run since i take such good care of it with APTUSHOLLAND organic/mineral nutrients, i did add some magic to the soil ,this will help my girls and the living matter in it. I ad APTUSHOLLAND All in one pallets, MycorMix and Micromix and for the first waterings i will be adding all in one liquid all so, just until the solid amendments break down and from there on i will be giving them only water with some microbial help to keep my soil alive and in shape.
Thank you MARSHYDRO and APTUSHOLLAND for having faith in my love for growing , lets make magic together 🙏🙏🙏
Genetics - Gorilla Blue - Advanced seeds
Grow tent - MARSHYDRO 4x4
Ligth - MARSHYDRO TSW 2000 @ 100%
Food - HAPTUS HOLLAND
Filter - vanguard hydroponics Falcon Filters
Extraction - 2 x vanguard hydroponics 280m3h
Extraction control - SMSCOM Smart MK2
All i grow is medicine for myself, for me and for my best friend with is me 😆 nothing to sell, so don’t even ask 😅💚💚💚
All info and full product details can be find in can find @
https://www.mars-hydro.com/grow-tent
https://www.mars-hydro.com/led-grow-light/mars-ts-series-led-grow-light/mars-tsw-2000-led-full-spectrum-hydroponic-led-grow-light
https://marshydro.eu/ DISCOUNT CODE - DOGDOCTOR 💚💚💚🙏🙏🙏💚💚💚
https://marshydroau.com/
https://aptus-holland.com/
#marshydro #aptus #aptusplantteck #aptusgang #aptusfamily #aptustrueplantscience #inbalancewithnature #trueplantscience #growerslove
With true love comes happiness 💚🙏 Always believe in your self and always do things expecting nothing and with an open heart , be a giver and the universe will give back to you in ways you could not even imagine so 💚💚💚
More info and updates @
https://growdiaries.com/grower/dogdoctor
https://instagram.com/dogdoctorofficial
https://youtube.com/channel/UCR7ta4DKLFMg2xxTMr2cpIg
💚💚💚Growers love to you all 💚💚💚

Likes
12
Share


@Krissci
Follow
Day 6 - all is well with both plants.
Organic molasses teanyo be used going forward to increase sugar and flavour

Processing
Likes
27
Share


@Garreweedlover
Follow
Buenos humos para todos los fumetas :) , bueno esta semana la verdad en lo que respecta a las plantas , fue muy bien creciendo vigorozas y yo aprendiendo a medir la electroconductividad del agua , en especial hay una planta muy grande y de tallo muy grueso , le tengo mucha fe , EC y PH de entrada 0.6 y 5.8 , Ec y Ph salida 2.0 y 5.5
Likes
18
Share


@Diips
Follow
d.85 really fading hard, and buds are growing in size. just letting her do her thing, we are taking this to the end. also got my humidity down.
d.87 buds are fattening up 😍
all i have to say about that is, bigger boots, bigger roots = bigger fruits.
mainlining is possible with auto, as long as you choose a big enough pot size and time the topping and lst. after that part is done, then the auto just needs time to do its thing.
Likes
70
Share


@Roberts
Follow
Big Fat Wedding Cake is growing good under the Spider Farmer G5000/UVR40 lights, In the Athena blended line nutrition. She is bulking now and has a aroma that is developing. She has a nice layer if frost going as well. Everything is looking good. Thank you Spider Farmer, Athena, and DutchFem Seeds. 🤜🏻🤛🏻🌱🌱🌱
Thank you grow diaries community for the 👇likes👇, follows, comments, and subscriptions on my YouTube channel👇. ❄️🌱🍻
Happy Growing 🌱🌱🌱
https://youtube.com/channel/UCAhN7yRzWLpcaRHhMIQ7X4g
Spider Farmer Official Website Links:
US&Worldwide: https://www.spider-farmer.com
CA: https://spiderfarmer.ca
UK: https://spiderfarmer.co.uk
EU: https://spiderfarmer.eu
AU: https://spiderfarmer.com.au
G5000 Light Amazon Link:
amzn.to/4643esa
UVR 40:
https://www.amazon.com/dp/B0BR7SGTHS
Discount code: saveurcash (Stackable)

Likes
2
Share

@Bear_Grows_Green
Follow
12/25 Merry Xmas. The ladies got a priming light feed this morning to get ready to clone in 2 days. Watered on 3 gallons plain water and 3 gallons of the mix the bed was thirsty
12/26 got a priming foliar feed. Very light.
12/27 took all the tops as cuttings for clones
12/29 watered in 3 gallons plain water and 3 gallons of full supplemental feed.
12/30 added trellis light training


Likes
25
Share


@EBxAH
Follow
Well week 7 has started and 1 full week into 12-12. This time of year is perfect for winter time flowering. Basha is 26" Steffa is 36" and Wandzia is 27" so I average the height at 30". I think they look pretty damn good for 50 days old, lol. These ladies are currently taking in a gallon a piece every two days now, different from last grow. Also I've been bottom feeding these girls. That's about it for now.
Happy Growing Everyone
✌️❤️😁🍀🎶👽
EB


Likes
6
Share


@CANNASIM
Follow
A lot of rain and wind, continuously. Temps have dropped as well.
I’m reading another week or two to chop this plants.
Sativa dominant hybrids did the best, the Fastberry and the banana purple punch did not really develop as the other two.
In specifics the cbd crack developed sizable buds, and the blue dream as well, the flowers are not as developed tight and dense as in the indoor grow. A bit of fox-tailing nothing too expressive.
Minimal work, as per the setup chosen, an no extra nutes this week.
Likes
5
Share

@Bread_n_Buds
Follow
Merry Christmas and happy holidays to everyone, and above all, a fantastic new year of growth with monsters, plants, unicorns, and all the magical beings we love.
** This week, mostly just grow tent photos, so you don't miss any updates over the holidays.
Our Nectar Drip #3 is growing beautifully and healthily. It's not a giant in terms of characteristics or technique, but it looks very interesting. It's been trimmed and will be flowering in 7-10 days.
Selected Techniques - This plant will grow with a classic main lining but without the traditional lst application that spreads the plant across the pot. This is only because the plant, or rather this phenotype, has very short internodal spacing and hardens quickly, risking cracking. So, a healthy classic main lining (topping mainfolding 3 internodes topping x2 and then x4, maybe if the plant goes well).
We're 100% organic and 1000% Plagron, as always.
The soil we've chosen is the recently launched Plagron Bio LightMix, which will allow us to get our growing process off to a smoother and more reliable start, without the sudden changes that liquid fertilizers can cause. A week is more than enough, so don't overdo it.
We're in the early stages of the vegetative phase, but we're well-equipped with nutrients and additives. We've added:
- Power Roots 1 ml/l
- Pure Zym 1 ml/l
- Silic Rock 1 ml/l
- CalMag Pro 1 ml/l
- Sugar Royal 1 ml/l
- Alga Grow 5 ml/l
Once a week as a foliar spray:
- Vita Race 5 ml/l
Choose your preferred style and calculate the results on the website:
www.plagron.com
Our new 720W Spider King lamp from Vanguard Hydroponics is still set to the lowest setting. Visit the new Growshop area on the Zamnesia website:
Z - https://www.zamnesia.io/it/531-growshop
Crazy, it was sold out, it was a limited edition! Try another one: the shop is full!
Z - https://www.zamnesia.io/it/35-semi-cannabis
T - https://www.zamnesia.io/it/35-semi-cannabis/745-tical
Z - Nectar Drip is a unique cannabis hybrid created in collaboration between Zamnesia Seeds and TICAL. These flowers are pure power, with up to 26% THC and effects that stimulate the mind and stabilize the body. But if you want to try them, you'll have to hurry: only 750 packs are available!
There's nothing better than a good collaboration: we know that better than anyone! For this partnership, we joined forces with TICAL to create a strain packed with flavor and potency. We brought our delicious Apple Fritter, while TICAL contributed its 24K Gold Fangs. After perfecting the result, Nectar Drip was born. This strain produces potent flowers with a THC content of up to 26%, accompanied by delicious fruity and skunky aromas.
Considering one of its parents is Apple Fritter, you can be sure that Nectar Drip has inherited a burst of fruity aromas and flavors. Skunky notes are also noticeable, creating a rich and intriguing profile. When you smoke this beauty, you'll feel relaxed, with a pleasant cerebral buzz accompanying the experience. It's definitely a great evening smoke, perfect for when you want to take a moment for yourself.
You know it, but I recommend it. You'll find so many wonderful things here, essentially "all the best that nature has to offer."
Z - www.zamnesia.com //
Music //
www.radionula.com
+ Feng Shui Music
+ Frequencies 432 Hz
Likes
7
Share


@Herbie
Follow
I opened the converted wardrobe door and the first colour I thought of was Orange sovI knew it was time.
I did a lot of experimenting throughout the grow, trying to find my own technique and this girl has been a great help.
Its my biggest haul to date ooking at it altough I can't weigh it without seriously messing around so l just weigh when dry.

Likes
4
Share


Likes
17
Share


@StickyFingah420
Follow
Planta de crecimiento no muy exigente, no demanda grandes cantidades de agua y nutrientes.
En este caso solo apliqué LST y respondió bastante bien. Formó un buen tallo principal y una estructura ramificada y firme.
Lo mejor de todo viene en la floración, adivina porque?... COLORES!, alrededor de la 3era semana comienzan a aflorar tonalidades rojizas, púrpura, rosas que deslumbrarán a cualquiera.
Sus cogollos son más bien aireados y desprenden un fuerte olor cítrico como a cáscara de naranja intensamente dulce.
En fin, una genética de calidad y con una visual hermosa y aromas asombrosos!. En lo personal prefiero los brotes más densos y compactos, pero me encantó todo el proceso de esta hermosa planta, totalmente recomendada!
Likes
5
Share


@Ninjabuds
Follow
The Gas Tax x Obama Runtz plant is looking really good. It's got these super pretty leaves and it's stretched a whole bunch. I think it might be my favorite plant in the tent.
The new year is off to a frosty start! We've had snow falling for what feels like forever. My kids are loving it, of course. They're building forts, having snowball fights, and turning everything into a winter wonderland. It's been a lot of fun to watch them enjoy it.
All this snow is really making me think about how quickly time flies. It feels like just yesterday we were celebrating the holidays, and now here we are knee-deep in winter. I'm looking forward to warmer weather, but for now, I'm enjoying the quiet beauty of fresh snow.
Likes
1
Share


@Nickeluring
Follow
We are trying to survive the heat wave we have here at the moment. Hopefully an extra dose of silicone will aid a bit...
Both plants look very well. The mainlined plant is slightly taller at 58 cm, while plant 1 measures 54 cm.

Processing
Likes
Comments
Share


Likes
35
Share

@PEAKYPLANTERS
Follow
Hi guys, there was a nutrient blockage while I was away and it affected my little girl a bit, now we're taking action... nothing mommy can't fix ❤️?
Likes
1
Share

@Robertgrowsit86
Follow
We think one of these lady’s are being thrown in to flower by me stressing it. I topped it and I think I shouldnt have , They originally got stunted due to environment technicality difficulties / grower error. Humdifier died , power outages the works , all sorts of obstacles have taken place . But we will see this through to the end for, learning and journal purposes. Happy grows

