


Likes
Comments
Share


@Roberts
Follow
Sorry I missed a lot of updates. I was recovering from hand surgery then gd was not working right. She has a sweet earthy brown sugar smell. She did well for the limitrd care I could provide while I recovered. Was a good grow and I am excited to get to try her soon. Thank you Divine Seeds, Athena, and Spider Farmer. 🤜🏻🤛🏻🌱🌱🌱
Thank you grow diaries community for the 👇likes👇, follows, comments, and subscriptions on my YouTube channel👇.
❄️🌱🍻 Happy Growing 🌱🌱🌱
https://youtube.com/channel/UCAhN7yRzWLpcaRHhMIQ7X4g.

Likes
9
Share


@Ryno1990
Follow
The strain came out amazing very purple an very dense didn't have a very strong smell but deff a nice one got 3 ounces after all said an done


Likes
5
Share

@Growfather1
Follow
Hello everyone,
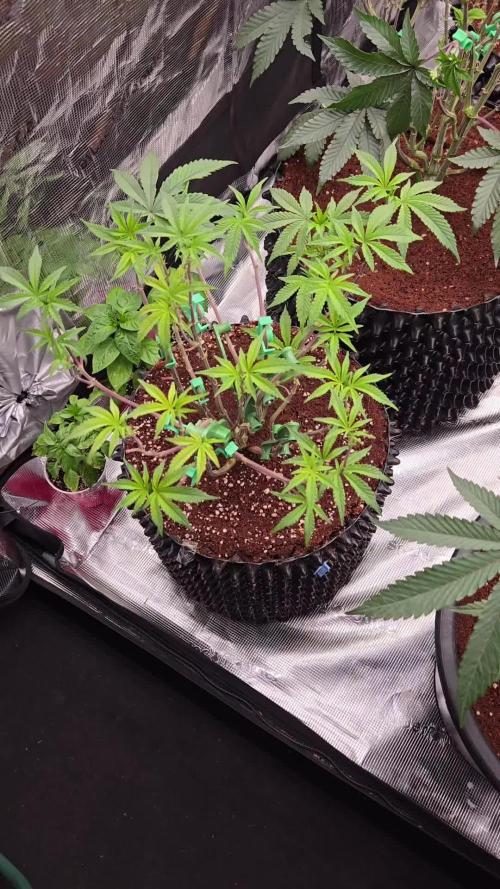
The 3 plants are okay a little nutrient deficiency because the ph meter was 0.3 ph to high.
The plants are almost ready for flipping to flower 7 days more in veg is enough.
Thanks for stopping by and have a nice day.
Best regards,
Growfather

Likes
10
Share


@SkunkyDog
Follow
Hallo zusammen 🤙
Habe sie heute geerntet.
Melde mich in 2 Wochen mit dem Erntebericht.

Processing
Likes
4
Share


@CrookedyNook
Follow
I’m driving myself crazy trying to figure out what to do. I’ve been on the web, sent an email for help and scoured social media. I hate feeling like I’m harming my girls. I just got one plant doing a little better. Now the other has joined in. Gelato is a rock star.
Likes
19
Share


@Organic_G
Follow
Ansich gute Sorte, in der Blüte ein leckeren Zitrus Candy Geruch, leider beim Rauchen nicht so exotisch… man macht zar wenig verkehrt mit der Sorte, aber einmal grown reicht für mich, bin leider Pheno Hunter ;)


Likes
Comments
Share

@SirNutalot
Follow
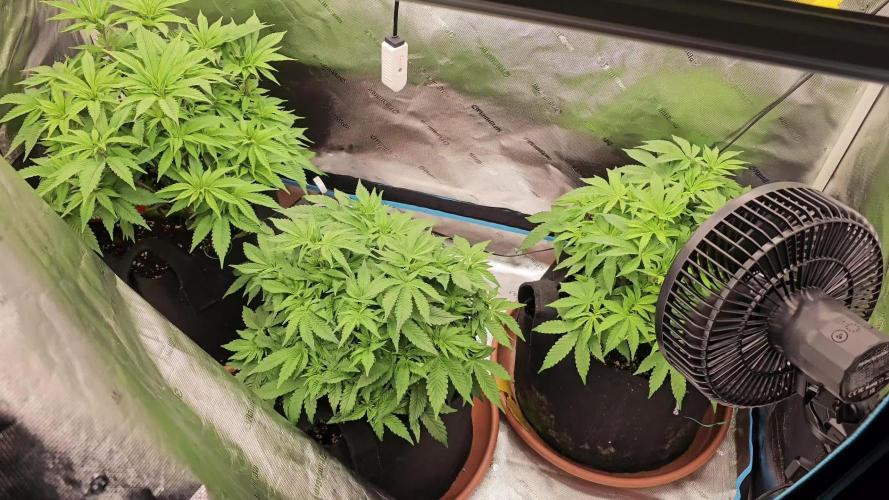
First day in flower and they looking good but there some burnt leaves from to much fertiliser is my diagnosis


Likes
57
Share


@Zurban_Poison
Follow
Hello everyone! this week, I had to do defoliation all the same .. on that girl I was not going to touch .. the fact is that there were a lot of leaves .. too many .. it was difficult for the plant to breathe .. in short, I did defolation and also took advantage of the fact that the plant itself made a topping))) and with the help of the LST I took 2 central branches to the sides .. from today I will decrease the light regime gradually .. I hope this will help the plants show their gender as soon as possible ..

Likes
16
Share


@Sethstover
Follow
Always used the least amount of calmag if this specific plant and it was always darker green than I'd like but that's jus the picky plant
Likes
13
Share


@Livinit2019
Follow
Can't believe we're at the start week 5 already. This is such a beautiful process.
Things are looking good - I started defoliation on all the ants this week. I figure, the little one isn't getting much bigger, the big one is so bushy the light is having trouble getting thru even with LST, and the bag seed seems to be a photoperiod plant so I have all the veg time I need to recover on that one.
Update: The bigger girl started flowering on day 32!
Let me know what y'all think!

Likes
8
Share


@DoMoNe
Follow
Following RQS auto guide : https://www.royalqueenseeds.com/blog-how-to-grow-autoflowering-cannabis-n83
WEEK 2: LATE SEEDLING STAGE #8 22.3. - #14 28.3.
#8 22.3.
- Canna PH- grow (and bloom) arrived today, mixed 6ml to 3liters and poured around the pots (hoping to get hum. up also)
will see what it does and if the PH starts going down from the 7+ i can start adding smaller amounts.
-Moved around the LEDlights (those have 'bout 2000LUX at plant level) so they are more along the tent walls.
-Moved temp meter from lamp to plant levet (have now confirmed the lamps wont heat up too much under current air flow so its safe to stop monitoring heat source temps.
-Removed the "glass" from 3in1 meter and the tape from the front, tested the luxes, still at few hundred, so i would guess the LUX meter in that cheap meter is BS!.
Now the PH is way more visible in the camera when there is no screen reflection etc. Added pics of the luxes from android app, will receive the "real"meter possbl this week.
-When i had tent door open and did the stuff mentioned above the temp dropped to about 13degrees, but now we are already back up at 23'c at plant level, so seems stat the current exh-fan rotation is good.
-Plants emself have taken some sort of an growth spur 'cause just few days ago they seemed like they are not growing at all, and ow i can really see the difference and they are making next set of leafes, might be that the temps risen so they enjoy em self now way more
- forgot to take new pics from the plants emself so will juts update pics from cam for now , at least there's been some change again.
-Will try to remember take proper pics of the plants next time i visit the tent physically
-Should remember to buy the "LST-wire" for training, would be good time to buy some eastern decorations fluffy wires.
#9 23.3.
-Noticed that the timelapse camera is getting thrown around as well as one LEDpanel, so went and tied em up to tent posts.
-Added 1,5liters of water that had 6ml of PH- canna in it, and poured in to "middle corner" of every pot.
-Tent was way more warm and moist inside then ever before, which is a good thing, im sure after the latest added water im getting there.
-Ordered a RAM humidifier. And some nutes pack from bio-grow.
-Updated "week2 timelapse" (Check 1st week for its timelapse)
-Note to self: Take those damn "camera quality" plant pictures, you are supposed to...-
#10 24.3.
-Started small form of LST
-Guess who forgot to take the closeup pictures... again... Well better luck next time :D
-Added 5liter RAM humidifier, at lowest possible setting, so that the water would last longest
-Added 1,5liters of water with BioBizz nutes that came today in mail, Alg-A-Mic, Root-Juice and Top-Max.
-Added ScrOG, but obviously its now just tested that it fits and its hanging at the tent side.
-Had to move the Fast Eddy a bit and make a "stand" for the humidifier.
-Moved the other LED (2300lux) a bit further up, will have more effect when plants grow, and those can be had as a xtra lights.
-Moved some wires around their sockets to get better fit for all connectors.
-Adjusted the camera directions
-Turned both fans to level 1 of 2
-exhaust fan still at about 50% timer on/off, that must been what caused the "wobbly"pictures in timelapse as the tent gained more vacuum inside which must have drawn in the walls a bit.
#11 25.3.
-Not sure if i did anything
#12 26.3.
-Water run out from humidifier
-Added a pic of the day
-Luxmeter arrived, didn't had time to install it yet, but tested and found working.
#13 27.3.
-Added Hydrometer
-Filled humidifier
-Poured 1liter of water with nutes
-Added/moved LST's
-Finally remembered to take the close up pics of the plants! wohoo.
-After following the hums i think i might add exhaust flow as its also warmer outside so the tent can now take it
#14 28.3.
-Last day of #2 week
-Did nothing, just watched em grow.
-Water run out of hum. hum went from 65% to 45%
Likes
12
Share


@CanadianFillmore
Follow
Flip mode squad in the house! LSD and Green Crack move to the 4x4 room, under the Samsung strip's. Both plants were topped and defoliated. All four ladies look happy and healthy, I can't wait to see how they grow under this light.
Thanks for stopping by growfessors 👽🌳💚

Likes
6
Share


@GroloCup
Follow
We continue forward and the flowers are looking beautiful. Battling pH issues and the drift in this tent is just crazy, especially since I barely have room to move her around to adjust her parameters. I need to not be lazy 😂 and do what needs to be done. She's got a funky grapes profile and berry smell that's getting more acrid as she ripens. From the amount of pistils she's still throwing, I'd say she's gonna be going for a while longer. I'm still in love with that beautiful purple flower and can't wait to see how far I can push her in this micro set up. The power of the Groloponix MiniMax 1G is on full display!!!

Likes
32
Share

@Roberts
Follow
Critical x animal cookies has grown into the nutrition now good. She did get topped today and roots pruned. She has been doing okay beside the nutrition burn early on under the Hortibloom Solux 350. She should start making some decent progress now with growing. Thank you Hortibloom, and Ripper Seeds. 🤜🏻🤛🏻🌱🌱🌱
Thank you grow diaries community for the 👇likes👇, follows, comments, and subscriptions on my YouTube channel👇. ❄️🌱🍻
Happy Growing 🌱🌱🌱
https://youtube.com/channel/UCAhN7yRzWLpcaRHhMIQ7X4g

Likes
39
Share


@Bluemels
Follow
Tag 77: Heute ein letztes Mal die Lampe auf 30cm gestellt. Wurde auch Zeit so langsam werden die heller. Nun auch die volle Düngemenge.
Nur das Klima ist ein Krimi 😱 wir haben aktuell hier viel Regen, zwischenzeitlich recht warm, also ein ewiges hin und her.
Gestern hatte ich dann schon die ersten Trauermücken 😩 Da hab ich nicht lange gefackelt und Entfeuchter in die Grow Boxen gestellt, dafür ist es nun aber mindestens 1°C wärmer in den Boxen. Wenn es draußen nicht zu warm wird könnte es klappen.wenn.....
Tag 80: Aktuell haben wir hier ein Subtropischen Klima, ich habe Temperaturen in der Box von bis zu 28°C, Abkühlung in der Nachtphase ist auch nicht mehr möglich.
Doch meine Pflanzen stecken es soweit gut weg, sie sehen sogar noch vitaler aus 😍
Likes
1
Share

@Terpofthetown1
Follow
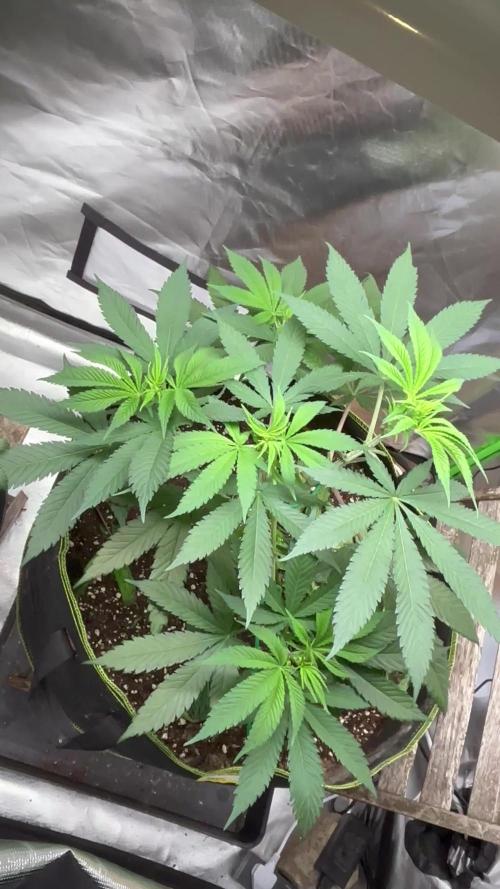
Switches to 12/12 a couple days ago, no signs of hairs but I think I’m abit eager if I’m expecting them this soon and tips on helping an organic soil flip to flower? I think I might be okay but any suggestions could help in case
Likes
21
Share


@MG2009
Follow
12/17/2021
They are growing well,#1 will be eliminated she is a runt, and way to far behind her sisters in growth, so culling her tomorrow.
Ps. #1 sprang back to life!
No sign of sex yet but soon I hope, as I was hoping for a short veg. More pics of #2-#8 in a.m.
Pretty cool to see plants know when lights going to out, and leaves look lower (drooping) about an hour before light shuts off !.
Getting ready for (sleep)? Pics 1-8 at lights on and leaves starting to reach for the sky (waking up)
Plants are about 31 days old and should start to show signs of sex.
Likes
Comments
Share


@TheCH
Follow
89 грамм сухих шишек. Результатом выращивания в банке из под чипсов, очень доволен. Сорт неприхотлив. Выращивание простое.

Likes
53
Share

@Roberts
Follow
Merlin's Mintz Autoflower has come to a harvest day. She is a sweet fruity kush smell. She has some nice colors and is super frosty. I will be back for the smoke report in a month or 2 once I get her dried, Cured, and trimmed up. Everything went well. Thank you Spider Farmer, Athena, and Aeque Genetics. 🤜🏻🤛🏻🌱❄️🌱
Thank you grow diaries community for the 👇likes👇, follows, comments, and subscriptions on my YouTube channel👇. ❄️🌱🍻
Happy Growing 🌱🌱🌱
https://youtube.com/channel/UCAhN7yRzWLpcaRHhMIQ7X4g