
Likes
Comments
Share


@dopeasstitties
Follow
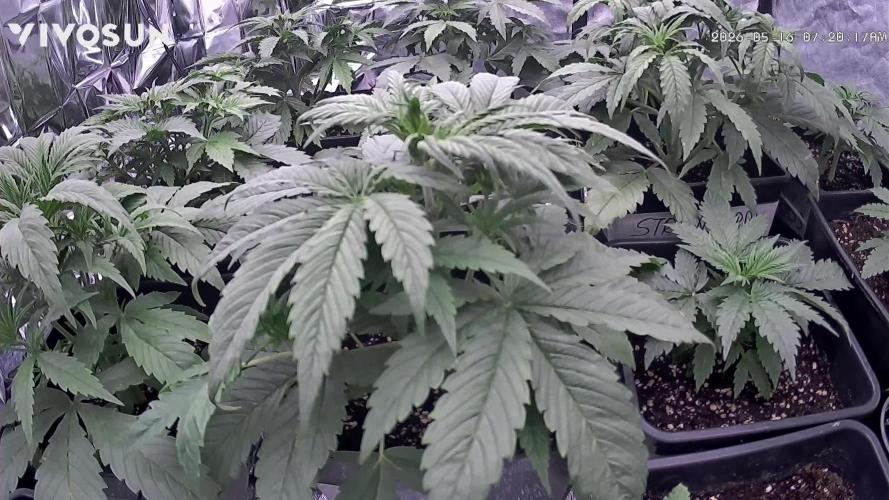
Onto the next week of flower. Going on a short trip away for 2 days from 17-19th, so the reservoirs will be full before we leave.
Got back to more growth and had to raise the light up. Ladies looking great and getting big. We are a few days before lollipop so the tent is a bit humid but not bad. It will be easier to keep VPD at 1.2 after day 50 or so when some of that unneeded growth is out of there.
Lollipop done on 21st and 22nd. Next on 23rd to finish up. Things are getting frosty with the CropSalt Bloom nutrients.
Ladies didn't mind the haircut one bit
Buds are starting to swell!


Likes
6
Share


@technics702
Follow
The grow itself was really easy, apart from keeping the height in check on a relatively long indoor veg. These did love a lot of nutrients, though I couldn't push them as hard as I would've liked to, even without CO2. There were times of 4.5-7EC in the substrate during vegetative phases of the grow, and they took it with a bit of tip burn, but nothing too serious. During generative phases I was really able to push them, though not as hard as the Florida Pie I grew prior from Jungle Boys.

Likes
2
Share


@Saintvicious
Follow
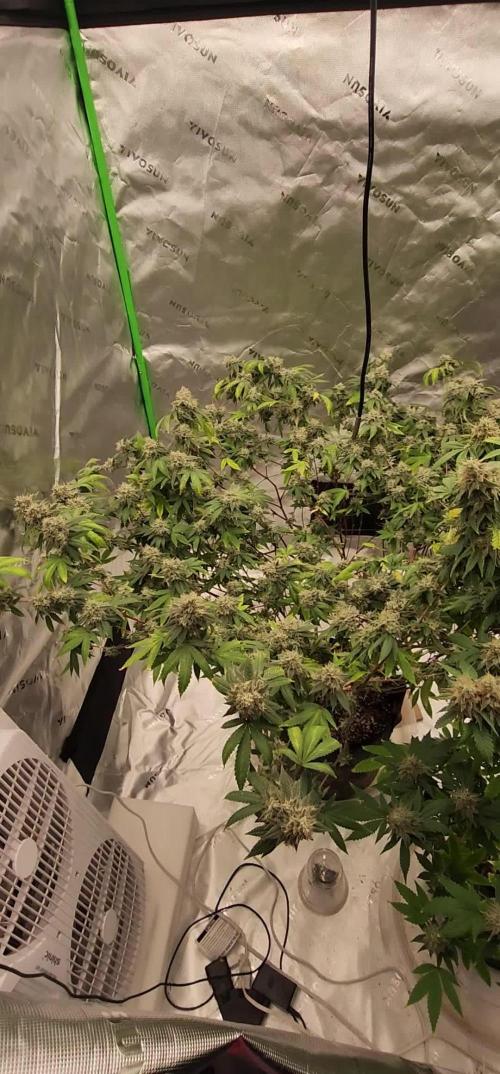
Flower stretch and bud sites are setting. Lots of tops from the lst. Fingers crossed.
Likes
18
Share


@Pokan187
Follow
The buds look very good, not the most dense but it's to be expected with this strain, they have the classic foxtail structure
Looking forward to tasting in a few weeks

Likes
6
Share


@Frosty905budz
Follow
Flushing with pure r20 ph@ 7.4
Flushing about 10g of water per plant until
Overflower water comes out clear
One more week of flushing and will harvest on the 16th week
Likes
7
Share


@RunWithIt
Follow
Starting to get a bit hot in my area so I'm not sure if the autumn hues will show up as prevalent as before. But she's still kicking ass, doing her thing. We'll see.. I've just been feeding her liquid seaweed and molasses. I plan on throwing in 1 more dose of recharge by the end of the week. That should supplement the microbe content. I'm also planning on using overdrive on her the last two weeks. So two weeks from now. Other than that, I've been feeding 2-3 times per week with 1 pH 6.5-6.8 watering on in-between days.
I also wanted to mention that I'm a little worried one of my Banana daddies infected this girl with pm. So I'm keeping an eye out for that. Read on an article that spraying the spores with pH 8+ water kills and prevents it from forming. So I've been spraying her every night when the lights are out, then pumping the fans on high. Seems to be doing the trick, haven't seen any spores on her yet... but I digress, 👀 on her til' she's for sure in the clear.
I'm so glad i got my perpetual grow dialed in. I've swap outs well-vegged and ready to go when the time comes. Blessings on everyone who stumbled upon my garden. I hope you all have dope harvests 😎


Likes
54
Share


Likes
33
Share


@Southwest_budders21
Follow
Day 75 I'm shocked how big she is already considering a few weeks ago she was so stressed but seems to have bounced back really well definitely one I may keep in the seed bank 😏✌️🏻💚 hopefully she'll be ready end of November then cured for Xmas 😍💚
Likes
19
Share


@Teydoee
Follow
How do you control really huge fan leaves that are putting too much weight on lower leaves?

Likes
9
Share


@DeepRootsGrowTrees
Follow
KICKASS AUTO by KANNABIA
Week#7 May 14th-21st
Week #2 Flower
This week she stretched about 2 inches she's right at 19 inches she also continues to grow side branches she really a nice looking bushy plant. Dark green color trichomes are starting to form on her buds and leaves and she's starting to fill in you can see the white hairs and start off little buds on her. She is doing great outside!! Stay Growing!!
Kannabia.com Kickass Auto

Likes
16
Share


@MarcGrows
Follow
Great week. Girls finishing up and taking longer to drink. Checked trichomes and this plant is ready with mostly cloudy and a spattering of amber. Will harvest tomorrow morning and will provide weights and measures after harvest. Will dry in tent without light and offset circulation. Will keep tent naturally at 67 degrees. I will need to assist with humidifier to get humidity to around 60 RH. Perhaps a wicking cloth in a bucket? Just thinking out options.
Update: Cut down the girls and hang them up to dry. Great thick hard buds. Can't wait to see what they smoke like, but it is going to take time to dry. Thanks to everyone that helped to make this a successful harvest. I will weigh the harvest before starting cure after a closer trim.


Likes
29
Share


@ClubRiot
Follow
Afghan OG
Week 14
11L Pot
LED: SP250 (245W) for Flow. Stage
Canna COCO
Mineral Nutrients:
👇
Flawless Finish: 2 ml/L


Likes
51
Share


@420DeepGrow
Follow
Gracias al equipo de Anesia Seeds, XpertNutrients y Marshydro sin ellos esto no seria posible.
💐🍁 Smashberry Fumez:
Adéntrate en la humeante bruma de nuestra nueva Smashberry Fumez, donde la dulzura de las calles se encuentra con el octanaje del oráculo. Esta iniciadora de incendios feminizada es una mezcla de Candy Fumez y nuestro éxito de ventas Oracle Octane, que logra una armonía increíble con un 60% de Indica que te permitirá relajarte profundamente mientras mantienes la cabeza en las nubes.
🚀 Consigue aqui tus semillas:
💡FC6500: Eficiencia líder en el mercado: la lámpara de cultivo LED FC-E6500, que ostenta un estatus líder en el mercado, es una solución rentable con un PPE de 2,8 µmol/J y un rendimiento máximo de 2,5 g/vatio. Ofrece un PPF alto de 2026 umol/S y es adecuada para una cobertura de vegetación de 1,50 m x 1,50 m y una cobertura de flores de 1,20 m x 1,20 m.
Iluminación versátil y uniforme.
https://marshydro.eu/products/mars-hydro-fc-e-6500-730w-commercial-led-grow-light/?gad_source=1&gclid=Cj0KCQjw1qO0BhDwARIsANfnkv9IIrYSbmJqz8PqpJOIyWwJfp5bc3SGJgUV68USLQ4tjmXDYwoBuAsaAue3EALw_wcB
🚥 MarsHydro ADLITE UV/IR/RED:
Para lograr un crecimiento óptimo de las plantas y maximizar los rendimientos es un arte simple que depende en gran medida de las condiciones ambientales adecuadas. Reconociendo las limitaciones de la iluminación natural y las soluciones de iluminación tradicionales para satisfacer estas necesidades únicas, lanzamos ADLITE. Estas luces especiales UV, IR y roja están diseñadas para llenar áreas del espectro, proporcionando las altas longitudes de onda que las plantas necesitan para un crecimiento y desarrollo óptimos.
🚀 Consigue aqui tu Adlite:
https://marshydro.eu/collections/adlite-supplemental-lights/
🏠 : Marshydro 1.50 x 1.50 x 1.80, carpa 100% estanca con ventanas laterales para llegar a todos los lugares durante el grow
https://marshydro.eu/products/diy-150x150x200cm-grow-tent-kit
🌬️💨 Marshydro 6inch + filtro carbon para evitar olores indeseables.
https://marshydro.eu/products/ifresh-smart-6inch-filter-kits/
🍣🍦🌴 Xpert Nutrients es una empresa especializada en la producción y comercialización de fertilizantes líquidos y tierras, que garantizan excelentes cosechas y un crecimiento activo para sus plantas durante todas las fases de cultivo.
Consigue aqui tus Nutrientes:
https://xpertnutrients.com/es/shop/
📆 Semana 12:
Última semana de lavado de raíces y cosecha la siguiente semana, ha quedado una planta muy compacta y totalmente cargada de resina.


Likes
12
Share


@DoDrugs420
Follow
This is a giant autoflower that reaches 150cm and produces massive yields of up to 600gr/m2, a modern Cali strain that offers what a top-quality Indica-dominant hybrid should; nugs capped in resin with the density you would expect from Indica-dominant strains and that bag appeal that will surprise even the most experienced growers. Expect beautiful purple and magenta hues that come along with a sweet almost pastry-like taste and, thanks to the 24% THC, a very pleasant and potent effect that surprisingly starts as a motivating high and in no time relaxes you completely, taking a bit of the energetic edge off.
Tech Specs
Taste
Blueberry Muffins, Cherry, Spicy
THC
Up to 24%
CBD
< 1%
Size
XXL
Height
90 – 150 cm
Flowering
9 weeks
Genes
Sativa 15%/Indica 85%
---------------------------------------------------------------------------------------------------------------
Grow Sponsored by MARSHYDRO
HIGH EFFICIENCY WHITE LED LIGHT: Newest SMD LED technology provide highest PAR/LUMEN output(743umol@18"), designed to replace a single-ended 250watt HPS; MARS HYDRO TS 1000W Plants Growing lamp makes you get 30% higher yield compare OLD blurple led lights, Max 2.0g yield per wattage (power draw)
LOW ENERGY CONSUMPTION GROW LIGHTING : Consuming only 150W with 342 LEDS! It saves up to 50% energy than other led grow lights. Perfect for 2.5x2.5ft,Max coverage 3x3ft. Over 90% light energy can be absorbed by plants; higher intensity and more even coverage in a MARS HYDRO grow tent, reflective area, or by crossing over using multiple TS1000
SUNLIKE FULL SPECTRUM LED INDOOR GROWING: 660-665nm Red IR/3200-4200Knm/5200-6800Knm, infinite close to natural light, best for all plants all stages growing, rapid plant response from seed to flower and increase yield & crop quality
HIGH REFLECTIVE & NOISE FREE-Fanless LED GROW SYSTEM design will make your growing life easy and quiet, quickly heat dispersing material aluminum reducing light lost to aisles and walls, increase the light intensity up to 20%, allowing your plants receive more energy and without burning your plants for maximum headroom
Get your own at https://www.amazon.de/dp/B07ZVFBR34