


Likes
Comments
Share


@Jointjourney
Follow
I feel like I didn’t put enough fertiliser in the soil of the Morello Cherries Auto. It’s starting to show early signs of autumn colours and nutrient deficiencies. However, it has a very distinctive sweet odour.

Likes
7
Share


@Mr_nugs_lover_David
Follow
My beloved Black cherry punch pheno 2 is looking absolutely stunning, those indica leaves makes me go nuts 🤪, absolutely beautiful strain not only for its grow patterns but also because her effects is really special to me, it's the perfect mix between sedative sleepy high but has a really mellow happy sensation, this is plant is the perfect choice for all of the people that consume pills that fucking kill you with overdose, cannabis is a miracle! Follow me on my journey growing my cannabis that I use with recreational intentions however It helps me with certain little pains due to sport. Hope you guys enjoy my work!!

Likes
23
Share


@Calveeno
Follow
Greetings Fellow Green Thumbs!
We are approaching harvest very soon. Within the next week, week and a half tops. Need to monitor the trichomes closely (aiming for at least 50% milky) before I start flushing for 4-5 days (PH'd Filtered Water + FloraKleen)
Debating putting up some kind of support to keep the chunky colas from falling over.
Keep your joints fat and bowls filled 😆 Stay tuned and stay blessed! Peace 🙏
Likes
16
Share


@HomeCannaGrower
Follow
Starting to see purple in the buds! Completely covered in trichomes.
Dropping temp to 61 at night. Excited for harvest. Smells sooooo good in here.
Covered in purple now. Loving this color change. Super stanky!! Cannot wait!!

Likes
3
Share

@CheeRz
Follow
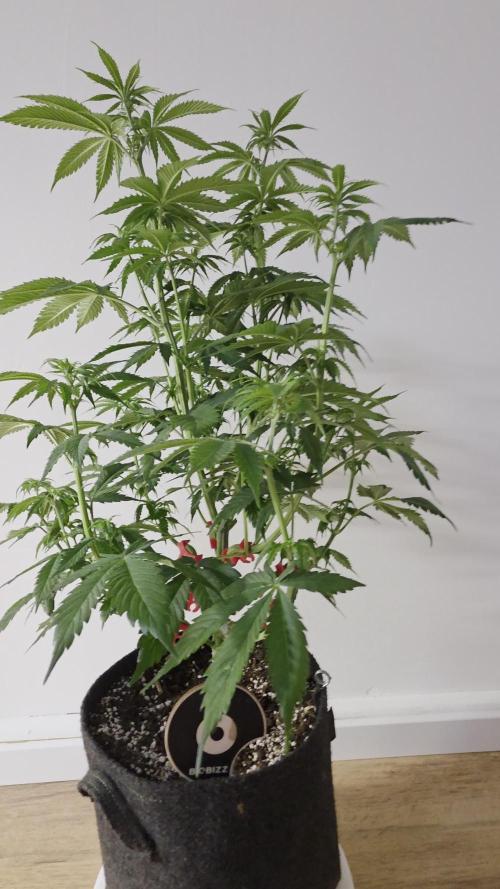
The ladies are doing great and growing well. I'm really happy with the progress so far. They have now reached 60 cm. I plan to install the Scrog net within the next few days to allow them to grow wider.

Likes
20
Share


@NoProbation4Weed
Follow
dry weight of buds after trimming = 93 gram and about 5 gram of Trim so 98g Total.
Actual plan was to leave the plant some more days but after seeing some Nanas developing inside the buds i decided to cut it at day 65 of flower.
great smell and cant wait to smoke the final product. All in all definetly a good strain for living soil.


Likes
5
Share


@HempZ
Follow
Been a while since any updates here on growdiaries, but now im back! Gonna start keeping progress of my plants here again, so here is the info of this new diary:
11 straberry lemonades from Barneys farm
1 granddaddy purple from Blimburn seeds (freebie)
i've been hunting for a special SBL pheno to keep as a mother. 3 of the them have the terp profile im looking for, i'll refeer to them as SBL 1, SBL 2, SBL 3. the other 8 SBLS are not what im looking for.
The GDP is looking and smelling amazing too, one of the best looking plants i've ever grown.
Plants with 34 days of flower - 31/08/24


Likes
14
Share


@CrazyRussian
Follow
This week I started giving Green Sensation to the large plants. They are blooming rapidly from now on. I will add a stick as a support, because I feel that the plants will be too heavy for themselves,I don't want them to collapse. My small daughter still received power roots, and blooming nutrients. Unfortunately she is not growing as good as the rest, but I will keep her anyways.

Likes
2
Share


@HiddenMessage
Follow
growing pretty well. think I started to get a nutrient lock so watered with straight water last 2x and prob 1 more. gonna switch to flower on new years and start flower nutrients. the one in the back smells amazing , considerably better than any of the others so far. both of these plants have purple stems so expectations are some purple later on as its in the name.
I actually switched these into flower on day 1 of this week and put in a different tent. will bring back when I switch the other plants to flower.

Processing
Likes
10
Share


@The_Chef_420
Follow
Unseasonably cold temperatures has had me on edge but growth still looks to be normal. Noticed some magnesium deficiency in some of the lower branches from the temp dipping below 60 so I bumped up my cal mag slightly to compensate. Also increased part B and C of my base nutes as well as Monster Bloom, Nirvana and Purpinator. Still no signs of any purple growth but I'm still very optimistic that these babies will be beautiful no matter what. Might cover up their pots and surrounding ground with hay/straw/mulch or whatever I can find today to help keep the roots warm with lower 40's°F for lows at night in the near forecast. Two of the three Devil's have shown exponential flower growth over the past few days, with more indica characteristics, where the middle Devil is straight sativa, totally a bunch of foxtails forming 🦊 and extra tall, long branches as where the other two are more Christmas tree 🎄 shaped.
Likes
112
Share


@Dunk_Junk
Follow
Week 2 done. She is the only one that hasn't fell over. Her stem looks the thickest of all her tentmates. She also grew the most in height this week.

Likes
Comments
Share

@DogDoctorOfficial
Follow
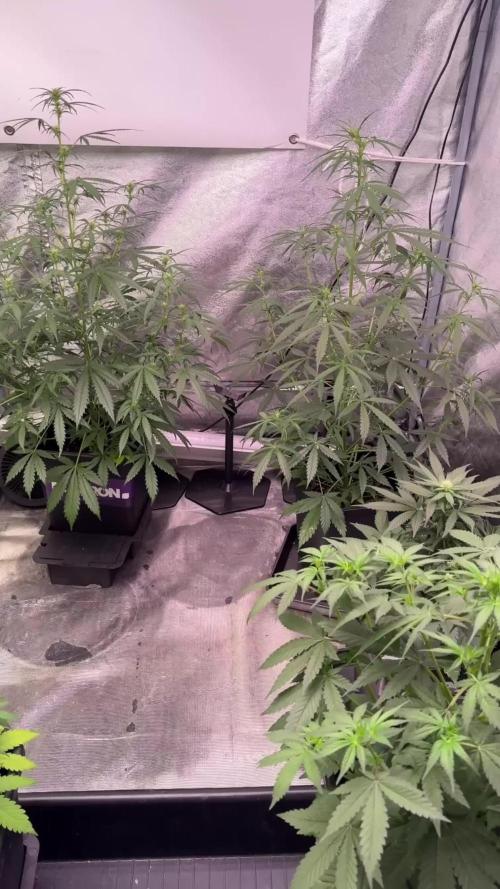
💜 Week 5 – Purple CousKush Auto (Pheno A)
Every Plant Has Its Own Rhythm
One of my favourite parts of growing from seed is watching each plant develop its own personality.
This Purple CousKush has shared the exact same environment, feeding schedule, lighting, and care as the rest of the project since day one. She germinated under the same conditions, transitioned into the same 12/12 flowering schedule from seed, and has been treated exactly the same throughout her journey.
Yet, despite identical conditions, she’s chosen her own pace.
While several of her roommates rushed head-first into flowering, this young lady has taken a more measured approach, focusing first on building a solid structure before fully committing her energy to bloom.
And honestly… I’m perfectly happy to let her tell her story.
⸻
🌱 Plant Development
This week she continued her steady transition into flower.
Standing at approximately 66 cm, she has developed an elegant, open structure with excellent internodal spacing and strong vertical growth. Rather than producing large clusters of pistils all at once, she is introducing flowers gradually across every branch, giving the impression that she’s carefully preparing her framework before beginning the real work of stacking buds.
The LST performed during the previous weeks continues to pay dividends, allowing multiple flowering sites to receive excellent light exposure while maintaining a balanced canopy.
Her stems have thickened nicely, the branching remains symmetrical, and every day she seems just a little more confident.
Some plants explode.
Others simply keep making quiet, consistent progress.
This Purple CousKush definitely belongs in the second category.
⸻
🌿 Environment & Growing Conditions
Like the rest of the Project Blue Tent, environmental conditions remained stable throughout the week.
* 12/12 lighting schedule from seed
* Future of Grow Black Series LED delivering approximately 850 PPFD
* Mammoth Pro tent with excellent airflow
* Day temperature around 31°C
* Relative humidity averaging 72%
* CO₂ around 639 ppm
Even under these warm summer conditions, she has remained healthy, vibrant and stress-free, showing no signs of environmental discomfort.
Although she hasn’t advanced into flowering quite as quickly as some of the other phenotypes, her overall health leaves absolutely no reason for concern.
She’s simply moving at her own rhythm.
⸻
💧 Feeding Program
Unlike several other plants in the room, this Purple CousKush is also being hand-watered and is not connected to the AutoPot system.
Growing in a 15 L Plagron Lightmix container, she received approximately 0.9 litres of nutrient solution per watering.
This week’s feeding consisted of:
• Terra Grow – 1.8 ml/L
• Terra Bloom – 1.9 ml/L
• Pure Zym – 1 ml/L
• Power Roots – 1 ml/L
• Sugar Royal – 1 ml/L
• Power Buds – 1 ml/L
The feeding program continues to provide everything she needs. Her foliage remains a healthy deep green, new growth is vigorous, and the root zone appears to be supporting strong, uninterrupted development.
At this stage there is no reason to change something that is clearly working.
⸻
🌸 Phenotype Notes
This phenotype is another wonderful reminder that growing is never about comparing one plant against another.
It would be easy to look across the room and notice that several plants have already pushed further into flowering.
But that’s not the point.
Every seed carries its own expression.
Some begin flowering earlier.
Some stretch more aggressively.
Some invest additional time building structure before stacking flowers.
This Purple CousKush seems determined to build patiently before asking for the spotlight, and I have complete confidence in allowing her to follow that path naturally.
Growing isn’t a race.
Harvest day eventually arrives for everyone.
⸻
🔍 Looking Ahead
The coming weeks should be very exciting.
Now that flowering has clearly begun, I expect to see the stretch gradually slow while the energy shifts toward developing larger flower clusters across every branch.
Her open structure should provide excellent airflow and light penetration as the buds begin to bulk up, and I’m looking forward to seeing how this phenotype expresses the beautiful colours and aromas Purple CousKush is known for later in bloom.
Until then, the plan remains wonderfully simple:
Stay patient.
Stay consistent.
Let her do what nature intended.
⸻
💭 Final Thoughts
Not every plant needs to be the fastest to become memorable.
This Purple CousKush reminds me that one of the greatest lessons gardening teaches us is patience. We can create the ideal environment, provide balanced nutrition and careful training, but ultimately each plant decides the pace of its own journey.
Right now she looks healthy, balanced and full of potential, and that’s more than enough for me.
The flowers will come.
The stacking will come.
The weight will come.
For now, I’m simply enjoying watching her become exactly the plant she wants to be.
⸻
🙏 Thank You
As always, a huge thank you to everyone following along with this adventure. Your comments, encouragement, questions and shared experiences make these diaries far more enjoyable than if I were growing alone.
A special thank you to all of the incredible companies helping make this project possible:
💜 Zamnesia for the genetics.
💜 Plagron for the nutrition.
💜 Future of Grow for the amazing lighting.
💜 TrolMaster for helping keep everything under control.
And finally, thank you, the GrowDiaries community. Whether you’ve been here since the very beginning or you’ve only just joined this journey, I truly appreciate every visit, every comment, every like and every bit of support.
Until next week…
Growers Love and happy growing! 🌱💚
Processing
Likes
39
Share


@G4NJAG4NG
Follow
Day 57 Day 15 flower - what can I say? No issues reported so far, did some more defoliation below the scrog and tidied up some of the flower sites, removed a few of the old fan leaves and checked on Zkittlez OG, she is frosty already and starting to look really sparkly and beautiful 💎😍
The others are also showing some frost and bud development is going well!! Exciting times ahead!
290319 day 59 flower day 17 - no issues apart from slight heat stress for the girl in the middle, will adjust the light tomorrow to ease the stress. Bud candy just arrived so I will add 1ml/l on next feed tomorrow morning! Overall the bud sites have came through in numbers and are looking very strong and healthy, OG Zkittlez auto has turned into diamonds of trichomes and the others are following suite 😍 more updates to come! Hopefully skittlez is finished in the next 3 weeks! Also added a rotating flow to get good air flow in the tent, there were some dead spots.
020419 day 63 flower day 21


Likes
127
Share


@HAPPYWEEDS
Follow
Really big monster with big yield powder. Beauty green colors. She is very leafy so I recommend some defoliation. I will upload more details when it will be cured. Also I will upload smoke review and dry weigh.

Likes
8
Share


@JolliGrowz27
Follow
Emerald Fire OG Auto from Humboldt Seed Company.
Took a sample last week and smoked a couple, spicy, it hits hard. Still maturing, I am getting anxious for the final product. Has a peppery smell and sweet at the end. Kind of like a peppery cucumber.
Likes
10
Share


@Kardo
Follow
Die Lemonberry Haze kommt zu 100% nochmal also ich wurde garnicht enttäuscht von meiner Hoffnung wie sie sich entwickelt ist einfach krass die buds sind richtig dick und voll mit Zucker sehr schön zum angucken

Likes
2
Share

@AestheticGenetix
Follow
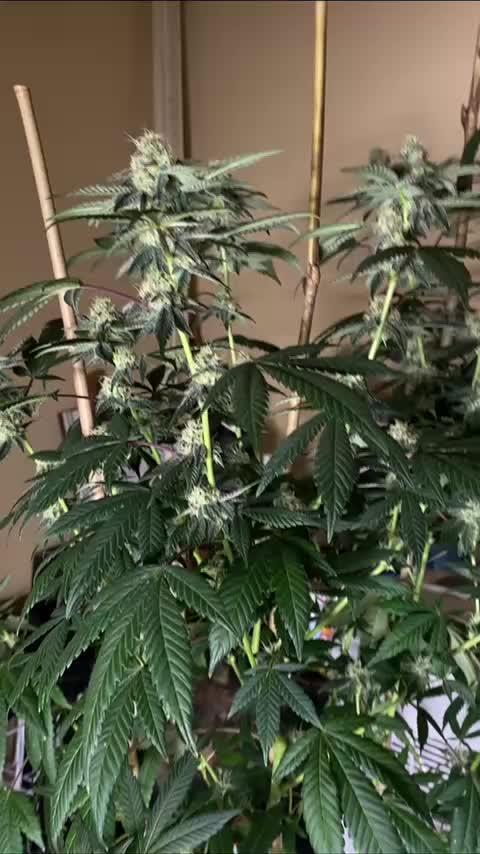
Looking so so frosty now. The stinks really starting to eminate and dominate the room
Likes
1
Share


@AdamTheGod
Follow
It was one of my first experiences mainlining and heavy defoliating, and I definitely saw the advantages to doing so(even on a smaller plant). I enjoyed this plant so much I wish I could find more seeds. Very potent, RUBBER, diesel, gas smells. Super sticky and gooey, and the bud structure was perfect. Dense, with very little leaf for trim. Beautiful colors and all together an amazing strain.

Likes
24
Share


@GR0WER
Follow
Second week of flowering starts!
☀️01.11.2023
Nearly all is going like it should.
'Nearly', because of lidht signs of magnesium deficiency on the few leafes of one 'Special Queen' plant. I'll try to give them a drop of 'CalMag' before it'll be too late.
Therefore, I have a great garden, - it's lovely looking and the budz are forming well. The trichomes developong have started.
I'm spraying it with 'Bio Bloom' solution every day.
☀️03.11.2023
Watered two of them today. 'Bio Bloom' spraiyng also.
☀️05.11.2023
'Bio Bloom' spraying only.
☀️07.11.2023
Watering with 50% consentration 'TA Tripart' + 100% 'Bio Bizz CalMag'. Spraying with 'TA Pro Bloom' solution.
Week ends.
