The Grow Awards 2026 🏆 


Likes
Comments
Share
@Bread_n_Buds
Follow
In small barrels there is good wine, says a classic proverb from my home country and our two Do si Dos naturally branded Zamnesia seem to fit this proverb perfectly.
Small and beautiful like two very beautiful girls, it often happens I have a weakness for short and pretty girls.
The smallest one was worked with a topping to create a mainfold and then main lining. Being a plant with a low internodal distance it ended up becoming a kind of bonsai which to tell the truth we don't mind at all very cute and effective.
The worked plant left growing straight is practically ready and. we are flushing it with industrial quantities of water because it arrived a bit loaded at the end.
The shape is very very beautiful like the structure of this plant for real.
We are still using soil, fertilizers and all the additives recommended by Plagron 100% organic on one and the other Canna Flush.
---- Decide on the right soil and calculate your fertilization program based on the soil on the official website. -- www.plagron.com
Try a seed of this strain that drives us crazy..
---- https://www.zamnesia.io/en/10664-zamnesia-seeds-do-si-dos-f1-automatic.html
Zamnesia Description // From the team at Zamnesia Seeds comes Do-Si-Dos F1 Automatic. Using consistent and reliable F1 genetics, this strain is not only incredibly easy to grow, but also offers potent and delicious buds. The plants remain small and offer a reliable growing experience that everyone will appreciate.
All the best that mother nature has to offer is at ---- www.zamnesia.com


Likes
3
Share
@CalGonJim
Follow
2/16, 10:28 AM. I got a little distracted with my vegetable garden and some more movie props looks cool though.
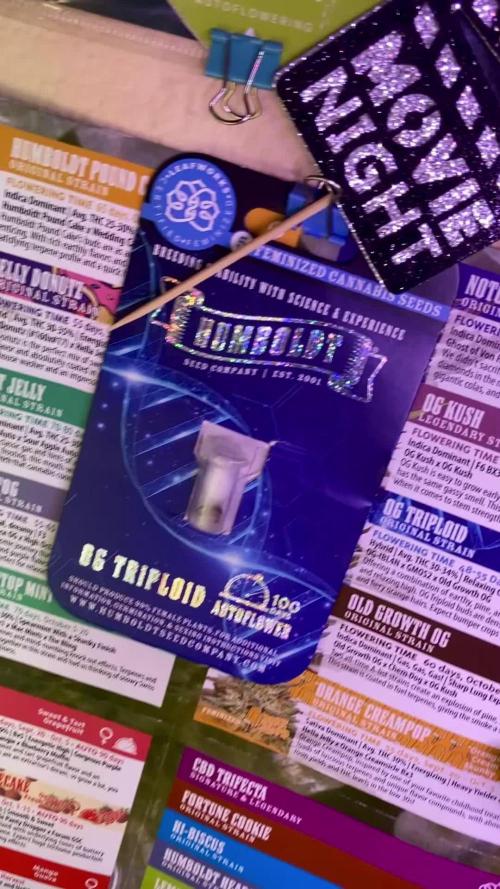
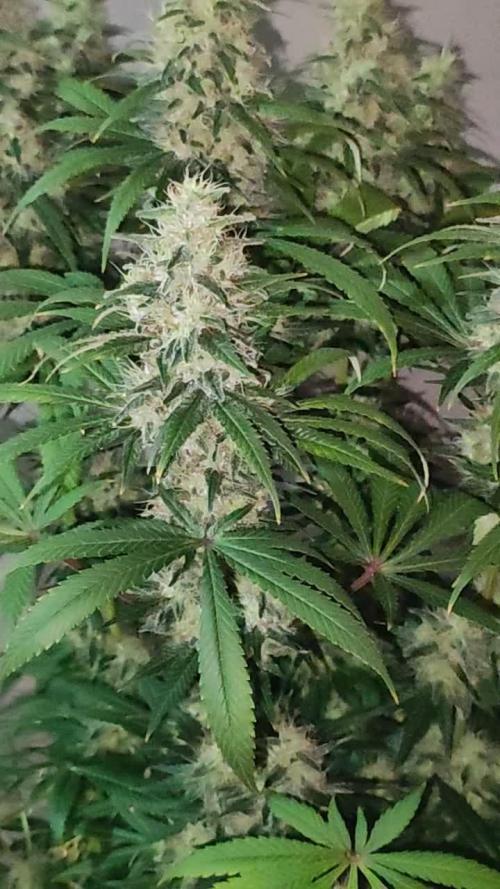
2/17 9:34 AM. My EC was high on these plants so I took it down. to about 1200 on banana and I’ll try and get a lower on OG triploid she’s just great. I used water with EC at about 970 going in and I used a whole gallon on each until the EC coming out was 1280 on BPP and still 1700 on OG triploid. Responding very well right now.
I did it about an hour ago and the resin on OG.Triploid is just incredible and banana purple punch RF3 by fast buds. She’s throwing out very thick pistil formation much more than I usually see. She’s still behaving like a flower and 7 to 8 week a lot of pistils formation lotta flower growth she is not slowed down and the flush today darted her growing again.👍


Likes
6
Share
@illforwill
Follow
These fast bud genetics have given me a new hope for autos. For 53 days I have some nice sized colas and buds with beautiful color and the most amazing smells. I can’t believe these things just get better by the day. Can’t wait to grow my next set of fastbuds genetics
Processing
Likes
21
Share
@kushh
Follow
Hello friends. I have 1 problem
Could you help ?
[seed , genetic, manufacturer company, I do not know.]
day 37 flower started. day 65 low flower.
Likes
49
Share
@Mr_und_Ms_Lue_Roots
Follow
So wir befinden uns am Anfang der 9ten Blütewoche
Es ist einfach faszinierend was die für die Größe schaffen. Gerade die Blütephase bei dieser Anbauweise verschafft wohl wirklich viel Entspannung ^^
Es wächst so geschmeidig aber doch sicher. Auch wenn man zu den Zeitpunkten auch schon mal zweifelte, die Natur und ihr Streben geraten in Vollendung.
Auch komplett Unterstrichen, dass Blattgut ist dem gesamten lauf über sehr Gesund und somit ein guter Kraftanker für die Pflanze.
Allgemein wollten wir in diesem lauf, auch eher natura fahren und mehr Blattgut der Pflanze überlassen.
Die SQ1 hat davon sehr positiv profitiert für ihre Größe, wirklich schade das unser erhoffter Streck auf der Strecke blieb. Aber der Fehler wird zu dem Zeitpunkt noch im Boden leben liegen. Aber man kann nur besser werden im besten Fall ;-)
Ansonsten gibt es nicht soviel zu Berichten außer, dass die Pflanzen in diesem lauf Lilafarbende Trichome aufweisen :-)
Wir sind sehr gespannt und freuen uns schon auf den Smoke Report für euch.
Vielen Dank und euch allen eine mega Erfolgreiche kommende Woche!
VG


Processing
Likes
12
Share
@2Stones1Bird
Follow
Checkout my Instagram @smallbudz to see the Small budget grow setup for indoor use, low watt, low heat, low noise, step by step.
07/12/2019 - Fed her 2l of 6.5PH water with 0,5ml of each Grow, Bloom, Max and Alga-mic, and 1ml of each Heaven and Vera,noticed about 10% run off, also added a green filter to the camera lens. Adjusted the light distance to 55cm again it was toooo close about 32cm.
10/12/2019 - Decided to go back and check the basics, removed led strip to give a proper 'night' time, changing light cycle to 20/4h no more 'exotic' 22/2h, re-checked the light distance every 2 to 3 days to ensure 60-45cm and I can tell all ready she is loving it.
Also added home made Co2 made with 1 tsp of yeast, 3/4 tsp of sugar 700ml of warm water in a 1l bottle with a tiny pin hole on the cap.
11/12/2019 - Fed her 1.5l of 6.5PH water with 0,5ml of each Grow, Bloom, Max and Alga-mic, and 1ml of each Heaven and Vera,noticed about 10% run off.
12/12/2019 - 8 weeks have passed and no flowers I guess I'm flipping to 1212h to see if she reacts.

Likes
9
Share
@Jbuttch
Follow
Ya viendo el resultado del último LST, desde aquí ya veo cómo van las cosas!
Likes
25
Share
@Mrs_Larimar
Follow
When I started this Grow, i never expected such a vigor Plant, and i havent been reading about the
XL-Versions.
But now its clear, by incrossing the Ruderalis, the Plants grows explosive and extremly Strong
I had to move them out of the small Cabinet
after i took them into the Floweringroom, they continued to Grow and in the End the Plants got
130 cm Hight
I wished i had grown them in bigger Pots
But i started them into 5l ( fitting into my Growbox)
and it was to late to transplant them
3 of 4 Plants turned darkpurple-one was pink.
Harvesting was an easy Job, because of those lovey Budshape, they are growing symmetric konic
along the Branches
they were Smelling like Peach, and some musky Undertone
while Harvesting them ,i got a Smell of fresh pressed Applejuice and some " green smell"
Plants were covered with sticky trichomes,
very courious to the endproduct
Its an easy to grow Plant, if you know about her vigourness 😂
Iam very pleased with the grow
welldone @Sweet_seeds

Likes
11
Share
@Bncgrower
Follow
We've reached the end of the penultimate week. This girl's buds are also very dense, resinous, and fragrant. Based on the trichome analysis, she's at a great point. 😎
In the 15 days before harvest, I start watering only with RO water and a pH of 6.2. At the beginning of the last week, and about 3 days before harvest, I'll flush with RO + Cleanse 10mL.

Likes
8
Share
@Aranseed
Follow
Tercera semana de vida de las niñas. Ya nuestras plantas feminizadas en condiciones de pasar a floración, pero no sin antes aplicar podas apicales a estas (Mostrare el resultado de ese corte a comienzo de la floración). A nuestra automática no le haremos nada y la dejaremos crecer normalmente, incluso recibiendo menos luz, pero si intentaremos acomodarla en nuestra malla Scrog cuando tome mas tamaño para maximizar su producción usando LST.


Likes
5
Share
@Ensign420
Follow
Greetings fellow growers 🖖 and welcome to my first grow ever. This adventure actually started several months ago when I decided to stop buying flower from dispensaries and just grow my own bud. How hard can it be!?
This is actually my second seed of this strain. The first bean sadly died due to over watering (sorry girl, RIP). I was literally watering the cube to the point where water was dripping from the bottom, then heavily sprayed the humidity dome and tray with the vents completely closed. Everyday. Multiple times. I never let the dome or try dry out. So after about 8 days of not sprouting, there was a funky smell of rot. So that was that.
Later I learned that rockwool retains a lot of water and can easily drown seeds. So a wet/dry cycle is best for rockwool germination.
So even after hours of researching and digging through forums and tutorial videos, I was still under prepared for this journey. Did not consider how delicate the germination phase is. Oh well. Lesson learned. Reset and try again!
I hope everyone is safe and stoned during this corona crisis. Just like everyone else in the world, I want this pandemic to be over with. But in the meantime, let's grow some weed! 🖖
[START OF WEEK 01]
Day 01 - Monday - 08/03/20 - Total Days: 001
-----------------------------------
- [0830]: Light Schedule: 24Hrs/0
--- Soaked cube in 5.5 PH water for 10 min. Did not shake water out.
--- NO NUTES! Only PH'd down to control the PH levels.
--- Did not use the default hole (way too deep).
--- Flipped cube upside down and made a shallow hole for the seed (less than 0.25" deep).
--- Placed seed in and pinched hole close. No additional water added.
--- Sprayed the tray and dome with straight water (5.5 PH).
--- Vents are cracked opened a for ventilation (about 1/4 opened each).
--- Distance between the light and tray was 53"
--- AC was set to 80 °F
--- Exhaust fan was set to 86 °F
--- Room average temp was at 85 °F
--- Dome humidity was at 85-99% when sprayed.
--- Allowing to completely dry before respraying.
- [2200]: Dome and tray were completely dry! Sprayed only tray and dome with more water.
Day 02 - Tuesday - 08/04/20 - Total Days: 002
-----------------------------------
- [0845]: Sprayed dome and tray in the morning. Everything was dry.
--- Hoping for the best!
- [2130]: Everything was dry again, so sprayed dome and tray at night along with a light spray on the cube.
Day 03 - Wednesday - 08/05/20 - Total Days: 003
-----------------------------------
- [0830]: Everything was dry again. Resprayed dome and tray. Slightly sprayed cube.
- [2125]: Hooo damn!! She popped! Am little stub is visible! Resprayed dome and tray again.
--- Still going 24/0 for lights.
- [+0033]: Just checked up on her and I swear she grew a bit taller! Getting excited!
Day 04 - Thursday - 08/06/20 - Total Days: 004
-----------------------------------
- [0845]: Wow! Went from a little stub to fully sprouted overnight! Everything was pretty dry again so resprayed dome and tray.
- [2200]: Tap root is visible! Over 1" long too! Just resprayed dome and tray again.
-- Going to prep for hydroton transplant tomorrow!
Day 05 - Friday - 08/07/20 - Total Days: 005
-----------------------------------
- [0930]: She keeps growing!
-- Added a bit of CalMag to the spray bottle (8 drops to 650ml of distilled water). Resprayed dome and tray. Water was at a 5.4 PH with 141 PPM.
- [1045]: Prepped the bubble bucket with 4.5gal of water. Water is high enough to reach about 0.25" above the bottom of the net pot.
--- Added 3 drops of Superthrive
--- Added 3.5ml of CaliMagic
--- Added 2ml Hydroguard
--- Then PH'd down to 5.6
--- Solution Strengh: 120 PPM
--- Water chiller is set to 20 °C
- [1100]: Transplant time!
--- Filled the net basket 1/3 with hydroton. When placed in the bucket, air bubbles are not visible, but are slightly below the surface (slight digging will reveal the water/bubbles below).
--- Removed plastic on rockwool cube and placed in basket, then filled around and covered with hydroton. Making sure to block any light from passing through the net pot and into the nutrient solution.
--- Covered with a half-bottle dome sprayed with the CalMag water from earlier.
--- Hoping for the best!
- [1300]: Raised Bucket 5" higher. Now light distance is 48" to top of bucket.
- [1820]: Lowered tent exhaust temp to 76 °F
--- Lowered AC to 75 °F
--- Raised bucket even higher so light distance is 30" to top of bucket.
- [2300]: Looking good!
--- Sprayed dome and surrounding hydroton with more CalMag water.
--- Attached timer to light! So new 18 Hrs On/6 Hrs Off light schedule.
--- Lights On: [1600] (4pm)
--- Lights Off: [+1000] (10am the next day)
--- Decided to go with lights on during the evening/night and off during the later mornings/afternoon (the hottest part of the day) to see if temps can be controlled better.
--- Please survive girl!
Day 06 - Saturday - 08/08/20 - Total Days: 006
-----------------------------------
- [0800]: Everything was dry. Resprayed hydroton and dome.
- [2000]: Here first night cycle seemed to go well! Get'n taller!
--- Dry again. Removed the dome.
--- PH went up to 6.5 so PH'd down to 5.7
--- Ran the top feed drip ring for a bout a minute to wet the hydroton and rockwool with the nutient solution.
---Too scared to leave the top feed on 24hrs (I don't want over water her and cause dampening-off). Will let dry before re-watering.
- [2100]: After closer inspection, I think she's looking a bit yellow.
--- Decided to add a bit of grow nutes to the bubbler solution.
--- Added 2ml of Sensi Grow A
--- Added 2ml of Sensi Grow B
--- Solution strength after adding more nutes: 176 PPM
--- PH went up to 6
--- I hope that the extra chelating properties of the 'PH Perfect' solution is enough of a buffer for proper nutrient uptake.
Day 07 - Sunday - 08/09/20 - Total Days: 007
-----------------------------------
- [0800]: Water dropped a bit (mostly due to evaporation) so solution strength was at 190.
--- Checked PH again. Was still at 6, so PH'd down to 5.4
--- Ran the top feed for a minute to wet the hydroton a bit.
- [0915]: Since she's looking perky but still a bit yellow. So decided to up the nutrient concentration even more before lights out.
--- Added 2ml more of Sensi Grow A
--- Added 2ml more of Sensi Grow B
--- Solution strength after adding more nutes: 199 PPM
--- PH went up to 5.8
- [1700]: Checked nutrients.
--- PH: 5.9
--- Solution strength: 202 PPM
--- Added 4ml of Voodoo Juice
--- Added 4ml of B-52
--- PH after adding more nutes: 5.9
--- Solution strength after adding more nutes: 238 PPM
- [2130]: Decided to make a new foliar spray to address the continued yellowing.
--- Started with 500ml of distilled water.
--- Added 3 drops of CaliMagic
--- Added 3 drops of Sensi Grow A
--- Added 3 drops of Sensi Grow B
--- Added 3 drops of B-52
--- Added 1 drop of Superthrive
--- Solution strength: 164 PPM
--- PH was at 5.9 and did not adjust.
--- Gave her one spray.
--- Also sprayed the surrounding hydroton.
[END OF WEEK 01]

Processing
Likes
8
Share
@Max1973
Follow
Day 63 - lookin good.... haha....
um, tanks stabilized, ph 5.8 - ppm 1200 .... she's feedin alot.....
buds are fillin and lotsa white furries....
listed the nutes and amounts etc.., but i'm kinda feeding her as she needs.... so every few days she is drinking
2 lts +- and i'm just mixing up a neut solution in a 2 lt bottle every day or 2 ..... sometimes she just wants abit of water......
Day 64
+vid....shows her deep green and gloss... abit of crystalic :)
Day 65 - vids pics.... trimmed her, and abit of bending....
Added blood and bone.... she's stretching alot, 60cm+ ........
Day 67 took all the early buds on all the stringy 0ff shoots....
Poor lighting vids, but don't want to mess with her flowering, :)
👍😎👊


Likes
174
Share
@Schnabeldino
Follow
📅 Week 12 | 🗓️ Day 78–84
Day 84 – 4-5 week of flower 🌸 Lemon Cherry Runtz 🍋🍒
🔸Nothing much happened this week. I spent a few days in London with friends and watching the NFL London Game between the Denver Broncos and New York Jets, my mother took great care of the ladies, hehe. 😇
🔸Conditions are stable over the entire period. I am very excited.
📈 Current Conditions (Day 77)
🌡️ Day = 26 °C
🌡️ Night = 19 °C
💨 Humidity = 55%
🌬️ VPD = 1.4 – 1.6 kPa
🔦 PPFD = ~1000 µmol (12/12)
🛠️ Setup (unchanged)
💡 2 x SANlight Evo 4-120 @100%
⛺ 120 x 120 x 180 Spiderfarmer tent
🍯 Pots: 18L fabric pots
🌱 Soil: Bio-Bizz Light Mix
💊 Nutrients: BIO Tabs
🌱 “Easy, organic, only-water method. Save 15% with GDBT420. biotabs.nl/en/shop/”
Likes
19
Share
@Takeaims
Follow
The rest are still going good only 1 hiccup that was my fault damaged 1 plant it happens but atleast my tents still full looking to upgrade to bigger tent
Likes
6
Share
@Ninja_grow
Follow
This is my first grow indoor, 2 plants in a tend 80 x 80 x 160 cm. Using a mix substract, in a 7 liters vase. Germination was done with the paper towel method. At the first week one of them was stagnated, so I forced up the seed and probably hurt a cotyledone.
