
Likes
Comments
Share


@Dr_Green_Thumb87
Follow
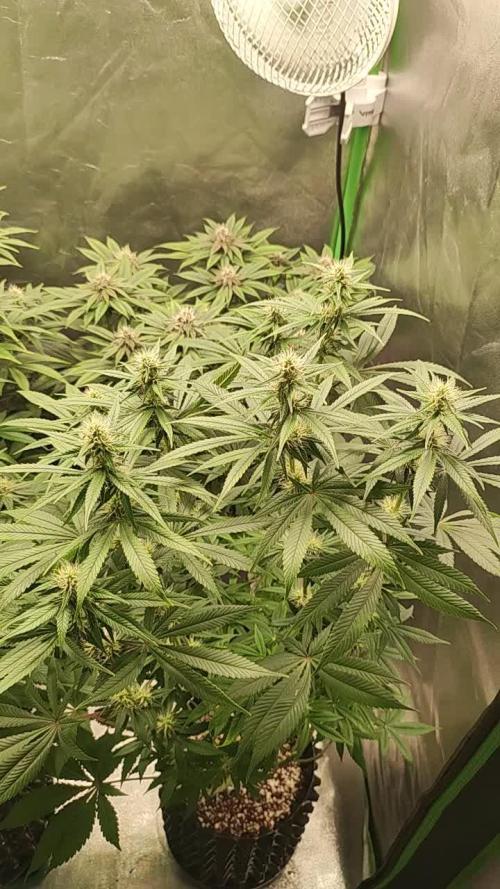
Day 65 harvest of the main buds and some bigger side buds. Lower parts stay for a couple more days for better results.


Likes
24
Share


@TerpTurtle
Follow
Strawberry cream soda terps
Check out Detroit Seed Co
..........................................................................................................................
2x4 grown with Mars Hydro Sp3000 in Organic soil 7 gallon pots
Processing
Likes
24
Share


@GrowGuy97
Follow
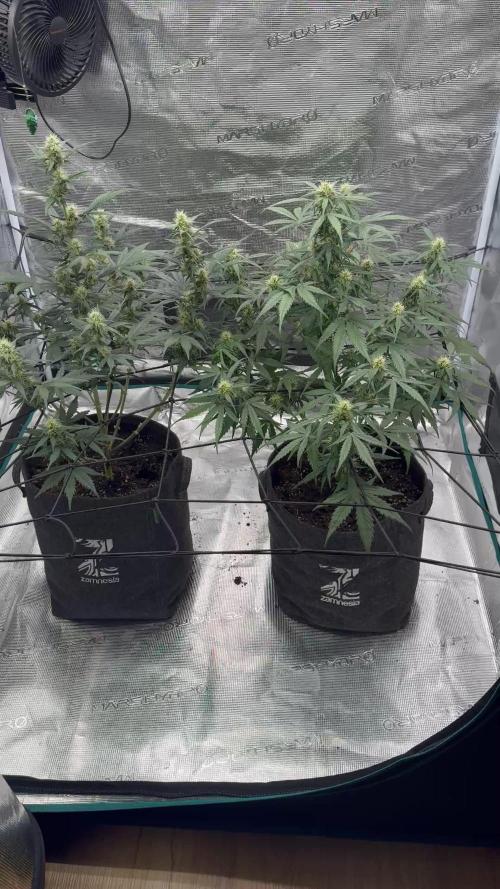
Day 35 - All still growing very strong, both plants that aren’t being mainlined are very short & bushy but have a lot of bud sights! This strain has taken very well to mainlining as well, the double mainline is up to 8 tops now and doing great! Thank you to everyone for following & make sure to check back for daily updates! Happy growing friends!✌️🏼🌱

Likes
22
Share


@BB_UK
Follow
Honestly an amazing week! They’re stretching and producing so many bud sites widening their structure with some well let’s call it mid stress training lol i may if had a problem though I’ll see 😞 as my lights didn’t turn off until an hour and 15mins after their normal time due to a malfunction… sooooo hoping no problems ffs but will be switching that to a manual one tomorrow when lights are on! 🤞🏽 I hope because up til now it’s perfect no complaints!
Likes
6
Share


@midnitrtoker
Follow
What’s up everybody. So I started to flower already as you see I identified the sure males and tossed them out. What is left is 2 that still have not confirmed whether they’re female/male. I will see you all next week. Where they lol be in there forever home which will be 1Gal. The nutrients are all in Grams I hope this doesn’t confuse anyone.
Likes
14
Share

@Bncgrower
Follow
Following the plan, the girls are beautiful and were already quite big during this stretching phase. I hope everything continues as it is now during this growth and weight gain phase. For the rest, just wait for time to pass. 🌱🌿✌️✌️

Likes
12
Share


@Pedro_88
Follow
solo me fui dos días de la casa y cuando llegue así estaba, va muy bien su crecimiento
Bueno como ven e ido podando las hojas bajas para que pueda coger más luz su tallo, ahora mismo la tengo en un indoor casero que tengo por qué el clima está muy lluvioso

Likes
4
Share


@goeser
Follow
She is growing amazing! Buds are sticky af and the small is really interesting, love it!
Hope to hatvest her in 1-2 weeks

Likes
44
Share

@Natrona
Follow
Straw-Lectric Lemonade
W6 12/14-20
Important dates
11/9 Germination
11/25 Transplant to 1.5 gal,
12/1 Topped, Pinned and removed 2 large center leaves
12/5 Repositioned pins and removed lowest fan leaves
12/16 Topped 4 tops on each plant topped the cut with manuka honey and pinned the tallest limbs. Cadillac1 got her first topping.
Nutrients:
12/16 1.5 ltr
Aptus Regulator 1.5ml
Aptus startbooster 2.5ml
Fora micro 5ml/g
Flora grow 5ml/g
Grow Time 5ml/g
Plant Juice 2 TBSP/g
6.32ph, 825ppm, 60.9
12/19 Pics 1.5ltr
Aptus Regulator 1.5ml
Calmag 2.5ml/g
Recharge 2.5ml/g
5.71ph, 310ppm, 64f
The Strawberry’s received 1.5 liters 2 times on 12/13 &19.
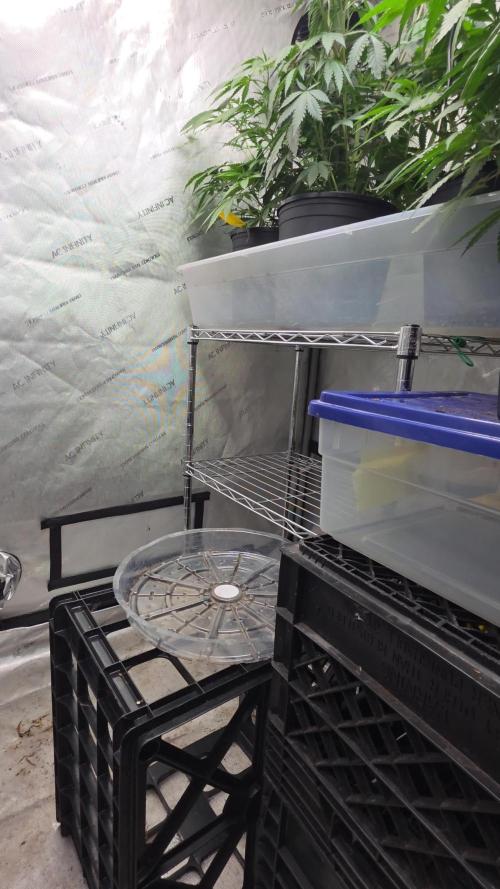
12/16 On 12/16 after harvesting apricots, I had to move Cadillac1 off the shelving unit and put her on lower crate. She is as tall as the other plants positioned on the top shelf. I topped Cadillac1 but since she is asymmetrical, I don’t think topping will create 2 tops. Time will tell.
All the girls bounced back after the topping.
Strawberry Cadillac #1 27” #2 18.5“
Strawberry Trop Cherry #1 18” #2 13”
Straw-Lectric Lemonade #1 15” #2 14
Happy Holidays
Stay green, growers love 💚🌿
💫Natrona💫
Likes
29
Share


@SolitudeCorners
Follow
Can't wait to blazeeee
Feeding💪
10/17 Water30L+Cleanse80ml+calmag@190ppm
Ph6.3
Ebb 10.42/11.32/12.26/13
Clone 11.35/12.21/13.05/14
Average runoff ec1.5
Keeper 300ml per pot
10/18 Water26L+Flawless90ml+calmag@300ppm
Ph6.3
Ebb 11.38/12.24/13.17
Average runoff ec1.2 ph6.5
Clone 12.38/13.56/15.20/16.10
Average runoff ec1.5 ppm750
10/19 Water26L+Cleanse80ml+calmag@200ppm
Ph6.3
Ebb 11.12/11.48/12.24
Average runoff ec1.4
Clone 11.50/12.12/12.37/13.37/14.40
Average runoff ec1.3 ph6.6
10/20 Water30L+Cleanse30ml+Calmag@190ppm
Ph6.4
Ebb11.42/12.22/13.20/14
Clone 12.40/13.20/14.20/14.45/15.15
Average runoff 1.2ec ph6.4-6.7
10/22 last light day
10/23 2 Pm Cut and hang
Plan 21day at 23temp 55rh


Likes
4
Share

@cangrowz
Follow
Wir befinden uns jetzt in der 7 Woche sie hat deutlich nochmal aufgebaut bin sehr dran interessiert wie das Endresultat ist. Bisher haben sie schon leichte Lila spuren an den Buds hoffe das wird noch mehr. Soweit bin so zufrieden auch wenn ich denke sie sei zu klein.
Processing
Likes
20
Share


@Hawkbo
Follow
Couple got a little burn I think maybe a little too much soil in there with the coco on top of the light feed? I got all the final pots filled up today they will go in 3 gal bags either today or tmm. It's a Greentree pro ultra coco/perlite mixed with some roots organic soil about 70/30.
Likes
9
Share


@Staffedition
Follow
Привет друзья.
Наше знакомства продолжается с новым сортом автоцветущих растений от Smail_Seeds сорт ORIGINAL AUTO CHEMZKITTLEZ F1 reg.
Сегодня растению 58 дней.
Растение очень хорошо развивается, ни каких сбоев в генетике не наблюдается.
Шишки наливаются😀
Сорт выводим сами.
Смотри мой профиль, у нас всегда есть что то интересное.
Не забудь поставить лайк❤️, если понравилась как прошла неделя
И читайте наш TELEGRAM: https://t.me/smail_seeds
#Smail_Seeds 😀
Likes
8
Share


@pegas
Follow
El olor es cada vez más dulce y afrutado, 3 semanas y estarán listas para la cosecha.
Likes
41
Share


Likes
48
Share


@MadeInGermany
Follow
Info:
Unfortunately, I had to find out that my account is used for fake pages in social media.
I am only active here on growdiaries.
I am not on facebook instagram twitter etc All accounts except this one are fake.
Have fun with the update.
Flowering day 64
since time change
to 12/12 h.
Hey everyone ☺️.
We have slowly reached the end .
Harvesting takes place in the next 4 - 8 days.
The trichomes are 80% clear and 20% amber.
Yesterday I freshly prepared the water again with a pure Ec value of 0.4.
Now the lady is allowed to use the last sewing material she still has until the harvest 👍.
All pumps and the tent were also cleaned.
As always, there is an extra harvest update and finally the update after the fermentation process 👍.
until then, I wish you a lot of fun with the update.
Stay healthy 🙏🏻
You can buy this Strain at
https://www.amsterdamgenetics.com/product/kosher-tangie-kush/
Type:
Kosher Tangie Kush
☝️🏼
Genetics:
Kosher Kush
X
Tangie
👍
Vega lamp: 2 x Todogrow LED CXB3590 COB 55 W
1 x Sanlight S2W 62 W
💡
Flower lamp : 2 x Todogrow LED CXB3590 COB 55 W
1 x Sanlight S2W 62 W
💡 ☝️
Grow Aero System : Growtool 0.8
☝️
Fertilizer:
Canna Aqua Vega A + B , Canna Aqua Flores A + B , Rizotonic, Cannazym, CANNA Boost, Pk 13/14, Canna Cal / Mag, Canna Ph - Grow, Canna Ph-Bloom
☝️🌱
Water:
Osmosis water mixed with normal water (24 hours stale that the chlorine evaporates) to 0.2 EG. Add Cal / Mag to 0.4 Ec Ph with ph- to 5.2 - 5.8
💦 💧

Processing
Likes
10
Share


@TrimQueen
Follow
So, guys.. This is her first month blooming. 4 complete weeks has passed. Here we are for 2 more. Gave Her a super powerful egg shell fert (all powdered - Phosforium Whelthy.)
07/10/20 - We are in the middle of week 5. Thats the way they look like. For me a good number of buds and they are as dense as I thought they would be by this time. I think everything is under control despite some foxtails cuz the heat. Loving the experience.
Likes
163
Share


@JamMAKEcan
Follow
After plucking middle stems she has filled out perfect...just waiting couple weeks to grow up little before switching to flowering.. She in same tent as malasana cookies an purple shot... BIG UP MARS HYDRO COMBO LIGHT & TENT.. HIGHLY RECOMMENDED
Don't get any better
