
Likes
Comments
Share


@AllCannabisAreBlazin
Follow
04/28/25
Round two of WongBurger! (After failed autos..)
Two methods: directly in soil & glass of water.
4 seeds: 2/2 1 week apart.
Two ish weeks ago we bought some worms to eat the roots of the last harvest. The cover crop grew insane. Cut it back & tilled the top soil for the worms. Broke it down fast imo.
04/20/25 planted 2 WongBurger & 2 Bible Fruit Auto Flowers. None of the autos sprouted. We checked to see if it just couldnt get thru the soil. Seeds never popped. So now experimenting with glass of water germination.
First harvest we let it Xmas tree & allowing for smaller yield just to see how it grew. This harvest, plan to scrog, tip & fine tune a bit more for a higher yield. See what we can get up too!
**First harvest, thru the growing process stem smell checks smelt like pickles & now during cure it has a gassy pickly funky smell. It's pretty loud but you wouldn't smell down the street. Synthetic grows prob lol high: calming, can have sedation, can have munchies, just over all relaxing couch lock. Pretty chill.

Likes
6
Share


@midnitrtoker
Follow
What’s up everybody. So I started to flower already as you see I identified the sure males and tossed them out. What is left is 2 that still have not confirmed whether they’re female/male. I will see you all next week. Where they lol be in there forever home which will be 1Gal. The nutrients are all in Grams I hope this doesn’t confuse anyone.
Likes
15
Share


@CzAlmighty
Follow
First time , i am tried cmh lights. and i am satisfied. beautiful harvest. Thank for watch🤟🏼

Likes
2
Share


@Solv7
Follow
Harvest on day 72 for this Northern Lights auto by Seedsman. Yield was not a priority as I messed up my watering schedule. Overall pretty happy with this plant, buds are super dense and sticky, great citrus smell when you break up the buds, tastes really smooth and also sweet. Lovely night time smoke. Great strain by Seedsman!

Likes
3
Share


@AdirondackGreen
Follow
Had to re-settle a few of the arrangements to avoid crowding, but generally pleased with the canopy. Not very level but every cola has their space to fill just fine. Check out my timelapse!

Processing
Likes
3
Share


@Barcelona_Farmers710
Follow
Mientras yo me divertía en la spannabis las niñas se ponian cada vez mas resinosas farmers!! Solo basta ver la shining haze para darse cuenta que el mammoth p es brutal!!👌🏻

Likes
Comments
Share


@Dankmark420
Follow
Just transplantere into the autopot system and the girls didnt even slack for one day before bouncing back and starting to grow some more🤩😍
After two days we put up a trellis🙌🏼

Likes
81
Share


@NugLife420
Follow
Things are going pretty well. 🙂 I am just about to start flushing. Buds are swelling up and getting denser every day. Getting close to the finish line. 😎 I'll update throughout the week.

Likes
28
Share


@eldruida_lamota
Follow
Que hay familia, vamos con la sexta semana de floración de estas Apple Fritter de Zamnesia.
La temperatura está entre los 21/24 grados, la humedad está entorno al 55%, y el ph lo mantengo ahora al principio en 6.2, el foco por supuesto está enchufado 12 horas , estan creciendo bien fuertes.
Y aparte añadimos nutrientes de Agrobeta, que no puede faltar semejante gama.
Todo correcto hasta ahora, ya empiezan a formarse las flores y ya están produciendo tricomas, estas próximas semanas veremos cómo avanzan.
Os comento que tengo un descuento y para que compréis en la web de Zamnesia de un 20%, el código es ZAMMIGD2023
The discount 20% and the code is ZAMMIGD2023
https://www.zamnesia.com/
agrobeta: https://www.agrobeta.com/agrobetatiendaonline/36-abonos-canamo
Mars hydro:
Code discount: EL420
https://www.mars-hydro.com/
Hasta aquí es todo, buenos humos 💨💨💨.

Likes
2
Share


@Earthsower
Follow
I will need to put her in natural sunlight to cool her down. She is not coping to well with the light penetration. I will keep a close eye on her over the next few weeks!


Likes
13
Share

@sanibelisl
Follow
Mulberry F3 day 91. All is good and just a couple of days left to go. Plans are to shut off the lights tonight and give her 36 hrs of darkness and harvest Monday morning.


Likes
7
Share


Likes
6
Share


@rvabudman
Follow
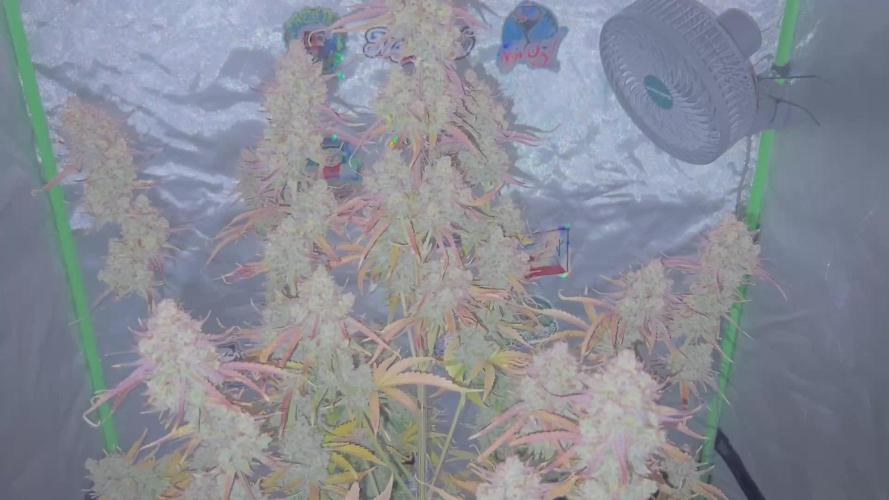
Cant take my eyes off my plant. This is my second round of growing and I am the type of person who learns through failure (not gonna upload the pics of the first round plants lol). The buds are thickening up very nicely. Hoping to get between 3-4oz , the strain is high yielding but I have a smaller tent. My auto yielded 2oz with the same space (2 plants in one tent splitting the space), but the buds definitely didn't develop as well as these buds.
Likes
17
Share


@Broedt
Follow
Day 78 of flowering
Stopped adding nutritions to the water after day 71. The plants started to get a bit shady after that, by shady I mean that they been hanging and slowly turning yellow, and getting some spots on the leaves.
I almost had an heart attack when i saw that one plant had during 30ish hours turned brown and dried all out - See the pictures. I couldn't see any mold or any thing, so i chopped the top of the plant off. None of the others had anything like this..
The buds are getting so fat that the plants are starting to have a hard time holding the weight pf the buds.
Im planing on harvesting during the next week.

Likes
6
Share


@Liljaystalin
Follow
So the bigger one I keep under watering it’s drinking a half gallon every two-3 days and I’ve never watered this much so I keep hesitating and wilting her other two are doing amazing switch nutes to the geoflora they didn’t respond well to the advanced nutes so we will see what happens one is actually flowering finally one is barley starting and the other hasn’t and it’s day 42 I’m kinda confused started silica on 1/4 so hopefully they like it they are looking good tho my canopy is staying level for the most part I’m happy with this grow so far


Likes
7
Share


@inversi0n
Follow
Hello, readers!
Frida feels alright. She drinks more every day.
Stretching a lot.
83: Photo of usual defolation, which i perform once in 2-3 days.
83. Photo of some pimple, that appeared on the stem. I have no idea, what is that, but it's not insects. It's how she grow something.
I've noticed, water in a tank becoming more greeny, so I should change it.
I recon, I wouldn't be able to finish to finish this grow properly, so I'm trying to shift schedule to 12/12, not rushing yet. But moving towards it day by day.
I'm not sure it helps with autoflower, but i need to finish it faster
Likes
43
Share


@Pearl
Follow
Mixing a ratio of
4ml start
5ml Katana
/ 1 litre water at PH of 6.2
Mix well and spray onto paper towels to soak,
Fold paper towel in half & place seed inside & fold to cover so the seed is in darkness,
Place damp paper towels with the seed inside a zip lock sandwich bag.
I only had to wait 28 Hours and the seed had split
She was planted into her 1st pot last night.
Happy days, looks like a very good start 🏆
😵💫🤘🏼
