
Likes
Comments
Share


@SkunkyDog420
Follow
Hallo zusammen 🤙.
So das war es für sie habe sie heute geerntet
Sie riecht fantastisch und sieht sehr lecker aus.
Wir sehen uns in 3 Wochen mit dem Erntebericht.
Rabattcode für den BIOTABS-Webshop https://biotabs.nl/en/shop/ GDBT420, damit erhalten Sie 15 Prozent

Likes
54
Share


@AsNoriu
Follow
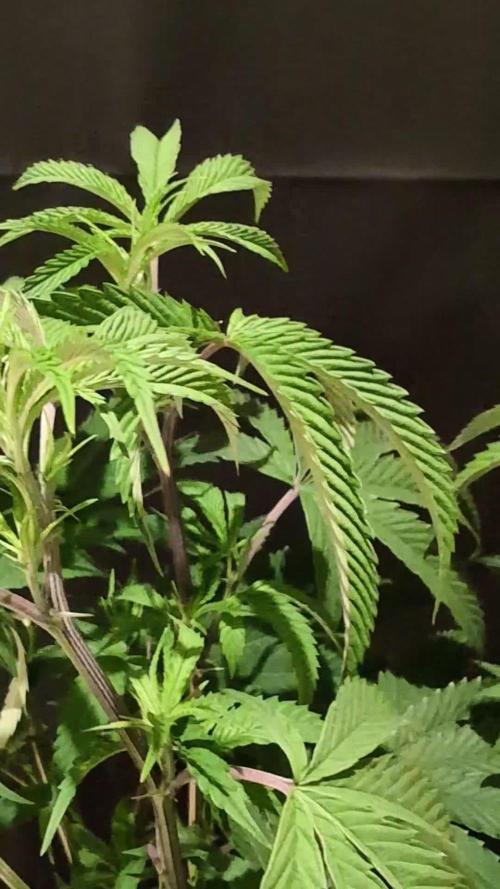
Day 50 since seed touched soil. From now on all is in stable position.
AK will always be in right corner from now. Biggest, fattest girl in all garden, takes a bit effort to bend even few top, stacked and fat ;)
5 liters went in, want good run off and saturation.
Later today will install second level of scrog.
Reposition all shoots, some are lost, i almost regret instaling scrog, lost control of even height a bit, but canopy is very dense, branches went fatter during that week, i am happy .
Mars TSL2000 is on 80% will increase to 90% at the end of this week.
Day 53. Second level of scrog almost eaten, will have to make third, plus heavy clearing awaits next week ...
Day 54. Think tomorrow is watering day. Girls need good clearing, bottom canopy been canibalised heavily, lack off air shows a lot. Will do third level of scrog together with watering.
Happy Growing !!!

Likes
Comments
Share


@herewegrow
Follow
F07 - Good start after 1 week of 12-12 lighting. They're growing so fast! I think i left just enough room for my lights to keep them from burning/stressing the buds but I think I'm going to max out on my vertical room.
Fl13 - I think the stretch is finally over and I was right - I pretty much maxed out my vertical room with only have a few inches to spare above my lights. Gave the girls their first low-dose feeding today.

Likes
5
Share


@CaliBlueDreamin
Follow
Day 84
Starting to see some amber triches on the ripest spears of Red so the first round of chop should be a few days after Danksgiving weekend. Gotta get ready. Started flush on red, will likely stop hot nutes on white over next week. Blue exploded some great bud sites. Working on lollipopping yellow now that it bounced back

Likes
16
Share


@Sethstover
Follow
Week one of flower they’re all doing pretty good my 2 purple lemonades are doing well the baby one is trying but getting burried quick lol but I’ll keep it in light so hope it can stay up but other one is stretching like crazy best I’ve grown so far I havnt grown many times I’m only 19 and self learning. other plants are growing good too the gg4sherbert is I thought was male but looks like calaxys now so I’ll keep watching I liked it’s structure in the beginning but it’s just very bushy plant right now. my orange Sherbert is a short one but looks like a lot of stems are shooting up


Likes
14
Share


@DaddyPrime
Follow
6/29 the past 3 days were 112, 115, and then 118 degree days. The plants held up fine but this one had some heat damaged leaves because of it. Also top dressed with a cup of one shot
7/3 watered with slf-100 and recharge

Likes
41
Share


Likes
12
Share


@InTheSmallSpace
Follow
20/06 the plant is having a good streching, I try to control the height so that all the buds are always the same

Likes
12
Share

@GoodTimesOrganics
Follow
Hi liebe Community and Welcome Back! 💚
Slush Mint Cake von Dutch Passion
Nach dem Topping erholt sich die Pflanze wunderbar und wir haben eine schöne Homogenität der Seitentriebe.
Die Pflanze hat nun eine Höhe von 76cm erreicht.
Aus Platzgründen bleibt die Pflanze nochmal im Wachstum.
Die hat eine wunderschöne Wuchsform.
Ich habe die Pflanze nochmal etwas frisiert und entlaubt.
Die Wuchsform ist kräftig und Energie geladen.
Die Bedingungen im Growschrank sind für die Wachstumsphase Top!
—————
🌞 Temp: 26
🌚 Temp: 18°C bis 19°C
💨 RH: 64%
VPD: 1,1 kPa
💡ppfd: 330 mpm
—————


Likes
32
Share


@BigBadLion
Follow
Week 3 of my soon-to-be purple ladies! 😻
Everything was going well but I noticed these issues:
- The girl on the back is stretching waaaaay more and is less "leafy" than her sister. Perhaps she has more sativa in her DNA?
- Leaves on both girls love to twirl around, specially on the girl on the front.
- The stem on both girls is still weak and the girl on the front no longer needs the extra help she needed!
Weather where I live is getting colder for some odd reason (it should be the opposite, damn!) and the "purple" is... perhaps starting to show a little? Which is good!? 😮
Anyway, that's all for this week. See you all next one and I hope you'll all enjoy the photos and the timelapse! 😁
Likes
14
Share


@Chi_K24
Follow
Update Sunday... hey guys uploaded a security cam footage of the blizt storm in the GTA.... ladies survived somehow... also did top dressing at 30tbs per 15 gal of 444 and 284 gaia green organic amendments. 70/30 ratio. Watered them in with dechlorniated, pH 6.2 and 60mL of molassas to 5 gals of water.
Defoilated and did some maint pruning on growth under the main canopy.
God bless.
Hey folks,
Well I got good new and some bad news. Last weekend, these ladies got thrashed by a thunderstorm.. break some branches along the way. Had enough time to splint the bent stems and they bounced back.
Note that due to the storm, the pots got watered down pretty heavy... but to my surprise I let the ride out from Monday to Friday... and regretted that. I should of watered the ladies on Wednesday or Thursday, but found out the pots where extremely dry (also probable that the fabric pots are drying the medium out allot faster). The plants started to droop Friday afternoon. Also did a little lst but didn't want to over stress the plant that still recovering from the major storm.
Iv watered each pot about 8L of molasas water @ 5mL/L and see how the soil and plant respond. Im going to check on them more frequently and prevent under-watering. Hope you guys enjoy the grow so far. Let's see how far i can push these ladies!
Cheers.

Likes
4
Share


@AJarOfNotDirt
Follow
Plant starts to change colours , trichomes start changing from clear to cloudy . I am checking the development every 3 Days , looking in top , middle and bottom , to get a good avg. result .
Overall I want like 5-10% Clear ones , 70-90% cloudy ones and around 5-10% amber ones , this wont be achieved perfectly in every layer , but gives me a little more variety in the effect later on.
I do sort them when I put them in jars or curing bags.
I flush with around 2-3l with a little top max acti vera and heaven like 1-2ml per l on the first flush with like 10 % runoff , after like 2 Days i went with clear water aiming for very little run off .
Also cleaning my pot with a pump sprayer to get salts and used fertilizer out of it .
I think the plant has another 1-2 weeks to go .

Processing
Likes
25
Share


@Ashbash
Follow
Still going lol. Still not too many amber, but I cut down one of the smaller side growths to dry and test. Keeping up with just water, probably could have added nutes for quite a bit longer, but oh well next time haha. Couple buds moved onto a light bulb and burned pretty badly. Be careful out there!

Likes
91
Share


@Greenwolvesfarmer
Follow
Mientras iban pasando los días estás plantitas lindas de a poco se formaban , defoliacion en el 1er y 2do nodo , quedando firmes el 3ro , 4to y 5to nodo ....pronto tendrán una estructura más estable y firme , aún estamos con el Haluro metálico , ya es cosa de tiempo para la renovación !
Siempre agradecido del padre Sol y madre tierra por su bondad y abundancia , te amo ...
#evaseeds #lemonkingevaseeds #greenvolesfarmer #growdiaries

Likes
16
Share


@Dingle_Dangle
Follow
27/04/22
CONTEST TIME! 😍
I'm very happy to announce that I've been selected for "Best Diary of the Year - Edition 2022" 😍😍😍🎉
Third year as grower and first time with this strain.
🙋♂️For those that don't know me, I'm a 100% OUTDOOR grower from Italy, great supporter of efficient and simple things; I love experimenting and always learning for my errors and this what I do also when growing 💪
🌱 The candidate for this new diary is a "White Widow Auto" by Ganja Farmer Seeds.
I would like to thank @GanjaFarmerSeeds for sending me these seeds and allowing me to take part to their contest.
I will update the diary once a week and in particular the first day of each week.
"Day 0" will be assigned when the first leaves will come out from the soil.
#OUTDOORGANG #PRAISE_THE_SUN
- DD
Likes
11
Share


@UrbanBoer
Follow
I cannot come to a conclusion, when it comes to this strain it could be the grow medium, because Unknown Strain has the same vigorous growth rate in recovery and development of new growth while flowering you would not say i defoliated all these ladies on the same day, worse this is a 2nd aggressive defoliation which my other four ladies are showing slow growth and development of new growth, and this past eek I have not been feeding them any nutrients just rain water stored in a 1000lt tank.
Likes
36
Share


@Costosito
Follow
Todo sigue bien excepto que siguen apareciendo esos bichitos enanos blancos como puntos o bolitas enanas en las hojas mas bajas y suelen estar en las mas amarillas pero intento limpiarla y fumigarla pa mantenerlo a raya
Likes
81
Share


@NugLife420
Follow
So far I am really happy. The ladies are definitely packing on some weight and swelling up nicely. Looking nice and frosty up close. I can't wait to upload more pics. 😃

Likes
46
Share


@pifflestikkz
Follow
She continues to swell this week. The stretch was alot to deal with, with I am overall very impressed with Royal Queen Seeds this pheno is incredible.
The smell of banana is really coming through now, vibrant pink and purple and green plant.
Smells like a sweet sherbert still too.
Feeding every other water still she loves it.
Ill try take her to 10/11 weeks with feed before I try flush for 10 days.
All depends on her development and trichomes at end of week 9🤤🏆
Mid week 4 flower
Day 26F
Continues to swell and throw out such a banging aroma, pungent banana, then closer sweet banana sherbert, crazy.
Bud stacking nice, I love its structure. This plant impresses me daily.
Day28F- Stacking weight on, buds getting denser.
Thanks for following I'll update more pictures in the week ✌️💚