


Likes
Comments
Share


@CalGonJim
Follow
7/14 MONDAY 428am.
7/15 1140am Tuesday . These are the nutrients and amino acids enzymes I will be using and a new way to use germination station experiment . mesh fits 10 inch planter can be outside tent safe from bugs!!!
7/16 245pm putting her in 4 inch glass cube thing or maybe Bud Cups, or put the rock wolll in the Bud Cup

Processing
Likes
4
Share


@Big0zGrower420
Follow
Day 49!
Starting to give her just plain water for 2 weeks of flushing. Getting really excited to harvest and then get going on another grow.
See you next week.

Likes
63
Share


@Wicked_Stix
Follow
The frozen diesel was really slow to transition to flower, but shes moving along now. Gave the girls a flush and a complete water change this week. That was only the second water change they have had this grow. I have just been letting them drink the reservoir almost empty and then filling it up with fresh nutes. The 5 plants are drinking about 4 gallons a day combined. Been running AC when the lights are on and the dehumidifier 24 hours a day. All of the plants are showing some decent trichome production. Running 1/2 tsp maxibloom and 1/8 tsp beastie bloomz per gallon every time I add water. Seems to be keeping everyone happy.
Likes
7
Share


@unclewoody3
Follow
Some of these were planted later but all doing good at all or not topped
Likes
13
Share


@FlavoursUk
Follow
Welcome back to another week, finally decided to flip to flower as these girls do grow pretty quickly in DWC. Aiming for some nice quality buds bit also a decent yield of at least 1 gram per watt of light.
Nutrient solution has not been changing to complete flower schedule yet but I will be sure to switch it over in a few days. The crucial part now is keeping the EC and pH in a good range to avoid any deficiencies or Nutrient lock out.
Let's see what the stretch brings the first few weeks. Stay tuned, and I'll be back for the by the end of the week to report some video feedback.
End of the week has ending with a heavy defoliation session. Plants were getting bushy and covering potential tops so that needed to be addressed. For now, it will be selective defoliation once they have recovered, which should be in 2/3 days.
Let's watch them bounce back. Stay tuned for week 2.
Check out my YouTube and Instagram channel for a closer look. (Link on profile)

Likes
4
Share


@GothBotanical
Follow
Week 8 marked the final stretch of mid flower, and she’s really starting to show off. Buds continued stacking steadily across the canopy with thick white pistils and frost ramping up hard. Trichomes are now fully visible on the sugar leaves and showing the first signs of cloudiness. On Day 50, I watered with Cal-Mag (1 ml/gal) before heading out of town for a few days. She held up great while I was away — no droop or stress. On Day 56, I brewed and applied Compost Tea (Tea Party #4) as a full-strength drench and refilled the auto-watering base with the rest. I also refreshed the topsoil to maintain moisture contact. Some purple has started showing up on the buds, and the fade has officially begun on the lower fan leaves. No new training this week, just some tucking to keep bud sites exposed. The aroma is ramping up and she’s entering the home stretch with a strong structure and healthy energy heading into Week 9.

Processing
Likes
29
Share


@Grey_Wolf
Follow
Ginger Nut Cookies & Aussie Music Videos
Week 16 Harvest
17 th April 2020
This Entire feminised seed making and growing project was a very good learning experience for me. Right from the very start, when I successfully got a Cutting ,taken from a Barneys Farm Red diesel female plant to produce feminised pollen after treating it with a silver thiosulfate solution.
I then used it to pollinate a Fastbuds Girl scout cookies auto plant and let it grow to maturity.
This only produced 3 viable seeds one of which is the subject of this Diary.
I made up the name "Ginger nut cookies" after a variety of cookies we have here in Australia that are made with ginger. They are the same colour as the distinct red hairs on the red diesel buds.
And would you believe those same vivid red hairs were passed on to this plant
so I wasn't too far off the mark with the strain name.
Her flavour however is nothing like red diesel or girl scout cookies and infact as taken on a smell and aroma all of it's own.
She has a lovely tropical fruit like taste and the smell is a bit like fruit yoghurt. It has an unreal after taste on the exhale and the lingering second hand smoke smells very sweet and enticing.
She has a pretty well balanced high too not as potent as the GSC nor as energenic as the red diesel but just a
pleasant mix of the two.
It was a very easy to grow and undemanding plant that didn't seem to require a lot of extra feeding other
than the 100% organic nutrients that were within the soil and a few things like compost teas etc.
The other element of this diary was of course the weekly Aussie music videos
That I provided the links for and put up a little video clip preview of each Artists song.
Week 1 Dance Monkey
Week 2 Gotye
Week 3 AC/DC
Week 4 INXS
Week 5 Dire straits
Week 6 Yothu yindi and Midnight oil
Week 7 Divinyls
Week 8 Was Request week where I asked growers to pick and because only 3 growers put in a request I decided to choose all three which were
Kylie Minogue , Flume & Airbourne
Week 9 Paul Kelly
Week 10 Daddy Cool
Week 11 Cold chisel
Week 12 Jimmy Barnes
Week 13 The Angels
Week 14 Crowded House
Hoodoo gurus Mental as Anything
Week 15 Empire of the sun
Big Pig , Silverchair , Peking duk
Grinspoon , Hilltop hoods and the White stripes
And Finally for the last lot of music videos I have chosen another multi
list bonanza of Aussie Music with the artist/s name and Youtube link below.
So in no particular order here are my last choices for this Diary its been a fun grow with a steep learning curve.
John Williamson
True Blue
https://youtu.be/ceWKrsJX9N4
Nick Cave and Kylie Minogue
Where the wild roses grow https://youtu.be/lDpnjE1LUvE
John Farnham
Your the Voice
https://www.youtube.com/watch?v=tbkOZTSvrHs
Powderfinger
Pick you up
https://youtu.be/4Ha-dtNXTM8
Slim Dusty
Pub with no beer
https://www.youtube.com/watch?v=8E0aZ387M_I
Men At Work
Down Under
https://www.youtube.com/watch?v=XfR9iY5y94s
Icehouse
Great southern land
https://www.youtube.com/watch?v=3mkidP2OUCk
Before I go I'd like to thank all of you who read & like my diary updateseach week you are all awesome!! This is a great platform full of great growers and great people : 1:
The End.......
Likes
10
Share


@HazeyBobby
Follow
Week starting 4/10/2019
Spotted a few aphids today on some of the yellowing leaves - confirmed with the magnifying glass.
Humidity continues to be an issue as I cannot seem to lower it below 60% at best, averaging 65%. The extraction currently is pulling the air from the tent into the room - will need to look into taking it outside of the house before looking at dehumidifiers.
White powdery mildew is more prevalent on some of the tops. Manually wiping them off with a wet cloth each day.
05/10 - Applied nematodes today to all 4 pots (https://www.biogroei.fr/stenema). Had to apply it with water at pH6.5
08/10 - Watered all 4 plants to keep the soil moist for the nematodes.
#1
08/10 - Watered at pH6.3 at 17 deg
10/10 - Feed of Vega at pH6.4 at 19.8 deg, EC 1.84
- still seems stunted during flowering and behind the others of same strain by a week or two.
#2
08/10 - Watered at pH6.3 at 17 deg
10/10 - Feed of Vega at pH6.4 at 19.8 deg, EC 1.84 (pot was not dry yet, should have waited another day or two with feeding)
- colas are still developing nicely whilst continuing with the leaf loss.
- defoliated and cut all small branches with flowers at the bottom.
#3
08/10 - Watered at pH6.3 at 17 deg
10/10 - Feed of Vega at pH6.4 at 19.8 deg, EC 1.84 (pot was not dry yet, should have waited another day or two with feeding)
- a few curled/twisted leaves. Continues to need the most frequent watering - most probably due to the limited 7L pot.
#4
08/10 - Watered at pH6.3 at 17 deg
- is not drinking a lot of water compared to the other 3 G13 Haze strains.
- getting close to harvest time, still not showing big signs of nutrient deficiencies or other issues. Some purple leaves at the very top of the main cola.


Likes
150
Share


@Ferenc
Follow
Day 106, 17th of November 2020:
We need to say goodbye to her very soon. The judgement is harvest.
Time has come and she is old enough to be cut. I have checked trichomes all good some days darkness and no more water also and she will be just outside on the table for some days.
Really nice little plant not strong smell. I really wanna try the smoke the ratio 1:1 CBD:THC and only 7.5% CBD and 7.5% THC haha :)

Likes
42
Share


@GanjaReaper
Follow
The plant in front is still looking ugly as always haha, the buds are small, they develope really slowly, the leafs look like they never had any (N)itrogen lol,
had this from the start. Whatever I did about it, it never changed into a better plant. Some people talk about bad genetics, but lets keep that in between.
I'm already glad these are indica's and kushes, so they can stand the cold better then a sativa kind. Sativas would already been full of budrot, molts and stopped flowering.
However, the plant behind it goes really well with the colds, as expected it even got nice collors, Most of the times color will show at colder climates.
I used to trick my inside plants into bud discoloration but the outside weather did it for me.
I gave them less nutrients, because i want them to get it from the soil( old nutrients) and from the leafs. Because of this, the leafs have now many signs of deficiency/discoloration.
They really look like other plants/trees in the autumn.
It was a wise choice of me to keep adding enzymen because when it gets colder, many enzymatic proceses are slowed down or even stopped.
Therefore my plants kept drinking, flowering.
This was the end of week 7 of flowering.
Might havest them at the end of week 8, but lets see how it goes.
9 weeks of flowering would be my maximum but I'm 80% sure i will harvest them at the end of week 8.
So again, they gained beautifull colors( the pictures are ugly, will make better ones next week, they look better in real), bigger size buds and now even got decent flowers instead of pistels with leafs like most outside grows LOL.

Likes
8
Share

@Bread_n_Buds
Follow
Zamnesia's Lemon Cherry Gelato seems to be flowering very quickly; we're in our third week, and we have a nice main cola forming.
It's a bit sensitive to fertilizer, so we only use a small amount of base fertilizer and additives, always monitoring for signs of overgrowth.
We're growing in an 11-liter square plastic pot.
Techniques chosen: The plant was left to grow and we pruned the lower parts thoroughly to give the upper parts a boost.
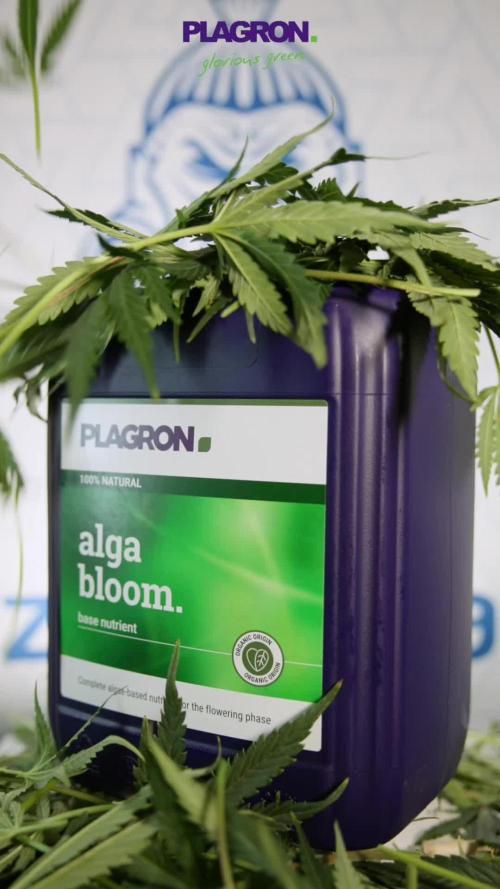
We're 100% organic and 1000% Plagron, as always.
The soil we've chosen is the recently launched Plagron Bio LightMix, which will allow us to get the grow started more smoothly and reliably, without the sudden changes that liquid fertilizers can cause. A week is more than enough, so we're not overdoing it.
We're in the early stages of flowering, but we're well-equipped with nutrients and additives. We've added:
- Pure Zym 1 ml/l
- Silic Rock 1 ml/l
- CalMag Pro 1 ml/l
- Sugar Royal 1 ml/l
- Alga Bloom 3 ml/l
- Power Buds 1 ml/l
- Green Sensation 1 ml/l
** Plagron recommends Green Sensation from the 4th week of flowering, but if the plant is a fast-flowering plant, I start earlier when I see the buds forming. The booster is useful while the flower is forming, and also at the end to consolidate.
Choose your preferred style and calculate your results on the website:
www.plagron.com
Our new 720W Spider King lamp from Vanguard Hydroponics is now at 80%
Z - https://www.zamnesia.io/en/531-growshop
It looks more than promising. Try it.
Z - https://www.zamnesia.io/en/11242-zamnesia-seeds-lemon-cherry-gelato.html
Z - Lemon Cherry Gelato is an extraordinary hybrid capable of offering a complete and satisfying experience to all growers and cannabis enthusiasts. This premium strain is the result of crossing Sunset Sherbet and Girl Scout Cookies, two strains renowned for their high quality and delicious aromas. With a genetic makeup composed of 60% indica and 40% sativa, Lemon Cherry Gelato produces stimulating and dynamic effects. With 26% THC, it infuses deeply relaxing vibes, keeping the mind clear and alert.
Lemon Cherry Gelato easily adapts to any growing environment. Indoor plants maintain a compact structure, reaching 110 cm in height, making them ideal for limited spaces. Outdoors, this strain grows up to 140 cm. Extremely adaptable, this strain responds well to cultivation techniques such as topping and low-stress training (LST), allowing growers to optimize space and increase final yields. Indoors, a minimum of 600 g/m² is possible after a flowering period of 8-9 weeks. Outdoors, plants will reach maturity in September and, in optimal conditions, will yield around 1000 g each. Thanks to its innate resistance, Lemon Cherry Gelato is perfect for both beginners and experienced growers.
You already know this, but I recommend it: here you will find many beautiful things, essentially "the best that nature has to offer."
Z - www.zamnesia.com
Music //
www.radionula.com
+ Feng Shui Music
+ Frequencies 432 Hz


Likes
4
Share


@MasterKush714
Follow
07/16/2024 Week 8 Update!!!!
Yoo gang update lessgooo!!!!!!
Sooo what's brackin gang, so we starting into week 8, officially I think it's week 6 of actual veg but that's here nor there, the girls are really coming into their own really great leaf structuring and coloration other then will keep y'all updated as the week goes on thanks for stopping by and LFG!!!!

Likes
17
Share


@DudeGrowsWeed
Follow
6’-4” & 5’-8” as of today, 6’-0” average height.
These ladies are beautiful! Everyone who comes by the house just stops and stares when they get near my garden. So do I 👍🤣
I had to move some plants outdoors from my indoor grow due to losing the battle to high heat and humidity. Two are super close to harvest, one might get cut over the weekend. Feel free to comment and let me know what you would do. Thanks!
Processing
Likes
15
Share


@MG2009
Follow
08/09/2020
She is a little wilted but she will be fine water now.Gave her LAB earlier this week and feed her next week with Fox farms 4-9-3 fruit and bloom?
I think?
She will bounce back to life in about 10min.
Likes
16
Share


@CanarianGrow92
Follow
The sugar Bombs are recovered from the topping last week, we will cut the next top also when they are a bit taller, we also provided some synergy mycorrhizae and some iguana grow. At the moment they are nice and green, the expectations are to flower in around 2-3 weeks


Likes
13
Share

@HydroLab-Germany
Follow
*english version below*
Willkommen zurück im HydroLab, wo die Pflanzen offiziell beschlossen haben, dass Photosynthese ihr Vollzeitjob ist – und wo der Wissenschaftler (also ich) mit Kabelbindern, Big Bud und einem neuen Spielzeug bewaffnet durchs Unterholz kriecht. 🌿⚗️
🔬 Statusbericht – Die Damen gehen ins Blühen über
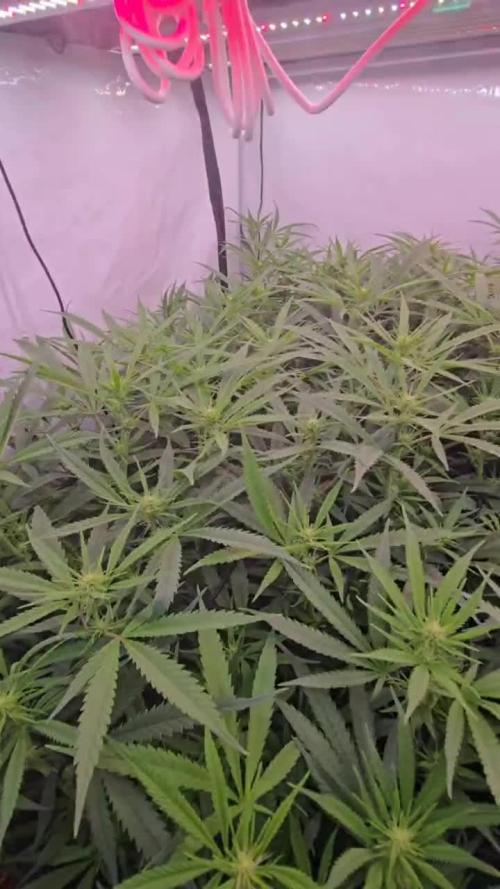
Blütewoche 2 ist nahezu abgeschlossen und das Labor bestätigt:
Bud Blood hat seinen Dienst getan.
Überall zeigen sich kleine Blütencluster, wie winzige Supernovae aus weißen Stempeln.
Ich habe zu Beginn der Woche leicht entlaubt – aber die SLH hat das bereits wieder vollständig verschluckt.
Wirklich, die wächst schneller zu als ein Reddit-Thread über Hydroponik eskaliert.
🌿 Großer Friseurbesuch angekündigt
Für Ende der kommenden Woche steht das an, was ich nur “Operation Kahlschlag” nenne:
Extremes Lollipoppen unter dem ersten Netz
Entlauben zwischen den beiden Netzen
Canopy-Optimierung oben (alles, was kein Licht sieht → weg)
Luftzirkulation erhöhen
Energie nur noch in Blüten, nicht in Laub
Wie ein botanischer Beauty-Salon – nur mit mehr Schere und weniger Smalltalk.
⚙️ Systemparameter – Die Laborwerte
EC: stabil bei 1.5
pH: 5.8–6.0
Nährlösung: 19°C konstant (Wasserchiller küsst perfekt)
Raumtemperatur: 25°C
RLF: 58–60% (glücklicher VPD-Bereich für Stretch-Ende)
Dünger:
Bud Blood abgeschlossen
seit heute Big Bud im Tank
Entlaubung: leicht, Hauptschnitt folgt
Under-canopy-flow: hervorragend, Struktur steht massiv und offen
Alles in allem: Wachstum, Farbe, Stretch und Blütenbildung → absolut on point.
Neues Spielzeug im Labor
Ja – es ist passiert:
Ich habe mir ein Bud-Mikroskop gegönnt.
Ab jetzt heißt es:
„Keine Trichome entkommen der Analyse.“
Die nächsten Wochen werden also sehr detailliert.
🌸 Optische Beobachtung – Blütenstand Woche 2
Weiße, lange, typische SLH-Stempel
Aroma beginnt minimal (Zitronen-Note blitzt auf)
Budsites gleichmäßig über das gesamte Netz verteilt
Stretch geht langsam Richtung Ende
Zweites Netz arbeitet perfekt als Stabilisator
🔍 Labor-Notiz der Woche
„Die Pflanzen wachsen wie von einem Koffeinrausch getrieben.
Die Blüten zeigen sich zuverlässig, die Vitalität ist hervorragend,
und mein Wasserchiller hat vermutlich weniger Stress als ich.“
🔮 Was kommt in Woche 3?
Der große Defoliation-Run
EC stabil weiterfahren
Big Bud hochskalieren
Lichtintensität leicht erhöhen
Unterseite sauber halten
Videos & Mikroskop-Shots für die Community
Beginn des massiven Bud-Formings
Die Bühne ist bereitet – jetzt wird es spannend.
-------------------------------------------------------------
Welcome back to the HydroLab, where plants have officially accepted photosynthesis as their full-time occupation — and where the scientist (me) crawls around with zip ties, Big Bud, and a brand-new toy. 🌿⚗️
🔬 Status Report – The Ladies Are Entering Bloom for Real
Flower Week 2 is almost done, and the lab confirms:
Bud Blood has done its job beautifully.
Tiny white explosions of pistils are popping up everywhere.
I did a light defoliation earlier this week — but the SLH swallowed that effort instantly.
Seriously, this strain grows back faster than a comment section on a hydroponics forum.
🌿 A Major Haircut Incoming
By the end of next week, we begin what I call “Operation Full Cleanup”:
Extreme lollipopping under the first net
Heavy cleanup between the two nets
Canopy thinning on top (anything that doesn’t get light → gone)
Improve airflow
Redirect all energy into bud production
Think of it as a botanical beauty salon — just with more scissors and less small talk.
⚙️ System Parameters – Lab Values
EC: steady at 1.5
pH: 5.8–6.0
Solution temperature: 19°C (chiller doing god’s work)
Room temp: 25°C
Humidity: 58–60% (great VPD for end-of-stretch)
Nutrients:
Bud Blood finished
Big Bud started today
Defoliation: light — main session coming up
Under-canopy structure: wide open, strong, and well-ventilated
Overall: Growth, color, stretch, and bud formation → absolutely on point.
New Gadget in the Lab
Yes… it happened:
I bought myself a bud microscope.
From now on:
No trichome shall escape analysis.
Expect extremely detailed updates in the coming weeks.
🌸 Visual Observation – Flower Formation Week 2
Long white SLH pistils everywhere
First hints of lemon aroma
Budsites evenly spread across the entire net
Stretch slowing down
Second net working perfectly as a support frame
🔍 Lab Note of the Week
“The plants are growing like they’ve had three espressos.
Buds are forming nicely, vigor is excellent,
and my water chiller is probably under less stress than I am.”
🔮 Coming Up in Week 3
The big defoliation session
Continue running EC 1.5
Scale up Big Bud
Slightly increase light intensity
Keep the lower zone clean
Microscope shots + canopy videos
Bud formation ramping up
The stage is set — things are about to get exciting.

Likes
2
Share


@ChitownCannaChica
Follow
The smells on these autos is just insane! Great terps, decent yield for an auto and should have been better but I screwed up the DWC in the transition weeks/- hard with multiple autos in one dwc bucket


Processing
Likes
10
Share


@Barcelona_Farmers710
Follow
Seguimos en fase de Vega con alguna que otra plaga... pero de momento todo bajo control, pasaremos a foliar con delta 9 para ver los resultados. Pasaremos a flora con el nuevo equipo Led para intentar reducir el calor de los focos y ahorro energético. Iremos informando farmers buenos Humos!🍁