Likes
Comments
Share
@Arcadium
Follow
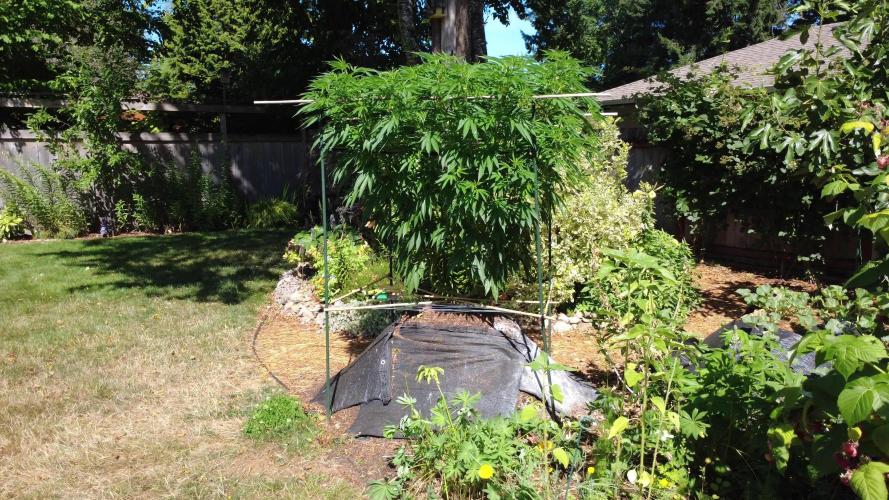
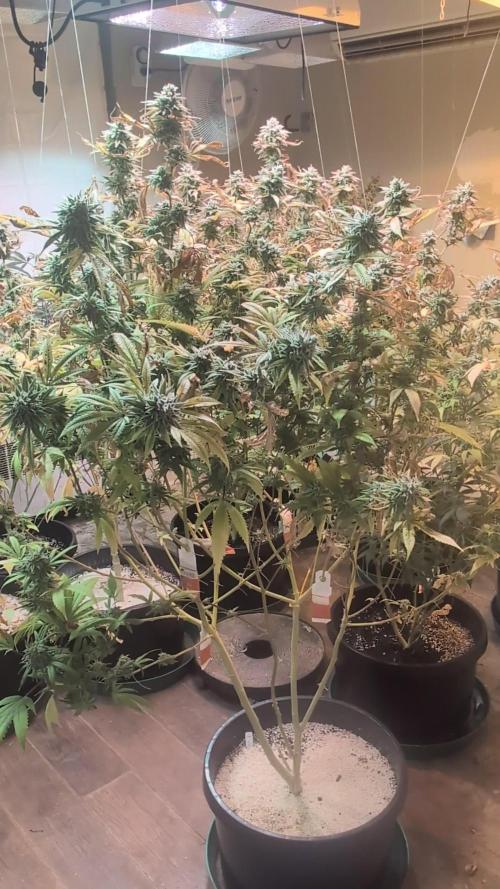
Super hot week again, 32c days, she's loving it. Growth slowed a bit, just starting to finally see pistils, so hopefully on track for end of September harvest. Got a new DJI Mini 4K so I don't need to get on a ladder to get pictures anymore! Just drip irrigation and LCPT spray this week and that's it. Full 4K Drone video on YouTube @VanIsleTerps
Likes
89
Share
@Njanne
Follow
The nights are cold now, and the days are not warming up the way they used to... I think we are ready to harvest. Ripening is slowing down. I'll give her a day or two more and then I'll do the chop! Stay tuned for the harvest reports.
Likes
22
Share
@Aedaone
Follow
We had rain morning Day 1 and the previous night. Early morning Day 2, around 2-3 a.m., we had thunderstorms with strong winds and heavy rain. This was followed by sunshine that afternoon. Despite the 5% rain forecast for day 3, we had a thunderstorm. It produced heavy rain and strong winds. For about a hour in the morning Day 3 and that evening showers. Day 4 was all day sunshine with a lite breeze. That was excellent turn of weather to dry out the soaked soil. Day 5, 6, and 7 we had sunshine and a breeze. I added 2.5 ml of ferrous sulfate per gallon of soil on day 1. I added a second dose of 2.5ml ferrous sulfate per gallon of soil top dressed on day 5 for a total of 5ml/gallon of soil, top dressed for the week. I added 1.3 ml/gallon of soil(10ml) blood meal, top dressing on day 5. I watered on day 6 and 7. The ferrous sulfate really began to work on day 6. On day 7 they had a healthy even green color and are rdy for the stretch to begin flower. These plants surviving and thriving through the challenging spring weather and grower proves how resilient these fastbuds genetics are.
Likes
7
Share
Likes
48
Share
~ WEDDING CHEESECAKE FAST FLOWER by FastBuds ~ Well fam, here we go again with another epic strain from FastBuds Fast Flowering stable. After having such tremendous success growing their Gorilla Cookies Fast Flower outdoors last year, I've decided to run another of their fast flowering strains outdoors this year... Wedding Cheesecake Fast Flower! The best description of this awesome cultivar comes directly from my friends at FastBuds which is as follows: "A delight for the mind and body: Wedding Cheesecake FF (Fast-Flowering) is a delicious strain that offers XXL yields in a 7-8 weeks flowering cycle. This terpene powerhouse produces loads and loads of mouth-watering vanilla-creamy-cookie-scented terps with hints of citrus and cinnamon. In addition to its delicious aromas, this variety grows very well in both indoor and outdoor setups, yielding up to 650 g/m2 without extra maintenance, making it the ideal strain for beginners as it allows you to maximize yields while minimizing work. This super-fast feminized photoperiod version offers upbeat and energetic yet deeply relaxing effects that are perfect for consumers looking for a heavily focused, motivating, and creative high. It’s the ideal strain for those needing that extra energy boost to start a busy day on the right foot. Wedding Cheesecake FF boasts chunky, large-sized buds with a thick layer of silvery-white resin and bright orange hairs scattered all over: that just screams ‘quality’. The lime-green flowers sparkle with an array of hues ranging from dark to light green, to magenta and purple, and reek of a delicious aroma that’ll remind you of fresh store-bought cheesecake. This is an XXL hybrid that grows extremely tall in height, reaching up to 3m with one huge main cola and multiple long side branches that can withstand enormous yields of up to 650 g/m2 with ease. Wedding Cheesecake FF is extremely resilient to the elements and can be grown in almost every climate as long as you’ve got the space and basics covered, making her an excellent choice for those looking for large-scale harvests with a quick turnaround time without much effort." ________________________________________________________________________________________________________________________________________________________________________________________________________________________________________________________________________________________________________________________ The Setup: This is going to be an outdoor grow, but I have started the Wedding Cheesecake FF indoors as our weather is still too cold to put her outside (nighttime temp's dipping regularly into the 30's℉). The plan is simple... let her grow inside under a 19/5 light schedule until the nighttime temperatures stay above the mid 40's℉, at which point she'll be moved outside and transplanted into the soil which I have already setup and inoculated with beneficial microbes, and then let the fun begin!🤪💚 ________________________________________________________________________________________________________________________________________________________________________________________________________________________________________________________________________________________________________________________ Weekly Updates: 6/26- Can you believe that it is now Week Thirteen since breaking ground for the FastBuds Wedding Cheesecake Fast Flower??? This lady has turned into a genuine beast of a plant and continues to remain healthy with great color and vigor! 6/28- Our weather is HOT now with heat indexes over 100℉ so I'm watering the Wedding Cheesecake FF every day with 5-8g of straight well water from the garden hose in the late afternoon once the plant is in the shade. Other than the ever present leaf hoppers, which love the leaves but leave the flowers alone, and an occasional Japanese Beetle there aren't any serious pest issues currently. The Wedding Cheesecake FF continues to have excellent color and vigor and continues to add vertical growth! 6/30- The weather continues to be hot and humid and the daily watering continues. I also removed a few shade leaves that were below the canopy, as well as some in the middle of the plant that were blocking a lot of light to new shoots. 7/2- Thirteen weeks of veg behind her now, the FastBuds Wedding Cheesecake Fast Flower is on her way to stardom... see you next week!🤩 Thank you for checking out my diary, your positive comments and support make it all worthwhile! 💚Growers Love!💚😎🙏
Likes
2
Share
@Roster
Follow
Setted up this cutting of Skywalker. Having some initial problems with air and humidity. Hopefully is going to rain soon so humidity will rise a bit. Planning to do some LST and ScrOG. I'm helped by a friend because my skills are not good enough yet. Let me know if you liked the sequences! I'm trying to do some timelapse research as well. Raspberry is running the timelapse and compiling the video I'm trying to update every day or two. 😷7/12 Changed water due nutrients deposit. Clean start as the roots have touched the water. EC 1.5 Ph 6.2 😵Ps. light was set with VEG and BLOOM BOTH ON! Lol, hopefully this is the 5th day 😂
Processing
Likes
68
Share
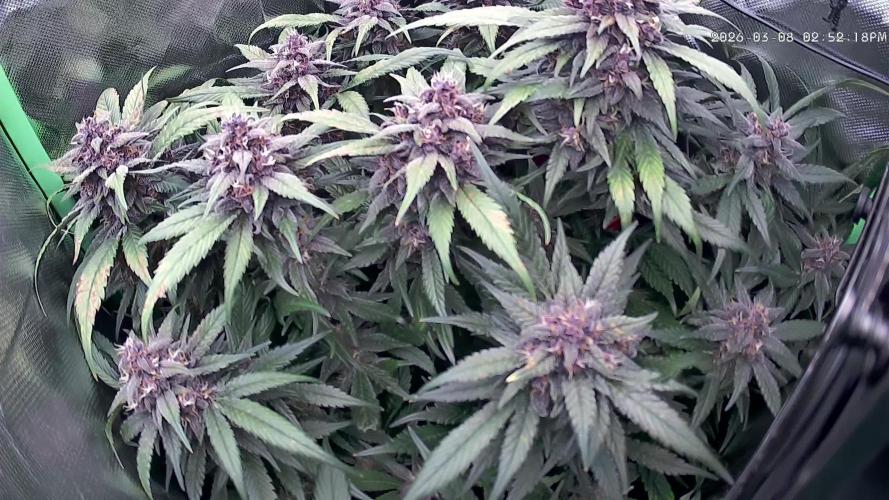
hello guys some news on the week 10 flowering day 21 this week i put more bio bloom and she drink more water and we can see that the buds start to swell 😀👍
Likes
18
Share
@Swanberg
Follow
77 total days of flowering White runtz Chopped after 3 day dark period, cut by the roots and rinsed with ph water drying begins. Smells are very sweet
Likes
7
Share
@gablmo
Follow
Another busy week with the vege. I gave it microbes, a HID lamp at 400 watts, sprayed for bugs and also covered the media with plastic wrap to get rid of 3 or 4 gnarts and of course a had another flood with the GoGro water system and I took one plant out of the garden because she is frozen in time. I still don't know why. The trellis is doing good. Lots of work.
Likes
2
Share
Easy,fast,fat,dense,stinky,sticky and absolutely tasty. These were 2 clones I took at the middle of flowering and the only retreat or issues I had is I wish I would have vegged these two clones at least 3 weeks more. Dos si Dos 33 from Barney's Farm is one the most beautiful strains to look at. !!!!
Likes
6
Share
First grow ever, may the auto gods bless this grow 🙏
Likes
43
Share
Increased the amount of nutrients in the feed this week and got a little bit of burn on V, Nemo handled it no problem! removed the yellow spotted fan leafs as part of general defoliation for this point in flower. Continuing to pluck and tuck, meaning removing extra fan leafs (plucking) and bending tallest colas back under the scrog (tuck). shooting to keep all budsights 18 to 22 inches from the light to prevent burn and allow healthy development. I can see where proper distance has been kept best development has occured.
Likes
9
Share
@Rckeh
Follow
Day 94 - 13/07/2023 Start of 8th Week of Flower and FLUSH Day 95 - Buds are starting to have that final golden color, harvest really is arriving. I could harvest now but i want to flush this plant properly. Today it started to rain and buds are all wet. When it stops raining i´ll check the plant and shake it to remove water. The plant love it but humidity is really high here and mold can forms even when it´s not raining. I´ll check trichomes when possible aswell. Day 96 - Today rained in the morning, but after midday sun started to shine. Had some minor mold problems which i removed immediately, but nothing really to worry , this strain is tough aswell. I checked trichomes, i already have some amber but i think i saw some clear ones here and there. My instinct is telling me to harvest now, but my experience wants to flush this plant properly. I think i should have started to flush earlier, but i did not regret as i want to try out and let a plant really mature. After all im am not that experienced. Day 97 - Today the pot was already kind of dry so i watered her to help the flushing process and i think this will be the last watering. Day 99 - Here i just think i took some really cool pictures, for me at least! 😄 I´ll let the soil dry well so i can harvest with less humidity possible
Processing
Likes
5
Share
@Ensign420
Follow
Week 02 Introduction This week has been a bit of a struggle. Had my first experience dealing with slime and brown algae. But I think adding enzymes and increasing the beneficial bacteria helped to fix the issue. Also experienced nutrient burn for the first time. My nutrient solution strength got as high as 671 PPMs. So backed it down to about 430 PPMs during the end-of-week reservoir change. Also cut Hydroguard (expired?), CaliMagic, and Superthrive from this grow. Now she's still stunted, but is starting to recover. Hopefully... [START OF WEEK 02] Day 01 - Monday - 08/10/20 - Total Days: 008 ----------------------------------- - [0830]: Still looks a bit yellow. But getting larger! --- Solution strength was at 248 PPMs. --- Just topped off with a bit of distilled water --- PH went up to 6.1 so PH'd down to 5.8 --- Ran the top feed for a bit to wet the hydroton. - [2130]: She's looking even more yellow now. --- Even the new leaves are really yellow. --- Decided to add more base nutes. --- Added 4ml of Sensi A --- Added 4ml of Sensi B --- Now at about --- Solution Strength went up to 304 PPM. --- PH was at 6, --- Also raised the water level a bit more. --- I really hope it's a nutrient deficiency and not an over-watering issue. --- Please live! Day 02 - Tuesday - 08/11/20 - Total Days: 009 ----------------------------------- - [0830]: Looking less droopy. But still yellow. --- Decided to do a reservoir change. --- 4.5gal of distilled water --- 8ml of Sensi Grow A --- 8ml of Sensi Grow B --- 8ml of Voodoo Juice --- 4ml of B-52 --- 4ml of CaliMagic --- 4ml of Hydroguard --- 4 drops of Superthrive --- PH'd down to 5.8 --- Solution strength: 302 PPM --- Since I didn't want to risk over-watering the rockwool, I did not to do a top feed, may do one tonight after the sleep cycle (lights are still set to go off at 10am and back on at 4pm). --- As I was doing a reservoir change, I noticed that the tubes and bucket were a bit slimy. Didn't really stink or anything. Is this normal? Maybe due to the Hydroguard and Voodoo Juice? --- I hope she gets better soon! - [2215]: Getting larger! But still yellow. --- Also can see a root growing through the net pot! Tiny little thing but it's there! Will have to start dropping water once more appear. --- After looking over a few DWC diaries using AN nutes, seems like my solution strength is still too low. Most around this stage average around 500 PPMs with about 4ml per gallon. --- Top fed for a minute to wet the top of the hydroton. --- Solution strength went down to 263 PPM. --- Added 8ml more of Sensi A --- Added 8ml more of Sensi B --- Now base nutes are at 16ml for 4.5 gal of water. --- PPMs went up to 411. --- Still lower than 500 PPMs, but that's okay. --- PH was at 6. Not sure if I should adjust PH using AN nutes. So going to not ajdust unless PH goes above 6.1. Day 03 - Wednesday - 08/12/20 - Total Days: 010 ----------------------------------- - [0830]: Looks like more root growth! --- She still looks yellow. But leaves are perky. --- PH was at 6.2 so lowered down to 5.8. --- Solution strength was at 394 PPMs --- Since roots are still growing, I decide to lower the water level a bit. Now water level is a bit below the net pot. - [2200]: Root is getting longer! --- Slime is returning. Not sure why. --- Solution strength: 357 PPMs --- PH: 6.1 --- Decided to add an enzyme along with more beneficial bacteria to hopefully cure the slime. --- Added 16ml of Sensizym --- Added 5ml of Hydroguard --- Added 8ml of Voodoo Juice --- New solution strength: 430 PPMs --- New PH: 6.1 --- Top fed for a minute. --- This slimy residue is really freaking me out! I hope the added enzymes will help eliminate the slime. --- Going to do a full reservoir sterilization/nutrient change over the weekend. Please survive until then girl! Day 04 - Thursday - 08/13/20 - Total Days: 011 ----------------------------------- - [0930]: I think the enzymes worked! There is little to no slime now! --- Although I think the root was also dissolved in the process. It's now just a little stub sticking just below the net pot. The enzyme is also suppose to dissolved dead roots too but guess that root was too weak? Not sure what happened there. But I think the slime is cured! --- Solution strength went down to 395 PPMs. Decided to add more base nutrients. --- Added 8ml of Sensi A --- Added 8ml of Sensi B --- Added 4ml of B-52 --- Solution strength went up to 598 PPMs. --- PH was at 6.1 --- As long as the PH is between 5.5 and 6.3, I'm not going to use PH Up or Down. But still will monitor PH levels. - [1715]: Checked up on her after her nap and shes looking alive but stunted. But no slime! --- Decided to add some sugars to help maintain the enzymes and beneficial bacteria. --- Solution strength was at 587 PPMs. --- PH was at 6.2 --- Added 8ml of Bud Candy --- Solution strength went up to 671 PPMs. --- PH also went up to 6.3 --- Lowered water level a bit to hopefully promote more root growth. --- Top fed for a minute. --- She is getting bigger, but still looks yellow. Day 05 - Friday - 08/14/20 - Total Days: 012 ----------------------------------- - [0915]: Leaves look a little burnt on the tips. Still no slime. --- Going to back off on the PPMs to hopefully fix the nutrient toxicity. --- Solution strength was at 632 PPMs --- PH was at 6.3 --- Added/Removed water until PPMs were at 536. --- PH was still at 6.3 --- Raised water up a bit, then top fed for a minute. - [2200]: Looking better. Still yellow though. --- Solution strength: 514 PPMs --- PH: 6.5 --- Added PH down. --- New solution strength: 518 PPMs --- New PH: 5.2 --- PH was kind of high. So decided to PH down. Had to use quite a bit to bring it down. But eventually got it to drop down to 5.3. A little low, but so far, the PH has always gone up so wanted to start it really low. --- Ran the top feed for a minute to re-saturate the top of the hydroton. Day 06 - Saturday - 08/15/20 - Total Days: 013 ----------------------------------- - [0830]: She looks stunted. leaves are still yellow. --- Solution strength: 514 PPMs --- PH: 5.6 --- Top fed for a minute. --- Not sure what to do at this point. Going to do another reservoir change soon. Hoping she lives until then. - [2145]: Looking pretty much the same. --- A bit of slime has returned. Since I've been diluting the nutrient solution, the enzyme ratio has dropped. So I guess this is expected. --- Also noticed that slime build up was on the air-stones. Never really checked the stones so not sure how long that has been there. Looks brown too, which can't be good. --- Going to do an H202 sterilization of the system (minus the net pot) tomorrow so did not add anything. --- Lowered the water level to below the net pot. --- Then top fed for a minute. Day 07 - Sunday - 08/16/20 - Total Days: 014 ----------------------------------- - [0900]: STERILIZATION DAY! --- Decided to skip today's night cycle for a deep clean. --- I'm hoping that skipping a night cycle won't be too stressful. --- Temporarily moved her to a new bucket. --- Used about a half of gallon of straight distilled water to flush out the net pot. --- Drained the system and wiped up all the brown sludge. Also removed the air stones and cleaned up all the goo. --- Filled the system with 2 gallons of distilled water and at least 30ml of food grade hydrogen peroxide (35% strength). --- Yea its a lot, but since I'm not going to sterilize the system overnight, I went with a really high doseage. Basically I kept adding until I started to see little bubbles start to form. --- Then I ran the water pump. - [0915]: Boiled the air stones in tap water for about 10 min. Then reconnected them to the airlines. --- I let the air stones and hose soak in the sterilization solution for about 5 minutes so the peroxide can absorb into the stones. Then ran the air stone to help mix and agitate the solution. --- Occasionally, I'd repeat the process of turning the air pump off for a few minutes to let the stones soak. - [1000]: Covered the top two row of holes of the net pot with some aluminum tape. Hopefully this solves the light leaking in through the hydroton. - [1200]: Used an old toothbrush and scrubbed the pump clean. Then drained the system. --- Refilled with more distilled water and peroxide. Again added a lot. --- Ran system again to sterilize even more. - [1530]: Drained the system and refilled with distilled water to rinse. --- Ran the system for a few minutes, then drained and rinsed again. --- Did this a few more times over about an hour. - [1630]: Added 4 gallons of fresh distilled water. --- Added 15ml Sensi Grow A --- Added 15ml Sensi Grow B --- Added 12ml of B-52 --- Added 16ml of Voodoo Juice --- Added 16ml Sensizym --- Solution strength was at 430 PPMs --- PH was at 5.6 --- I was going to add Hydroguard, but I think the bottle is expired. Since 2017 or 2018!? I think Hydroguard is good for up to 2 years from the date on the bottle or 6 months after opening. So not going to use from now on. I wonder if this could have contributed to the slime build up. --- Also removed the CaliMagic and Superthrive too. Going to only use AN products to eliminate the chance of incompatible nutrients. --- Placed her back in the bucket and top fed for a minute. --- Here's hoping for the best. Going to let it ride until morning! Please feel better! [END OF WEEK 02]
Likes
2
Share
Das ist heute der letzte Tag mit Licht, es folgen 36 Stunden Dunkelphase und dann wird geerntet. Dieser grow hat sich toll entwickelt und hat soweit keine Probleme bereitet! Die terps beider Pflanzen sind sagenhaft und ich werde definitiv nochmal Z-ups in mein Zelt stellen. Ich bin sehr angetan von der Qualität der neuen Fastbuds strains! Für die Ernte werde ich wahrscheinlich mit meinem diary-eintrag warten bis fertig gecured ist um auch etwas zum Geschmack sagen zu können!
Likes
23
Share
OMG! Miss Gorilla was showing her strength this week and grew a whopping 9 inches this week. The sun is shining and she is drinking 1 gallon of nutrients a day. @Fastbuds website says, "Plant Appearance This lady likes to stay low and will usually grow to a height of 60-130cm. Her growth structure is short and bushy, thanks to her sativa dominance, and will grow one main central cola, with fat side branches all around. Once flowering starts, expect Gorilla Auto to fill out thick and fast, as she begins to pack on size, weight and go crazy with the trichome output. From seed to harvest she is ready in 9-10 weeks, where she will finish with a short and fat appearance." So far, Miss Gorilla is keeping up to her description. I took a magnified picture and it shows me that Miss Gorilla will probably be in flower next week. It looks like she is in the beginning stages of flower. @Fastbuds website said to, "add support around this strain, to help the side branches during the flowering stage" which I have done by LST with her side branchs. I have tied them down to allow light in and support growth. I am feeding her 1 gallon on nutrients a day right now and @Fastbuds website said, She can take a big feed especially during week 3 and onwards." So, I am on target with that information. I also have a pool umbrella protecting all of my plants from the direct sun. As always, please comment and let me know what you think of Miss Gorilla.
Likes
15
Share
All is well here in week 10 although I'm starting to notice some possible nutrient burn or deficiency. Some of the foliage on plant 2 and 4 are looking a little rusty speckled. It's probably too late to correct the issue but if anyone has any advice on that I'd much appreciate it! Plant 1 is starting to do her thing, she's definitely stunted and may take an extra week or two to finish out guess we'll see! I've started late bloom feeding schedule which consists of 1.5 grams per gallon of B1&B2 as well as 3 grams per gallon of FullTilt from FloraFlex.