
Likes
Comments
Share

@BioGrowBayer
Follow
Die Pflanzen entwickeln sich weiterhin sehr gut. Blütenbildung schreitet planmäßig voran

Likes
223
Share


@Tropicannibis_Todd
Follow
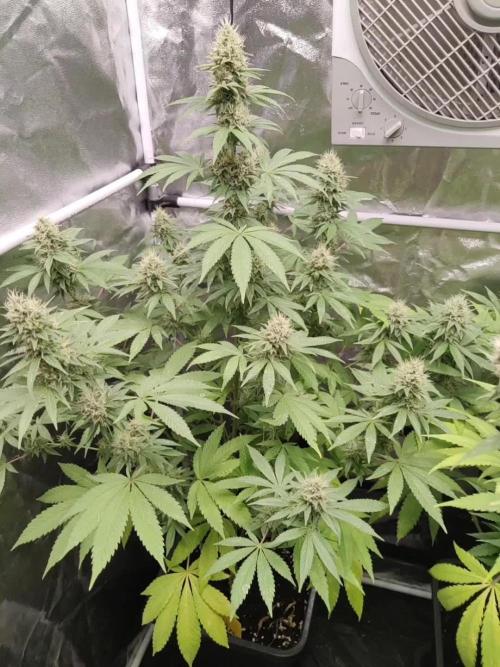
💩Holy Crap We Are Back At It And Loving It💩
Growmies we are at DAY 56 and she's just killing💀it👌
The Gorilla Punch Is Amazing 👏 But so is the OG
👉We are in full flowering mode for the👈 OG 👍 GP 👍 the AF was the hold out but shes finally went into flowering👈
So Shit , I gave them just a tad to much nutes at the start feeding 👈 But I have since fixed it
So I'm still doing some low stress training 🙃 and some defolation 😳
Lights being readjusted and chart updated .........👍rain water to be used entire growth👈
👉I used NutriNPK for nutrients for my grows and welcome anyone to give them a try .👈
👉 www.nutrinpk.com 👈
NutriNPK Cal MAG 14-0-14
NutriNPK Grow 28-14-14
NutriNPK Bloom 8-20-30
NutriNPK Bloom Booster 0-52-34
I GOT MULTIPLE DIARIES ON THE GO 😱 please check them out 😎
👉THANKS FOR TAKING THE TIME TO GO OVER MY DIARIES 👈

Likes
1
Share

@soil2bud
Follow
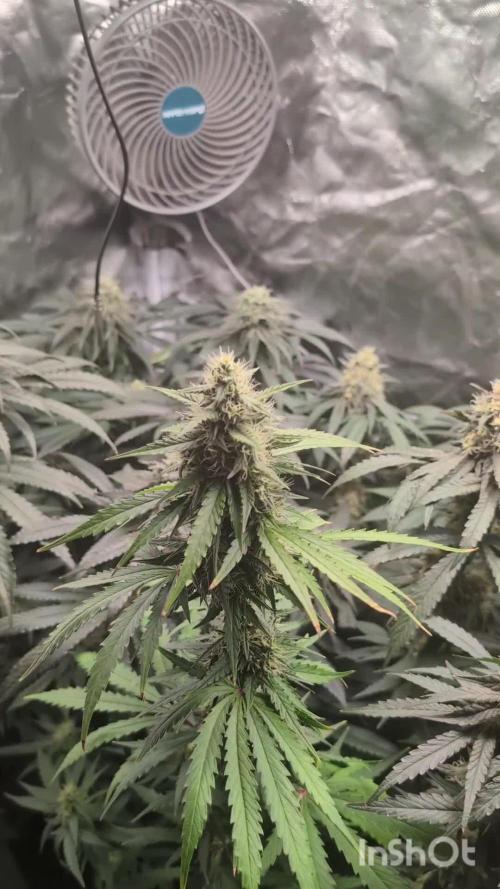
Again late with the update.
Sorry. They are doing great. The terps is starting to form and the tent is getting a fruity / citrus smell


Likes
9
Share


@Soskar69
Follow
The plant is ok, we are near the harvest.
Because she is the smallest , she drinks less than the others plants I have.
Also I've done some research for my problem, and I'm gonna wash the buds. I have read a lot of opinions and all the people that at first were sceptical, say that now they doing it all the time, so I'm gonna try it! If the flavour and the overall experience is good, I'll do it also on my gorilla. And what's your opinion on "bud washing"? Let me know in the comments!
Here the weather is gonna be bad for the next days so I'm a lil worried because I'm so near the harvest and I'don't want to fck up things now. The humidity is gonna reach 90% so for the next 2 days I will take them inside.
Sorry for the bad quality, next time I'll try to use a better camera

Processing
Likes
24
Share


@MadeInGermany
Follow
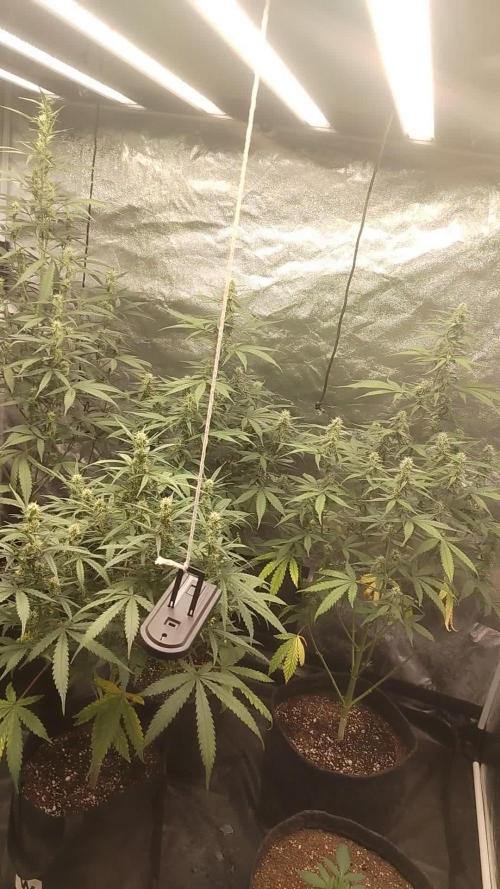
Day 27
since the time change to 12/12 hrs.
Hey everyone 😃.
This week the lady has developed very well 👍.
Their stretch is very nice and the buds are starting to develop really well 😊.
There aren't any problems, and I'm really excited to see what she'll do until next week 😍.
Until then, I wish you all a lot of fun with this update, stay healthy 🙏🏻 and let it grow 🍀🌱
You can buy this Strain at
https://www.amsterdamgenetics.com/product/kosher-tangie-kush/
You can buy this Nutrients at
https://greenbuzzliquids.com/
Type:
Kosher Tangie Kush
☝️🏼
Genetics:
Kosher Kush
X
Tangie
👍
Vega lamp:
2 x Todogrow Led
Quantum Board 100 W
💡
Bloom Lamp :
2 x Todogrow Led
Cxb 3590 COB 3500 K 205W
💡💡☝️🏼
Soil :
Canna Coco Professional +
☝️🏼
Fertilizer:
Green Buzz Liquids :
Organic Grow Liquid
Organic Bloom Liquid
Organic more PK
More Roots
Fast Buds
Humic Acid Plus
Growzyme Big Fruits
Clean Fruits
Cal / Mag
Organic Ph - Pulver
☝️🏼🌱
Water:
Osmosis water mixed with normal water (24 hours stale that the chlorine evaporates) to 0.2 - 0.4 EC. Add Cal / Mag 2 ml per l water every 2 waterings . Ph with Organic Ph - Pulver to 5.8 .

Likes
6
Share


@valiotoro
Follow
Hello everyone 😎
Week 5 of flower for the Dutchie🧡
Time to flush⚓️
Mac#1 Very nice smell of citrus & cookies 🍪🍋
SFV top buds ready✂️super dense,smell citrus & earthy🤤
Glueberry one more week for the top buds✂️

Likes
3
Share


@Blunoser
Follow
Week 5 Flower. This is the start of Week 5 Flower. Grow is cruising along. Adding Epsom salts on the last 2 feeds of the week. Tip burn from using it too often.

Processing
Likes
11
Share


@4F1M6
Follow
I started germination of 3 Amnesiac beans on 29/12/2020. I pre moistened my rockwool cubes with ph balanced water to 6.4. Made sure the plugs were just damp and not soaked. Using a small wooden dowel I increased the size of the plugs pre made holes. Than I sowed my beans into the holes. Ripped off a small piece of rockwool and mulched it up. Lightly filled the holes in with the mulched rockwool. Than stuck the plugs into a misted humidity dome, to complete germination.
Shouldn't take anymore than 4-5 days to see some sprouts. Once I see some cotlydon leaves bursting to the surface. I will get the plugs planted into some 1 gallon pots. Plus get these ladies situated into their home. Cant wait!
Some background information on my first run with Amnesiac. She was super powerful straight out the gate. Hammering off quite the amount of veg growth in 6 weeks. She was a little stingy on nitrogen and really wanted s slightly decreased dose from my norm but nothing to extreme. She was the tallest in the room going into flower and she was quite the stretcher. She gained about 250% size after the first 2 weeks of bloom. Leading to me supercropping her at that point. She didnt mind the hst one bit! Was back to growing and turning her bud sites up withing about 12 hours.
She resulted in a great quantity of high quality flowers. Very fat chunky colas just coated in trichomes. Looking to knock her out of the park even further this time around!


Likes
118
Share


@Njanne
Follow
This was my first time growing outdoors, and this variety did well in Eastern Ontario region. I started seeds indoors and put the mainlined plants in the garden in early May. They were done flowering September 27th. The plants were beautiful and purple. The flavour is sweet and earthy. This is remains my favourite variety. One thing I learned from this outdoor grow is that I need to allow more space between plants. One of these Purple Kush plants was choked out and didn't grow as well as she could have. Next year I'll do a better job.
Likes
34
Share


@Salokin
Follow
Hello Growmies,
We’ve entered week 10, and the Watermelon Candy F1 Hybrids stand as a testament to the art of cultivation. Sharing the tent with Epic Buzz and Red Banana Pudding, they've reveled in the same meticulously controlled environment, with each plant exuding its unique vibrance.
The fade has begun its delicate dance, a visual symphony of hues signaling the nearness of harvest. This gradual shift is not just a visual treat but also a sign of the plants channeling their energy into the dense, trichome-laden buds that have developed into rock-hard nuggets. The intense, pungent aroma that fills the air is a prelude to the flavors and effects to come.
Watermelon Candy #1 stands out with its remarkable bud structure, its stature commanding attention amidst its siblings. Not to be outdone, Watermelon Candy #2 and #3 boast their own magnificent floral nodes, each a promising indication of the bountiful harvest that looms a mere two weeks away.
The TrolMaster's environmental control has been nothing short of exceptional, keeping the conditions optimal for these final and decisive stages of flowering. Our unwavering nutritional regimen has supported the plants without the need for alteration, ensuring a finish as robust as the care provided.
As we anticipate the impending harvest, we're reminded that cultivation is as much about the journey as it is about the destination. The hard nuggets and the powerful scent are clear markers of success, yet it's the anticipation of the cut that holds a certain thrill—a culmination of weeks of dedicated effort.
Soon, we'll have the privilege of trimming and curing the fruits of our labor, but until then, we watch and wait as the Watermelon Candy F1 Hybrids prepare to reveal their final, glorious form.
Stay lifted, and ready for the harvest that awaits,
Salokin


Processing
Likes
6
Share


Likes
23
Share


@Kynareth
Follow
Dia 5 y las plantas ya muestran su primer par de hojas verdaderas que practicamente triplica en tamaño a los cotiledones y con un buen color verde. Pasaré a abonar conforme a la table de crecimiento y ph a 6 (algo menos realmente pero se estabilizará a 6 en las próximas horas). El ph mas y menos que uso es de boom nutrients que alguien me lo preguntó, tengo el de ghe pero como ya tengo las dosis pilladas con boom nutrients uso este, en teoría de ghe debería ser más estable pero tampoco es algo con lo que haya tenido problemas.
La ec se ha ido hasta 1,9 aplicando la dosis recomendada del fabricante, creo que el fulvic/diamond nectar sube mucho el valor. Quizás con agua destilada se puedan mantener esas dosis
Dia 10 - The plant keeps developing good. i have lowered the water dosage
Likes
Comments
Share

@Adriano420
Follow
Começaram a tocar a rede e a beber bastante água, estou impressionado com a saúde e velocidade de crescimento


Processing
Likes
Comments
Share


@Grownewgenetics
Follow
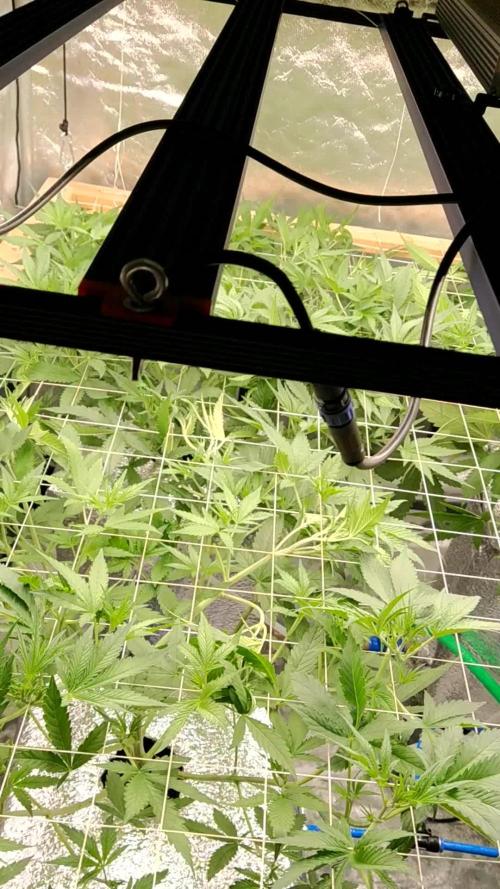
we opened these diaries the bsfseeds guys give us these Strains to testing.
the rainbow on week 3 the oldest and one on week 2 , the two really beautiful and become beautiful Jung lady's really quick.
the small one is the San Fernando Valley also from b.s.f.seeds , to our bad we get just one of these and take 3 week's.

Likes
4
Share


@ATX_growguy
Follow
Nanners. Pollen sacs are coming in. So exiting. Plants teach you patience. And constant growth.. stick to the program. Stick to the goal. Plant Smells like a if you melted candy and put them in a trashcan in the summer heat.
I only 3 times so far. Got alot of nitrogen going on but it should slow down eventually

Likes
38
Share

