
Likes
Comments
Share

@Crusty_Juggler
Follow
These were just used for dry sift, together with the poor Iced Outs and the small Sugar Cane.
Don't grow this freebie if your space/time is limited.

Likes
6
Share


@Lamotaenmoto
Follow
Así están ahora mismo, he tenido bastantes problemas en este cultivo estoy deseando acabarlo y empezar uno nuevo, pero de los errores se aprende 💥🏌️♂️🧟♂️🧟♂️🍁🍁💚💚💚🤯🤦
Likes
12
Share


@ELPIRATA
Follow
(11/06/20)Dia 36.- Actualizacion correspondiente a la semana 6 de Cultivo.
Hasta el momento se ha dedicado principal atencion al tejido en la red Scrog.
El día 11/06/2020 se han regado 3 plantas en macetas de 11 litros:
X2 Semillas Auto Lemon Kix= 1L [1,5mlKnactive+3ml/L ATAGrowth-C+5mL ATAFlower-C] PH 6.1 / EC= 1.29 Tº=2
X1 Semilla Auto Tutankhamon= 1L [1,5mlKnactive+3ml/L ATAGrowth-C+5mL ATAFlower-C] PH 6.1 / EC= 1.29 Tº=2
*El día de hoy se han regado 1 planta en macetas de 7 litros:
X1 Semillas Auto Lemon Kix#3 = 550 ml [1,5mlKnactive+3ml/L ATAGrowth-C+5mL ATAFlower-C] PH 6.1 / EC= 1.29 Tº=22
El día 14/06/2020 se han regado 3 plantas en macetas de 11 litros:
X2 Semillas Auto Lemon Kix= 1L [1mlKnactive+3ml/L ATAGrowth-C+5mL ATAFlower-C+2mLAutoTop] PH 6.4 / EC= 1.49 Tº=22
X1 Semilla Auto Tutankhamon= 1L [1mlKnactive+3ml/L ATAGrowth-C+5mL ATAFlower-C+2mLAutoTop] PH 6.4 / EC= 1.49 Tº=22
*El día de hoy se han regado 1 planta en macetas de 7 litros:
X1 Semillas Auto Lemon Kix#3 = 550 ml [1mlKnactive+3ml/L ATAGrowth-C+5mL ATAFlower-C+2mLAutoTop] PH 6.4 / EC= 1.49 Tº=22
El día 17/06/2020 se han regado 3 plantas en macetas de 11 litros:
X2 Semillas Auto Lemon Kix= 1L [0.5MlBLOMBASTIC+0,5mlKnactive+5ml/L ATAGrowth-C+5mL ATAFlower-C+1mLAutoTop] PH 6.2(?) / EC= 1.56 Tº=23
X1 Semilla Auto Tutankhamon= 1L [0.5MlBLOMBASTIC+0,5mlKnactive+5ml/L ATAGrowth-C+5mL ATAFlower-C+1mLAutoTop] PH 6.2(?) / EC= 1.56 Tº=23
*El día de hoy se han regado 1 planta en macetas de 7 litros:
X1 Semillas Auto Lemon Kix#3 = 700 ml [0.5MlBLOMBASTIC+0,5mlKnactive+5ml/L ATAGrowth-C+5mL ATAFlower-C+1mLAutoTop] PH 6.2(?) / EC= 1.56 Tº=23


Likes
133
Share


@PapaNugs
Follow
After topping last week,we flipped to flower! I've been training the girl down with LST wire. Want as level as I can until I reach the edge of the light. But I've been increasing the light intensity slowly this run. Normally I just blast them but went slow over the week. Getting water more often now and will install the self watering pots today.
Lights at 100% power.
Here are the lights details:
Medic Grow Mini Sun-2 150W LED
Model: MN150-022
Spectrum mode: V1
Efficacy: 2.8 umol/J
Thanks for stopping by!
You can find the light on Grow Diaries:
https://growdiaries.com/grow-lights/medic-grow/mini-sun-2-150-watts
You can find the light on Medic Grow's website:
https://medicgrow.com/

Likes
294
Share


@StarLorr
Follow
Welcome to my Ðivine ØĠ Ķush diary.
In this diary:
Seeds: sponsored by Ðivine Șeeds
Media: Promix HP
Nutrients: Advanced Nutrients, Diablo Nutrients, Gaia Green Power Bloom.
Light and Weather: Şun☀️and Mother Earth.🌎
___________________________
Feeding:
Mon 26Aug: 6L water not pH'd
Tue 27Aug: 4L water not pH'd
Wed 28Aug: 4L water not pH'd
Thu 29Aug: 4L supplements Monster Blaster, Flower, K. Not pH'd
Fri 30Aug: 4L water not pH'd
Sat 31 Aug: Rain Showers🌧️
Sun 01Sep: 4L nutrients pH'd 6.5 with a micro tropical storm mid afternoon😬
___________________________
*please note that most watering are from top now since topping with Gaia Green Power Bloom*...... and since i smashed the saucers with the weed wacker🤦🏻♂️
______________________________
Kush Kush is "still"on autopilot. We had a warm humid week but Sunday's micro storm⛈️brought us cooler temperatures as today (sept 2nd)we maxed out a 17°C and this morning we had 12°C.
______________________________
Started using Diablo Nutrients's supplements for the blooming phase.
Monster Blaster, Monster Flower and Monster K.... for good mesures😉
______________________________
Thanks for stopping by, likes and comments are appreciated!👊🏻😎
Keep on growin!
Keep on tokin!!!
😙💨💨💨💨💨

Processing
Likes
14
Share


@kevgrow
Follow
Hey Friends, end of Week 10 from seed
Colas are looking Very nice
Noticed some orange color on some leaf tips so I lowered the amount nutrition when feeding
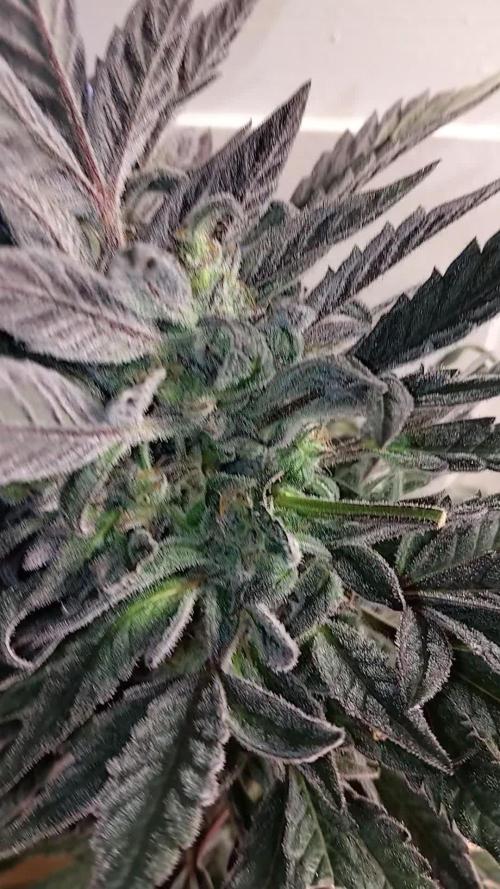
I used a magnifier to have a closer look at the colas, trichomes used to looked like little crystals, now they are bigger and cloudy.
So far no amber coloring on trichomes
I need some advice as to when I should begin flushing and harvest
Smell is slowly getting stronger, like a muffin with a small touch of gas ⛽️
Looking Forward in seeing some bud growth in the following week, will keep you guys posted!
Likes
7
Share


@Meksi2790
Follow
still recovering from the nitrogen def will flip into flower next week still feeding ph 6.5 and 800-900ppm


Likes
26
Share


@BlackDragon22
Follow
Praticamente ultima settimana vegetativa per loro, una gorilla skittles è già enorme e in fase di fioritura, il tempo ha iniziato ad essere sempre buono per loro, non sono molto esperto nell' outdoor, quindi spero che il risultato finale sia più o meno appagante. Mi preoccupa soltanto la cherry cola che inizia a tirare fuori i pistillo ma di crescere non vuole saperne, aspettiamo.. Sapete com'è..😅😅🤞🏽
Likes
42
Share


@Gabarram
Follow
Day 121 (Day 1st Week 19) and the lady's buds are very clearly packing on weight. She is ready ready for a PK boost again! But if I really have to tell my opinion, I think she doesn't need more P, she's growing very well. On the other hand, a boost won't hurt. It's a pity the high temperatures of summer, she may be really suffering the heat inside the grow room. Luckily prosilicate may help her (as it seems to be) helping on this heat issue. Of course everyday I inspect buds to put those approaching the lights farther. Led lights are too bright and may bleach the precious buds so proximity to lights is the real problem of this current grow.
Day 124 (24/01/2020) Helaas i found an incipient spider mites infestation, this f*cking plague always makes its way into my grow. Because of spider mites I sotpped growing outside. Really, I do hat these nasty animals and I would eradicate forever if it was in my power. I found a few leaves with inequivocal symptoms of spider mite bites, and in the back of the leaves I saw eggs, nymphs and adult forms. I started treatment with neem oil 5 mL/L applied as soil drench. I'll repeat in 5 days. on the other hand it's fortunate that I have seen them and so I can start treatment soon before they take over the entire plant.
1/5 day for PK boost: 0.5 mL/L Prosilicate + 1mL/L CalMax + 0.6 g/L Bloom fertilizer + 0.2g/L Boost (inflow 530 ppm) pH 5.85 (run off 450 ppm)
Day 125 High temperatures again, with the open tent temp is 29.4 ºC inside... Day 2/5 for PK Boost
Day 126 (26 01 2020) PK Boost day 3/5 inflow 550 ppm, run off 530 pmm
Day 127 (27/01/2020) PK boost dat 4/5, luckily it was a cooler day today , i kept the tento closed, and temperatures did not exceed 29 ºC which I consider "normal" for the summer (but I would like lower temps though)
Likes
24
Share


@Jays_Not_Here_Man
Follow
Another great week for the Apple Betty girls. I have not seen a single deficiency, other than the odd yellowed or withered leaf under the canopy, typically due to lack of light. I will come through soon and do a defoliation of both tents to allow for more light to penetrate, and perhaps get a good push for some girthy colas 😋.
I have lowered the temps a bit in the tents by controlling my lung room temps, and they are maxing out at 77 degrees and hitting a night time cool of about 70. I have also lowered the humidity to hover between 47 and 52 %. Hopefully will start to get some nice colours as they finish.
As I mentioned before, when I water is when I like to get under the canopy and check the stems and leaves for anything that shouldn’t be… and typically once a week after watering I’ll wipe down the tent and sanitize any surface I can. There is no reason to get lazy, that’s how you get Pests, Mold, and PM. Happy Gardening 🇨🇦👊❤️

Likes
19
Share


@NORTHWALESAUTOS
Follow
Been a great plant to grow. She filled out rapidly in early stages and thicken up to the point the bud are very dence.


Likes
40
Share


@Ukfarmer420
Follow
Small pots small plants but they smell amazing and are icey i will.run again in bigger pots next time.
Tastes like nothing iv tasted before I.will run again for sure.
Likes
8
Share


@Huntress007
Follow
This beautiful lady is doing well! She is flowering beautifully and strong 💪! Doubling up on her flower nutrients!


Likes
13
Share


@LeedsGenetics
Follow
All plants have been repoted into 20 litre fabric pots, 6 topped and LST will begin this week. One plant has already been bent over abit as you can see in the video as it was getting abit taller than the rest. Growth now seems to be picking up I went away for 2 days and when I come back it looked liked they'd doubled in height! Some Cuttings are abit slow but that is down to my impatience. Nutrients are now been given at full dosage. From now on the plants should grow significantly every week giving me chance to bush them out whilst also getting the desired height before filling to flower and scrogging!


Likes
4
Share
@Smev1337
Follow
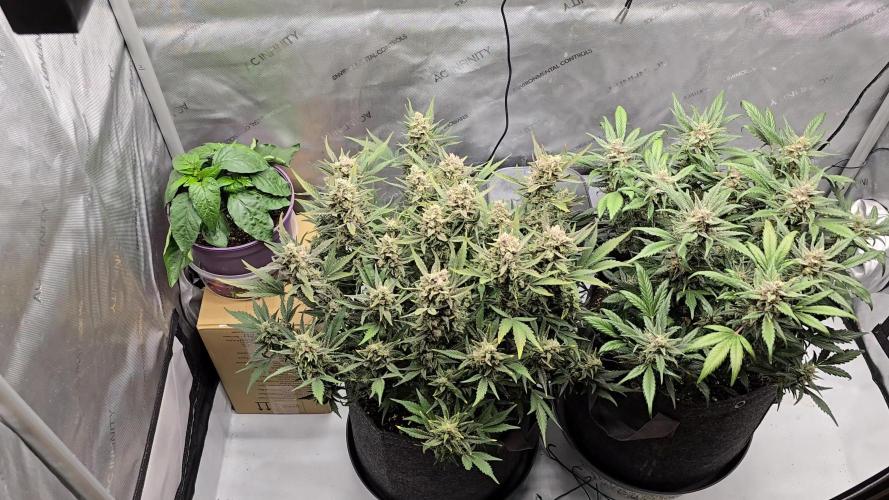
Hey all! this week both ladys are going good just the left plant started to yellow on the leaf tips so i don't know what that might be but we are in late flower anyways i guess! everytime i enter this room i smell these fruity terps and its really nice, the right plant also is producing lots of trichomes under the leafes hehe👽 happy growing all!💚✌️😎