The Grow Awards 2026 🏆 


Processing
Likes
46
Share
@Visions
Follow
Week 6 is here. Finally starting to see a little fade. Full force on her flowers. They are already rock hard beautiful bastards. Stripped some dead weight and bigger fans over sights. At this point in the game I'm giving a low grow feed and high pk for 2 more weeks then flushing. Should be a 9 to 10 weeker. Trichomes are massive.
Day 40 she is showing pink and purple hues. Man even the clone is showing pollen signs! She smells super strong with berries.
Day 41 more colors and denser buds. Expected harvest day, day 63. Next feed which I fed plain water today, will be a heavy pk boost. She can take so much at this point, she can take a half tsp of flower fuel. So week 6 flower start a heavier feed for a week 10 to 11 ending. If not expect week 9. Noted. Shes going to be an amazing mom. Let's see what colors we get our of her dense ass buds.
Likes
22
Share
@Ieiogrow94
Follow
Tutto perfetto piante molto molto soddisfacenti!
Sicuramente verranno riproposte!!
Grazie a tutti del supporto e al team @Kannabia per la collaborazione ❤️💚
Ne vedremo delle belle!!!

Likes
22
Share
@HydroHerb420
Follow
Wish I could have vegged the clones another couple of weeks but the Zkitzo was just growing to fast. In hindsight shouldn’t have put a plant from seed in with the clones. Seeds always grow like mad in NFT and clones are more manageable as they don’t have a tap root. Still got some absolutely beautiful looking and smelling bud from the Zkitzo so can’t really regret it. The Gelatos are rock solid right through and look absolutely beautiful. Used rainwater right the way through on this so should smoke nice to. Better pictures as it dries.

Likes
28
Share
@CrystalMeph
Follow
So this was quite the week...I was looking over our set up, and making sure Grandma has everything she needs when she says "it seems to me that we need a vegetation cabinet." Turns out she had all the supplies too. Cracked me up...so I ended up building a nice little veg / drying cabinet. You'll see it in the second Meph run diary, was too busy to get some shots today. 😅
She doubled in size from last week, super happy with the progress. She's under a combo of flouro and LED in the new cabinet and LOVING it. Started ramping in nutrients slow and steady, keeping the c02 around 600-800ppm while I finish up the environmental control in the new cabinet.
I realized that Mephy, might be a flight risk...so I made her a pen. 😂 ...also removed any confusion on her breed. Yeah, I nerded out a little. #prusagang #piggydankfarms
Hope everyone had a great week, and all the competition ladies are stellar! Until next week...time to go play on the farm. ✌️🌱
Processing
Likes
41
Share
@MadeInGermany
Follow
Hi everyone 🤗.
It was rinsed slightly 3 days ago and now only gets water with 0.4 EC.
From tomorrow on she won't get any Canna Boost anymore, because I'm not the fan of giving it to the end :-)
It always looks more beautiful and more beautiful 😍. You can see how she removes the last nutrients from the leaves and slowly comes to an end 😇.
From next week the trichome pictures will also be added 👍. I can't wait to try them 🤣
I wish you all a nice week, stay healthy 🙏🏻 and let it grow 🌱
You can buy this Strain at :
https://sweetseeds.es/
Sweet Seeds Cup 🏆
Type:
San Fernando Lemon Kush
☝️🏼
Genetics:
OG Kush x Kosher Kush
👍
Vega lamp: 2 x Todogrow Led
Quantum Board 100 W
💡
Bloom Lamp : 2 x Todogrow Led
Cxb 3590 COB 3500 K 205W
💡💡☝️🏼
Earth: Canna Bio
☝️🏼
Fertilizer: Canna Bio
☝️🏼🌱
Water: Osmosis water mixed with normal water (24 hours stale that the chlorine evaporates) to 0.2 EC. Add Cal / Mag to 0.4 Ec Ph with Organic Ph - to 6.0 - 6.3
💦💧

Likes
1
Share
@Mr_Maes
Follow
For sure this strains genetics are strong. She is really blowing up with growth. Almost a foot tall and extremely strong structure.

Likes
134
Share
@Herbalize
Follow
Hello Folks 😎
8th week of flowering,it's time to flush these girls !!!
40 liters of water per plant, with ajusted ph ( 6.2 ) and the senescence has begun 👌
I managed to reduce the daytime temperature to 23 ° C and much cooler at night 15/16 ° c
They are beautiful, the smell is powerful, and these buds are dense like rock !!
I plan to harvest between 63 and 70 days, it depends on the maturation of trichomes ( already almost all milky )
Follow, like and comment if you enjoy it
I also have a second diary with 2 Moby Dick
Peace Love & Weed 😍👊

Likes
9
Share
@Wicked_Stix
Follow
Got some phat girls up in here! Everyone is looking pretty good. A few of the plants are starting to ripen up while some others have at least a few weeks to go. Just filling the reservoir and letting them drink it. These girls show that simplicity isn't always a bad thing. I pulled the slurricane 7 from the system and started flushing it with plain tap water. It got a heavy 10 gallon flush today and I will give it 5 gallons a day for about a week. Just going to keep pumping the juice to the rest of them.
Likes
10
Share
@oldschoolS2
Follow
Hey!
Day 35 after flip of Zombie Kush!
Growing nicely, strong intense smell ..and we can see the topped one is a little behind on bud production aswell... see u next week!


Likes
137
Share
@MrJones
Follow
mrjones - Slurricane #7 S1
🌱Slurricane #7 S1
@inhousegenetics_official
👨🌾🏽GD Grower: MrJones
🔹🔹🔹🔹🔹🔹GOALS🔹🔹🔹🔹🔹🔹
🌞Environment - 75/80℉ and 60% Humidity Good Old Mother Nature
💧 Feeding - The Green Sunshine Company - Earth Dust All-Natural Plant Nutrients
⚗️Soil - 35% ProMix MP / 25% Ocean Forest / 20% Tupur Royal Gold / 10% lobster Compost / 10% Additional Perlite
🍃Training / So this girl was 60 Inches and spread her out under a 5x5 Trellis
🕷️ IPM - Will be using Green Cleaner" 1 OZ per Gallon, and CannControl from Mammoth alternating between product each month
🔹🔹🔹🔹🔹🔹🔹🔹🔹🔹🔹🔹🔹🔹🔹
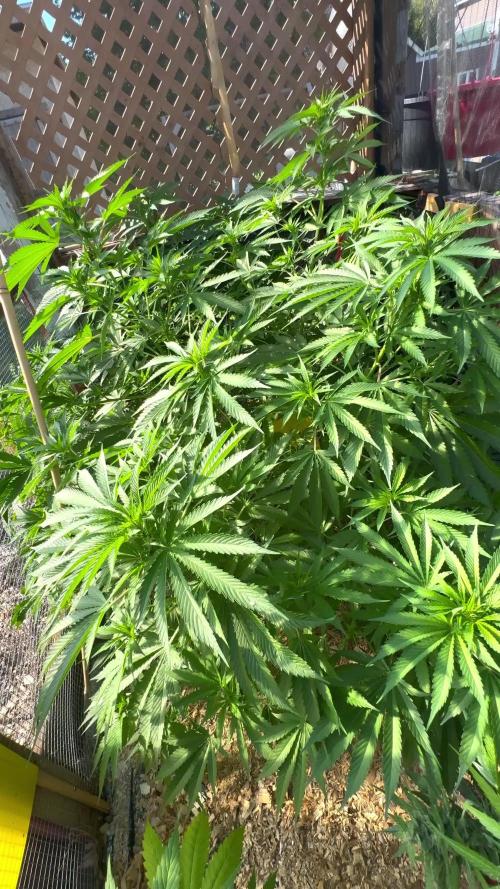
📜 Rambling - Week 1 / So weeks are flying by, sorry for the slow updates, having unusual personal life struggles, but with that said, these outside plants are just doing great, thanks to my partner Mother Nature!!
🔹🔹🔹🔹🔹🔹🔹🔹🔹🔹🔹🔹🔹🔹🔹
▶️ Sunday - 06.06.21 / These plants are on autopilot with Mother Nature at the helm, we have been having gentile summer showers, plenty of sunlight and things are looking great!
▶️ Monday - 06.07.21 / These plants are on autopilot with Mother Nature at the helm, we have been having gentile summer showers, plenty of sunlight and things are looking great!
▶️ Tuesday - 06.08.21 / Finally got to water them today, they are just growing like crazy!
▶️ Wednesday - 06.09.21/ These plants are on autopilot with Mother Nature at the helm, we have been having gentile summer showers, plenty of sunlight and things are looking great!
▶️ Thursday - 06.10.21 / These plants are on autopilot with Mother Nature at the helm, we have been having gentile summer showers, plenty of sunlight and things are looking great!
▶️ Friday - 06.11.21 / These plants are on autopilot with Mother Nature at the helm, we have been having gentile summer showers, plenty of sunlight and things are looking great!
▶️ Saturday - 06.12.21 / These plants are on autopilot with Mother Nature at the helm, we have been having gentile summer showers, plenty of sunlight and things are looking great!
🔹🔹🔹🔹🔹🔹🔹🔹🔹🔹🔹🔹🔹🔹🔹
Earth Dust - DESCRIPTION
🔹Earth Dust is our all-natural plant nutrient designed for indoor and outdoor flowering plant growers. You can grow easily by “just adding water” to your soil for the entire growth cycle. It creates a “living soil” so your plants thrive from seedling all the way through flower and harvest. Earth Dust represents an organic dry amendment method of gardening, it’s made of a natural powder of ingredients.
🔹Because you only need to water your soil with Earth Dust, you can concentrate on caring for your plants and getting a healthy crop “on autopilot”. Now you can grow without spending hours of your life mixing chemical nutrients, and you can do it naturally. What’s more, is you will enjoy the cleanest, most aromatic, and flavorful harvest you’ve ever experienced when a plant grows in a rich, organic web of living soil.
Product Highlights
🔹All-Natural Ingredients – Mostly plant-based – Safe around children and pets.
🔹Packaged in kraft paper bags that are recyclable and compostable.
🔹Easy to Use – Just mix the powder into the soil 3 separate times – then water only.
🔹Packed full of rich microbe food & contains billions of beneficial fungi and bacteria! Creates a resilient, living soil that defends against pests and diseases.
🔹Rich in trace minerals and nutrients for full plant expression. Sourced from rock dust, sea-farmed kelp, and land-grown crops.
🔹Soil Conditioners help balance pH and make nutrients more available in the soil. Achieved with ingredients like bat guano, worm castings, limestone, molasses, and humic acid.
🔹The correct balance of N-P-K nutrients for each stage of growth:
🔹Earth Dust Base (3-1-2) contains key nutrients for sustained vegetative growth. High nitrogen (N), Low Phosphorous (P), and Medium Potassium (K).
🔹Earth Dust Boost (2-3-6) contains accelerated-release nutrients for powerful flowering growth. Low nitrogen (N), Medium Phosphorous (P), and High
Potassium (K).
🔹Re-use soil harvest after harvest by simply adding more Earth Dust Base to begin again. Create your own living soil that gets better every time it’s used.
🔹Go organic, save time, and get predictable, healthy harvests.
🔹🔹🔹🔹🔹🔹🔹🔹🔹🔹🔹🔹🔹🔹🔹
Compost Tea for Vegetative Stage
Water 4 Gallons
3 Cups Composr (Your Favorite Worm)
4 TBL Molasses
4 TBL Seaweed Extract
4 TBL Fish Fertilizer
Use air Stone o the tea for 24/3 hours 70/75F, use at full strength for establishing plants and a half strength for younger plants

Likes
96
Share
@Swollen
Follow
During the harvest I've collected lot of trims. I think this genetic will be great for extractions.
I've dried all the buds in the tent at 50%rh, 23°C with indirect ventilation for three weeks. Now are curing in a dark room at 21°C inside a jar with a 58% Boveda.
Thanks to everyone who followed and liked this diary! I hope you enjoyed 🙏

Likes
8
Share
@rorrobz25
Follow
Hola cultivadores.
No había podido actualizar antes por problemas personales pero aquí estamos denuevo.
La planta se agiganta poco a poco, ya, de aprecia una mayor cantidad de pelos.
Se añadió Bud Candy para agilizar los azúcares y estos sean absorbidos por la planta. De igual manera se subió la dosis de Bio-Bloom y de Fish-Mix.

Likes
4
Share
@KCChiefers
Follow
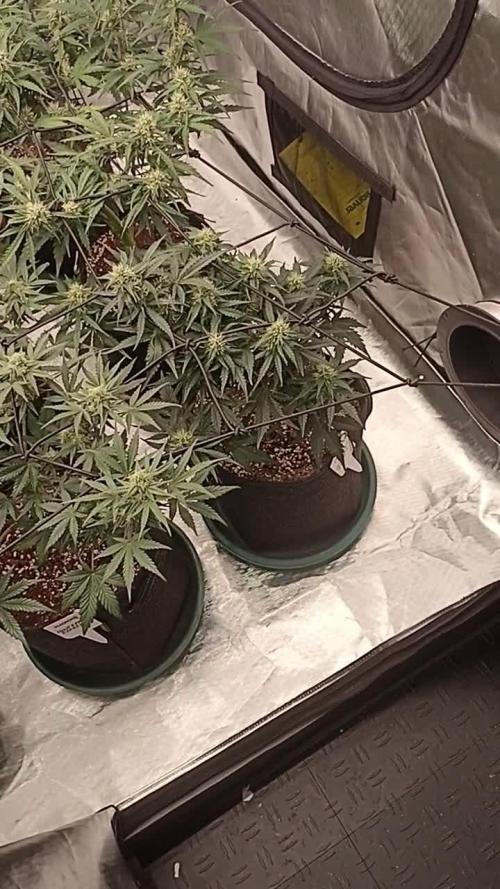
Day 65 Update: Watered both plants with almost a gallon until runoff. Plant #2's water was dosed with Terpinator at 25ml/gal. 11 days left of flushing on Plant #1. This will be Plant #2's last nutrient watering, as she will start the flushing process next watering. Also added two yoyo hangers and two stakes to Plant #2 as her branches are getting heavy (not complaining 🤷♂️)
Day 68 Update: Starting flush on Plant #2 today. Plant #1 has 8 days left of flushing. Watered both plants with almost a gallon of pH balanced water until runoff.

Likes
21
Share
@JeyGanesha
Follow
Inizio fioritura.prima settimana bene bene bene.. continuate così 💪✌️🙏
Una delle 3 papaia è diventata Maschio.peccato.....
Likes
7
Share
@Marijuanaut
Follow
Another week down! 😁
Everything running smooth. 😃
Finnaly a grow without so many issues 😂
And cold weather so I can push the led to the MAX 😎

Likes
19
Share
@Organic473
Follow
The pictures speaking for themselves...added some plants that would go to seed after being cross bred with Khalifa Kush. This week onward the girls would be fed black strap molasses for taste and big bud.
Likes
42
Share
@DrLaggis
Follow
🌱 Day 50 - First Day of Week 8 🌱
Hello, Grow Friends!
My plant is doing well, and it’s amazing to see visible progress every few hours. 🌱✨ The buds are in full throttle, and I feel like the plant is now needing more water as the pots are drying out faster. 💧
Watering:
I’m still watering with 1L every two days. 💦 The dosage of BioBizz Grow and BioBizz Bloom has been increased according to the BioBizz feeding schedule. The pH of the water remains constant at 6.0. ⚖️💧
Temperature & Humidity:
Luckily, the weather in Germany is cooling down, so I no longer have to deal with temperatures of up to 30°C in the tent. 🌡️🍂 I’m expecting temperatures to settle between 18-23°C now that we’re in September, and humidity should stabilize around 50-55%. This will create perfect conditions for the upcoming drying process. 🍃✨
Plant Health:
The plant is looking good overall. 🌿 I did have some calcium and magnesium deficiency symptoms recently, but I’ve managed to get that under control with CalMag. 💪 I’m continuing to carefully remove any leaves that are noticeably blocking light to the buds and hindering photosynthesis. 🍃✂️
Vibes:
Every day, my plant still enjoys an hour of Lo-fi Jazz music. 🎶🌱 I think it helps set the perfect growing atmosphere. 🎷
I’ll keep you all posted, and remember, I upload new pictures to the diary every day! 📸🌿 Stay tuned!
Processing
Likes
13
Share
@Hawkbo
Follow
Pics and video were taken a few days ago been busy as shit lately so the update is a little late. I'm gunna put the video up first on all of them then go back and upload the pics so if come back if the pics arent up yet.
Likes
30
Share
@SAC87
Follow
Day 49 Flower
Hey Growers. I did a flush last week to get my runoff closer to 1050. I’m not sure why this happens that I get tip burn doing FFW. Maybe I start ramping up flower nutes too much too quickly. I have tip burn on my Blue Dream too. I’ve gotta come up with a solution as it buggers everything up. Flushing and Dealing with tip burn instead of packing on size.
This is a 10 wk strain so I’m not as concerned cuz there’s lots of time and I think I got ahead of it. The nugs are smaller, marble to golf ball sized but hard as a rock already. The smell is of over ripe lemon when it get that sweet and Hazey earthy woody characteristic. I’m going to feed 2 more weeks and try the Advanced Nutrient Overdrive that I have kicking around. Then flush heavy for 1 ish weeks and hopefully get a nice fade.
The Vipar spectra XS2000 is doing a great job, it has me wondering if I could use it to flower a 4x4 of autos. Its super strong. My poor man’s light mover has the plants getting a ton of light every other day with a nice rest in between. There is no light burn or yellowing, a tiny bit of leaf edge curl that goes away during its rest day. I am very happy with this light and know it’ll blow up whatever I run in here next.
Happy 420 &
Happy Growing 🌱
