The Grow Awards 2026 🏆 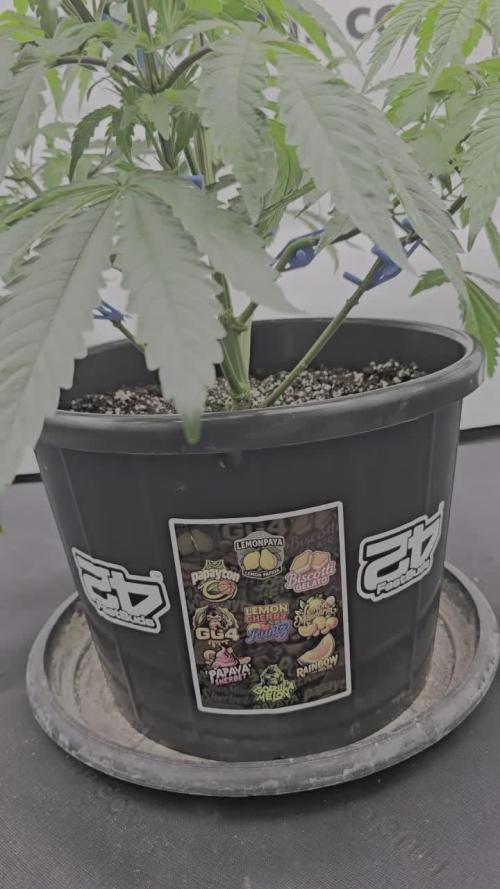


Likes
Comments
Share
@IslandTerps
Follow
Strain: Fast Buds – Mixed Photoperiod Pack #2
Grow Type: Indoor
Pot Size: 3 Gallon
Medium: Peat Moss & Perlite
Nutrient Line: Athena
Week 6 Update
She’s doing amazing this week showing great growth and filling out nicely. For a plant that was only topped once, her structure looks really good.
The training clips have definitely helped open her up and shape her just right. She’s healthy, vibrant, and showing no deficiencies. I’ll be flipping her to flower this week and can’t wait to see how she performs once she starts stacking.
Feeding
1.7 L Athena nutrient mix (will increase gradually if needed).
Indoor Climate Conditions
Temperature: 18–23°C
Humidity: 60–65%
VPD: ~0.5–0.8 kPa
See y’all next week! And don’t forget to use my discount code ISLANDT for 15% off your next order at Fast Buds!

Processing
Likes
16
Share
@The_green_room
Follow
Using the paper towel method, my girl's taproot starting showing after 24 hours.
I also buffered my medium with Multi Total and Calmag, before flushing with pH 6 water to a low EC.
Once the taproot was 3/4 inch long, I planted her into the coco and watered her with RO water at PH 6.2 for a few days. I also switched my light on (first at 20% power and 30 inches away from seedling, gradually up to 40% at 25 inches). Until the first leaves unfurled, I kept the light on for 24 hours.
After the first cotyledons opened I switched my light to 18/6 at 60% power and have given her the first dose of nutes at EC 400.
Think we can say germination was a success so on with week one! 🌱 💡

Processing
Likes
10
Share
@CrackinBeans
Follow
Well I'm a bit upset last week I ended up dropping my ph meter in a tank of nutes I was mixing and by the time I got it out the meter was junk. I was planning on flushing the crystal but had to wait another week for the meter.
I suppose the good thing to take from this was I found out why I was having issues with my plants. When the new ph meter came in I went to check my run off and my nutes that I had all ready mixed up. It turns out that my meter i had been using this whole grow was off by about -2-2.5 so this whole time I had been feeding the plants at around 3ph smfh. I cant believe they look how they do knowing what went on this whole time.
Fastbuds crystal meth is 3days into flush and i will be cutting it down this weekend most likely.
Mephisto hubbabubbasmelloscope is smelling like sweet sweet candy and is thick in resin
Bighead seeds freeze berry/ blueberry crumble has a dank pungent stank to it and also is frosty but larrfy
Big bomb is still growing thick and have bud sites everywhere
Now I'm ready for the next batch and ready to get dialed in!


Likes
79
Share
@DudeGrowsWeed
Follow
Mexican Airlines is looking good. I'm doing some LST experimentation on her so far I'm seeing some nice development from the lower nodes, tried spreading those nodes out today.
She's front-left in the group pics.
Likes
Comments
Share
@Halsk8
Follow
Ok so I had throw out the strawberry because it wasent an auto so now I've got three the sour diseal which is shooting up , the Nefertiti seems to be still going and then the big lemon ami

Likes
10
Share
@DeepRootsGrowTrees
Follow
ROYAL QUEEN CBG AUTO
Week #12 Overall
Week #9 Flower
This week she's doing good she continues to pack on weight and she looks fantastic with her white and red hairs just covering the buds!! Stay Growing!!
ROYAL QUEEN SEEDS
ROYAL QUEEN CBG AUTO


Processing
Likes
4
Share
@TEMPLEOFWEED
Follow
NEW croissance hydro + floraison hydro . Tous en hydro début à la fin .


Likes
11
Share
@Hempshire_Empire
Follow
So glad that this girl was my first grow. This stuff reeks of lemon, I love jack and I think The Bulldog nailed it. I Look forward to posting some of the fire genetics I have next up. She never lost color even through a pretty thorough flush.
Effects are very cerebral and uplifting, awesome for a hike or going outdoors!

Likes
4
Share
@DRO420
Follow
Plants just received their last feeding. Only ph balanced water for the last 2 weeks to flush out nutrients. Leaves are starting to yellow showing signs of being almost ready for harvest. The trics are about half cloudy.
Processing
Likes
11
Share
@grower1212
Follow
A partir de esta semana se agrega a la alimentación bac boost y top candy.

Likes
10
Share
@Koopee
Follow
Olin 4päivää poissa niin Jack herer on pullistunut ja lsd ovat venyneet mielestäni todella hyvin jos jollain jotain neuvoja olis kiva kuulla


Processing
Likes
27
Share
@Dunk_Junk
Follow
13cm vertical growth this week. She's now 24cm tall.
She seems to be growing... but very slow.
She's still in veg, no sign of any flowers yet..

Likes
12
Share
@Belverde
Follow
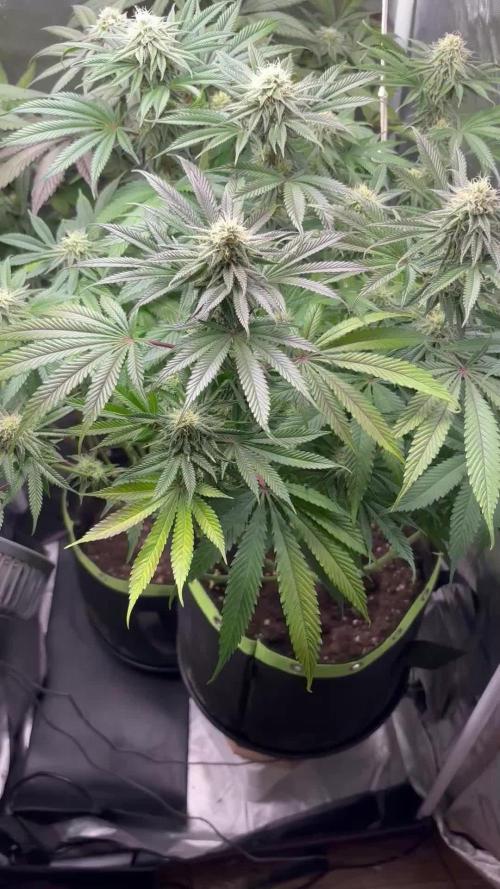
I really like all three pheno..I was have some problem because I was use a new led light for the first time..
But in the end of the day I'm very Happy, really happy for the result..
For the bloom I setting the timer at 12/12 light cycle..
Not 18 or 20..
And in the end they gives me some nice looking flowers..
Very stycky too..
The plants was easy to grow..i cut only the first two branches in close to the end of week four..
Anyway..
I have described exactly what happened every week if you want to learn more ..
But nothing to special growing cycle..
Nice smell nice taste and nice effects, all bilancaded for me..
Sweet, candies, earthy and somntingh else..
I try it with two vaporizers and I like it(use mighty /ghost mv1)
I do not talk a lot about the effect because it is subjective, and in any case I think is a quiet cannabis that can be used all day..
Even with regard to the flavor, it is always difficult to grasp the characteristic features, apart from some super obvious ones .. I speak for me of course..
In about one or two weeks I will try for the second time but in to the organic rolling paper, pure nice green joint..
Thanks for the time🙏..
Hope you enjoy 🌱
Happy end of 2019..
And good year too..
See you in another diary..
Ciao✌️

Likes
24
Share
@Alpha_Green
Follow
Three large glasses full to the brim with the purest, sour and diesel-smelling sativa monster!
What a tough passage this time. A few unpleasant personal events occurred during 3 months of the finest organic farming, some of which were in the battle with my motivation. A time full of happiness and a time full of sadness and compassion.
I also learned an incredible amount once again.
I’m very grateful.
“The outside of a plant is only one half of reality.”
Take care & 🐝 positive
Alpha_Green

Processing
Likes
15
Share
@dank604
Follow
Trucking right along with no issues. Girls putting on weight and it's pretty cool to see other bud-sites fatten up with this light compared to my old blurple. Day 50 for the 2-gal and day 43 for 3-gal, cannot wait until harvest!! Gonna wait minimum 80 days for the 2-gal, maybe longer.
Likes
10
Share
@Skinnytalls420
Follow
Day 8-19/12/21 she is looking healthy!!! Day 10-21/12/21 she is looking good!!! Day 13-24/12/21 everything is going well