
Likes
Comments
Share

@nijuana
Follow
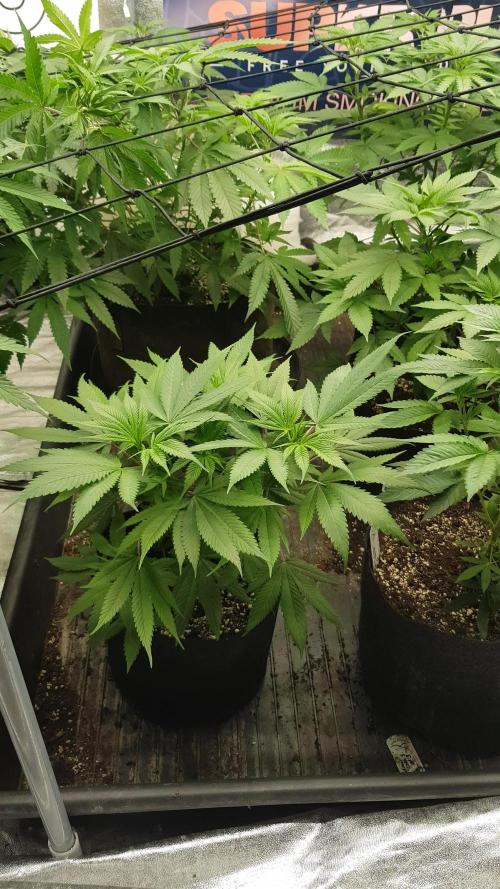
I had the same problem with the nutrients you can very see this problem on the gorilla and specially the killer Kush ones with just one of the little apricot but the 2 big plants have nothing, I think it's an excess


Likes
3
Share

@CalGonJim
Follow
3/30 Monday RF3's are doing great! EC was a little high 1.2 but with runoff they are ok.
3/31 3PM One is already throwing resin!!!❄️ they look so good.....im going full power soon on these with 2 Mars Hydrow TS 1000's. I have a CBG and Pink Kush Auto by Seedsman they are slow and need lots of power, not giving up, CBD and CGG are harder to grow especially in lower power setups. These RF3's will NOT have that problem. Not only are they just perfect smelling, tarp profile...they are ALSO more photo efficient. These are fine for lower 80 90ish watt grows and still get about 3OZ, in a smaller container, probably lots more in the 2 gallon and more lights at half power. IF I shut down all but one 1 tent (low power still a priority) and run 2 ts1000's they will be massive!! Out doors would just be crazy I m guessing 👍
4/1 12pm We're gonna need a bigger TENT!!!💐🌼Humboldt Seed company email today...Im doing this!!! https://californiahempseeds.com/garden-seeds/
4/3 4am Took OUT the FE1500 with Samsung LED's and now using only 1 TS1000 getting much better light dispersal, higher PPFD and very low watts now. RF3's are very light efficient so the is a great setup, no heat!! very low power, no heat very safe and clean. all powered by solar. 3:30PM ONE light now at 60 from 75. PPFD 750 -800, 8 inches from most colas 1 closer might be Gorilla Strawberry so a MONSTER might need her own tent.... maybe another light..... great fun experience experiment with lights 2 TS1000 in 2x2 at 60 W is great for a packed tent with 4 photos. I over planted and wont do this much again so 1 TS1000 is pretty much all that is needed a perfect light in every way!
Likes
28
Share

@SkunkyDog420
Follow
Hallo zusammen 🤙.
Habe sie heute geerntet.
Wir sehen uns in 3 Wochen mit dem Erntebericht
Likes
7
Share
@SkunkyDog420
Follow
Hallo zusammen 🤙.
Sie wächst sehr schön und macht keine Probleme.
Wer einen Rabatt von 20 % haben möchte muss den Code: ZAMMIGROW2024 eingeben


Likes
15
Share


@Aleks555
Follow
42Fast Buds - Gorilla Zkittlez Auto 🌱
Today marks 70 days, and it's finally time to bring this incredible journey to an end. 💫 Honestly, I can hardly bring myself to cut her down, I've grown so attached to her, and she's just so beautiful. But the trichomes have turned a deep amber, and there's no more time to wait.
For the last 6 days, we’ve been flushing her roots with ice-cold water, watching as she transformed, her colors changing and becoming even more stunning. It wasn’t just a grow – it was a true process of evolution.
I want to give a huge thanks to 42FAST Buds for their amazing genetics and for allowing me to grow such a phenomenal strain. Gorilla Zkittlez Auto is an absolute masterpiece! 💥
Special thanks to Xpert Nutrients for their incredible fertilizers and ongoing support. Without you, we wouldn’t have achieved these remarkable results. You helped grow not just a plant, but a true work of art! 🌟
Likes
3
Share


@Passx
Follow
Thanks to growdiaries I followed the entire growing stages of the plant seeing all the little details usually not seen. Sincerly I expected more than 30g with the nutriens and light utilised anyway it is a good result.

Likes
10
Share

@farah4weed
Follow
The sixth and final week of the growing season😍👽
I changed the pots this week⚱️
I changed the light to 12/12 hours.🌓
It's time to bring the project closer to success.🔥🔥
Of the 10 seeds we planted to test #OgCream, all of them germinated successfully and were healthy.
Now, in the coming weeks, I will check them for feminization😍😍👽👽
Thanks for your feedback🙏🌐
"farah4weed"


Likes
3
Share


@lozaa111
Follow
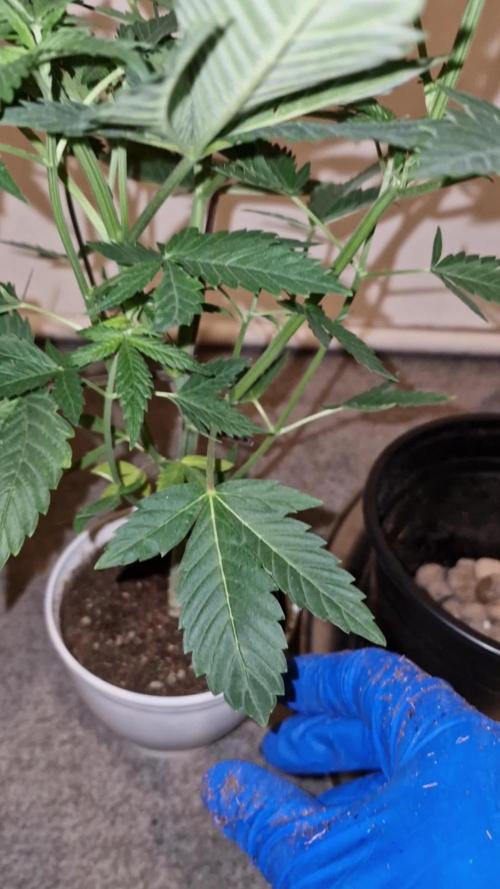
Day 31 veg…
Some these girls are looking mutated 🤨
I have really low humidity which i will correct with a Humidifier tomorrow…
What are these mutants coming from is it heat stress ???
And also the spots on my girls ?
I have been on holiday for a few days so made a pre mixed feed for the girls for my freind to water…
Im not aure if the badly mutated plants are worth pulling or growing out still?? Anybody got experience with them ??
Could it be down to really low humidity
Girls will be getting transplanted tomorrow..
Check my other cuttings diary
Temp 25 day 19 night
Humidity high 45 low 20


Likes
10
Share


@Archieballs
Follow
All doing well added a bigger dehumidifier on day 68. Fed them day 68 will be last feeding for Banana #1 her trichomes are clear nearing cloudy.

Likes
27
Share


@Stealthman
Follow
Nutrients are being changes every 2-3 days due to water consumption. Ideally the nutrient concentration remains more or less the same as the water level drops but I am not able to maintain optimum health as seen in the video. I tried a number of different brands and concentrations with not much in the way of improvement. It's amazing how the mood is effected when the plants are not doing perfectly well. Its can be quite upsetting :/
Likes
4
Share


@TwinExotics
Follow
Despite no A/C in the spot temporarily, things are going perfectly fine, no complaints! Thank goodness I’m just vegging. Temps have been around 87 ish, but the plants seem to love it.


Likes
19
Share


@CultoCannabiss
Follow
En esta primera semana mantuve las luces muy alejadas lo que provocó un estiramiento prematuro lo que a mi gusto no me gusta mucho a sí que para la siguiente prepararé un transplante.
In the very first week I kept the light so far so the it create a early grow on the structure but for me its not so good so I prepare a transplant for The next week.


Likes
2
Share


@Ryno1990
Follow
Week 5 of veg for this girl she's been picking up some size still the smallest girl but not by much she's deff been growing nice an healthy under this fold 6 from medic grow she's I nice little bush with some big fan leafs
Ending week 5 this girl is doing good she's not the smallest one but she's not to far ahead she has been doing great since her transplant into her final pot so hopefully she'll start picking up some size
Likes
19
Share


@Tmasm
Follow
Saudações.
Menina está bem, botões formados e lindos 🤩. Agora esperar e torcer 🤞, para que engordam muito e bem.
Ela está ficar com uns tons de roxo 🤩, bem tenho borrifando ela com água de torneira, que tem um ph alto, o alto ph e sua genética deve ficar roxa no final, esperamos para ver.
Bem tenho borrifando ela por ter ácaros aranha na sala, tenho mantido praga controlada. Mas ácaros aranha se reproduzem muito rápido, nunca se sabe bem dia de amanhã.
Bem por agora tudo controlado, menina não foi afetada. Espero manter limpa até ao fim, 🤞 torcer para que tudo corra bem.
Visite Dutch Passion conheça suas novidades e promoções.
Likes
1
Share


@Marmotaaaas
Follow
Esqueje de gorilas glue y de blue berrys
Me las dieron en flora crecieron arto ya van super bonitas las flores bien olorosas y pegajosas se les iso el scrog y an abierto los brazos a todos lados
Likes
1
Share


@Bwright_315
Follow
So far flowering has been going extremely well. The plant in the back that had deficiency 2 week ago is now bigger then the one in the front. And
The one in the front (the one i topped)is growing nice and even across with alot of bud site.


