


Likes
Comments
Share

@frankensoil
Follow
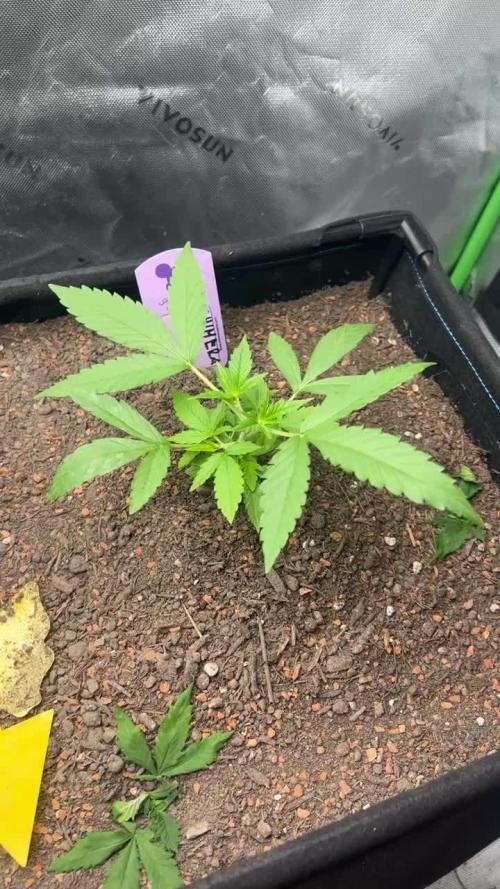
Heute wurden die Mädels getoppt und alles haben es sehr gut verkraftet


Likes
12
Share


@DBQush
Follow
Dear diary,
Week 9 marks the last week of veg as it ends with us finally transitioning into the flowering phase. As we embark onto flowing, I continue to fine-tune the environmental conditions and adjust nutrient levels to support optimal development.
🍀🍀🍀🍀🍀🍀🍀🍀🍀🍀
⏰ Day 60:
I administered a feeding with a nutrient strength of 1.66ms and adjusted the pH to 5.8. Additionally, I increased the light intensity from 20 to 25 dli (daily light integral).
To maintain the desired humidity levels, I turned on the air conditioner to dehumidify the space, successfully bringing it back down to 58% as it started slipping up to the 70s again. However, this adjustment caused a slight drop in temperatures to 24.5 degrees Celsius.
⏰ Day 61:
During the evening feeding session at 18:00, the plants received a feeding with a nutrient strength of 1.66ms and a pH level of 5.8. Furthermore, I elevated the light intensity from 25 to 28 dli, positioning the lights 50cm above the canopy.
The night temperatures have also stabilized at 22.5 degrees Celsius after the AC change.
⏰ Day 62:
I provided a feeding with a nutrient strength of 1.67ms and a pH level of 5.6.
I also conducted some light low-stress training and removed any growth on the horizontal stems, as each stem already possesses its intended 16 tops. These adjustments will help maintain an even canopy and ensure optimal light penetration.
⏰ Day 63:
During the evening feeding session, I administered a feeding with a nutrient solution at a strength of 1.67ms and adjusted the pH to 5.7.
To enhance light exposure, I increased the light intensity to 32 dli/500ppfd and positioning the lights 48cm above the canopy.
⏰ Day 64:
At 11:55, just before lights off, I applied pesticides to address any potential pest issues.
During the evening feeding session, I provided a feeding with a nutrient strength of 1.67ms and a pH level of 5.7.
Additionally, I removed some excess growth and increased the light intensity to 37 dli/580ppfd, getting to the optimal levels before flowering starts.
⏰ Day 65 (Day 1 Flower):
I initiated the flowering phase by switching the lights to a 12/12 cycle and provided a feeding with a nutrient strength of 1.85ms and a pH level of 6.1.
As the plants enter the flowering stage, I have adjusted the nutrient composition.
The calmag has been reduced to 1.5ml/l, Bud Candy has been added at 1ml/l, and the A+B mix has been increased to 3ml/l.
The plants water consumption has also increased, now reaching approximately 2 liters per day, which aligns well with the timing of the light cycle change.
The temperatures have stabilized around 25 degrees Celsius during the day, and the relative humidity ranges between 55-60%. I have also set up the scrog net in preparation for the upcoming stretch phase.
⏰ Day 66:
During the evening feeding session, I administered a feeding with a nutrient strength of 1.85ms and adjusted the pH to 6.0.

Likes
69
Share


@DogDoctorOfficial
Follow
Week 14 from Seed – Week 3 of Flower – Full Bloom Ahead
The garden is shifting, and so are the vibes — we’re now stepping into the serious stages of the Eternity Grow Cup. Week 3 of flower, and what a beautiful time it is. The girls are officially locked into bloom mode and starting to show their power, stretching with grace and stacking flowers that promise magic. They’ve filled up the SCROG like it was meant for them — one look, and you can feel the energy radiating off the canopy.
We started this week a little on the chilly side, with temps dropping down to 16°C, but we found the rhythm. By the end of the week, we had it all dialed in: 24°C with 60% humidity, giving us a clean and steady VPD of 1.22 kPa. CO₂ is rolling at 1107 ppm, and let me tell you, the girls are loving every part of it. They’re responding like pros — strong, healthy, compact, with early signs of dense flower sites setting in all over the canopy.
The ICL 300s are fully in play now, and they’re doing a spectacular job. Light penetration is even, and the plants are soaking it up. We’re still holding off on UV, just letting the full spectrum and reds do their thing for now.
We’ve updated our feeding too — we’re now into Week 4 of the Aptus Holland Clean Program, and we are about to introduce Plagron Green Sensation into the mix. A little booster to spice up the bloom and get those flower stacks rising to the challenge. The water temps were a struggle — stuck at 14°C — so we dropped in a classic aquarium water heater, and now we’re sitting at a comfy 20°C. Small changes, big impacts. You can see it in the leaves, in the way they pray up toward the light.
This week’s visuals? Shot with both the Nikon and Sony setups, featuring different lenses and filters to capture the layers of depth, light, and mood in the garden. The difference between them is clear — two different worlds coming together to tell one story. You’ll feel the vibe through the lens, I promise.
Also, it’s veggie season outside — and in the middle of the flower hustle, I’ve been grounding myself with the babies in the outdoor garden. You’ll find some shots of the onions, peppers, and early green life joining the party. Nature always balances herself.
Looking forward, Day 21 defoliation is just around the corner — we’ll be opening up the canopy, making way for the light to reach deeper, and helping these compact queens shine even brighter in the weeks to come. We’re just getting started.
Massive love and gratitude to Zamnesia, Plagron, and Grow Diaries for building this amazing platform for us to grow, share, and celebrate this journey together. And to my beloved sponsors — Aptus Holland, Grove Bags, TrolMaster, ThinkGrow LEDs, Promix, Cannakan, and Ziggy Papers — thank you for the love, the gear, and the belief.
And to all of you — lovers, haters, OGs, first-timers, and curious wanderers — thank you for being here. For showing up. For feeling the garden. This journey is for all of us.
Let’s keep blooming.
More magic coming in the next chapter. 🌸💨
Genetics - Runtz https://www.zamnesia.com/6000-zamnesia-seeds-runtz-feminized.html
Nutrients - Plagron https://plagron.com/en/hobby
- Aptus Holland https://aptus-holland.com/
Controls - Trol Master https://www.trolmaster.eu/
LED - https://www.futureofgrow.com/en
LED - https://www.thinkgrowled.com
Soil - https://www.promixgardening.com/en
Germination - Cannakan https://cannakan.com/?srsltid=AfmBOopXr-inLXajXu3QFgKXCXXos4F1oEvScjMKIB5MR5dk8-GJ-F49
DOGDOCTOR 15% off
Smoking Papers - https://ziggioriginal.com/
Terpene saver - https://grovebags.com/
As always thank you all for stopping by, for the love and for it all , this journey of mine wold just not be the same without you guys, the love and support is very much appreciloved and i fell honored with you all in my life
With true love comes happiness Always believe in your self and always do things expecting nothing and with an open heart , be a giver and the universe will give back to you in ways you could not even imagine so
As always, this is shared for educational purposes, aiming to spread understanding and appreciation for this plant. The journey with nature is one of discovery, creativity, and respect. Let’s celebrate it responsibly and continue to learn and grow together!
Growers Love To you All 💚
#EternityGrowCup #RuntzHunt #GrowersLove #CannabisCommunity #AptusHolland #ProMixSoil #TrolMaster #Zamnesia #Plagron #ZiggiPapers #Grovebags

Likes
5
Share


@Unnamed
Follow
Added some Universol Yellow to counterpart the KMPS which has high K.
ORP dropped a lot, countered it with KMPS and POLY(DIMETHYLAMINE-CO-EPICHLOROHYDRIN).
RH and am ambient temperature are lower at the end of the week due to my other plant being chopped and I want a cooler climate for slow cure over 14-21 days for that one, both grow and dry tent are in the same room.
The Buds are more dense than previous weeks, the supplemented K seems to do the trick and of course because it is end of life.
Will harvest early next year, wanted to do it on the last day of week 12 but I was sick and holidays.
Internodal spacing is good, long buds at the top.
Buds smell like sweet candy with a touch menthol, lets see if that stays after cure.
My mind changed about the plant in the last week, maybe this one shows just at the end.
Values are average of the day.
DATE - °C - RH% (Tent Temp/RH)
20241223 23.0 60.6
20241224 22.7 61.5
20241225 22.8 61.7
20241226 23.2 62.2
20241227 22.4 61.7
20241228 21.9 60.6
20241229 21.3 57.8
DATE - PH
20241223 5.83
20241224 5.81
20241225 5.76
20241226 5.74
20241227 5.65
20241228 5.78
20241229 5.85
DATE - ORP (mV)
20241223 80
20241224 30
20241225 -12
20241226 19
20241227 128
20241228 104
20241229 81
DATE - EC(us/cm)
20241223 1664
20241224 1617
20241225 1604
20241226 1551
20241227 1558
20241228 1597
20241229 1614
DATE - CF
20241223 16.64
20241224 16.17
20241225 16.04
20241226 15.51
20241227 15.58
20241228 15.97
20241229 16.14
DATE - °C (Reservoir)
20241223 21.6
20241224 21.6
20241225 21.8
20241226 21.7
20241227 21.5
20241228 21.5
20241229 21.0
Likes
9
Share


@Not_a_tutorial1990
Follow
I've been a bit confused about the age of my clones but I reached out to suppliers and got more details.
Clones were cut on September 20, I transplanted on October 25 when I received.
I'm thinking I should flip to flower end of November.
Lots of bud sites after lst and bushy.. a bit short in my eyes but I know will stretch once in florer


Processing
Likes
66
Share


@DrGreenThumb95
Follow
This week has been a really good week for me,
Growth ✅
Run off ✅
Temperature ✅
Humidity ✅
I am started to do a feed cycle of
feed - feed - flush
As I am watering evey 3 days should work out to a flush every 9 days
Day 78 I started to defoliate underneath the scrogg to increase air flow underneath the canopy
Each day I increased the amount I removed working my way up slowly until I had removed majority of the leaves that wasnt receiving sufficient light and was restricting airflow in between all my bud sites by Day 83 I had finished removing all that I will be removing other then huge fan leaves coving/shading areas in upcoming weeks, thanks for reading my diary👊😁
Happy Growing Guys!

Likes
23
Share


@Monkey_D_Luffy
Follow
So the plant is taking off. She is growing a thick stem and big fan leaves. I'm slowly trying to bend the fan leaves out the way so that the lower branches get the most light they can. She looks to take the nutrient solution well and is thriving. 5 weeks left and calyx are forming which are my first signs of preflower!


Likes
30
Share


@MrJoint
Follow
✌️🎃 Thank you for checking my cultivation.
✂️ Defoliation Time’s
🌷 Started flower stage

Likes
9
Share


@Sleestacker
Follow
I was wondering why she wasn’t breaking ground. So on 4/20 I started looking into the rapid rooter. She was breech! Stuck sideways in the rooter, turned her head first and she’s going in the right direction now!

Likes
9
Share


@Gawelwel
Follow
Bon voila ! les larves de chrysopes sont arrivées, je les aime bien car après avoir mangé les thrips sous toutes leurs formes, les chrysopes adultes restent dans la tente, très utile en cas de nouvelle invasion de thrips...
en seulement 2 jours on voit que les feuilles des plantes ne s'abîment plus et redeviennent bien verte, c'est plutôt bon signe...
ma petite bouture acid dough entame donc son reveging, les fleurs qui restaient s'allongent et des nouvelles feuilles à 1 pale sont apparues, pour le moment elle fait un peu mutante mais je ne m'inquiète pas, affaire à suivre, en attendant arrosage à l'eau, et je prévois un TCO la semaine prochaine.

Likes
2
Share


@Ninjabuds
Follow
My little skunk apple runtz lady man I am disappointed so far with this plant not much can be expected from a pollen chuck seed I made myself but I think it will have nice smoke in the end just not alot most likely
The day has come and it's time to flip these ladies to flower. I was planning on letting them go untill Friday and let the smaller ones grow just a bit more but they will be fine. I have the eternity cup contest in mind and I'm thinking timing so I need to get these lady done and out my tent lol. This past week I turned the light up alot getting them ready to flower they have grown a bunch inhavendone lst maybe 5 it 6 times on the branchs and they arw nit bendy anymore that will help durring flower.
Processing
Likes
29
Share


@CANNASIM
Follow
—SETUP—
.BOSSLED LED 1800W full spectrum, real power consumption is +-250W.
.Grow space 60X100X200(a simple shower box.
.AN nutes and other simple additives.
.Grow medium is 60% peat, 30% perlite, 10% organic correction(worm castings), 5 gallon fabric pots(18l).
—BRIEF—
Hi there, I have tried already done this genetic outdoors, in poor lighting and a general purpose nute from Neudorff, yielded 25g dry, in 3gallon pots same medium.
So this is a good experiment, lets see indoors how she will compare.
—GERMINATION—
My germination process always start by scarifying the seeds, i created a little tool for that. I just a little container with sandpaper walls. Shake gently for about 60 secs+, this allows for the water to penetrate better in the seed shell, once you soak. Then i soak overnight from 12 to 20 hours max.
From there i either plant straight or use the paper towel method to see the tap root before. If you are a bit on the impatient side seen the tap root is advisable so you see some movement before planting. Lol!
—ROYAL QUEEN SEEDS . QUICK ONE . INFO —
Chose this strain because is basic and I have to travel for a month soon, and someone else is going to take care for this time. :)
Quick One is a fast-growing autoflowering strain. This was one of the first autoflowering strains developed. When it was first released, it was one of the quickest growing strains on the planet.
THC: 13%
CBD: Low
Yield Indoor : 275 - 325 gr/m2
Yield Outdoor: 100 - 150 gr/plant
Height Indoor: 50 - 60 cm
Height Outdoor: 60 - 100 cm
Flowering: 5 - 6 Weeks
Harvest month: 8-9 weeks after sprouting
Genetic Background: Strong Indica x Ruderalis
Type: Sa 10% In 60% Ru 30%
Effect: Physical
Climate: Mild
—RQS QUICK ONE GERMINATION UPDATE—
My mood said to me to plant straight, so scarify > soak 18 hours +- > plant straight.
Seedlings look a bit odd, with a yellow center, let's give her some days in and see what happens next.

Likes
22
Share


@ILoVeThiSpLaNt
Follow
Day 14
Nulla da dire se non che la Sweet è più lenta e che le 5 Crystal Candy XL sono molto simili.
Se posso dare un consiglio questi sono i giorni più importanti per le autofiorenti. Non toccatele e vedrete che vi ripagheranno alla grande. Al massimo piegate qualche voglia se vedete che copre i getti inferiori ma nulla più anche perché c'è il rischio di bloccare una pianta e portarla in fioritura più piccola di quanto sarebbe potuta essere
A settimana prossima 🖐️ ❤️
PS: Da adesso. In poi blocchero tutte le persone che mi scriveranno commenti tutti uguali sotto ogni diario. Poco mi importa che lo fate per avere tanti like e salire di livello per avere semi, fertilizzanti e luci gratis.Prefisco aprire una notifica e leggere qualcosa di costruttivo piuttosto che "buona crescita" o "buona fioritura" e poi aprire i vostri 50/100 diari e non trovare uno strain decente. Il mio consiglio anche qui è :"ma cosa perdete tempo a fare quando questo tempo potreste usufruirlo per capire qualcosa di banche semi, cloni e incroci ???"

Likes
52
Share


@MadeInGermany
Follow
Flowering day 52
since time change
to 12 / 12 h
Hey guys :-)
All ladies look very healthy and delicious :-)
We're slowly getting closer to the end.
This week it was poured 3 times with 1.2 l each (sewing materials see table above)
At the next watering there is a very light rinse with Clean Fruits so that the last nutrients can be slowly used up.
The trichomes are now checked every day.
I'm looking for my microscope with an app so I can take pictures of it 👍.
I wish you a lot of fun with the update and stay healthy 💚🙏🏻
👇🏼👇🏼👇🏼👇🏼👇🏼👇🏼👇🏼👇🏼👇🏼👇🏼👇🏼👇🏼
You can buy this Nutrients at :
https://greenbuzzliquids.com/en/shop/
With the discount code: Made_in_Germany you get a discount of 15% on all products from an order value of 100 euros.
👇🏼👇🏼👇🏼👇🏼👇🏼👇🏼👇🏼👇🏼👇🏼👇🏼👇🏼👇🏼
You can buy this strain at :
https://www.ripperseeds.com/en/feminized/kmintz-feminized-cannabis-seeds
Water 💧 💧💧
Osmosis water mixed with normal water (24 hours stale that the chlorine evaporates) to 0.2 EC. Add Cal / Mag to 0.4 Ec Ph with Organic Ph - to 5.8 - 6.5
MadeInGermany
Processing
Likes
51
Share


@Silverback_Guerilla
Follow
1/4:
Crazy stink suddenly erupting from the closet over the past few days..ordered a new carbon filter and replaced all other carbon filters in the house...and 3 jars of skunk scrubber...worth a shot...
1/5:
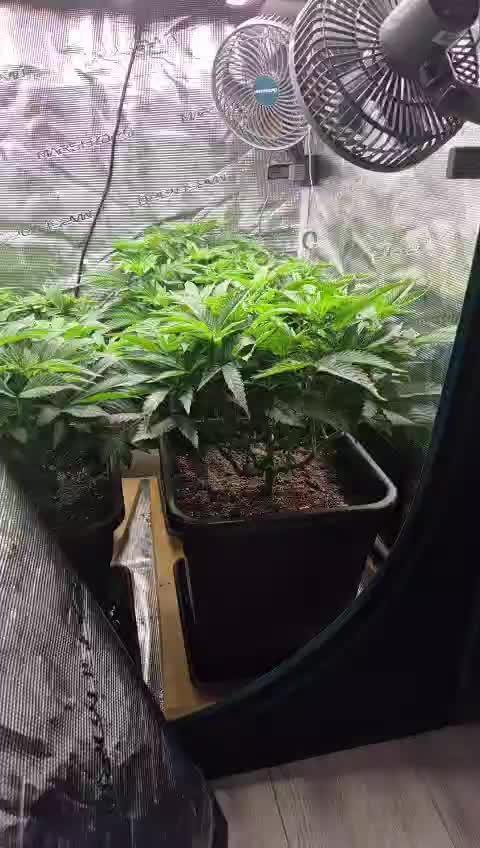
Now just have 13 plants in the closet, so maybe I can increase mass and density on the lowers a little better now.
Moved the Platonium, Velvet Sugar Breath (Sugah Bref), and the GG4 into the tiny tent under a pair of Mars Hydro TS1000W's. They spent the first month of their lives in this tent, and they'll spend the last month in there as well.
There's barely enough headroom for them, but they have a little more elbow room than they did in the closet. I think I'll put one of my 70w 3000k waterproof boards on the floor of the tiny tent facing upwards tomorrow and see if the temps are still manageable on mild days.
1/10:
Very happy with all these girls! Even the Berry Bomb is showing potential, but the Wicked Stix plants are absolute stellar whoopass
The trichs on the green Sucrose Overdose pheno look like river sand, or maybe brown sugar. Sexy. The red-leaved pheno has frost half way out its fan leaves and smells amazing. The Muscadine Wines are my favorite plants in the crop, though. Every bit as frosty as the SOs, but the sexy burgundy colorations make them special. Platonuium and Sugah Bref are also coming along very nicely. You can tell they've got something special brewing...wonderful aromas. The GG4 is the slowest flowering of the bunch, but she's gonna produce very well. Her branches are all over the place.



Likes
2
Share


@LittleBigTrees
Follow
New growth is fast soon I will put into a 20 litre pot and give her more space to spread out.
Processing
Likes
9
Share


@Mr_nugs_lover_David
Follow
This girl looks fantastic on tje beginning of the 2nd wewk of flower she's developing beautiful flowers,she's being fed 100% organically I applied my lactobacillus serum and also bat guano liquid by guanokalong she's doing very good so far,let's see how she ends up however I think that she's a very good automatic plant to train with lst she's getting pretty big and bushy,she's responding very well. Peace cannalovers 💚✌️💎🌱❤️💛 I love the Short size of the internodes by the way and her smell noe on her final days of 2nd week is starting to get very stinky but very very citrusy and sweet at the same time is a very special genetic for sure
Likes
7
Share


@OwlGang_Uk
Follow
Week 10 - The Plants has shown so much growth within a week those buds are really now starting to form and pack on a scent. I have cut out using the formulex.