
Likes
Comments
Share

@Growbody
Follow
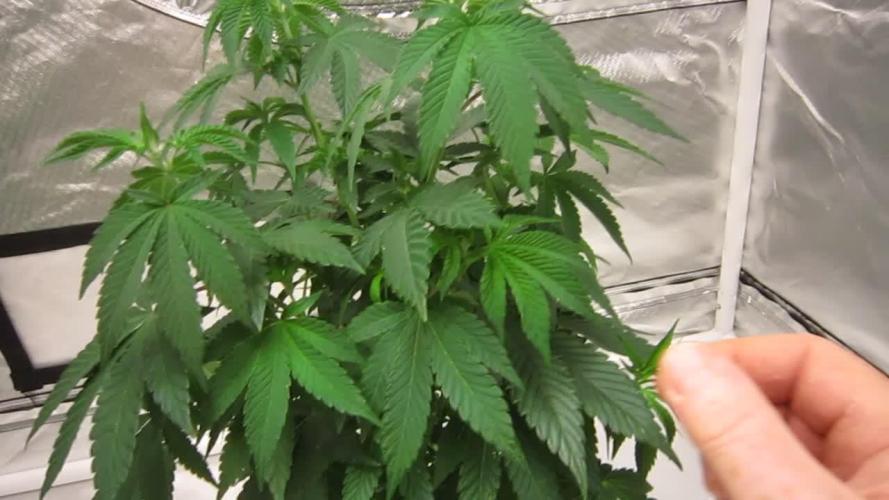
Hallo und herzlich willkommen zu meinem Schlußbericht Outdoor 2025 mit den Sorten Power Flower Feminized, Royal Medic Feminized und Special Kush #1 Feminized, alle 3 von Royal Queen Seeds. Es ist das erste Mal, das ich Töpfe für den Outdoor grow verwendete, bisher waren alle Gorilla grows und direkt in die Erde gepflanzt.
Die URL der Royal Medic Feminized: https://www.royalqueenseeds.de/cbd-samen/148-royal-medic.html
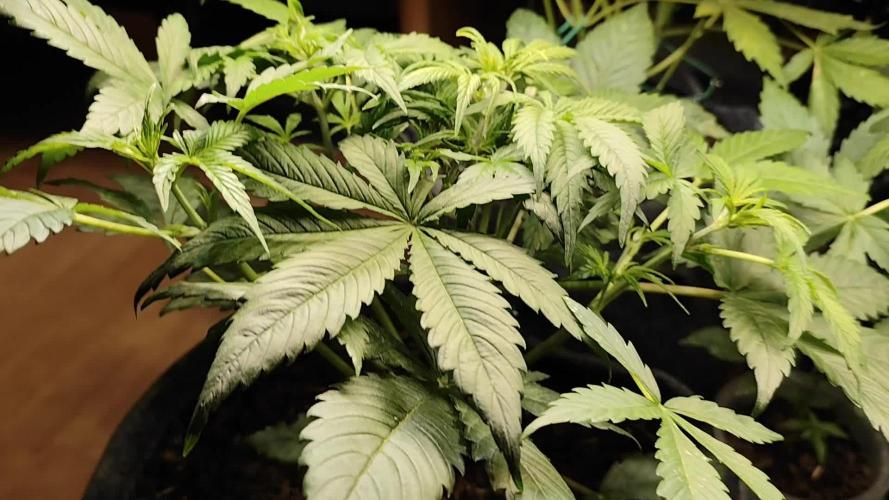
Die Planung für den Grow war, die Samen in easyplug Anzuchtwürfeln keimen zu lassen und danach in 0,6L und 2,2L Plastiktöpfen, dann letztlich in die neuen komplett doppellagigen ROOTIES 15 Liter Wide Version Stofftöpfe umzutopfen. Sobald die Witterung es zuläßt, sollten die Pflanzen an die frische Luft.
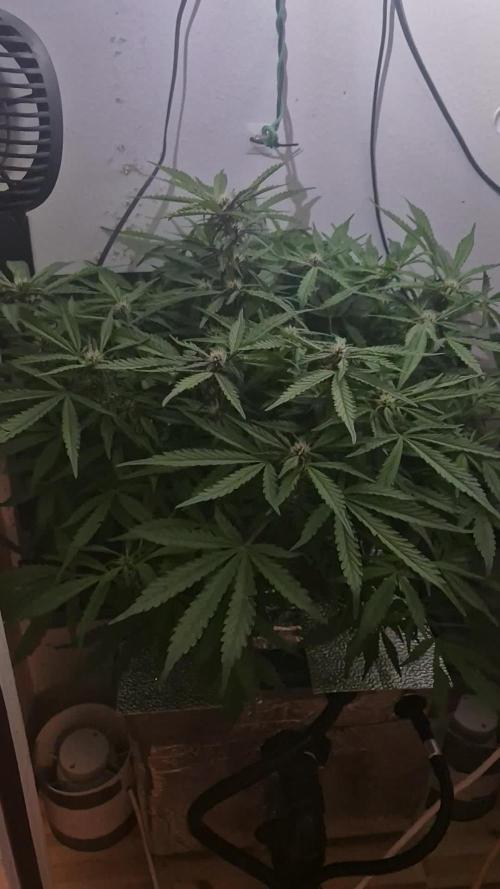
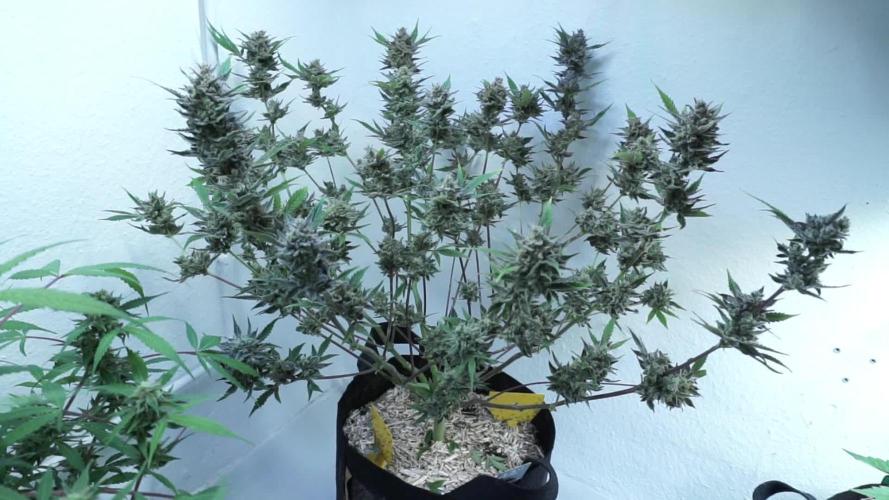
Tag 249: Die Blüten der Royal Medic feminized von Royal Queen Seeds haben in den letzten 4 Wochen enorm zugelegt. Wenn ich das viele Laub sehe, bin ich nicht sicher, ob 2 Tage zum Trimmen ausreichen.
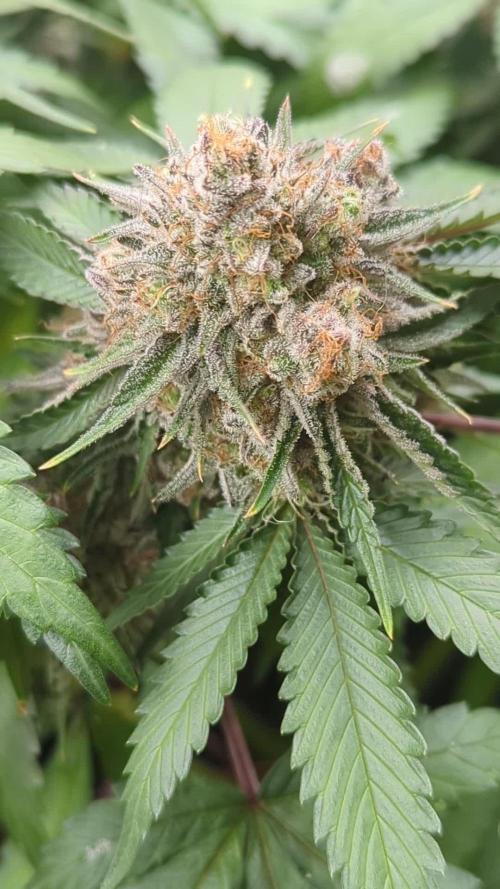
Tag 252: Es ist wieder sehr Spät geworden aber die 2 Tage haben gereicht. 134 Gramm nass getrimmte Blüten hat es gegeben. Die trocknen jetzt im Keller in DryFerm Bags bei 15,5°C langsam vor sich hin.
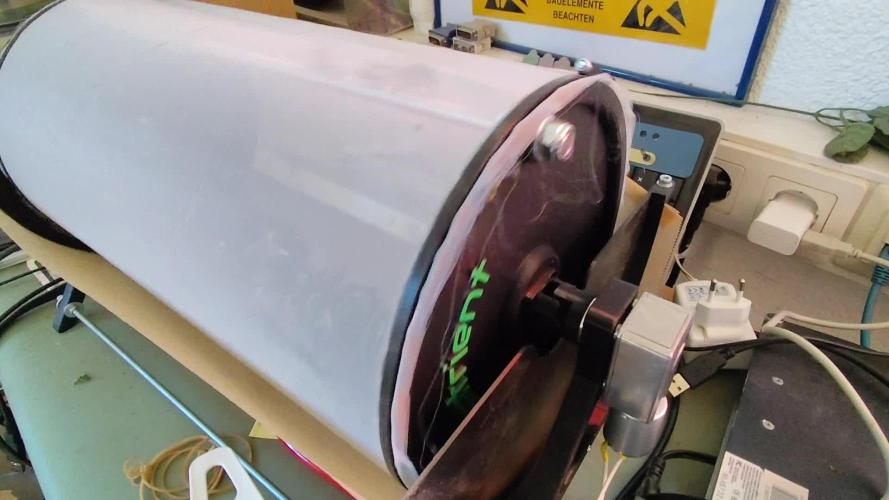
Tag 258: Die Trichommaschine kam zum Einsatz und hat ein gut gefülltes Gläßchen ergeben.
Wenn's dir gefallen hat, schau wieder vorbei ✌️😎


Likes
2
Share


Likes
1
Share


@BiggaB
Follow
Plant freshly cropped smells very gassy, big trichomes
I will post the harvest once dried✌️
Likes
12
Share


@ZzTooRightOGzZ
Follow
Week 3 going well.
Topped her and doing a bit of lst to her as well hope everything goes well.
Week 4 fead her with 25ml off grow auto from living Soils.


Likes
12
Share
@Growbody
Follow
Herzlich willkommen zu meinem neuen Grow mit der Orange Sherbet Auto von 2Fast4Buds. Die Eltern sind Cookies Auto F5 x Tangie´matic, der Typ ist F3 Feminized Polyhybrid Autoflower. Der Strain war Winner of the American Autoflower Cup 2025, Kategorie Best Auto Hash. Die Aussicht auf frischen Orangensaftgeschmack macht mich wunderfizzig.
Wieder verwendet wurde für diesen Grow die 15Liter Stofftöpfe von ROOTiES, die Sonnenerde Bio Hanferde, BioBizz Wurmhumus, BIONOVA + zamnesias MonsterBud Mix Living Soil, zamnesias Smart Start Plugs und Plagrons Seedbooster Plus. Hat sich alles bestens bewährt.
Tag 30: Die Orange Sherbet Auto von 2Fast4Buds bekommt nochmal etwas LST und 1,0 Liter Wasser.
Tag 32: 1,5 Liter Wasser.
Tag 35: 1,0 Liter Wasser.
Schön, dass du dich für meinen Grow interessierst. Schau gerne wieder rein. 👋😎


Likes
3
Share

@ElCapitol
Follow
Could probably harvest three of the four of I was short of smoke. Ones lagged behind a little, but I'm in no hurry :)
Classic Kush smell and these have been real quick to flower. I know there's a lot of new strains around with quirky names but honestly everyone should have a Kush grow and these are a good place to start that Kush adventure. Been real easy to grow, stayed low, no silly stretch and no complex needs. Good signs of strong genetics. You could do a LOT worse than pop these for your next grow. Hopefully the smokes as good as the smell. Going to leave these on plain water with a dash of calmag as long as possible, see how stanky they get when left a little over ripe. Ten days maybe 🤔

Likes
4
Share

@Chucky324
Follow
Hello This is the end of week 7 and the beginning of week 8 of veg.
The plant is looking good and growing well.
It's got a good shape and should be easy to train.
Went to my local thrift shop and found a great air cleaner for thirteen .95 Can.
It has those electrified metal plates that shock any organic matter the fan pulls through them.
I bought 2 of them for my grow room and living room and it cost me around seven hundred canadian dollars about 25 years ago for them.
So I was glad to find this one at a cheap price. I can smell the ionized air when I walk into the room. It works great.
OK. Have Fun.
Chuck.


Likes
2
Share

@Idiotproof420uk
Follow
1 x black apple hitchcock}p#1
1 x choccolatto
1 x black hell
1 x black apple hitchcock p#2


Likes
17
Share

@Aircoholic
Follow
And that's it. She probably could've gone a few days longer, but since the spider mites kept coming back and the plant just overall felt ready, I initiated the harvesting ritual. The buds are super sticky and


Likes
Comments
Share


@Jbcultivates
Follow
Going into the final week of flower, will be harvesting the next week. Buds are super dense and frosty! Purple Queen is sweet and sticky while the Girl Scout Crack is more pungent and stinky.


Likes
21
Share


@reirrac1
Follow
Decided after seeing the improvement in the Tangerine Dream to continue with the new feeding schedule, which will include a flush in a few days. She got pretty burnt from the salt based nutes, but her flowers have thickened up considerable over the last few days so I will try to get as much out of her as possible. NCH x SB trichomes are finally beginning to fill out with milk, and several sugar leaves have already gone 30% amber. One more week of flushing and I think I’ll chop her down. Feed pH 6.5, EC 0.9. Flush pH 6.2, EC 0.3.

Likes
1
Share


@SkunkleDamo
Follow
For a small plant with small buds there seems to be quite a lot. I will update when dry
Likes
20
Share


@DabbertGlobberfield
Follow
For the Herbies contest - https://growdiaries.com/diaries/157348-grow-journal-by-dabbertglobberfield#gallery=6777378 - Grandmommy Purple is guilty multiple noise violations for being too loud and for stanky funk.
Harvest - 169 days / 66 days in flower
Well, we did it. I made it to the end. All I can think is...WOW that was A LOT of work. But I think I had very good results for a first time grower. I
For harvest, we took Plant B and D and prepared them for immediate freezing. Altogether, I ended up with 1212g wet on plant B and 1089g wet on plant D. I ended up freezing 1816g of this. There was some from each of these plants that was set aside from freezing because, for whatever reason, I thought they were not worthy of washing because of how progressed the leaf damage was from the root rot battle. So that was cut up and dried as nuggets instead of hanging like the rest. Sawtooth and Plant C were both harvested and hung in the tent to dry for 12-13 days. I think I overdried by 1-2 days because when I jarred them they struggled to raise up to 55%. So I am using rh% packs.
After drying Sawtooth and plant C, I ended up at 459.8g for dried flower and 170.8g in dried trim. So just over 1lbs between the 2 plants and 4.15lbs wet between the other 2 plants that was washed for hash.
So... are you for real with the effort involved with washing bud for bubble hash? I don't think I would do this in the warmth. I only pursued doing bubble hash cause it's cold right now and I figured that would really help. Even in the 30s(fahrenheit) stuff would stick. It's hilarious how sticky of a process this is. I hope you have a bunch of gloves, water, and ice to burn through. I went through over 60 gallons of distilled water and 80lbs of ice to wash the 4 lbs. I am envious of people in videos using a hose to collect, clean, and refill. Also, doing this as a 1 person show is the definition of insanity.
I broke the washings up into 3 parts. The first part was was the tester wash. I broke off 420g of plant D's 848gs available. I used 7 bags to see where I would end up. I used 220, 160, 120, 90, 73, 45, 25. What I determined was that if I was hunting a specific micron with a lot of material this would help find what you can get. But for the next washing I reduced the amount of bags to 4; 220, 160, 45, 25. The time, with the 4 bags, I washed with 809g. I had a much more favorable experience and return this second time but I had green fast and probably used too much ice. The 3rd wash was the remaining 631g and I found an extra 137g I added of sugar leaves and trim, brining the 3rd wash to 768g. I used 5 bags this time; 220, 160, 73, 45, 25.
By the 3rd wash I have become an expert in collection but also never want to do it again. lol.
2 of the 3 washes have dried and I have 43.4g of bubble and 2.8g of dry sift. 37.4g of that bubble is able to be pressed into rosin. I will probably press that dry sift as well. The other stuff is 25u or 160u that I will experiment with or cook with. The other stuff is drying so I can't add it all in.
I pressed a bunch of trim and some flower. The trim presses nice and the dab is decent. I am working out a good temp for the flower. But the problem with all these tests to find the sweet spot is that I have all these testers to go through but want to keep pressing and trying that! I think I will need to work on a better storage solution.
I can't wait for the fresh frozen bubble hash rosin pressing... I have over 20gs of bubble to put in one bag. I am really looking forward to this. But I will need to work up to that pressing since I have never pressed hash/kief/bubble before in my rosin press. So this should be really fun.
I will 100% post an update of the hash pressing once I do that and also after the 3rd wash session is done drying.
In closing, saying I learned a lot from this grow would be an understatement. I fully expect to start it back up in a few weeks after some R&R then some R&D. There's some things I will need to work on before I start again, such as: having a single external reservoir that feeds multiple plants, hard to clog and easy to use ebb and flow system, miscellaneous final run stuff like space for drying. So thanks everyone for hanging out and perusing the photos and or reading all my huge rambling updates and thanks to those for the help along the way.
