
Likes
Comments
Share


@Master_weeda
Follow
Merci à tous les padawans et maîtres jedis qui m'ont apportés force conseil et gentillesse pour ce diarie 🙏 @philosopherseeds
@Williamsii @Castafunk @greenhousefeeding


Processing
Likes
Comments
Share


@Amnesiagrl
Follow
It's too hot here, i think it will be a problem for my terpenes
Likes
Comments
Share

@Xabii
Follow
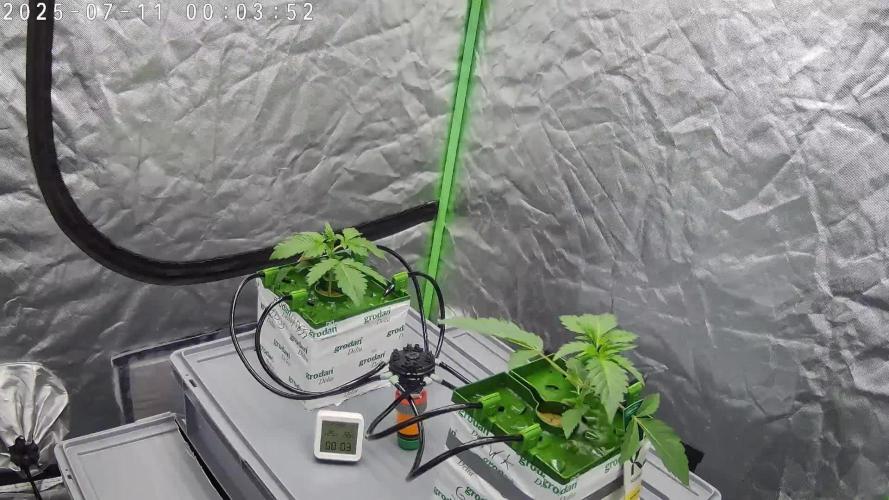
21 days!
The GWK cross is really going for it, really really happy that I did not ditch it of it stretched way to much as a seedling.
The HBSS cross on the other hand is still super bushy, very healthy but bushy, not what I am looking for in a plant but it is what it is.
Did not see any deficiencies or nutrient burn, guess I am hitting it spot on.
Had to bend down the GWK cross so that the lower shoots got more time to reach upwards.
Overall a very good week, even with the summer heat all goes just fine.
Values are average of the day.
DATE - EC(us/cm)
20250711 1024
20250712 1043
20250713 1083
20250714 1168
20250715 1189
20250716 1135
20250717 1159
DATE - PH
20250711 5.98
20250712 5.98
20250713 6.00
20250714 5.93
20250715 5.92
20250716 6.08
20250717 6.10
DATE - ORP (mV)
20250711 -42
20250712 -43
20250713 -45
20250714 -47
20250715 -49
20250716 -47
20250717 -50
DATE - °C - RH% (Tent Temp/RH)
20250711 23.7 61
20250712 23.8 59
20250713 24.1 62
20250714 24.6 64
20250715 24.9 56
20250716 23.5 59
20250717 23.7 65
DATE - °C (Reservoir)
20250711 19.6
20250712 19.4
20250713 20.1
20250714 20.9
20250715 20.9
20250716 19.8
20250717 20.3
DATE - CF
20250711 10.24
20250712 10.43
20250713 10.83
20250714 11.68
20250715 11.89
20250716 11.35
20250717 11.59
Likes
14
Share


@Auto_lover
Follow
Day 22 Took off lower three nodes of side branches on each main branch. Removed 4 leaves

Likes
125
Share


@Regenwurm
Follow
Die zweite Blütewoche ist erfolgreich ohne Mängel abgeschlossen.
Tage der Wachstumsphase = 32 Tage.
Tage der Blütephase = 14 Tage
Wachstum h in Blütewoche 2 = 12 cm
Die Blattfarbe zeigt das genug Nährstoffe verabreicht werden/ worden sind. Lichtstärke wird jetzt immer Schrittweise mehr erhöht.
1 mal in dieser Woche mit Purolyt Mischung 1:25 besprüht
Lichtstärke: 60 %
Lichtabstand: 40 cm
Std Tag/Nacht: 12/12
Temperatur Tag: 23-24,0 Grad
RLF Tag: 55%
Temperatur Nacht: 20-21 grad
RLF Nacht: 60 %
VPD Wert: ca. 1,0
PH Wert Wasser/Düngelösung: 6,4
EC Wert: nicht gemessen
Ventilator Oszillation: Stufe 1
Befeuchter: aus
Entfeuchter: mit Steuerung an
Zusätzlicher Entfeuchter: 1 Stk außerhalb vom Zelt im Raum
Bewässerung: 2* Regenwasser/ 1 * mit o.g. Nährstoffmengen
Purolyt Besprühung: 1 mal
Controlling: Grow Control
Dünger: Greenbuzz Nutrients
Licht: Pro Emit Vollspektrum
Abluft: EC Carbon Active 750 m3 gesteuert
https://greenbuzznutrients.com/de/
Danke an meinen Sponsor Greenbuzz
Ihr bekommt 25 % Rabatt bei der Nutzung des Codes auf der GB Homepage
https://greenbuzzliquids.com/de/shop/
Code: GD42025


Processing
Likes
3
Share


@KarukeraOxymore
Follow
she likes the heat a lot, i added the co2 on the 21st day, i saw all the difference in the next hour, it's amazing how they can store so much light/she likes the heat a lot, i added co2 to the 21st day, i saw all the difference in the next hour, it's amazing how they can store so much light
* I still have not turned on the HLG 300
Likes
16
Share


@danwho
Follow
2/8 (day 43 flower)
Full drain and fill today. Replaced CO2 as well. Plants are maturing at different speeds so harvest will be interesting to say the least. After seeing the stress nanners from late last week, I decided to leave the nutriemts at a slightly elevated level until closer to the end of week 7. Top off nutrients are right around 450ppm.
2/9 (day 44 flower)
Had to support one branch with a wooden dowel on the back left plant. The buds on that plant are getting so large and heavy. It is making the branches lean over other colas and block the light. This is why I decided to support it slightly, but I think the branches could support more before truly snapping - just not interested in pushing the limits and obscuring other buds.
2/12 (day 47 flower)
Adding supports where needed for heavy colas that are toppling over. Trying to keep the canopy from falling over and creating humidity concerns during these last few days of flower. Buds are nice and dense covered in trichomes! Reservoir PPM is very stable along with pH - a nice change from last grow where my pH was swinging wildly.
2/14 (day 49 flower)
PPM of the reservoir is rising when checking in the evening (650ppm), indicating it is no longer up taking nutrients at the same rate - time to begin the flush. Full drain and fill of the reservoir during the evening, 350ppm, 6.1 pH after drain and fill. Top off water will be strictly pH adjusted and hydro guard.
Buds are getting heavy, so working to manage the weight and stability of the canopy. As seen by the extra strings and dowel rods showing up as the week progressed.

Likes
6
Share

@eldruida_lamota
Follow
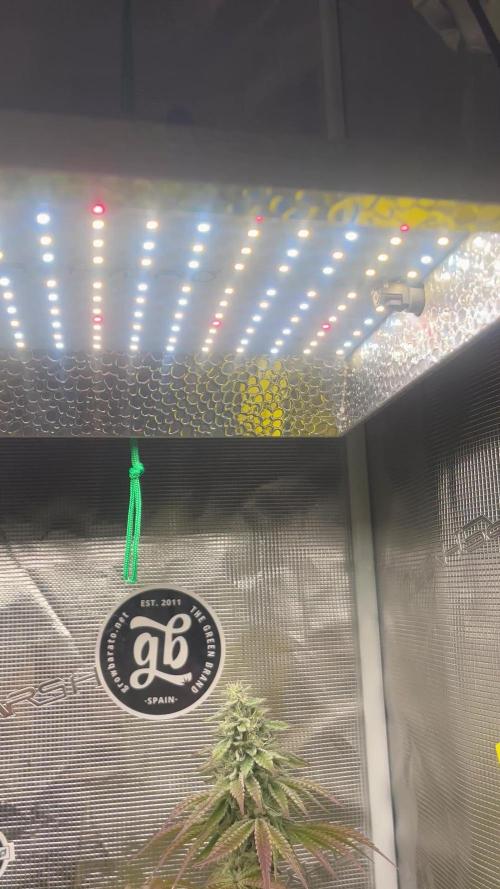
Que pasa familia, vamos con la séptima semana de floración de estas Drizl Pickl feminizadas de Seedstockers.
Vamos al lío ,se trasplantaron en macetas de 7 litros definitivamente.
El ph se controla en 6.0 , la temperatura la tenemos entre 24/20 grados y la humedad ronda el 50%.
El ciclo de floración puse 12h de luz, el foco está al 100% de potencia.
De momento van creciendo a buen ritmo y tienen un buen color.
La flor coge forma y se empieza a llenar de tricomas. Una de las 2 en concreto maduró mucho antes pero va fenómeno igualmente.
Agradecer Agrobeta por el envío del kit gold series para esta temporada, son unos jefes 🙏
- os dejo por aquí un CÓDIGO: Eldruida
Descuento para la tienda de MARS HYDRO.
https://www.mars-hydro.com
Hasta aquí todo, Buenos humos 💨💨💨
Processing
Likes
14
Share


@Dunk_Junk
Follow
She's growing well this week. Her flowers are fattening up nicely! I was a bit worried that they will be airy not dense, but I was being too impetuous 😬😅


Likes
94
Share


@Tropicalstorm
Follow
Pretty much half of the flowering cycle has been completed! 28 days today. She's very vigorous, thickening up and frosting A LOT. I've also done some more gentle LST to spread a few branches further because new shoots are coming everywhere. Beautiful to look at.
It's been quite moist at night, the sun sometines only starts at 10 am because of fog. When I decide to grow we have the rainiest year in the past 13 years and also the coldest May since 2006, fuck...at least the RH drops to 30% when the sun's at max, it's also been quite cold, that'll probably avoid mold problems.
She started to smell very gently this week. Started as a ripe guava sort of smell that has now developed to VERY sweety and fruity profile. Strong skittles smell when I press the flowers, which is awesome! I'm a big sugar fan, I did not expect this smell but I just loved it!
Thank you for visiting and see you next week! I'm so anxious I keep having dreams about her, mostly nightmares where someone chops her up or a bug kills everything...want to harvest soon 😂

Likes
7
Share


@Budking420
Follow
This is by far one of my largest autoflowers to date. Shes flowering hard now at week 5 and I'm super happy that I used LST on her. Without LST this lady would be about 5 feet tall without a doubt. I'm really happy with how she accepts the 24 hour lighting as other strains clearly don't like it as much. I hope you guys are enjoying this as much as I. I encourage you to check back next week to see just how fast she buds & remember its 4:20 somewhere!!!!
Likes
29
Share


@DesDeGrower
Follow
Pow pow and it’s already Week8
Girls are definitely in stretch now getting some training on ScrOG net to fill this tent in full.
Somewhere this week they will all go through defoliation process and planning to lower the upper net.
EC this week going up to 2.0
Temps around 26C
Humidity around 60%
Stay tuned with photo updates 🤘
Video update Day6 - defoliation done, second net done, all plants on same level done.
Stretching very nice in last few days 😍
Likes
5
Share


@Ninjabuds
Follow
The pound cake auto so far is an amazing plant. It has grown great and is super strong. Honestly it might be the strongest growing plant I have ever grown
The weather is starting to warm up a bit it has been below freezing for over 30 days and now the snow is starting to melt finally it’s a lot easier to keep the humidity on point when it’s like 32 outside compared to 10
Likes
Comments
Share


@Leonweed10
Follow
Primera semana desde el cambio de fotoperiodo,ya podemos apreciar las próximas posibles flores de estos 16 clones,se empieza a ver todo cada vez mas hermoso!!

Processing
Likes
4
Share


@Catire
Follow
Está semana les di mamooth p y monster bloom engordaron bastante espero les guste chao 😁
Unas fotos nuevas con otra camara


Likes
27
Share


@adam_pawloski87
Follow
Over all was an amazing grow, super sticky dense nugs with smell of berries, highly recommended for everyone!!
Likes
19
Share

@eldruida_lamota
Follow
Vamos familia sexta semana de floración de estás apollo black cherry de SeedStockers.
Que ganas tengo de ver el progreso de esta variedad, las plantas están sanas, se ven con buen color.
La cantidad de agua cada 48h entre riegos.
Esta semana añadimos nutrientes de la gama Agrobeta.
Las plantas están bastante bien subió algo la temperatura esta semana pero por el momento no les afectó, a ver si consigo bajar un poco la temperatura estas próximas semanas y acabamos todo bien.
Me pasé de mano con la comida pero solucionaré con agua destilada en un riego.
Estas próximas semanas veremos como avanzan y como engordan las flores.
Mars hydro:
Code discount: EL420
https://www.mars-hydro.com/
Agrobeta:
https://www.agrobeta.com/agrobetatiendaonline/36-abonos-canamo
Hasta aquí todo, Buenos humos 💨💨