
Likes
Comments
Share

@PlantMike
Follow
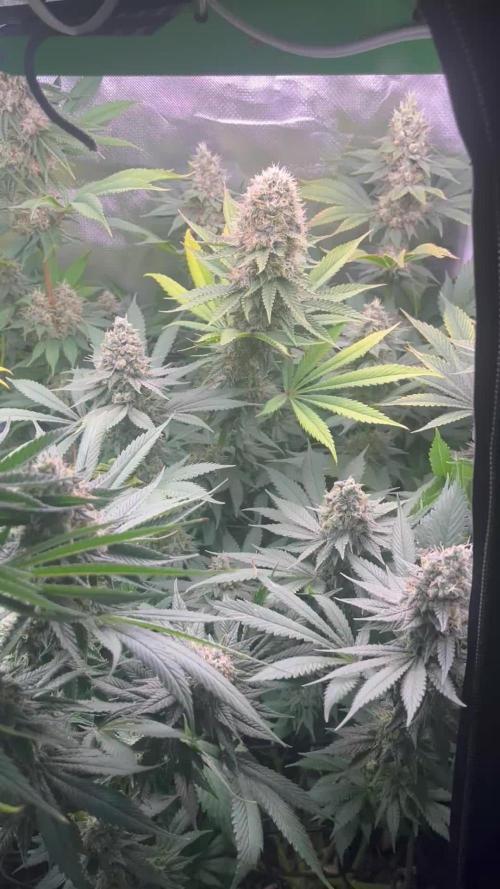
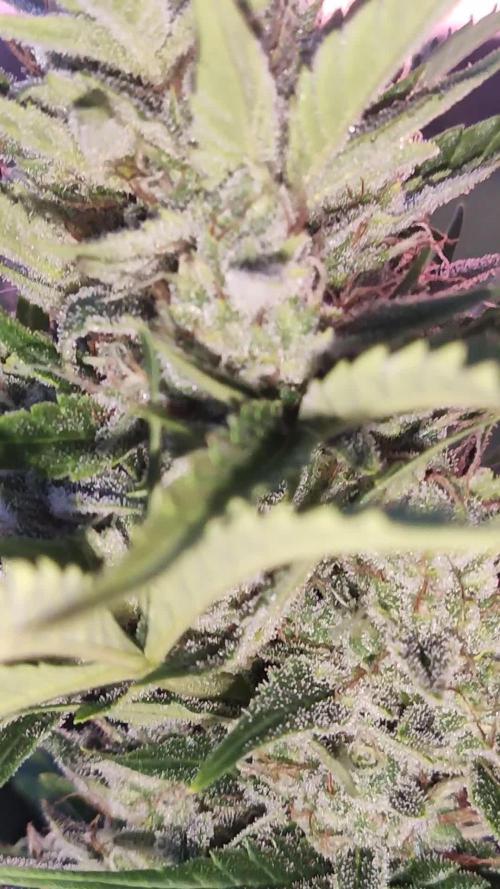
The BMR sisters have started to fade quickly in the last couple days. Been feeding plain cold water to usher shut down in the plants. The buds are beautiful the chemical grape smell still remains and the trichomes are just about 90% milky with very few amber so far. The plants have a strong base and with the double layer scrog I don't have to worry about branches toppling so we'll just ride out this last week and harvest when the time is right!

Likes
12
Share


@Chubbs
Follow
What up fam, weekly update on these gorgeous girls. They're showing preflowers now which I'm definitely happy as that means the stretch is almost over. I did add a 2nd scrog net its 6ft high. Overall, I couldn't be happier with how they've grown. Happy Growing.


Likes
Comments
Share


Likes
43
Share

@DE_BW
Follow
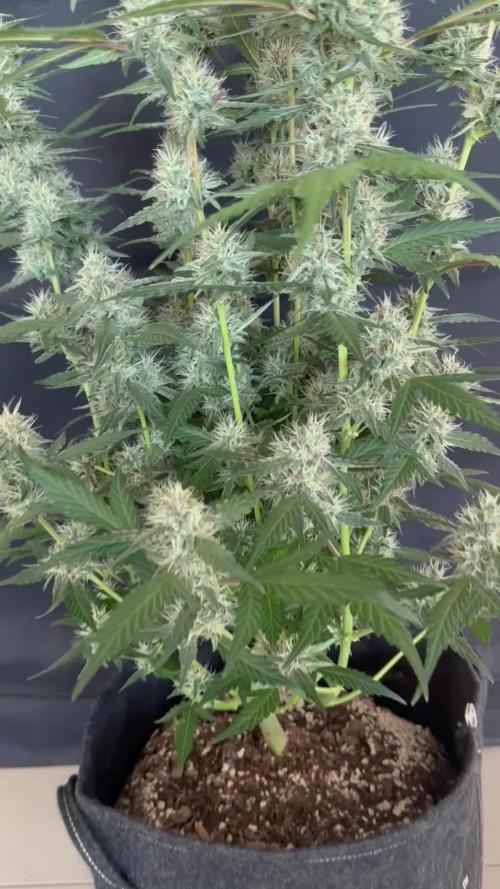
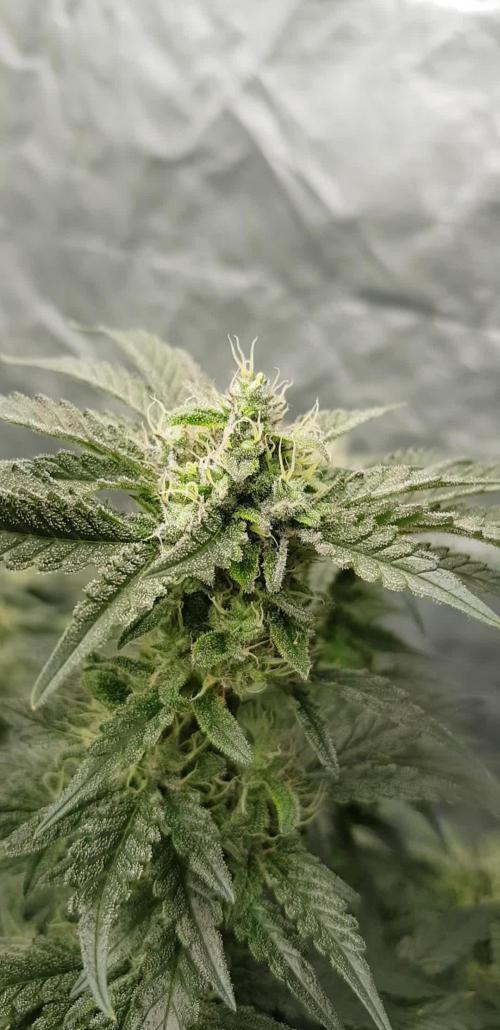
The Guava Runtz continues to stack buds beautifully across the entire plant, with the flowers steadily swelling and gaining density. A noticeable frost layer is starting to develop, coating the buds and sugar leaves with an increasingly thick blanket of trichomes. This week I performed a defoliation after discovering some feeding damage on the leaves, and starting with the next watering I will transition from Big Bud to Overdrive for the final flowering phase.


Likes
2
Share

@undermink
Follow
Both plants, Jackie I and Jackie II look great. Big buds all over and they smell awesome. Can't wait to harvest them. I love this strain from the coffeeshops, hope it tastes like I know it 😍
Likes
11
Share


@GREENPHOENIX6262
Follow
* 02/08 - Week 1 Flower - Flushed out veg nutes - Feeding only flower nutes - light feeds to begin - heavy water feeds in between - bend clips have been applied until the end of the week*


Likes
18
Share


@RadDad
Follow
Hey two weeks ago me.👏monitor👏and👏correct👏your👏PH👏
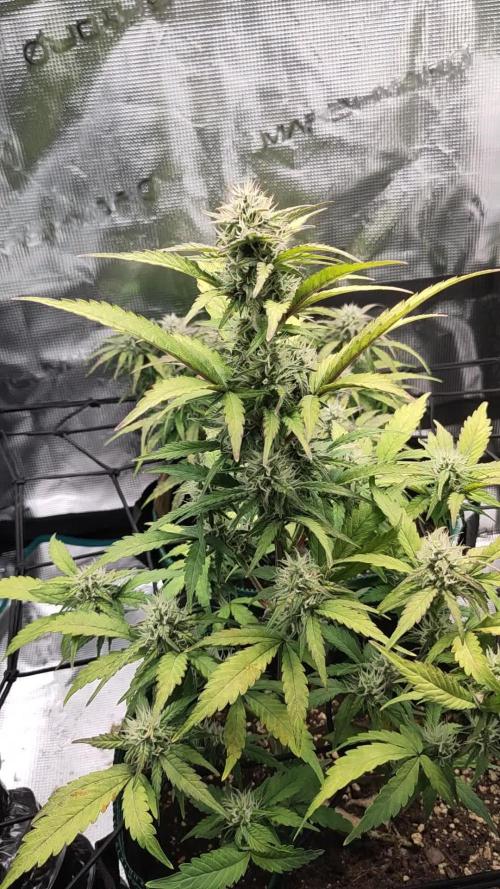
Over the past week we've gotten our ph back in balance and have had an explosion of growth. Shes so shaggy at the moment but shes definitely enjoying all those lush leaves and the photons they gobble up.
I did pick up on some red stems which led me to micro-nutrient deficiency so I picked up some Dutch Science Nutrients Cal-Mag and will be adding that to every plants feeding plan going forward.
I'm gonna let this one stay shaggy for a bit the light doesn't seem to have any trouble penetrating and reaching the flowers so let her enjoy the locks while she can. Soon...... snip snip.
In adjusting some LST I accidently broke a stem and topped her. I don't think it will make that much a difference at this point.
At least I hope not.😎😎😎

Likes
62
Share


@Roberts
Follow
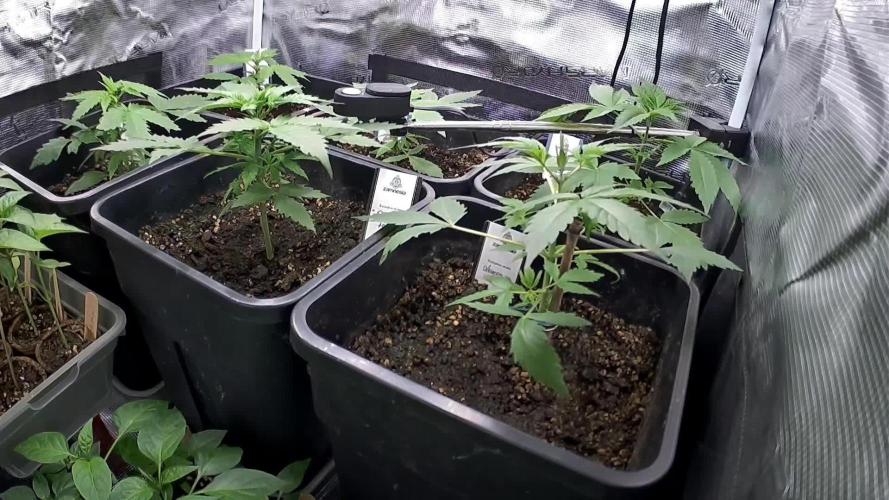
Dos-Si-Dos auto is growing good. Her roots are about ready to get into the solution in next day or 2. She is looking healthy, and off to a great start. She will be up for training likely by next update. Everything is looking great. Thank you Athena, Medic Grow, and Zamnesia seeds. 🤜🏻🤛🏻🌱🌱🌱
Thank you grow diaries community for the 👇likes👇, follows, comments, and subscriptions on my YouTube channel👇.
❄️🌱🍻 Happy Growing 🌱🌱🌱
https://youtube.com/channel/UCAhN7yRzWLpcaRHhMIQ7X4g
Likes
3
Share


@Vincentsta7
Follow
Super sour grape(small it was stunned early )
Bruce strawberry Fumes
Watermelon Zkittles Fumes


Likes
8
Share

@Webacca
Follow
Langsam sieht das aus, wie ein Canna Anbau. Sehr fein
Alle Damen wachsen gut, die ersten Anzeichen einer Blütenphase zeigen sich. Recht schöne Farben in den Blättern... Alles gut.
Uuuund es beginnt zu duften.
Darf mMn gern so bleiben
Zeitraffer der letzten Woche, heute mit Rucklern, am Ende der Bildreihe. Liegt am Arbeiten im Zelt, wo ich an die Kamera gestoßen bin und das Bild sich verstellt hat.
Es ist Do und ich kann nur sagen: boah, was für ein Urwald! Muss wohl was defolieren
Gesagt, getan. Gute Handvoll große Blätter entfernt

Likes
6
Share

@SkunkyDog420
Follow
Hallo zusammen 🤙.
Sie wächst sehr schön und macht keine Probleme.
Rabattcode für den BIOTABS-Webshop https://biotabs.nl/en/shop/ GDBT420, damit erhalten Sie 15 Prozent

Likes
12
Share

@GERGrowDesigns
Follow
Welcome to Flower Week 7 of Sensi Seeds Mandarine Jam
I'm excited to share my grow journey with you from my
Sensi Seeds Project . It's going to be an incredible ride, full of learning, growing, and connecting with fellow growers from all around the world!
For this Project , I’ve chosen the Feminized Photo Strain Mandarine Jam:
Here’s what I’m working with:
• 🌱 Tent: 120x60x80
• 🧑🌾 Breeder Company: Sensi Seeds
• 💧Strain Info : 20-23%
• ⏳ Flowering Time: 7-8weeks

Likes
9
Share


@TeaTime
Follow
today with more experience. I see that I made some mistakes, about nutrients and some techniques, but as I repeat this was my second crop. it did not yield as much income as it should, but it was worth it, cultivating and learning.


Processing
Likes
7
Share


@gablmo
Follow
I finally turned 600 watts on, would love to get comments from you folks, so clueless here. If you see something wrong, please let me know.

Likes
16
Share


@Northern_Ent
Follow
June 22: planted peat pot into final 5 gallon grow bag. Tore bottom off peat pot and ripped sides. Warm overnight so she’ll be outside for first time.
June 23: first hot days of summer. Late to start autos but with warm weather they will start quickly.
June 28: not much change in the first few days but she should start growing quickly here soon. Gave first compost tea this morning.

Likes
55
Share


@Reyden
Follow
Come ben mi aspettavo la Royal Gorilla sta facendo vedere adesso le sue potenzialità 🦍🔱e tra poco potrò fare un manifold anche a lei... La decisione tra lei e la Runtz per RQS Spring avverrà tra 2 settimane!!!


