Likes
Comments
Share


@Theia
Follow
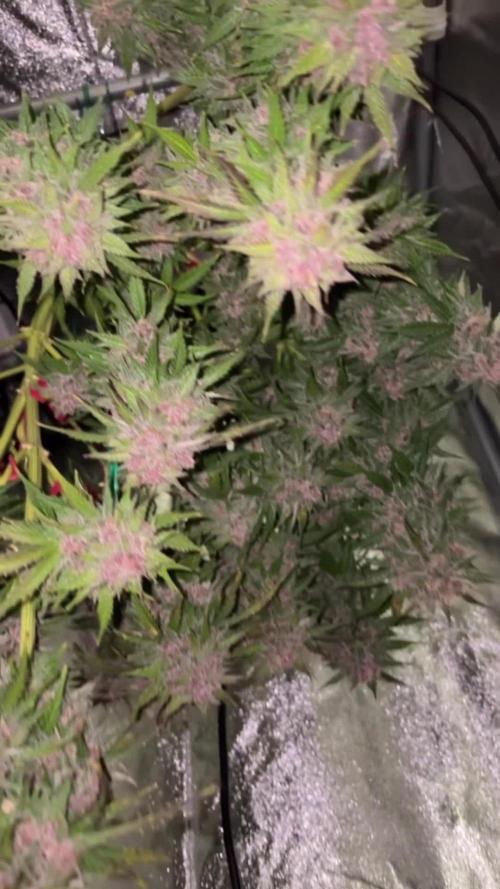
The tropicana cherry is a magnificent plant. Its stocky and stout with really great node space. I love how solid she is and i just see such a good foundation for stretch.
A really explosive week of growth. I pushed PPFD up to 310umols. Dimmers are at 60% which is drawing 224w plus 18w of DRRB. I have alos started Emerson effect ... Another The Emerson effect is triggered by the simultaneous exposure of plants to light in the deep red and far-red spectra Deep Red 660 nm /Far-Red 700 nm . A bit of boring science that explains why you need both far red and deep red in order to trigger Emerson.
The effect occurs because photosynthesis is driven by two distinct pigment systems working in series:Photosystem II (PSII): Absorbs energy most efficiently at shorter wavelengths (higher frequencies), like 680 nm (441 THz).
Photosystem I (PSI): Absorbs energy most efficiently at longer wavelengths (lower frequencies), specifically 700 nm (428 THz).
When you provide only the higher frequency (deep red), PSI becomes a bottleneck. When you provide only the lower frequency (far-red), PSII is not sufficiently excited to provide electrons. Providing both frequencies simultaneously allows both systems to work at peak efficiency, resulting in a rate of photosynthesis that is greater than the sum of the two lights used individually.
To understand the Emerson Effect, think of photosynthesis not as a single engine, but as a two-stage assembly line.
What is the Emerson Effect?
Discovered by Robert Emerson in 1957, this phenomenon shows that plants perform photosynthesis much more efficiently when they are hit by two specific types of light at the same time: Deep Red (660 nm) and Far-Red (700+ nm).
If you give a plant only Far-Red light, photosynthesis is very slow. If you give it only Deep Red, it's better but still limited. However, when you give it both at once, the total rate of photosynthesis is significantly higher than if you just added the two results together (1+1=3).
What is Happening? (The "Assembly Line")
Inside the plant's chloroplasts, there are two "workstations" called Photosystem II (PSII) and Photosystem I (PSI). They work in series, meaning the first one must pass "parts" to the second one.
PSII (The First Station): This station is tuned to catch Deep Red light (660 nm). It harvests electrons from water.
PSI (The Second Station): This station is tuned to catch Far-Red light (700 nm). It takes the electrons from the first station and uses them to create energy (ATP and NADPH).
The Problem: If you only provide Deep Red light, the first station works fast, but the second station can't keep up because it isn't being "powered" efficiently by that specific frequency. This creates a traffic jam of electrons. The Solution: By adding Far-Red light, you power up the second station. It now "pulls" the electrons from the first station much faster, clearing the traffic jam and making the whole assembly line run at full speed.
The Benefits for The Grow
Because i am using the Biotabs water-only method, my plants already have a steady supply of organic nutrients. Implementing the Emerson Effect offers several distinct advantages:
Increased Biomass: Because the "engine" is running faster, the plant produces more sugars and carbohydrates, leading to heavier fruits or flowers.
Faster Finishing: Plants often reach maturity sooner because they have more surplus energy to complete their life cycle.
Better Light Penetration: Far-Red light is very good at passing through the upper leaves. This "wakes up" the lower parts of the plant that would otherwise be shaded, allowing the whole plant to contribute to growth.
Enhanced Secondary Metabolites: In many crops, this synergistic light can stimulate the production of terpenes and antioxidants, improving the "quality" (smell, taste, and potency) of the final harvest.
The "Sunrise/Sunset" Trick
I am using 4x Invisible sun Far red/Deep red bars,they use high-quality Samsung LH351H (660nm Deep Red) and specific Far-Red (730nm) diodes for 10–15 minutes at the start or end of the light cycle. This mimics the natural shift in light at sunrise and sunset, "waking up" the photosystems or signaling the plant to go into "sleep mode" faster, which can further optimize the flowering cycle.
Enviromentally i am chasing a VPD of about 1,1kpa. My room seem to sit nicely at lights on at 24c with no real drama and a little help from a 220W greenhouse bar radiator. Its using abot 4kw/h a day atm because my room is attached to the side of my house and its been -5c.. I have had to add some humidity as its also very dry atm. Im aiming for RH of 65% with my 24c but it is more around the 62s.. VPD is crucial and is the focus for this grow for me. The autopots and Biotabs make it so easy ican really just focus on perfect enviroment. A VPD of 1.0–1.2 kPa provides enough "atmospheric pull" to move calcium and magnesium up from the roots, which is critical for the rapid cell division happening now..
Plants will be flipped on Saturday which is their week 5 as im a bit behind..
As this happens i will push PPFD upto 4-500umols. by week 2 of flower. Thats the plan anyway..

Likes
10
Share


@DeepRootsGrowTrees
Follow
ROYAL QUEEN CBG AUTO
ROYAL QUEEN SEEDS
Week #3 Overall June 19th-26th
Week #2 Veg
This week no issues she's growing well medical CBD grow so it's a all organic grow. Stay Growing!!
ROYAL QUEEN SEEDS
ROYAL QUEEN CBG AUTO




Likes
14
Share


@grower1212
Follow
Comenzando la quinta semana, sin novedad.
Aún queda una semana para que pasen a flora.
Esta semana las riego solo con agua, ya que el sustrato tiene los minerales, microorganismos y materia orgánica suficientes.

Likes
9
Share

@DeepRootsGrowTrees
Follow
KICKASS AUTO by KANNABIA
Week #5 Apr 30th- May 7th
This week was the last week of veg as she started to pre-flower towards the end of the week she's 16 inches and so growing she has side branches that are also growing at a good rate she going to be a shorter busy lady. She looking 👍 nice and green no issues this week. She's loving being outside!! Stay Growing!!
KANNABIA.COM KICKASS AUTO

Likes
13
Share


@XanHalen
Follow
Apr 20:
They hanging out at 65% rh and 65F..
Going for 7-10 day dry…
No wet trim, cut plants in half and hung…
Very happy with density and resin production…
Can’t wait to jar and test in 2-3 weeks…
I feel comfortable with this strain, I think it’s time to move on…
Really wanna run some Mephisto seeds….


Processing
Likes
66
Share


@DrGreenThumb95
Follow
What a week,
So I did a run off test end of last week and they was really high, but I would like to address the DNA Mills cork as I am using this in just one pot (A) to try it out I used 3/4 (B) to my normal coco in another pot 50:50 (C) in another at a 1/4 (D) then when just my normal coco mix ( E) and I havent seen much difference other then the retention of water... UNTILL NOW. So evaluating all my reading I have from run off this is how it WAS sitting running water with an EC 0.7 Ms/cm
A - 2.4 Ms/cm
B - 2.3 Ms/cm
C - 2.0 Ms/cm
D - 1.9 Ms/cm
E - 1.5 Ms/cm
So my conclusion is that I dont like the cork maybe I'm using it wrong somehow I dont know but in my experience, it seems to be grabbing hold of all the salts and not letting go, so this week I ran litres and litres of water through them to bring them down I can only get A down to 1.4 Ms/cm and am struggling to get it any further down does anyone have any suggestions.
As for the deficiency I was supposed to I produce the PK booster beginning of this week and couldn't with the run off being so high, well that's what I'm hoping anyways 😂.
Plant A doesn't seem to be swelling like the rest (front left in pictures) I'm hoping this is down to genetics if anyone else has any thought I'd love to hear them.
Thanks for dropping in and reading,
Happy Growing! 👊👍

Likes
21
Share


@RussianGrower
Follow
Hello my friends and all those who follow my progress. It is time to update the diary of the mother plant Bubblelicious. This plant is already 4 weeks old. I started to prepare it for cloning, I cut the lower vegetative leaves and washed it with clean water. The plant develops normally, but there is little room for roots. I'm going to make a third level pot, the biggest, but later when after I do the harvest of the Neville Haze Auto. I haven't decided yet how and how many clones to grow, so I'm not disturbing the mother plant.

Likes
12
Share


@gr3g4l
Follow
Me hubiera gustado menos dias en 1L pero tenia ocupado este armario con otras plantas este el seguimiento https://growdiaries.com/diaries/188469-ogkush-grow-journal-by-gr3g4l?in_active_week_choose=1
esta semana se pasaron al armario de 74 x 74 x 170 ctms. con el Lumatek Pro 300W
A mitad de semana después de 2 dias en un vaso y 22 en maceta de 1L. bajo 150W Fluorescente las transplanté a maceta téxtil e 7L. áprox. bajo el Lumatek Pro a 220W.
Una vez transplantadas les hice un riego, 1100ml/planta con MicroVita 5gr. / 10L. para potenciar la vida de bacterias y microorganismos saludables para la planta.
A final de semana me dió por hacerles una poda de hojas abanico. Algunas plantas miden más de 22 ctms y con la poda espero frenarlas en altura y que ganen en anchura.
Likes
2
Share


@SzkolaZiola
Follow
Germinated 10/10 seeds in easy-plugs
1 male, 1 weakling - both discarded - going further with 8 viable plants
Looking good 🍌🍊🍍
Can't wait to see them flowers 😎😁
Likes
29
Share


@DreamIT
Follow
I have little to add that I haven't already said. These plants in particular grew from start to finish in 0.50l pots, produced nearly a pound of wet grass and about 30 dry grass overall. Not much, but it was as I expected, the smaller the pot, the lower the yield.

Likes
13
Share

@El-Ecko
Follow
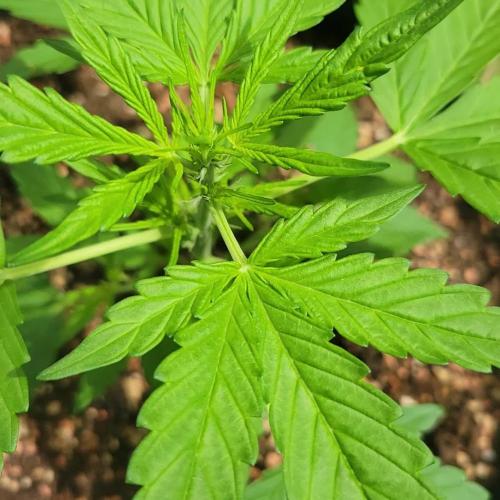
5 Week Flowering
Little Pearl ⚪️ is now slowly entering the flowering phase and is doing very well.
She certainly won’t be the biggest, but she looks absolutely healthy🤤😋.
Unfortunately, the weather has been rather dreary and wet at times, but it’s supposed to get sunnier and warmer again next week. ☀️
Likes
51
Share


@Bread_n_Buds
Follow
Here we are again ready to start again, always under the sign of Zamnesia, we make our fantastic plants and we show you what we are capable of. We have 5 autoflowering strains and 5 photoperiodic ones and now we present them to you.
The second autoflowering that we present to you is the Black Orchid Autoflowering. This was advised and recommended to us directly by the Zamnesia elves and we are sure that they are keen to send us refinements, we have seen some super beautiful photos of this strain. Guys, black is black as a style of beauty for me it is unbeatable.
To explain my germination method which is a combination of experiences acquired in the field and readings of the right advisors, I have chosen to divide it into phases so that those who want can follow them and understand better step by step.
- Preparatory Phase ---- Check the average temperature in the room, humidity status to understand if it is the case to start or wait, I decided for the end of August because the temperatures start to drop towards the 22-25 degrees recommended for germination.
Then another thing more or less credible depending on the sensitivity is the control of the lunar phases. I believe in it a lot, it is a method that ancient farmers used to understand when it was best to plant depending on the attraction of the moon. To make my life easier I use a simple app that advises you on the right time to plant, harvest and put in the jar (depending on the lunar phases).
- Phase 1 --- Soaking in water. There are many authoritative friends who advise against this method due to the risk of drowning, but I have always been fine and I follow the rule if it opens in water the seed is almost certainly healthy and will come out of the ground 90% normally.
- Phase 2 --- Opening the seed in water. As soon as the seed opens and the root comes out a little, you have to be very very careful not to leave the seed in the water open for too long. This is why there is a risk of drowning. So as soon as the root comes out, it must be planted. Do not wait for it to stretch out a lot, you can wait a little longer in the absorbent paper, but not in water.
- Phase 3 --- In the meantime, while I soaked the seeds, I prepared my pots: I use small biodegradable pots (choose the ones with holes underneath for drainage). A few hours before working with the opened seeds, I moistened the soil with water adjusted to the right pH (5.8 - 6.2) and Plagron Power Roots. The small root is now open and we can make a little hole with a toothpick, widen it and insert the seed. Not too deep with the root facing downwards. From Serious Seeds we learned the dome technique: if you put a small dome of soil on the seed the water will settle on the sides avoiding overwatering problems.
- Phase 4 --- The plant emerges from the soil. So far I have not put the light, now I turn it on at minimum after half a day of soil to give direction to the seedlings. The first week the light will be gradually brought from 40% to 60% to go to 70% - 75% in the remaining weeks of veg. During the first week maximum, I keep the cycle of 24 hours to avoid stretching. Be careful not to exceed the first week at least with photoperiodic plants.
- Germination % --- In water 20/20 seeds have opened for good luck I'm waiting to talk when they come out of the ground but it seems that we are going towards an excellent percentage of germination..."Not too bad"...
- Soil and Food --- The soil used is entirely organic in every part and is the Plagron Promix that will be used with the 100% organic pack provided by Zamnesia complete with all the main fertilizers for your plant buy it at the link --
https://www.zamnesia.io/it/11457-plagron-easy-pack-natural.html
// Strain Description // It is said that the orchid symbolizes love, refinement and beauty. Well, we can confirm that the Black Orchid Automatic contains all these attributes and many more. This autoflowering variety has a lot to offer: a particular but very pleasant aromatic profile, and a relaxing and carefree high. Furthermore, this plant is very productive when grown in optimal conditions.
- Get a seed of this fantastic strain --- https://www.zamnesia.io/it/9493-zamnesia-seeds-black-orchid-automatic.html
- Soil and Fertilizers entirely organic --- https://plagron.com/en
- Growbox --- https://www.secretjardin.com/
- Music and sound --- I made my girls listen to 432hz frequencies and music from www.radionula.com
- Z --- You can find these seeds, much more from the world of cannabis, mushrooms and an incredible series of accessories and gadgets on the reference site not only mine but of many growers ----
https://www.zamnesia.io

Likes
4
Share


@Bless
Follow
Week 14 Day 98
Almost time, leaves yellowing, drinking slow, white pistols starting to orange and shrink, bottom buds getting bigger, & small amount of amber trichomes starting to appear.
Giving the larger two only full tilt nutes before flushing. Keeping the smallest on extended bloom time.

Likes
42
Share


@GERGrowDesigns
Follow
Dear Growers ,
Welcome to Week 8 or Flower week 5 // Day 56-63 from Kannabia Lemon Haze Auto .
Incase of Moving to a New Home . I Decided to skip some Weeks from every Diarie of the 12x12 Automatic Project . Everything should be Normal in the next Weeks .
Whether you're a beginner or an expert, you are warmly invited to join, ask questions, and share your own experiences along the way!
Project Setup & Conditions:
• Brand/Manufacturer: Kannabia Seeds
• Tent: 222cmx150cmx150cm
• Light: 2x 720 Watt Full Spectrum
• Humidity: 50%
• Soil: Narcos Organix Mix
• Nutrients: Narcos Products
• pH Value: 6
If you want Germinitation results like mine , check out Kannabia Seeds with my link [https://www.kannabia.com/de?ref=61966] and grab the germination device or the strains I used . Trust me – it’s worth it for sure !
Get another 20% Discount at all products using the code [GGD] at the Checkout .
Stay curious and keep up Growing —we look forward to welcoming you back for the next chapter soon!
Likes
13
Share


@russrahl
Follow
All rite...here we go! Lol end of week 2 of flowering and plants are in full stretch mode now. I let them grow about a foot above the first netting and at the end of week 2 I did a huge defoliation and tied everything back down to the screen. Took a long time! Lol everything is even again though and all is well. We will let them grow up from here and tuck anything that gets above the screen to much. Gonna try and end with a canopy just above the first screen to maximize light penetration to all nodes. So far so good! Cheer 💨

Likes
6
Share

@AestheticGenetix
Follow
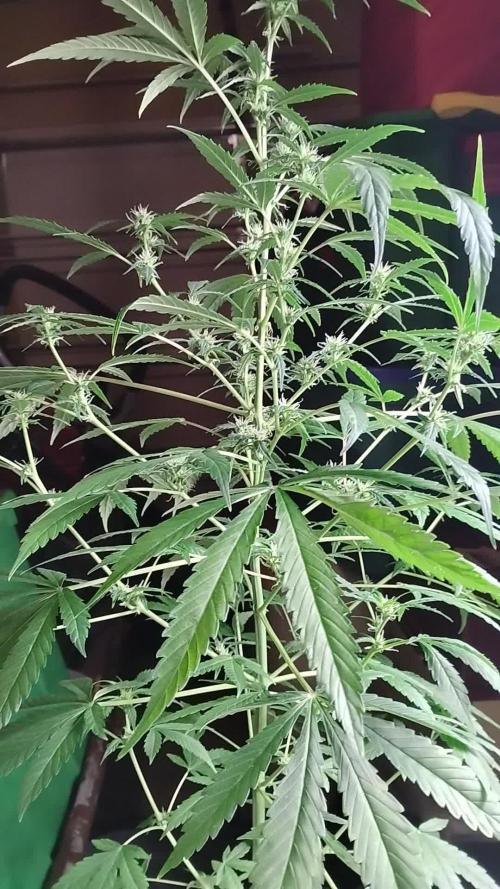
8/2/25 her structure is quite impressive. Bud sites everywhere. Very uniform but also very dense branching. Not overly leafy but just branches absolutely everywhere

Likes
14
Share

@India_Calcoen
Follow
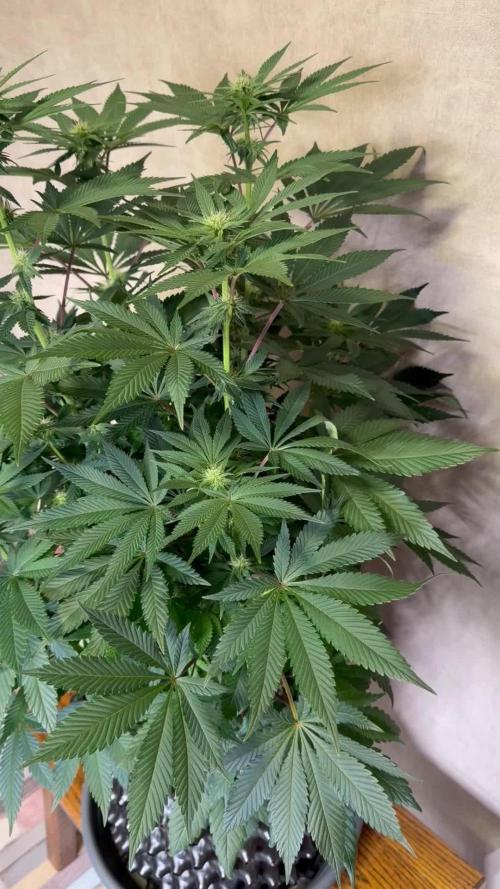
02-02-2026
Third week of 12/12 for Colombian Gold. Her buds are developing nicely, she has nice, white hairs. I saw some brown tips but didn’t find any herming in the tent. It’s probably some stress or me touching the plant. It’s quite crowded in the tent!
I defoliated her today big time. I didn’t know where to start so I started cutting some branches. Cutting branches hurts! Some of them where lime green, have never seen any light in their short lives. I also found some dried leaves. She already started defoliating herself a bit 😉 It’s a pity I forgot to take some pictures before defoliating, but the short video gives an impression of her bushy structure.
I love how she grows ❤️❤️💚💚💛💛