Processing
Likes
Comments
Share
@
Follow
Likes
9
Share
@stone2345
Follow
Seeming like we are going to be harvesting in the next week or so. So we are moving on to flushing. Watering twice a week with ph balanced water. No nutrients.
Likes
13
Share
I harvest this strain at my other grow this week so I'll have a preliminary smoke test super strong genetics super trainable fast growing and smelly they also boast a 27 percent thc content ( I normally consume 19 to 21 %) this gonna knock my socks off
Likes
61
Share
Hello growers and welcome to week 6. I expect Queen Citronella to gain a lot of height this week. I will be doing the measurements shortly, but first I wanted to share some news! Queen Citronella has a new home, she hasn't moved in yet, but I'm working on it today. I will also be rearranging all the other grows and starting some new things off! I am not sure if I have mentioned it anywhere but I am using a 1.2m x 1.2.m x 1.8m tent.. I have just got a 60cm x 60cm x 140cm tent and a 300w LED. Her Majesty I hope will enjoy her new quarters. Day 36: I have lowered the light to 30cm above the tallest plants. Day 37: It is done! Queen Citronella resides in her own palace, while the rest of the plebs squat together in the communal living area. I have reorganised and moved my 4x4, mounting the carbon filter and duct fan properly in the center. Setup a 2 x 2 with a 300w LED and put the lights for both tents on the same timer (for now). I will measure and photograph Her Majesty a little later, including photos of her new home. Day 37: Added media. Height: 31cm. Fertigated 2l. Day 37.5: Alright she is really stretching fast, she grew almost 5cm in a little over 30 hours, A thought has just occurred to me; I could, if I chose to, put the Queen on a flower cycle at this point. Now I did want to do a full grow of clones, however we're talking something like another 2 weeks of veg then 2 weeks for cuttings to root, then I'd want to veg them for a few more weeks, maybe 2, 3 or 4? So that's 6-10 weeks before I start flowering. Then at least ten weeks of flowering, A week to dry, and at least a fortnight to cure. We're talking 20-25 weeks before I get to smoke it, that's six months! I probably wont be able to grow in the summer due to the heat. Now I already have the one cutting which I am hoping will root soon, which I can take forward, but I also have two more seeds. So, regretfully, I think I will change my plans. I will flower queen Citronella, starting on day 43. I still intend to do a full tent of Super Lemon Haze clones, but I think I will postpone that adventure until September. So this is now the final week or final five days of veg, she will spend the bulk of her last week of veg under a different light. We wont get much data on vegging (unless there is a significant change this week) but it'll be a nice trial run flowering with an LED light for the first time. Exciting! I am still waiting for the Epislon F1 seeds from RQS. I set their pot up today, inoculated, fed, and sowed some Dark Opal (Purple) Greek Basil and a liberal sprinkling of chamomile. I am going to germinate all five seeds in jiffy pellets and then put them all in the same 40l Day 38: I have realised Her Majesty was too tall to flower in this little tent so I snapped her neck a bit. I installed a photometer app yesterday and discovered I was blasting Citronella with 75 DLI so I raised to light up until canopy level was 40 DLI. The LED is pretty good. The HPS Dual Spectrum bulb in the main tent must be on its last legs as output was around 40 DLI for optimally positioned plants and 30 least optionally positioned. I could do to buy a new bulb. Identical replacement is about fifteen bucks, best one is about fifty. For that I could get another one of those LEDs which seems like better value. At the moment though I really need the heat. So I am thinking identical replacement. 4 days to flower cycle! Day 38.5: Replaced crappy old Dutch barn reflector with a much nicer angel wing model. Installed a significantly larger carbon filter into the main tent which has significantly increased air flow. The main tent vents into the bottom of Queen Citronella's tent, and from there and unfiltered duct fan in the far top corner exhausts it out. The exhaust pipe goes up the chimney. Why have I reorganised and moved the tents again so soon is because I was wasting power heating the little tent with the LED light, but the main tent has excess heat. Well this setup is working a treat. Citronella is sitting in a balmy 23-24 degree wind tunnel. Check out the little video of the changes. Day 39: I think her majesty likes her new quarters. It's going to be weird seeing her square in a few more days. We are 2 days into a "dry spell" I'm simulating for all my plants. Day 40: Dry spell ended. Fertigated 6l. Day 41: Fertigated 3l. Citronella's penultimate day of veg, she is going 12/12 from lights out after next. Photos taken 10:00 9/2/23. Current lights out is Citronella's last 6 hour night! Day 42: Start: Have performed pre-flower LST, HST, and defoliation. 24 hours to flower cycle. Day 42: End: photographed immediately before first 12h night. End of week summary: Huge week for Citronella. I think this LED light is pretty good. Change of plans regarding the grow and preparing her for flower. Let's see how she does.
Likes
5
Share
10/8 was harvest day as a storm collapsed my plant, I should have set up support but live and learn
Likes
11
Share
@Tuki3
Follow
Hermoso el proceso, la verdad cada vez me gusta más todo lo que involucra al mismo! atencion, detalles, etc. Las chemical bride como verán salieron 2 fenotipos diferentes, uno con hojas más finas (tirando a sativa) y la otra hojas mas gruesas y las flores aparentan ser más "comprimidas". El olor que siento cuando toco las hojas con Resina es muy muy sabroso, realmente parece un caramelo de ananá (muy dulce, hasta empalagoso diría). En estos días voy a intentar subir un poco más el panel porque está muy cerca. Muy contento realmente con los resultados que vengo observando!
Processing
Likes
Comments
Share
Sticky and loud is all I can say! Hopefully whatever damage and burn I have doesn’t hurt my buds too much l! But otherwise they’re stacking up well! Couple more weeks to go!
Likes
14
Share
@MG2009
Follow
12/30/2021 5 Biscotti Skunk, 5 Lemon OG, 4 Grape Skunk. Starting veg at 18 hours for 4 or 5 weeks of veg and into flowering. Will reppot this week into 6" pots then into 3 gallon pots. One maybe going to 20 gallon fabric pot, if I got an extra one but I'll see 🙏🏻 Potted up to 6" pots 1,Biscotti Skunk 1,Grape Skunk 1,Biscotti Skunk Hoping to start a staggerd grow where I can trim only 3 plants a week. Into pots I added 1 tsp per 6" pot of Coast of Maine stonington plant food 5-2-4 added to happy frogs .30-.30-.05 NPK they should fill out quickly in time for reppot in 2-3 weeks.
Likes
2
Share
@Ensign420
Follow
|»» LOG DISCLAIMER: Not intended as a grow guide. Grow log entries are usually posted 3-4 weeks later and are for my learning reference. ««| Introduction - Week 18 Summary - Ensign's log, stardate 17729.3, Another grow week. In the main tent, been defoliating a few leaves daily and checking soil moisture levels. In the veg tent, topped a couple mother plants and transplanted a few clones. Also been keeping up with basic solo cup waterings. Also got more genetics for the seed stash. Onwards to next week.. [START OF WEEK 18] ========================================================== ---------- [ 3x3 VEG TENT - GR3 ] ---------- Heady OG BX1 #1 - WEEK 10 - Full Veg TKO #2 - WEEK 00 - Transplant Chill Out OG #3 - WEEK 07 - Full Veg Chill Out OG #2 - WEEK 03 - Full Veg ---------- [ 4x4 MAIN TENT - GR30 ] ---------- Chill Out OG #2 - WEEK 18 - Full Bloom Wk4 TKO #2-2 - WEEK 12 - Full Bloom Wk4 Heady OG BX1 #1 - WEEK 14 - Full Bloom Wk4 03/02/26 → 03/08/26 [WEEK 18] This Week's Estimated Goals ---------------------------------------------------------------------------------------------- DLI: ~22 mol/m²/d PPFD: ~500 μmol/m²/s VPD: ~1.2 kPa This Week's Meter Readings & Averages ---------------------------------------------------------------------------------------------- Light On/Off: 16:00 - 10:00 | Wattage: ~386.3W [LV05] Distance From Canopy: ~[21”, 3.5”, 9”] Plant Height: ~[31”, 48.5”, 43”] Max Plant Height: ~52” [Lamp-to-Soil Distance] DLI: ~53.31 mol/m²/d PPFD: ~520 μmol/m²/s VPD: ~0.59 kPa Soil %: ~[49.9, 45.1, 47.6, 46.3, 52.6, 60.6, 52.1, 60.4, 53.7, 73.6] ========================================================== Day 01 - Monday - 03/02/26 - Total Days: 117 ----------------------------------- Daily Averages ~[+01:00] - Temps: 78.5°F [25.8°C] - Humidity: 84.0% - VPD: 0.53 kPa - Soil %: [46, 48, 45, 47, 52, 60, 51, 60, 53, 73] ----------------------------------- - [22:42]: Night check on the 4x4 tent. --- Wow day 36 of flower and the garden looks great. --- Chill Out OG #2 is looking healthy and perky. --- Heady OG BX1 #1 is slowing down on the stretch and buds are swelling up. --- TKO #2 is also starting to focus growth more on bud development instead of stretching. --- Terpenes are also getting louder and starting to express themselves as bud growth continues to swell. Nice. - [22:45]: Checked on the BluMat soil moisture sensors: ------ Chill Out OG #2 » 48mbars ------ Heady OG BX1 #1 » 40mbars ------ TKO #2 » 55mbars --------- Watering Range: [Too Wet] ~25mbars «| [Ideal Target] ~40-80mbars |» ~125mbars [Too Dry] --------- BluMat Max Values: [10mbars «||» 750mbars] --- Continuing on with the daily defoliations and removed more fan leaves. --- Mainly focused on the larger ones covering bud growth. - [21:07]: Checked the Ecowitt soil moisture sensor data: ------------------ [ 3x3 VEG TENT – GR3 ] ---------------- ------ 46% - [CH01 » M1 » VBL – Heady OG BX1 #1] ------ 47% - [CH02 » M2 » VBR – Dry Soil] ------ 46% - [CH03 » M3 » VFL – Chill Out OG #3] ------ 47% - [CH04 » M4 » VFR – Chill Out OG #2] ----------------- [ 4x4 MAIN TENT – GR30 ] --------------- ------ 52% - [CH05 » P1 » FLT – Chill Out OG #2] ------ 60% - [CH06 » P1 » FLB – Chill Out OG #2] ------ 51% - [CH07 » P2 » BLT – TKO #2-2] ------ 60% - [CH08 » P2 » BLB – TKO #2-2] ------ 51% - [CH09 » P3 » FRT – Heady OG BX1 #1] ------ 60% - [CH10 » P3 » FRB – Heady OG BX1 #1] --------- Veg: ~38%-45% | Flower: ~45%-55% --------- General: ~30% [Dry] «| ~45-60% [Moist] |» ~70% [Wet] - [23:12]: Checked the 3x3 veg tent. --- Looking good in the veg garden. --- Wow 4 clones need watering. - [23:23]: Here are the starting initial watering ranges: ------ TKO #2-1 » 290.7g → 340.5g ------ Gorilla Goat #1-1 » 287.0g → 325.2g ------ Garlic Budder OG#1-1 » 299.1g → 340.6g ------ Garlic Budder OG#1-2 » 279.2g → 340.3g --------- General Weight Range: [Dry] ~275g «| [Dryback] ~300g |» ~325g-400g [Wet] --- All cups were last watered 2-3 days ago. --- Took the starting weight of all clones before watering, ------ TKO #2-1 » 266.6g ------ Gorilla Goat #1-1 » 289.1g ------ Garlic Budder OG#1-1 » 279.8g ------ Garlic Budder OG#1-2 » 260.5g --- While on a scale, --- Evenly misted the top all cups with RO water. --- Did not spray the top growth. --- Misted 10-20 sprays. Waited a moment, then misted again. --- Repeated this process until all cups weighted at least 300g. --- There was no runoff. - [+00:19]: Took the saturated weight of all cups after watering, ------ TKO #2-1 » 365.5g ------ Gorilla Goat #1-1 » 365.2g ------ Garlic Budder OG#1-1 » 365.1g ------ Garlic Budder OG#1-2 » 365.6g --- Updated the wet weight and watering dates for each cup. --- Placed all cups back into the tent. --- Veg cuttings in the propagation tray look good. --- Defoliated a few of the yellowing leaves. --- Did not mist the top growth. - [+00:35]: Checked the humidifiers. --- Tanks are still full and no leaks found. Day 02 - Tuesday - 03/03/26 - Total Days: 118 ----------------------------------- Daily Averages ~[+01:00] - Temps: 77.8°F [25.4°C] - Humidity: 83.6% - VPD: 0.53 kPa - Soil %: [47, 47, 48, 47, 52, 60, 51, 60, 53, 73] ----------------------------------- - [21:18]: Night check on the 4x4 tent. --- Looking great in the garden. --- Chill Out OG is in full bloom and she is stacking up with bud colas. Nice. --- Heady OG and TKO are about the same in growth structure and terpene profile, but both have distinct differences. --- Heady’s bud structure is more spear shaped whereas TKO is more spherical. --- The under canopy is looking clean and all pots look good. --- As for terpenes, TKO has a jet fuel-earthy profile whereas Heady has a more of a lemon-gassy pine-sol cleaner profile. --- Chill Out OG now has more of a vitamin-c grape terpene profile. --- All phenos smell dank and the garden is looking better than ever. - [21:21]: Checked on the BluMat soil moisture sensors: ------ Chill Out OG #2 » 48mbars ------ Heady OG BX1 #1 » 37mbars ------ TKO #2 » 54mbars --------- Watering Range: [Too Wet] ~25mbars «| [Ideal Target] ~40-80mbars |» ~125mbars [Too Dry] --------- BluMat Max Values: [10mbars «||» 750mbars] - [21:26]: Checked the Ecowitt soil moisture sensor data: ------------------ [ 3x3 VEG TENT – GR3 ] ---------------- ------ 47% - [CH01 » M1 » VBL – Heady OG BX1 #1] ------ 47% - [CH02 » M2 » VBR – Dry Soil] ------ 46% - [CH03 » M3 » VFL – Chill Out OG #3] ------ 47% - [CH04 » M4 » VFR – Chill Out OG #2] ----------------- [ 4x4 MAIN TENT – GR30 ] --------------- ------ 52% - [CH05 » P1 » FLT – Chill Out OG #2] ------ 59% - [CH06 » P1 » FLB – Chill Out OG #2] ------ 51% - [CH07 » P2 » BLT – TKO #2-2] ------ 60% - [CH08 » P2 » BLB – TKO #2-2] ------ 53% - [CH09 » P3 » FRT – Heady OG BX1 #1] ------ 73% - [CH10 » P3 » FRB – Heady OG BX1 #1] --------- Veg: ~38%-45% | Flower: ~45%-55% --------- General: ~30% [Dry] «| ~45-60% [Moist] |» ~70% [Wet] - [21:37]: Checked the 3x3 veg tent. --- Veg garden is looking great. --- All mothers and clones look good and cuttings in the propagation tray look okay. --- No need to water. Nice. - [22:02]: Checked the humidifiers. --- Tanks are still full and no leaks found. Day 03 - Wednesday - 03/04/26 - Total Days: 119 ----------------------------------- Daily Averages ~[+01:00] - Temps: 77.9°F [25.5°C] - Humidity: 81.8% - VPD: 0.59 kPa - Soil %: [50, 46, 48, 47, 52, 60, 51, 60, 54, 73] ----------------------------------- - [16:01]: Evening check on the 3x3 veg tent. --- Veg garden looks green and healthy. --- Wow both the Heady OG BX1 #1 mother along with the Chill Out OG #3 mother are getting big. --- Time to top. - [16:04]: Temporarily removed the solo cup clones. --- Then using a pair of trimmers, cut the main stalk of both Heady OG BX1 #1 and Chill Out OG #3. --- Removed more than half of the overall biomass. Mulched the trimmings. --- Did not top the Chill Out OG #2 mother. - [16:36]: Also decided to transplant 3 of the clones into the 3-gallon fabric pots. --- These 3-gallon pots have been already pre-amended and prepped for a fresh transplant. --- Will also be installing the BluMat watering carrots and connecting each to the gravity-fed water loop. - [16:45]: Took a 3-gallon pot out of the veg tent and set it on a drip tray. --- Loosened the soil and made a hole in the center of the pot. ------ Set a clear cup into the center of the pot. --- Tucked the sides of the cup in snug with the surrounding soil. - [16:58]: Gently removed the clear cup from the fabric pot leaving a perfect hole. ------ Sprinkled 1/16tsp of Great White ------ Sprinkled 1/32tsp of Beauveria Bassiana Plus --- Dusted the sides of the hole. --- Also sprinkled a bit around the top soil. --- Time to transplant. --- Starting with Garlic Budder OG #1-2, --- Loosened and unstuck the rootball by squeezing the sides of the cup. Then pressed the bottom of the cup upwards. - [17:01]: Once fully loosened, Vulcan-gripped the base of the plant before flipping the entire cup upside down. --- Did not break up the rootball. - [17:03]: Gently set her straight into the pre-inoculated hole. --- Pressed and evened out the top soil. - [17:08]: Using fresh BuildASoil Organic Straw Mulch, --- Covered the top soil with straw. - [17:10]: Then using a fully filled 5" BluMat watering carrot (pre-soaked and set to gold for gravity feed) along with a 5" drip ring, --- Placed the drip ring around the base of the plant. - [17:19]: Then gently inserted the BluMat carrot into the soil near the drip ring's fill tube before connecting it with a 3mm connector. --- Placed Garlic Budder OG #1-2 into the veg tent. --- Repeated this process for both TKO #2-1 and Gorilla Goat #1-1 - [18:59]: Once all cultivars were planted, connected each pot to the watering loop. --- Shut off all flow-valves in the water loop and made sure the 8mm tubing had no water pressure. --- Then cut the tubing and installed an RO valve-rig (with 3mm T-fitting) for each pot. - [19:34]: Finally connected each watering carrot to the valve-rig (3mm tubing) before turning all flow-valves back on. --- Transplant completed. - [19:41]: Checked the Ecowitt soil moisture sensor data: ------------------ [ 3x3 VEG TENT – GR3 ] ---------------- ------ 52% - [CH01 » M1 » VBL – Heady OG BX1 #1] ------ 43% - [CH02 » M2 » VBR – TKO #2] ------ 50% - [CH03 » M3 » VFL – Chill Out OG #3] ------ 46% - [CH04 » M4 » VFR – Chill Out OG #2] ----------------- [ 4x4 MAIN TENT – GR30 ] --------------- ------ 53% - [CH05 » P1 » FLT – Chill Out OG #2] ------ 60% - [CH06 » P1 » FLB – Chill Out OG #2] ------ 52% - [CH07 » P2 » BLT – TKO #2-2] ------ 59% - [CH08 » P2 » BLB – TKO #2-2] ------ 54% - [CH09 » P3 » FRT – Heady OG BX1 #1] ------ 74% - [CH10 » P3 » FRB – Heady OG BX1 #1] --------- Veg: ~38%-45% | Flower: ~45%-55% --------- General: ~30% [Dry] «| ~45-60% [Moist] |» ~70% [Wet] --- Also updated the sensor names a bit. --- Going to water in a bit of microbes for the newly planted moms. --- Spraying 2 cups of a wetting solution split evenly amongst all pots. --- Adding in a few extra microbes. - [20:01]: Filled a measuring cup with 2 cups of RO water. ------ Added 1/64tsp of Quillaja Saponaria Extract [60] ------ Added 1/16tsp of Stash Blend ------ Added 1/16tsp of Horticultural Aloe ------ Added 1/16tsp of Horticultural Coconut ------ Added 1/8tsp of Mycrobe Complete --- Mixed the solution and poured both cups straight into a pump sprayer. - [20:05]: Misted the straw mulch of each pot with the wetting solution. --- Briefly misted the center of each pot, but tried to mainly focus on the outer sides. --- A Garlic Budder clone needs watering. - [20:16]: Here is the starting initial watering range: ------ Garlic Budder OG#1-1 » 299.1g → 340.6g --------- General Weight Range: [Dry] ~275g «| [Dryback] ~300g |» ~325g-400g [Wet] --- Been 2 days since the last watering. --- Took the starting weight before watering, ------ Garlic Budder OG#1-1 » 285.9g --- While on a scale, --- Evenly misted the top of the cup with RO water. --- Did not spray the top growth. --- Misted 10-20 sprays. Waited a moment, then misted again. --- Repeated this process until the cup weighted at least 300g. --- There was no runoff. - [20:32]: Took the saturated weight after watering, ------ Garlic Budder OG#1-1 » 365.5g --- Updated the wet weight and watering date. --- Also decided to top. Using a pair of clean trimmers, --- Cut each of the branches leaving 5-6 nodes. --- Mulched the trimmings. --- Placed the cup back into the tent. - [20:47]: Checked the 4x4 tent. --- Garden looks good. --- Wow buds are swelling up and looking healthy. --- All phenos look and smell great. --- Under canopy looks clean and all pots look good. - [21:00]: Checked on the BluMat soil moisture sensors: ------ Chill Out OG #2 » 44mbars ------ Heady OG BX1 #1 » 37mbars ------ TKO #2 » 51mbars --------- Watering Range: [Too Wet] ~25mbars «| [Ideal Target] ~40-80mbars |» ~125mbars [Too Dry] --------- BluMat Max Values: [10mbars «||» 750mbars] - [21:11]: Checked the humidifiers. --- Tanks are still full and no leaks found. Day 04 - Thursday - 03/05/26 - Total Days: 120 ----------------------------------- Daily Averages ~[+01:00] - Temps: 78.3°F [25.7°C] - Humidity: 81.7% - VPD: 0.60 kPa - Soil %: [51, 46, 48, 47, 52, 60, 51, 60, 54, 74] ----------------------------------- - [12:16]: My package from Sustainable Village has arrived. Nice. --- Got more 5” BluMat watering carrots and drip rings for the veg tent. --- BluMats do have a bit of learning curve (already flooded the main tent a few times), but once properly dialed in, keeps soil moisture at incredibly perfect levels. --- Was using Ecowitt (WittFlows) for watering, but now switching the entire garden to run on BluMats. --- Anyways, - [16:09]: Evening check on the 3x3 veg tent. --- Wow the veg garden is looking good and recovering nicely. --- Both Gorilla Goat clones need watering. - [16:27]: Here are the starting initial watering ranges: ------ Gorilla Goat #1-1 » 287.0g → 325.2g ------ Gorilla Goat #1-2 » 294.4g → 325.4g --------- General Weight Range: [Dry] ~275g «| [Dryback] ~300g |» ~325g-400g [Wet] --- Both cups were last watered 4 days ago. --- Took the starting weight of both clones before watering, ------ Gorilla Goat #1-1 » 295.2g ------ Gorilla Goat #1-2 » 299.2g --- While on a scale, --- Evenly misted the top of both cups with RO water. --- Did not spray the top growth. --- Misted 10-20 sprays. Waited a moment, then misted again. --- Repeated this process until both cups weighted at least 300g. --- There was no runoff. - [16:36]: Took the saturated weight of both cups after watering, ------ Gorilla Goat #1-1 » 355.6g ------ Gorilla Goat #1-2 » 355.4g --- Updated the wet weight and watering dates for both cups. --- Placed both cups back into the tent. --- Veg cuttings in the propagation tray look good. - [17:04]: Checked the Ecowitt soil moisture sensor data: ------------------ [ 3x3 VEG TENT – GR3 ] ---------------- ------ 51% - [CH01 » M1 » VBL – Heady OG BX1 #1] ------ 45% - [CH02 » M2 » VBR – TKO #2] ------ 47% - [CH03 » M3 » VFL – Chill Out OG #3] ------ 47% - [CH04 » M4 » VFR – Chill Out OG #2] ----------------- [ 4x4 MAIN TENT – GR30 ] --------------- ------ 52% - [CH05 » P1 » FLT – Chill Out OG #2] ------ 60% - [CH06 » P1 » FLB – Chill Out OG #2] ------ 52% - [CH07 » P2 » BLT – TKO #2-2] ------ 60% - [CH08 » P2 » BLB – TKO #2-2] ------ 54% - [CH09 » P3 » FRT – Heady OG BX1 #1] ------ 74% - [CH10 » P3 » FRB – Heady OG BX1 #1] --------- Veg: ~38%-45% | Flower: ~45%-55% --------- General: ~30% [Dry] «| ~45-60% [Moist] |» ~70% [Wet] - [21:02]: Checked the 4x4 tent. --- Wow the garden is looking and smelling incredible. --- Removed a few more fan leaves. --- I think the defoliation has been helping with trichome production because the bud growth for both Heady OG and TKO (which are on their 2nd flower cycle), look frostier. --- Anyways. - [21:36]: Checked on the BluMat soil moisture sensors: ------ Chill Out OG #2 » 48mbars ------ Heady OG BX1 #1 » 37mbars ------ TKO #2 » 51mbars --------- Watering Range: [Too Wet] ~25mbars «| [Ideal Target] ~40-80mbars |» ~125mbars [Too Dry] --------- BluMat Max Values: [10mbars «||» 750mbars] - [22:03]: Checked the humidifiers. --- Tanks are still full and no leaks found. Day 05 - Friday - 03/06/26 - Total Days: 121 ----------------------------------- Daily Averages ~[+01:00] - Temps: 76.7°F [24.8°C] - Humidity: 79.2% - VPD: 0.64 kPa - Soil %: [51, 44, 48, 46, 53, 60, 52, 60, 54, 74] ----------------------------------- - [21:59]: Night check on the 4x4 tent. --- Wow the garden is looking good and smelling great. --- Buds are continuing to stack and terpenes are maturing. Nice. - [22:06]: Checked the Ecowitt soil moisture sensor data: ------------------ [ 3x3 VEG TENT – GR3 ] ---------------- ------ 51% - [CH01 » M1 » VBL – Heady OG BX1 #1] ------ 43% - [CH02 » M2 » VBR – TKO #2] ------ 48% - [CH03 » M3 » VFL – Chill Out OG #3] ------ 46% - [CH04 » M4 » VFR – Chill Out OG #2] ----------------- [ 4x4 MAIN TENT – GR30 ] --------------- ------ 55% - [CH05 » P1 » FLT – Chill Out OG #2] ------ 60% - [CH06 » P1 » FLB – Chill Out OG #2] ------ 53% - [CH07 » P2 » BLT – TKO #2-2] ------ 60% - [CH08 » P2 » BLB – TKO #2-2] ------ 54% - [CH09 » P3 » FRT – Heady OG BX1 #1] ------ 74% - [CH10 » P3 » FRB – Heady OG BX1 #1] --------- Veg: ~38%-45% | Flower: ~45%-55% --------- General: ~30% [Dry] «| ~45-60% [Moist] |» ~70% [Wet] - [22:11]: Checked the 3x3 veg tent. --- Veg garden looks good. --- Propagation cuttings look good for the most part. --- Culled one of the TKO cuttings (back right). --- Misted the top growth of the remaining veg cuttings with RO water. - [22:35]: Checked the humidifiers. --- Tanks are still full and no leaks found. Day 06 - Saturday - 03/07/26 - Total Days: 122 ----------------------------------- Daily Averages ~[+01:00] - Temps: 75.9°F [24.4°C] - Humidity: 78.9% - VPD: 0.64 kPa - Soil %: [52, 43, 48, 45, 54, 62, 53, 61, 54, 74] ----------------------------------- - [20:01]: Night check on the 4x4 tent. --- The garden is smelling great. --- Chill Out OG is the furthest along in bud development, but wow Heady and TKO have taken over this grow. --- The canopy is full of bud growth and getting coated with greasy trichomes. Nice. --- The under canopy also looks good. - [20:09]: Checked on the BluMat soil moisture sensors: ------ Chill Out OG #2 » 37mbars ------ Heady OG BX1 #1 » 36mbars ------ TKO #2 » 42mbars --------- Watering Range: [Too Wet] ~25mbars «| [Ideal Target] ~40-80mbars |» ~125mbars [Too Dry] --------- BluMat Max Values: [10mbars «||» 750mbars] - [20:12]: Checked the Ecowitt soil moisture sensor data: ------------------ [ 3x3 VEG TENT – GR3 ] ---------------- ------ 52% - [CH01 » M1 » VBL – Heady OG BX1 #1] ------ 43% - [CH02 » M2 » VBR – TKO #2] ------ 49% - [CH03 » M3 » VFL – Chill Out OG #3] ------ 45% - [CH04 » M4 » VFR – Chill Out OG #2] ----------------- [ 4x4 MAIN TENT – GR30 ] --------------- ------ 55% - [CH05 » P1 » FLT – Chill Out OG #2] ------ 62% - [CH06 » P1 » FLB – Chill Out OG #2] ------ 53% - [CH07 » P2 » BLT – TKO #2-2] ------ 61% - [CH08 » P2 » BLB – TKO #2-2] ------ 55% - [CH09 » P3 » FRT – Heady OG BX1 #1] ------ 74% - [CH10 » P3 » FRB – Heady OG BX1 #1] --------- Veg: ~38%-45% | Flower: ~45%-55% --------- General: ~30% [Dry] «| ~45-60% [Moist] |» ~70% [Wet] - [20:17]: Checked the 3x3 veg tent. --- The veg garden looks perky and healthy. --- All mothers, clones, and cuttings look good. - [20:34]: Checked the humidifiers. --- Tanks are still full and no leaks found. Day 07 - Sunday - 03/08/26 - Total Days: 123 ----------------------------------- Daily Averages ~[+01:00] - Temps: 77.6°F [25.3°C] - Humidity: 79.9% - VPD: 0.64 kPa - Soil %: [52, 42, 48, 45, 53, 62, 56, 62, 54, 74] ----------------------------------- - [19:38]: Night check on the 4x4 tent. --- Garden is looking great. --- Terpenes are still maturing and buds are getting coated with trichomes. --- Continuing with daily defoliations. - [20:07]: Took the weekly general PPFD readings. ------ Chill Out OG #2 was around 520 μmol/m²/s which gives a DLI of 22.46 mol/m²/d under an 12/12 light cycle. ------ Heady OG BX1 #1 and TKO #2 were around 1234 μmol/m²/s which gives a DLI of 53.31 mol/m²/d under an 12/12 light cycle. --------- Grow Light Intensity: LV5 @ ~396.3W - [20:11]: Took the weekly height and light distance measurements. ------ Chill Out OG #2 was about 18" away from the grow light. ------ Heady OG BX1 #1 and TKO #2 were about 2.5" away from the grow light. --------- Max Plant Height: ~52" [Distance From Grow Light To Top Soil] ------ Chill Out OG #2 was about 34" tall. ------ Heady OG BX1 #1 and TKO #2 were about 49.5" tall. - [21:16]: Checked the 3x3 veg tent. --- Veg garden looks healthy and green. --- All clones and veg cuttings look great. - [20:22]: Checked for roots. --- Gently lifted the Heady OG BX1 #1-1 cutting out of the propagation tray. --- Got roots. Nice. --- Set her gently back into the tray. --- The rest of the cuttings also have roots. Great. --- Alright. Time to transplant rooted cuttings. - [20:38]: Planting into clear cups with bottom holes cut out for drainage. --- Will also be using opaque red cups (without holes) to protect the roots from light damage. --- Partially filled each clear cup with recycled BuildASoil 3.0 potting soil. --- Made sure the soil at the bottom of each cup was well compacted. - [20:54]: Inoculated each cup with Great White mycorrhizae along with a bit of Beauveria Bassiana. ------ Sprinkled 1/16tsp of Great White ------ Sprinkled 1/64tsp of Beauveria Bassiana Plus --- Mainly tried to dust the center of each cup. - [20:59]: Placed a rooted Coco Coin into each inoculated cup. --- Made sure each cup still had enough room for more soil. --- To fully hydrate all Coco Coins, misted each with about 20-30 sprays of RO water. - [21:13]: Gently filled each cup with more soil. --- Completely covered each Coco Coin making sure to tuck the sides in. --- Each Coco Coin is about 1/4-1/2 inch below the top soil. --- Marked the names on each cup with blue painter's tape. --- Time to add mulch. - [21:22]: Covered the soil with BuildASoil Organic Straw Mulch. --- Made sure the top soil was completely covered. - [21:43]: Filled a measuring cup with 2 cups of RO water. ------ Added 1/64tsp of Quillaja Saponaria Extract [60] ------ Added 1/16tsp of Horticultural Aloe ------ Added 1/16tsp of Horticultural Coconut ------ Added 1/8tsp of Mycrobe Complete --- Mixed and poured the solution straight into a spray bottle. --- Time to water. - [21:46]: Took the initial dry soil weight before watering, ------ Heady OG BX1 #1-1 » 256.9g ------ Heady OG BX1 #1-2 » 255.4g ------ TKO #2 » 252.5g --- While on a scale, --- Evenly misted the top of each cup with the wetting solution. --- Did not spray the top growth. --- Misted 10-20 sprays. Waited a moment, then misted again. --- Repeated this process until each cup weighted at least 300g. --- There was no runoff. - [22:04]: Took the saturated weight after watering, ------ Heady OG BX1 #1-1 » 335.3g ------ Heady OG BX1 #1-2 » 335.4g ------ TKO #2 » 335.5g --- Marked the watering date, pheno names, and weight ranges on each red cup with blue painter's tape. --- Then placed each clear cup into their corresponding red cups. --- Placed all cups into the 3x3 veg tent, --- Have the cups resting on the drip trays on top of unused 3-gal pots. --- Done. - [22:51]: Checked the Ecowitt soil moisture sensor data: ------------------ [ 3x3 VEG TENT – GR3 ] ---------------- ------ 50% - [CH01 » M1 » VBL – Heady OG BX1 #1] ------ 42% - [CH02 » M2 » VBR – TKO #2] ------ 48% - [CH03 » M3 » VFL – Chill Out OG #3] ------ 45% - [CH04 » M4 » VFR – Chill Out OG #2] ----------------- [ 4x4 MAIN TENT – GR30 ] --------------- ------ 53% - [CH05 » P1 » FLT – Chill Out OG #2] ------ 63% - [CH06 » P1 » FLB – Chill Out OG #2] ------ 56% - [CH07 » P2 » BLT – TKO #2-2] ------ 64% - [CH08 » P2 » BLB – TKO #2-2] ------ 54% - [CH09 » P3 » FRT – Heady OG BX1 #1] ------ 74% - [CH10 » P3 » FRB – Heady OG BX1 #1] --------- Veg: ~38%-45% | Flower: ~45%-55% --------- General: ~30% [Dry] «| ~45-60% [Moist] |» ~70% [Wet] - [22:18]: Got more genetics for the seed stash. --- Both orders from Irie Genetics and Poppin Fire (Home Grow TV / Highigan) have arrived. Nice. --- As for genetics, from Irie Genetics, ordered and received: ------ Arise [F2 #D] = Arise [F1 #D ] x Arise [F1 #D ‘King Solomon’] » PHOTO-REG (Poly Hybrid) → Gassy/Juicy Fruit Terpenes | x10 ------ Royal Pine = Pine Tar Kush x Arise » PHOTO-REG (Poly Hybrid) → Heavy Pine/OG Terpenes | x10 ------ Glow Stick = Lemon Chem x Arise » PHOTO-REG (Poly Hybrid) → Lemon/Chem Terpenes | x10 ------ FREEBIE: Tinfoil Hat = Durban Poison x Afterglow » PHOTO-FEM (Poly Hybrid) → Durban/Fruity Terpenes | x6 - [22:23]: From Poppin Fire, ordered and received: ------ Gorilla Mega Stank = Don Mega (by Solfire Gardens) x Gorilla Candy (by Fresh Coast Genetics) » PHOTO-REG (Indica Dominant) | x12 --- Currently gathering and prepping for future breeding projects. --- Been hunting and have my first breeding line almost set to hunt and stabilize, but still not too sure about both Chill Out OG cultivars. --- Depending on how the terps ripen, may consider popping some new genetics. --- Anyways, onwards to next week. [END OF WEEK 18]
Likes
77
Share
So this week the little gelatocake is on week 8 and is really starting to eat herself now, full of trichomes and smells like tutti fruity chewie sweets. Last week of nutes for her then mollases only. Week 7 for the othere gelatocake and shes starting to fatten up now as well as fade also. Babys have got big since re potting I will.bend them over later. Sherbert mimosa are still taking there time I think they are starting to get bigger 🤔🤣 I Will keep you updated lol. Happy growing guys 👌💪💚
Likes
92
Share
🌸 Week 3 Flower – Growing Strong, Tall, and Vibrant! 🌱 Hey Grow Fam! It’s already Week 3 in flower, and I’m thrilled to bring you this update because these plants are doing phenomenally well! Some are stretching up so tall that I might have to get creative in the coming weeks! Fruit production is well underway, and it’s absolutely amazing to watch the canopy fill out as these girls reach their potential. Aptus Holland Pack Unboxing & New Additions This week kicked off with a big arrival: the Aptus Holland nutrient pack! 🙌 I couldn’t wait to share the unboxing with you all; there’s a video up where I go through all the goodies, so check it out if you haven’t yet! Between the photos and videos, you’ll be able to see just how well these nutrients are already feeding these green beauties. Having a blast sharing more content lately—I’m in the zone with editing and creating, so get ready for even more shares! 🌡️ Environmental Control and Fine-Tuning the Reservoir pH Temps this week have been holding around 27.2°C with RH at 65.2% and CO2 at 800 ppm, creating a VPD of 1.26 for ideal flower development. The lighting intensity is at 833 PPFD, and the solution in the reservoir is fine-tuned to a pH of 6.22, EC of 475, with a temp of 21.8°C. Let’s talk pH in the reservoir: it’s a dynamic process, and I’m constantly adjusting it to keep everything at the right level. The pH tends to rise throughout the week, and each day, I work it back down, fine-tuning it to keep those plants happy and balanced. Managing pH is truly a hands-on job, and it’s worth every moment. I love staying on top of it for optimal nutrient uptake—it’s all about consistent effort and keeping that perfect range dialed in. Leaf Maintenance & Selective Defoliation These leaves are HUGE and gorgeous, creating a lush canopy that’s nearly too perfect! I’ve been taking a few leaves here and there, focusing on leaves that may be blocking light from reaching lower parts of the plant. Selective defoliation at this stage is key because it opens up airflow and allows light to penetrate deep, boosting energy distribution across the whole plant. Big, healthy leaves mean we’re getting excellent photosynthesis, but a gentle, strategic defoliation can guide that energy toward those developing buds. Leaf removal is all about balance, giving the plant space to breathe and thrive while still maximizing growth in flower! 🌐 TrolMaster + App – Real-Time Precision Huge shoutout to the TrolMaster system and the app—keeping everything in sync and at peak performance is honestly effortless with this ecosystem. The app provides a full overview of each environmental parameter, allowing me to make real-time adjustments as needed and track trends over time. The precision here is unbeatable, giving me complete control over temps, humidity, CO2, and VPD, ensuring my girls are in a controlled paradise 24/7. What I love most is how the app records everything automatically, so I always know exactly where things stand without having to keep separate records. If you haven’t tried TrolMaster yet, it’s a total game-changer for any grow setup! 💥 Shoutouts & Gratitude Massive shoutout to TrolMaster and Aptus Holland for powering this grow with tech and nutrition that’s second to none. And, of course, gratitude to Pro-Mix for the superb growing medium and to the seed banks behind the genetics. We’re running strong thanks to each of you. And to the whole community—thank you, everyone, from new friends to seasoned followers, lovers to haters. Your energy, whatever form it comes in, is all part of this journey, and I’m so grateful for it all. Special shoutout this week to my brother Daggadna—head over to IG and give him a follow! And if you’re loving the journey, remember to like, comment, and subscribe—it really helps the channel grow and reach others who may also dig this content! Discount Codes so you can save big on your next check out 💚💚💚 Kannabia - DOGDOCTOR 30% off SeedsmanSeeds - DOGDOCTOR 10% off CannaKan- DOGDOCTOR 15% off terpyz.eu - DOCTOR 15% off The Neutralizer - PORKIT5-DOG 15% off As always thank you all for stopping by, for the love and for it all , this journey of mine wold just not be the same without you guys, the love and support is very much appreciated and i fell honored and so joyful with you all in my life 🙏
 With true love comes happiness 💚🙏 Always believe in your self and always do things expecting nothing and with an open heart , be a giver and the universe will give back to you in ways you could not even imagine so 💚 Friendly reminder all you see here is pure research and for educational purposes only Growers Love to you all 💚💚💚
Likes
10
Share
@Pearl
Follow
My ladies were suffering from light stress but i solved the issue before any real damage was caused. I have two pheno types here & you can clearly see the indica / sativa I'm feeding one on greenhouse feeding bio base feed & enhancer And the other is being fed exclusively on SHOGUN Both are still doing amazing in their own ways. No problems. Just happy veggies 💚
Likes
Comments
Share
Good 😍🔥🔥
Likes
14
Share
Zdar týden dneškem končí. Startujeme poslední týden Majora čeká sekera. Obral jsem z něj žlutý starý listy, ale stejně to žádnej krasavec není😁 Co se týče zálivky pořád dostával to co předtím, 6L výtok 1500ml. Palice jsou obrovský tvrdý a krásně voní. Následující týden už bude dostávat jen základ A+B a pošlu do něj ten Flawles Finish, když už jsem to kupoval😂 Díky za rady, komenty, kritiku ať se vám daří. Fotky a video pořízeno dnes 05.07.
Likes
18
Share
@Canna96
Follow
Hey now, hope everyone is haing a great weekend. The Sundae Driver is doing pretty well, she is 2 weeks from getting wet under the Spectrum X which is only cranked up to 30% so she is putting out close to 230 Watts for the 7 seedlings. I will only keep 5 of them and give a couple away as I think even 5 mainlines will be tight in my 5X5 tent. My plan is to transplant them in a couple days, and then top them for the first time at the third node around day 20, and then hopefully top her again around day 27, then again hopefully around day 30, and then flip her to flower by then end of week 6 or 7 at the latest. If i go much past there I think I will run out of room but we will see how it goes. First time ever running a Royal Queen Seeds Strain, but I have smoked this Sundae Driver before and she was one of the tastiest strains I have ever tried, so very excited for this run. I hope everyone has a great weekend, thanks for stopping by, Stay Safe and Blaze On!!! 💪 Website: https://medicgrow.com/ https://growdiaries.com/grower/medicgrowled
Likes
5
Share
Let the Sun & Bloom Begin! 🔥🌞 The past few days brought a whole lot of rain, so I didn’t need to water or even check EC—nature handled hydration for me. But today, the sun finally made a solid appearance, and the top layer of the substrate dried out just enough. Perfect timing to introduce the effective microorganisms I had waiting! 🌿 Looking ahead, the forecast is calling for some serious heat. With that in mind, I’ve decided to kickstart the flowering stage manually on the 12th of June. Starting bloom a bit early should help me dodge the risk of mold during the damp September and October stretch. Better safe than sorry! 💡🌺 Overall, she’s been developing beautifully—strong, healthy, and ready for the next phase. I’m seriously excited to see how she handles the stretch and what kind of flower show she puts on! Stay tuned—things are heating up, and this Red Hot Cookies girl is just getting ready to shine! 🚀🔥🌼
Likes
45
Share
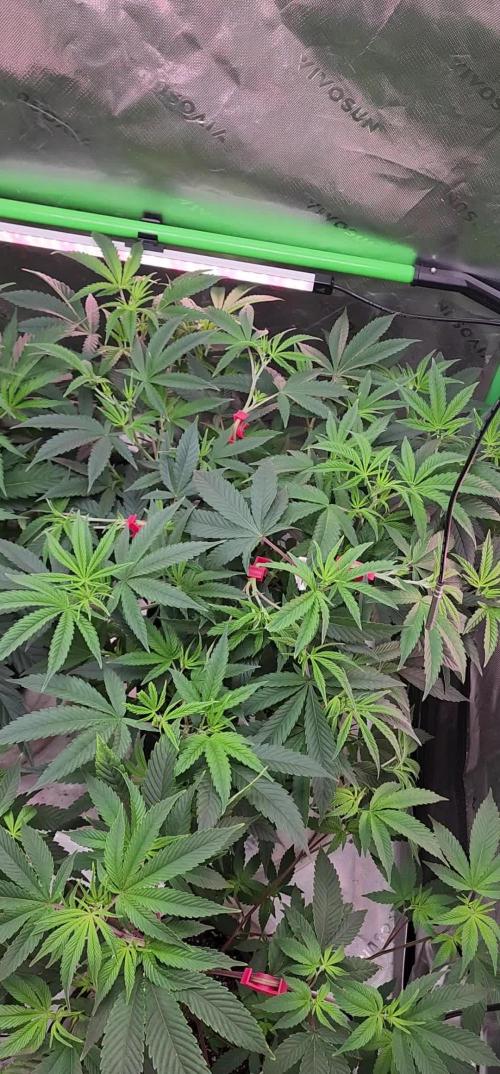
Hello guys! So it’s the end of week 2 of flowering and all is going well. Been watering every 2 days and, as you can see, we have white pistils and small buds in every plant Not much to say, the ladys are green, stretching and growing buds as it should Yesterday i’ve defoliated one of the critical + 2.0 clone and next week I’m going to defoliate the rest of the plants. Just wanted to test when it is better to do the defoliation so it’s kind of an experiment Tell me what do you think of how this is going
Likes
21
Share
Welcome to week 1 of my New Diary to Rule Them All!!! Here's the line up: 2 - CBD Medi Kush by Spliff Seeds 3 - DinaMed CBD+ by DinaFem 1 - Critical+ by DinaFem 3 - Cream & Cheese CBD by Seedsman 7 - Cherry Blossom CBD Hemp by Elevator Supply Co The 2 CBD Medi Kush plants and 2 of the DinaMed CBD+'s were all started from seed at the same time. All others are clones taken from cuttings from the plants I currently have in flower (the flowering plants are in the video). So the cuttings and seedlings were in my humidity for roughly a month. The first round of cuttings didn't do so well, so I took some more cuttings later when the plants were further into flower. A couple of the cuttings I took further into flower look amazingly good now, tons of nodes, branches, etc. Looking like a little bush. Once all surviving clones/seedlings were healthy enough I transplanted from dixie cups to small pots (I guess around 1 litre). They were transplanted into soil I had been composting and turning for 3-4 weeks. They really responded well to the transplanting and the new soil. Noticeable growth in 48 hours. My plan this grow is to go organic (or as organic as possible). While the soil was composting I added old fan leaves to the mix as well as Recharge, Mr B's Green Trees 'Growth', and Jobe's Organic granular fertilizer. I know, I know, everyone says don't use time release nutes with cannabis. BUT, The Rev said it was fine in his "True Living Organics" book. He actually recommends putting spikes in the flowering pots prior to transplant (I'm planning on trying that too). Recharge and Mr B's Green Trees don't claim to be organic specifically for whatever reason, but the ingredients include pretty much everything The Rev recommends adding to composting soil. Plus I love Recharge, that stuff is great! Organic or not I'll be using Recharge along the way. Here's the setup... First of all, I'll let you know my grow area is in my attic. The previous owners finished the attic with walls lights and even carpeting, but for some reason kept the folding attic stairs. Its pretty a pretty good space, we divide the attic in half. One side for my plants, they other for attic type storage. I have 2 2x4 tents and a larger flowering area (10x12'ish). One of the tents I use for drying only, the other is where I have these babies growing. The babies are currently under a single Viparspectra V300 300W LED. I'm having really good results with Viparspectra LED's. Bang for the buck, Viparspectra is hard to beat. I have a 2nd 300W Viparspectra which is a R300 (more reds) which is better for flowering. I may stick the R300 in the tent as well at some point, but for now the single V300 is doing a great job. In the flowering area I'm running 1000W HPS. The HPS has been kicking ass with the plants in flower now and I'm expecting more of the same with these girls when they are ready for the big time. Side note: I'm running a separate diary for the Spliff Seeds CBD Medi Kush. In that diary I'm just going to focus on the CBD Medi Kush specifically. But I did start the CBD Medi Kush and DinaMed CBD+ seeds at exactly the same time. So, in this diary I will do some comparisons and contrasts between the 2 strains as they grow. So far the DinaMed is taller, but the CBD Medi Kush has beautifully stacked node structure. This looks like its going to be a win-win. I'm also planning on doing an autoflower challenge soon. I want to try 2 plants in the flower room under 12/12 1000W HPS from seed to harvest and 2 other plants in my veg tent under 18/6 300W LED then see what the results are. I have the seeds picked out that I plan on using, but I'll keep that quiet for now in case I change my mind. Please follow and comment away!!! Any tips/tricks regarding organic gardening would be appreciated! 👍
Likes
4
Share
@Soskar69
Follow
This girl is a late bloomer, but now she is starting to reach my other girls. The plant stopped to grow and now she is pointing all her energies to to flowers. The smell it's very strange ( in a positive way). I have done some lollipopping because the plant is very bushy with 12-13 main colas, and a lot of side branches diddn't see the sunlight so i chopped them. Also I've found some unwanted guests, but outdoor it's a common thing. The first 5 weeks, I sprayed a mix of water and neem oil and it all went very good without any parasite, but when the plants started flowering I obviously stopped giving them neem oil, and now I founs sometimes insects, but nothing to bad, I nedd to wait another 3-4 weeks and then I'll harvest it :)
Likes
2
Share
@Unpluggy
Follow
Not much footage of that week. Rapidly turning purple now