


Likes
Comments
Share


Likes
6
Share


@DrReginald
Follow
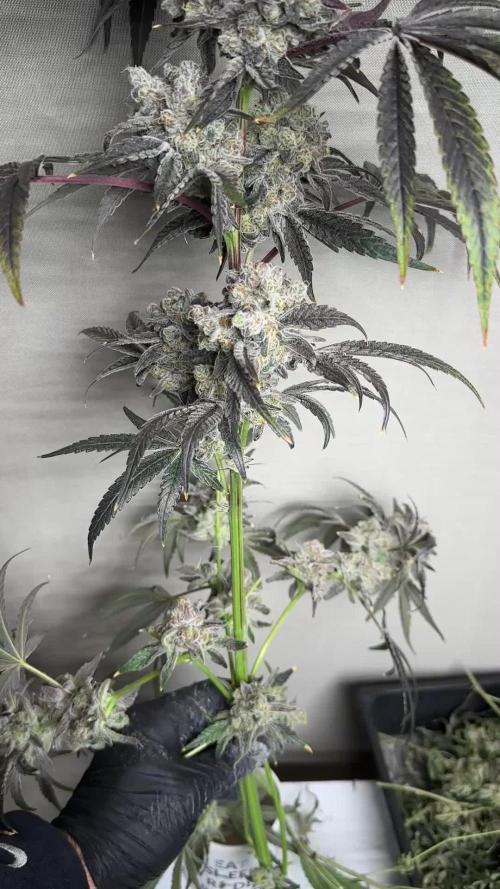
Перевел на 12/12 часов. Пока хорошо выглядит без удобрений) Жду начала цветения)

Likes
143
Share

@GreenHobbit
Follow
The Hobbit Hole – Woche 12
Eine weitere Woche im Hobbit Hole ist vorbei – und langsam beginnt sich die kleine Outdoor-Runde aufzulösen. 😅
Diese Woche hat sich einiges getan. Nicht unbedingt, weil die Pflanzen noch riesige Entwicklungssprünge machen, sondern weil wir inzwischen eindeutig in der Schlussphase angekommen sind.
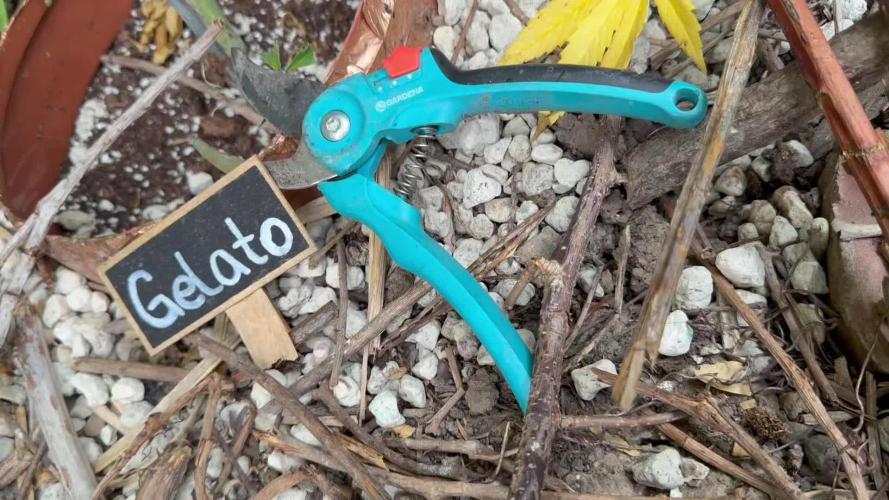
🍨 Gelato Auto – die Erste verlässt das Hobbit Hole
Für die Gelato war diese Woche Schluss.
Das zunehmend unbeständige Wetter hat die Entscheidung letztendlich etwas beschleunigt. Viel zusätzliche Entwicklung war nicht mehr zu erwarten und irgendwann wird draußen das Verhältnis zwischen „noch ein bisschen mehr Reife“ und dem Risiko durch Feuchtigkeit einfach schlechter.
Also fiel die Entscheidung: Gelato wird als Erste geerntet. ✂️🍨
Damit bleiben von ursprünglich drei Damen noch zwei im Hobbit Hole zurück.
☔ Ein Dach fürs Hobbit Hole
Nach dem letzten Wochenupdate gab es außerdem noch ein kleines Upgrade.
Am Samstag habe ich über dem Standort ein Tarp gespannt, damit die drei bei Regen nicht mehr völlig ungeschützt stehen. Gerade jetzt auf den letzten Metern möchte ich die Buds möglichst trocken halten und ihnen trotzdem noch jeden brauchbaren Sonnentag mitgeben.
Aus dem Hobbit Hole ist damit endgültig eine kleine überdachte Outdoor-Höhle geworden. 😂
👠 Cinderella Auto
Cindy ist inzwischen kaum noch zu übersehen, wenn man nach Zeichen der Endblüte sucht.
Das Laub wird zunehmend gelb und die Pflanze zieht sichtbar ihre letzten Reserven aus den älteren Blättern. Gleichzeitig sehen die Buds weiterhin gesund und ordentlich bereift aus. Besonders der Headbud hat sich schön entwickelt.
Unter dem Mikroskop wird es mittlerweile ebenfalls interessant: Viele Trichome sind milchig, daneben finden sich noch klare Köpfe und bereits die ersten eindeutig bernsteinfarbenen Exemplare.
Sie ist damit klar in der Schlussphase angekommen. 🔬
Noch sehe ich keinen zwingenden Grund, sie sofort umzuhauen. Solange das Wetter mitspielt und das Tarp seinen Job macht, bekommt Cindy noch etwas Zeit.
💜 Purple Punch Auto
Und Purple… nun ja. Den Namen muss man inzwischen wirklich niemandem mehr erklären. 😂💜
Sie hat sich wunderschön verfärbt. Dunkles Violett, rötliche Töne, teilweise fast schwarze Blätter und dazu die helle Trichombedeckung – optisch ist sie momentan ganz klar der Star im Hobbit Hole.
Auch bei ihr ist der Fade inzwischen deutlich sichtbar und die Pflanze steckt offensichtlich nicht mehr viel Energie in Blattmasse.
Beim Mikroskopcheck wirkt Purple momentan etwas weiter als Cindy. Viele der sichtbaren Trichomköpfe sind bereits milchig, einzelne bernsteinfarbene sind vorhanden, während sich dazwischen weiterhin klare Köpfe finden.
Ganz exakt möchte ich hier bewusst keine Prozentzahlen nennen – gerade auf den Zuckerblättern erscheinen Trichome häufig früher bernsteinfarben als direkt auf den Kelchen.
🔬 Jetzt entscheidet das Mikroskop – und das Wetter
Damit sind Cindy und Purple beide auf den letzten Metern.
Ich werde jetzt nicht versuchen, auf Teufel komm raus noch möglichst viele Tage herauszuquetschen. Wenn das Wetter halbwegs mitspielt, dürfen sie weiterreifen. Wird es allerdings wieder dauerhaft nass und ungemütlich, ist mir eine gesunde Ernte wichtiger als das letzte bisschen zusätzliche Reife.
Das neue Tarp verschafft mir dabei zumindest etwas mehr Spielraum.
Nach Woche 12 steht damit fest:
Gelato ist durch. 🍨✂️
Cindy steht kurz davor. 👠🔬
Purple wird immer dunkler und reifer. 💜
Und das Hobbit Hole hat jetzt sogar ein Dach. 😂
Mal schauen, wie viele Bewohner beim nächsten Update überhaupt noch übrig sind.
Die Ernteberichte stelle ich fertig wenn alle Pflanzen durch sind🏻


Likes
16
Share


@Prototype0181
Follow
The colorscheme popped up finnaly 😃
And for the rest nothing to report they are a joy to grow


Likes
6
Share


@GrapevineGrower2
Follow
Week 4 flower went fine with all three humming along nicely in living soil. Watered to saturation after applying a 1" top dressing of worm castings, compost, and Langbeinite from Down to Earth. No need for further plant training, defoliation, or pruning. Now, just sit back and let these girls finish their run.

Likes
84
Share


@Wastent91
Follow
Diciamo che le ragazze dovevano tutte e due arrivare a maturazione, invece io magari stupidamente (anzi sicuramente) ho raccolto due settimane prima la ragazza alimentata con RQS organico fertilizzante,, solo che era in una posizione scomoda, bloccata dalla mia rete per fare scrog, che l ha molto penalizzata e soprattutto l aria da quale parti rimaneva sempre spesso umida e la ragazza ne ha sempre risentito da quando ha iniziato a fiorire, mentre l altra aha continuato il suo sviluppo diventando uno "scherzo della natura *🤣 per grossezza e densità delle cime e delle foglie ritorte accanto piene di resina e sode come fossero cime loro stesse!! 😺 Anche se cmq mi rendo conto che avrei potuto avere risultati migliori con le potenzialità che ho acquisto nel tempo, e spero nella prossima edizione indoor di dare il meglio di me stesso e dimostrare che posso essere all altezza in un paese contrario alla legalizzazione riesco a produrre un prodotto di qualità che ormai sono 3/4 anni mi permette di non dover entrate in contatto con criminalità organizzata per avere due canne da fumare... È questo per me è già un lusso spettacolare che mi posso permettere ma per cui ho sudato, lavorato per anni prima di averlo... Vabbe buon 420 a tutti!


Likes
37
Share


@timbarin
Follow
Week 4/10 - 11/10
The plant dried up very nicely and no more eggs. She was moved back to her grow place and my gf topped her on Monday. Due to the excessive nitrogen she is getting only additives
6/10 she got only additives today.
7/10 steady growth is happy growth..
9, 10 she was fed amazing growth
11/11 closing the week with a video of the progress.
Catch up next week!
Processing
Likes
15
Share


@HisHope
Follow
10/5 Week 12
Harvest day for Bea her pics later
Hero remains in the tent for now she could use more time think she may be larger than Bea now they we look close.
We will see wont we
10/5 HARVEST DAY FOR Beatrice
light trim on remaining leaves and she yielded 1585 grams wet
Dry report in a few days


Likes
88
Share


@CBD_Sweden
Follow
Hi all the happy people here in GrowDiaries.
And hello to you who read my diary,
I just want to say that I am pleased that you have chosen to check in with me and in my diary.
I do this for myself and for a steady flow of my medicine.
Everything you read and see in my diary is 100% honest and I will never distort or beautify anything here.
I document my crops so that I can learn from my mistakes and also to look back at those different crops.
I try to update with pictures every day and with text if something special has happened in the garden.
This is my strainhunt for the best medicine and the beginning of my journey with cannabis and the cultivation of it.
This is my second feminised cultivation ever.
First, I'm just going to say something about my grow room.
The room is 2.14 meters by 1.7 meters and has a ceiling height of 2 meters.
It provides a floor area of 3.6 square meters.
I use a 54 Watt Lightwawe T5 for germination and 2 Pcs 400 Watt HPS lamps for bloom.
I have a channel fan that replaces the room air about 40 times an hour to get a comfortable environment in the room, the air enters a fresh air intake from the outside.
The air is purified through a carbon filter to then leave the room to the rest of the basement.
Then I use that heat to heat the rest of the basement.
I will use 15 liter Autopots to grow with and a 100 liter water tank that supplies the pots of water and nutrition.
I will grow completely organically in soil and will watercure my buds to get the best possible medicine for me.
Medical Mass is a new medical cannabis strain with a high CBD content and a low THC level that provides good medical properties without a strong psychoactive effect. This is a mostly indica plant that contains 40% sativa and 60% indica. Critical Mass and CBD rich strain were crossed to create this amazing valuable variety.
The plant suits both for indoors and outdoors, for beginner and experienced growers. The strain grows up to 60 - 100 cm tall and produces good yields for such height of about 500 - 550 gr/m2. The plant demonstrates great results even in small spaces. The flowering time takes only 7-8 weeks and the harvest comes in late September.
The smoke brings very strong, intense flavors with sweet notes of honey and skunk and an intense pleasant relaxation. Medical Mass is the great choice for each medical user due its small height, ease of growing, fast flowering and of course great medical potency.
2017-09-01. Started germinating.
------------------------------------------------------------------------------------------------------------
2017-09-03. 3 out of 3 seeds germinated today after 40 h, i planted them in soil and put them in my humidity dome under T5 lights. Added some pics.
KL 23.00. New video added, 2 of 3 girls is looking up from the soil.
----------------------------------------------------------------------------------------------------------------------------------------------------------------------------------
2017-09-05. New videos of the 3 girls. All is up from soil now and looking fine.
----------------------------------------------------------------------------------------------
2017-09-06. New pics.
-----------------------------------------------------------------------------------------------------------------------------------------------------------------------------------
2017-09-07. Kl 22.30. New pics.
-----------------------------------------
2017-09-09. Kl 21.00. New pics.
-----------------------------------------------
2017-09-12. Kl 12.00. New pics.


Likes
33
Share


@High_And_Hydro
Follow
She is feeling comfy now in her Joghurt-Becher Dr.Pepper DWC 😆
She looks a bit pale so next solution will be way stronger.
For a soda can she is doing ok i think.

Likes
5
Share


@btcywtsitw
Follow
This 3 of these seem to be doing fine. I actually accidentally threw away 2 of the other seeds by misplacing the proper germination paper towel. That's OK though all 3 of these popped so can't complain. Hoping to see a lot of stretching and a more leaf growth.

Processing
Likes
22
Share


@MELs_Garden
Follow
Del 5 al 12 de julio
Buenas a todos otra semana más.
La cosa avanza bien y Esta va a ser la última semana que actualizamos únicamente una vez por semana, volveremos a las actualizaciónes diarias.
Continuamos con nuestro LST diariamente.
8 y 9 de julio
Usamos el quemador de azufre alrededor de unas 5-6h como preventivo ante posibles plagas.
10 de julio
Hoy a tocado poda (bastante severa) podamos algunas hojas y seguimos doblando las ramas. Las dpblamps entre si, por debajo, por arriba... Por todos lados, es una salvaje.
Las temperaturas están siendo muy buenas en comparación a lo que me llegan en cuanto a los indoors de mi alrededor y de otros compañeros.
Tenemos unos 25 - 26°C en On cpn Max de 27.8°C y mínimas en pdf de 23°C.
Preparados porque viene lo bueno.
11 de julio
Regamos vía foliar 1 ml aceite de nem + 10ml spruzit + 1 ml de un producto que nos dieron para probar como preventivo e insecticida. De este mismo liquido inundamos la bandeja unos centímetros para realizar un riego vía absorción.
¿ Por qué ?
Pues porque los trips se alimentan en la superficie pero viven en la tierra, y muchos de estos están en la parte inferior de la maceta por lo que no tendran salida estos bichillos. Mi guerra con ellos ya viene de tiempo atrás y quiero mantenerlos a raya.
Likes
59
Share


@Jsammy09
Follow
I currently have the ladies drying in my dry tent on day 3 now. I have my temperatures around 61-63 degrees stable, with 50-60% RH fluctuating. Will be updating the diary with weights once they finish drying and I get them all trimmed up! Thanks everyone for taking a look, super stoked with how my first run turned out and will be starting my second run in the next few days as well so super excited. I have learned a lot from this run and looking forward to implementing things into my next run to improve. Will also update more info about the strain once I have it for sure. I will be pressing some of the flower and all of the dry sift from the trim. So if you are interested in that as well feel free to ask. Thanks everyone for checking out my diary! Good luck with all your grows and best wishes!
Dried for about 9 1/2 days. Just finished a 12 hour trim session, that was a lot. I ended up with 18.3 ounces of nicely trimmed buds, and a ton of larf and trim (26 ounces) which is fine because I will be dry sifting and pressing on the nugsmasher! I did press out a little and have some work to do to figure that thing out and dial it in.
I have learned a ton from this grow and look word to applying to my current grow. I see and have a much better understanding of feeding, training, and now I kinda see what is and is not going to developed that much. Going to give these girls time to cure. Will update. Thanks
As always tips and recommendations appreciated!
Likes
2
Share

@MrIssa3x3
Follow
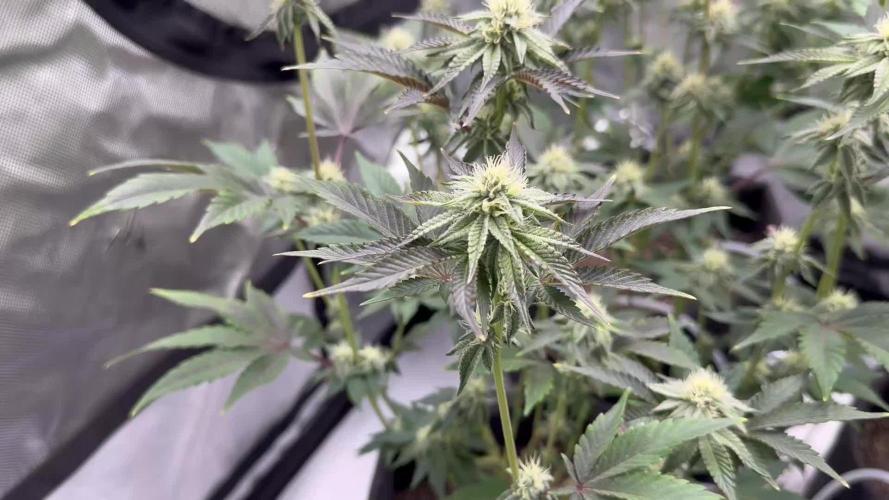
Day 28. Girls are looking good. Definitely got a good gnat population I’m dealing with. Girls are getting dripped for 2 mins every 2 hours. Pots are definitely on the lighter side so plants are drinking normal. Back left plant is fading pretty good already so been going a little harder on the Cronk but still no complaints. Keeping an eye out for anymore sacs. The frost is coming in EVERYWHERE so we’ll see 🤞🏾. Other than that they’re rollin!

Likes
5
Share

@CannaWolf420
Follow
Week number four.
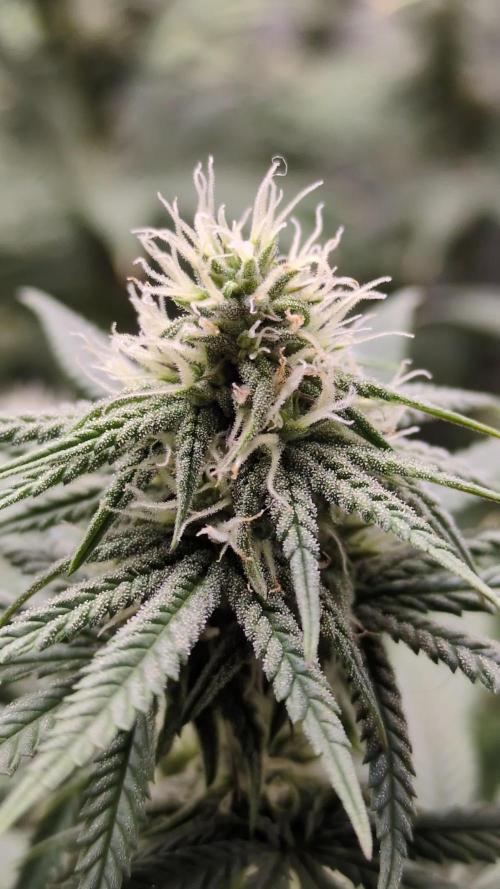
Man who would have known that a plant such as this could have a smell so prodominant. When I open my tent my nose is overcome by aromas of over ripe blueberries, I feel like I'm sticking my nose right into a jar of fresh blueberry compote. Yummy!
The tricom production thus far is very nice, along with bud development. I will slowly begin to adjust my cal mag along with the bloom B & A lower as the feedings go on.

Likes
35
Share


@SmokingTiki
Follow
Buds are growing and trichomes are coming! :) The smell is now quite strong.
I still poor +/- 2l in each pot during each watering (a little bit more for the 26l pots). I noticed that the leaf tips of all the plants become brown/yellow even far away from the light. I think it's because of a lack of nutrient so I started to progressively give BioBloom to all the plants.
I removed some leaves here and there to have a better buds exposure.
Plants heights at the end of the week:
Honey Melon Haze : 120cm (+4)
O.G. Kush : 75cm (+3)
Mandarin Punch #1 : 140cm (+13)
Mandarin Punch #2 : 123cm (+6)
The plants are now slowing their growth. I hope they will stop soon because the light is almost at the maximum height. The Mandarin Punch #1 is the highest plant I ever grow!


Likes
8
Share


@BudahBudz2020
Follow
Day 16 Notes
Took a few fan leaves off from the top they was blocking precious light...
I watered with about 1.5lt
I used.
1.3ml of bio grow to 2lt of tap water.
Have been removing leaves here and there
Day 21 Notes
I watered with 1.5 liters of tap water along with 1.3ml of bio grow and 3 drops of monkey Nutrients Root Shoot this root shoot stuff is actually really good they gave me a full free run and it's a UK brand