


Likes
Comments
Share

@fdvzdfgfdg
Follow
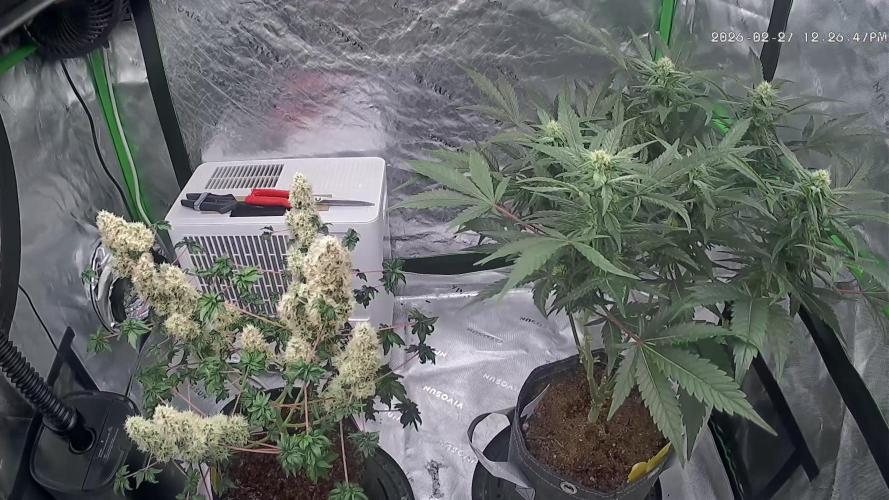
[2026 Feb 6 | Day 70] - She's now 6 weeks into flower and is maturing quickly. I defoliated her quite a bit this past week, removing all the fan leaves and any water leaves that were poking into nearby colas.
I've gone ahead and added some basic structural support to all the branches in the event that the buds get too heavy. The branches aren't as strong as I would like them to be where they connect with the main stem, and it's better to take precautions.
nutrients will be tapered off this week and part of the next. Lighting will remain in the 40-42 DLI range near the top leaves and be tapered off next week.
Trichomes are still mostly clear, but there's the odd milky head which could be just a trick of the light. The density of the trichomes are impressive though, they are so thick in spots that the heads are smushing together.
Her smell is getting pretty strong, and is now a mix of vanilla, berries and diesel.
Likes
35
Share


@nonick123
Follow
Día 37 (08/07) Ajustes de LST en todas las plantas! 🚀
Día 38 (09/07) Ajustes de LST en todas las plantas. Las ramas inferiores están creciendo como un cohete! 🚀😍
Riego con 250 ml H2O pH 6,5
Día 39 (10/07) Las plantas se muestran sedientas! Creo que el cepellón está lleno de raíces y piden el trasplante!
El crecimiento no se ha visto afectado de momento
Riego con 500 ml H20 pH 6,5
Día 40 (11/07) Paso a regar con 500 ml / día, ya que hace mucho calor (30 ºC) y efectivamente las plantas ya han copado la maceta de raíces
OnionOG y KS1: Las ramas de nodo inferior se han quedado enanas tras el entrenamiento, de modo que las elimino y aplico canela en polvo en los cortes
Riego con 500 ml H20 pH 6,5
Día 41 (12/07) Riego con 500 ml H20 pH 6,5
Clones! Mi experimento vuelve a demostrar que NO necesitas complejos productos de clonación ni sistemas para obtener clones!
Hace 15 días puse 2 clones con el tallo sumergido en miel durante 5 minutos en una maceta de 400 ml con PRO-MIX HP BACILLUS + MYCORRHIZAE
He mantenido la humedad alta con una cúpula de humedad casera hecha con una botella de agua PET de 5 litros cortada por la mitad y pulverizando a diario.
Han estado los 15 días en mi terraza con luz indirecta, y temperaturas que rondan los 30 - 32ºC durante las horas centrales del día
Hoy los he trasplantado a una maceta de 1 litro porque ya habían formado raíces y empezaban a formar nuevas hojas!
🐥🐥🚀🐥🐥
Día 42 (13/07) Riego con 500 ml H20 pH 6,5
Día 43 (14/07) Trasplante a maceta definitiva de 21 litros de ROOTPLUS Pot de GSKOREA GLOBAL!
Estas macetas son una maravilla!
Proceso de trasplante:
Se prepara con 17,85 Litros (85%) de sustrato PRO-MIX HP BACILLUS+MYCORRHIZAE + 1,05 Litros de Humus de Lombriz (5%) + 2,01 Litros de Insect Frass (10%) + 210 gramos de Earth Vibes Super Soil (10 g/L substrato)
Se llena la maceta de sustrato con las manos (limpias) y rompiendo los trozos más gruesos, para que el sustrato esté aireado y esponjoso, sin presionar
Se coloca una maceta vacía de 6,5L para que quede la forma perfecta de la maceta donde están actualmente
Se espolvorea la parte proporcional de la probeta de microorganismos sobre el agujero de trasplante
Se saca la planta de su maceta actual (bonitas raíces 😍) y se coloca en la maceta final
Se riega muy lentamente hasta percolación profunda con H2O EC 0,5 pH 6,5
Una vez asentada, complemento con un riego de 500 ml con 25 ml/L de Humus de Lombriz Liquido
Se coloca mulch (acolchado) de paja para evitar traspiración excesiva y cuidar a los microorganismos del suelo
A ver como reacciona al trasplante!
Aplicación foliar Kelp hidrolizado de Lurpe Solutions a 0.25 ml/l
Realizo ajustes de LST aprovechando el trasplante a la nueva maceta. De momento tienen una canopia muy bien formada!
💦Nutrients by Lurpe Solutions - www.lurpenaturalsolutions.com
🌱Substrate PRO-MIX HP BACILLUS + MYCORRHIZAE - www.pthorticulture.com/en/products/pro-mix-hp-biostimulant-plus-mycorrhizae


Likes
33
Share


@MrStryker
Follow
Welllllllllllllll last week of nutrients next two weeks will be watering with king crab molasses and flawless finish also cut down that early finished she just stinks so sweet lol so that will hang for a week or more !!! Going to start another grow this week which willl consist of Runtz Muffin again Sugar bomb punch , alien rock candy bruce banger Gelato O.g contemplating buying another 5x5 tent willl see what happens happy growing


Likes
2
Share


@Palto86
Follow
semana 9 desde germinación. solo utilizo esos fertilizantes. no mido ph. no mido ec. agua directa del grifo. la mas alta mide 110cm y la mas pequeña 90cm. utilizo unas alzas para elevar las mas pequeñas y dejar el cultivo en un mismo nivel.
no utilizo defoliación. ni podas. solo un poco de lst.
el panel led es DIY. lo fabrique yo con 9 led citizen clu 048 corriendo a 50w cada uno. 3 temperaturas de color distintas. (5 led 3000k, 3 led 2700k, 1 led 3500k)

Likes
91
Share


@Salokin
Follow
Hi Growmies,
I'm excited to share some big news today! Although there have been some unexpected twists, it's all part of the incredible journey of gardening.
I've just completed the harvest, a tad earlier than initially planned, due to finding a bit of mold in one of the buds. Despite this minor hiccup, the trichomes were already at a decent 10% to 15% amber. So, all things considered, the timing ended up being pretty spot-on. The harvested weight was a solid 609 grams after trimming, which is quite a feat!
A lesson learned for next time: perhaps I let her grow a few too many buds, leading to a denser canopy than ideal. But on the bright side, the aroma is absolutely divine. I sampled an airy bud that had dried a bit, and wow, it packs a stronger punch than its clone mother. And the flavor? Pure, unadulterated cheese – no hint of pineapple here!
Now, the anticipation builds for the final dry weight, which I should know in about 3-4 days. It's always exciting to see the fruits of our labor fully realized.
A huge thanks to everyone who's been following along on this journey. Your interest and support mean the world.
And now, the adventure continues! I've started on Epic Buzz by Anesia Seeds. The diary for this new chapter is up and running, and the seedlings have already sprouted, marking the beginning of another exciting phase.
(https://growdiaries.com/diaries/185718-grow-journal-by-salokin)
I can't wait to share more updates with you all. Here's to the continued growth and learning in our gardening adventures!


Likes
13
Share


@shwable
Follow
Everything looking fine so far.
I gave them a little amount liquid grow enzymes with distilled water on 19.04. what seemed to boost the growth.
If You have any tipps or recommendations feel free to let me know.
Likes
3
Share


Likes
9
Share


@Appoldro420
Follow
Title: 100% ChatGPT-Guided Grow – 12/12 Fast Flower Test (With Supervision)
Hey growers!
This grow is an experiment: I'm letting ChatGPT guide my entire grow cycle, from lighting to nutrients to environmental tweaks. It’s all based on AI suggestions.
Of course, I’ll still be keeping a close eye on things — if I see something going wrong or the plants aren’t vibing with the plan, I’ll step in. But the idea is to test how far AI can take a grow under controlled conditions.
Strains – All from @Sweet_Seeds (F1 Fast Version):
Mental Rainbow F1 Fast Version
Tropicanna Poison F1 Fast Version
S.A.D. Sweet Afgani Delicious F1 Fast Version
Gorilla Girl F1 Fast Version
Setup:
Coco in 20L @MarsHydroLED SmartPots
Grow tent: @SecretJardin DR240W
Lighting: 2x 720W LM301H EVO LEDs
12/12 from seed
Germination: May 14th / Main grow starts May 20th
Nutrients: Hy-Pro Coco A/B CalMag Pro, @BAC Silica Power, F1 Extreme Booster
Irrigation: Week 1 hand watering, then Blumat
pH starts at 5.8
CO₂ supplementation via natural gas system (Spider Farmer GGS)
Goal: Complete a full grow cycle in 10 weeks or less, from seed to harvest.
Updates will be posted in a personal yet informative style — a hybrid of stoner chill and data-driven grow logs.
Let’s see what AI can do in the grow tent. Stay tuned! 🤖🌿
🌱 Weeks 1–3 (May 20 – June 9) – Seedling to Early Flower (Stretch Phase)
Goals: Strong root development, firm stem structure, controlled stretch
Light: 12/12, start at ~500 PPFD → ramp up to 800 PPFD (day 14–21)
CO₂: 1500 ppm (only active when lights are on and temps 26°C)
Temperature: 26–28°C day / 22–24°C night
RH: Start at 70% → gradually lower to 60%
Nutrients (EC ramp-up):
Start EC: 1.0 → increase to 1.4
Plagron Cocos A+B + CalMag Pro (0.2 EC tap water)
Always mix Silica Power first (0.1 ml/L)
Actions:
Week 2: Start light defoliation on lower leaves
Week 3: Begin LST if desired
pH: 5.8 throughout the veg phase
🌸 Weeks 4–5 (June 10 – June 23) – Flowering Phase 2 (Bud Set)
Goals: Initiate flower formation, maintain healthy leaf mass, stimulate bloom
EC: 1.5–1.7 (monitor Blumat watering rate carefully)
RH: 55–60%
Nutrients:
Plagron Cocos A+B
CalMag Pro
Silica Power (0.1 ml/L – only until end of week 5)
Start B.A.C. F1 Extreme Booster at half dose, watered manually twice a week
Light: 900–1000 PPFD if plants can handle it
🌼 Weeks 6–7 (June 24 – July 7) – Flowering Phase 3 (Bud Building)
Goals: Develop dense flower structure, maximize flowering potential
EC: Up to 1.8 max
RH: 45–50%
Nutrients:
@Plagron Cocos A+B + CalMag Pro
@BAC. F1 Extreme Booster at full strength
Actions:
Final defoliation at beginning of week 6
Inspect leaves regularly for airflow and mold prevention
💧 Weeks 8–9 (July 8 – July 21) – Ripening Phase
Goals: Maximize terpenes, trichome maturity, flush medium
Week 8:
EC: taper down to 1.4
Stop using booster
Optional single flush with enzymes (manual watering)
Week 9:
Only plain tap water through Blumat (~0.2 EC)
Temperature: 24–26°C
Dim lights to ~600 PPFD for final 3–4 days
✂️ Week 10 (July 22 – July 28) – Harvest
Trichome check: Aim for 10–20% amber with a loupe
Optional: 48 hours darkness before harvest
Temperature: Keep low (20–22°C) to preserve terpenes
Deadline: Harvest no later than July 28
Powered by the new 2025 @SpiderFarmerLED GGS system..
Detailed setup (only SF parts mentioned here):
SF GGS Grow Light Controller (1x)
SF GGS AC10 Kit (1x)
SF GGS 6 Inch Clip Fans (2x)
SF GGS 6 Inch Inline Duct Fan (1x)
SF GGS SensorPro Kit
SF Ultrasonic Humidifier
May 20 – CO₂ moved outside, lighting dilemma, and a warm future ahead
Moved the CO₂ generator outside the tent today. Immediate win: steady 700 PPM from just the pilot light, no active burn needed. When turned off, it drops neatly to 400 PPM, matching the calibration point. Double-checked with the Dimlux CO₂ sensor—readings line up perfectly.
Still no tracking info for the originally ordered lights, so out of impatience I grabbed two new 720W LM281B fixtures from Germany this afternoon. Should arrive Friday/Saturday. It's a Trade Assurance order, so in theory, I'm covered.
Now the question: let the seedlings coast at 259 µmol for two more days, or hang the old lights to boost them to 500 µmol? Eight out of twelve are already above soil, and honestly, I’d rather not mess with the current vibe. Leaning toward leaving them be—low stress, happy sprouts.
Best part: temps dropped to 27.9˚C inside the tent now that the CO₂ generator’s out. Room itself is 24˚C, so all in all pretty chill. Curious what’ll happen once those dual 720W monsters fire up… it’s gonna get toasty, no doubt.
24/05: Stocked up on new Plagron nutes—finally. Now I can lock back into the full 10-week feeding plan (Plagron Cocos + B.A.C.). Flushing the res tonight and going full reset. Mixing fresh soup right after, dialed in to match this schedule:
Week 1:
Plagron Cocos A/B: 2 ml/L
B.A.C. Silica Power: 0.2 ml/L
Plagron CalMag Pro: 0.5 ml/L
B.A.C. F1 Extreme Booster: 0 ml/L
EC: 0.9–1.0
pH: 5.8
PPFD: 500
DLI: 22
RH Day: 70%
RH Night: 65%
CO₂: 700 ppm
Likes
18
Share


@Nune2021
Follow
Die Pflanzen sind jetz unter 245 Watt sanlight und ihre end töpfe hab die noch mal getopt und runter gebunden ich lass die Pflanzen jetz noch paar Tage anwachsen und dann schick ich die in die Blüte da ich ja an diesen Contest teilnehme muss ich mich an zeitplan halten

Likes
4
Share


@Smokwiri
Follow
this one was on a cold spot, and didn't grow large, but very easy to grow, nice compact bud, very light smell, can be grown indoor without filter if you grow a couple of 'm. wonderfull strain, i will try this one again in the coming year in a soilles setup

Likes
10
Share


@BelgianBudtender
Follow
Hey ho fellow farmers.
My little girl is two weeks old and I feel comfy entering the competition with this diary now, she's established and growing fine.
Germination could have gone better, I let her stretch a bit too long, I wanted her to stretch a bit because of my dripper ring, I had seen some very dense and compact phenos of this strain and didn't want to risk mold issues down the line.
as a result she fell over at the start of the week, I supported her and she seems to have recovered since.
She also threw some weird shaped leaves on her second nodes, likely from the stress of falling over, I tend to find ruderalis does this when stressed, more so than normal weed.
They look like lil thumbs up.
Thanks for coming by this week, hope to see you next week.
Stay safe and keep growing
Likes
7
Share


@jojopfoh
Follow
Responding well to the bloom nutrients. it is so wide and tall now. I will defoliate and LST this week. She is just exploding. I did some defoliation, removed lower buds and added more stakes to open her up. Her bud stacking is remarkable


Likes
24
Share


@Bncgrower
Follow
Harvested last night, truly strong smell, cultivation was absolutely perfect from start to finish. Very happy with the result, anxious for the drying and curing process! Thank you for following along.. 🤜🤛🌱🌿🌲
Likes
10
Share


@BudXs
Follow
FIRST OFF - A HUGE THANK YOU TO ALL OF THE GROW DIARIES COMMUNITY FOR YOUR SHOW OF SUPPORT. I WISH I COULD FOLLOW EVERYONES DIARIES AND LIKE EM ALL. ITS OVERWHELMING, AND I APPRECIATE ALL OF YOUR KIND WORDS. YOU ARE ALL GROWMIES
Thank you to GHL for the beans. This will be a first and will reqhire some timing skills that i think you will admire.
Germ method by BudXs;
https://www.instagram.com/tv/CMn3M9zl7H9WxMOpnDBxhm1TP5cloXQg7ZIpaQ0/?igshid=mlodbrr9vpcq

Likes
39
Share


@King_Geedorah
Follow
I can only say that the rate of growth im getting is amazing. Out of all three of the purple punch seems to have the most potent smell I am not sure if it's just the genetics or if it's what I'm feeding but we will see once the other start to develop. Touching the purple punch stem leaves a strong smell on the fingers and giving the bud small pinch smells strongly of grape chapstick. Stay tuned 😜
Likes
44
Share


@The_Good_Twin
Follow
11 Sep 2021
Today starts week 2 of the flowering stage and week 10 of life for my lovely Ladies. I did some massive defoliation and pruning the other day and all three of my babies are looking amazing afterwards!! Absolutely beautiful! I have a short video log (I’m not cool enough to call it a vlog), and a few pictures to upload to start this week.
I must admit that I really thought I may have overdone the defoliation and pruning, but so far it’s turning out exactly as I had hoped. There are budlets forming at every node, and all three plants are looking healthy and strong.
I decided to look at my feed chart and to count backwards from the date that they should be ready for harvest and to arrange their feeding schedule. I made a plan where I can provide a good steady level of nutrients in the proper stage of growth, and schedule time for the flush to be done by the time harvest time arrives.
So today I started the Mid-Bloom stage 4 of my Flora-Trio 6 part feeding chart. I’m still giving half the nutrient level until I know there are no issues, then I will adjust to full strength if necessary. At 50% strength each plant was given: CALiMAGic 2ml, FloraMicro 2.4ml, FloraGro 2ml, FloraBloom 4.2ml, Floralicious Plus 1ml, and Liquid KoolBloom 1ml mixed into a gallon of water. The initial pH for all three gallons was 6.3. I wanted to adjust them up, so I added 1.2ml of pH UP to each gallon which adjusted them as follows: C1 - 6.7, and C2/C3 were both adjusted to 6.6.
I still don’t have a replacement TDS meter, so only pH was measured in the runoff. Runoff pH was as follows: C1 - 5.9, C2 - 6.1, and C3 - 5.8. The runoff levels of C1 and C3 are still lower than id like, but still manageable.
As I mentioned several times above; my plants are looking great, and I plan to keep growing them as they are until this method needs to be adjusted or changed. I’m just letting them grow wild. Granted, I’m trying my best for them to grow the way I want, but I’m not using a support net at all (yet). I say (yet), because once the buds start to bulk up, they may need support to stand upright. If that day comes, I’ll use the net. Time will tell.
The temperature in the tent was 82F, and the humidity was 45%. So far my trio is growing beautifully! Enjoy everyone! I am!!
14 Sep 2021
I ended up using only about half of each gallon the other day, so today I gave the rest of each gallon to the perspective plant it belonged to. None of the plants had any real runoff from the amount given today, so I’ll probably start feeding every two days instead of every 3-4. It happens with each grow. The trick is to identify how much they need, and how often. It seems to change with every plant.
So as I stated above; each plant received about 1/2 gallon of water and nutrients that was prepared a few days ago. Each plant received CALiMAGic 2ml, FloraMicro 2.4ml, FloraGro 2ml, FloraBloom 4.2ml, Floralicious Plus 1ml, and Liquid KoolBloom 1ml.
The pH going in was: C1 - 6.7, C2/C3 - 6.6. As I said above, there wasn’t enough runoff to measure, so I don’t have runoff data today.
The temperature in the tent was 84F, and humidity was 57%. I measured each plant and adjusted the lights according to their growth. C1 is now 23 inches tall, C2/C3 are both 23.5 inches tall. I adjusted the lights to all be 15 inches over each plant. Light spill off is still awesome for all three plants, and each one of my lovely ladies is looking absolutely amazing!
15 Sep 2021
My plants are doing AWESOME!! I looked in on them a little earlier today and just sat in my floor and looked at them. They are doing amazing! Absolutely beautiful!!
I have used a support (scrog) net for each of my grows so far; till this one. At least so far that is. I may end up putting it in to support the branches once they are loaded with bud, but for right now I have just let them grow as they naturally want too.
Of course there are some exceptions to that last statement. At the end of my first week of flower I decided to defoliate and prune them down. I did so much defoliation and pruning that I thought I may have hurt my girls, but nope! They have responded even better than I had hoped.
I trimmed off all of the lowest branches that weren’t already long enough to get full light exposure, as well as most of the small intermediate branches growing off of more established branches. The result… every node growing on every branch is developing buds! All of them are getting full light exposure, and ventilation from the fans inside the grow room.
These three are looking better than any of my previous plants thus far. I am very pleased with how they’re doing!
I’m feeding again today because what I gave them yesterday just didn’t seem sufficient. None of them had any runoff to measure; so I’m going to make sure that they do as well as possible!
I’m sticking with the mid-bloom stage 4 of my Flora-Trio 6 part feeding chart at 50% of recommended levels. My plants are doing great at 50% strength so far, so if it isn’t broken, don’t fix it! No deficiencies have been seen, so I’ll keep on keeping on that.
Each plant received a mixture of a gallon of water with the following nutrients: CALiMAGic 2ml, FloraMicro 2.4ml, FloraGro 2ml, FloraBloom 4.2ml, Floralicious Plus 1ml, and Liquid KoolBloom 1ml.
C1 and C2 didn’t take the whole gallon, but about 3/4 of it. C3 took the whole gallon, but that may be because it is in a bigger pot.
The initial pH of each was: C1 - 6.4, C2 - 6.5, and C3 - 6.3. I added pH UP to each as follows: C1 - 2ml, which adjusted to a final pH of 6.7. C2 - 1ml, which adjusted to 6.9, and C3 - 1.5ml, which adjusted to 6.6.
I still haven’t gotten another TDS meter, so no TDS data to report. Runoff for all three plants was lower than I expected. C1 was 5.8, and C2/C3 were 5.7. I really expected them to be near 6.2 or thereabouts, but nope. I’m going to have to keep an eye on that.
The humidity today was 65%, which is pretty good. The temperature in the tent was 84F. It was over 90F outside today, so hot outside = hot in the tent. 🤷♂️
They’re still looking great! Happy growing everyone!

Likes
25
Share


@DeepRootsGrowTrees
Follow
FAT BANANA 🍌 AUTO / RQS
WEEK #10 OVERALL
WEEK #5 FLOWER
This week she's doing good no issues to report she's looking good buds are getting structure to them and they have nice trichome coverage! Stay Growing!!
Thank you for stopping by and taking a look much appreciated!!
Thank you ROYAL QUEEN SEEDS!!
RQS / FAT BANANA 🍌 AUTO

Likes
9
Share


@Rastaluna
Follow
Planties are getting bushier :3
This week we focused on LST, providing as much light so smaller tops could reach the size of bigger ones.
We raised the light cause NL started showing signs it didnt like being close to the light, but also saw some other issues, tips of canna leafs started to yellow, about a week and a half ago we fed them some nutrience, home made organic and also a mix. So now im not really sure from what caused the yellowing tips. Nutriante deficiancy? Nutrient burn? Light?
Taking now a closer look, to see upcoming signs that would make this situation clearer.
Apart from yellowing leafs, the smell(rrrlll goood) becomes more noticable, its nice coming to the tent, feels like youre high from growing nature :=)
We topped speedy chille and took of yellowing leafs, she really liked it and is now growing 4 tops