Likes
Comments
Share
@Miketama
Follow
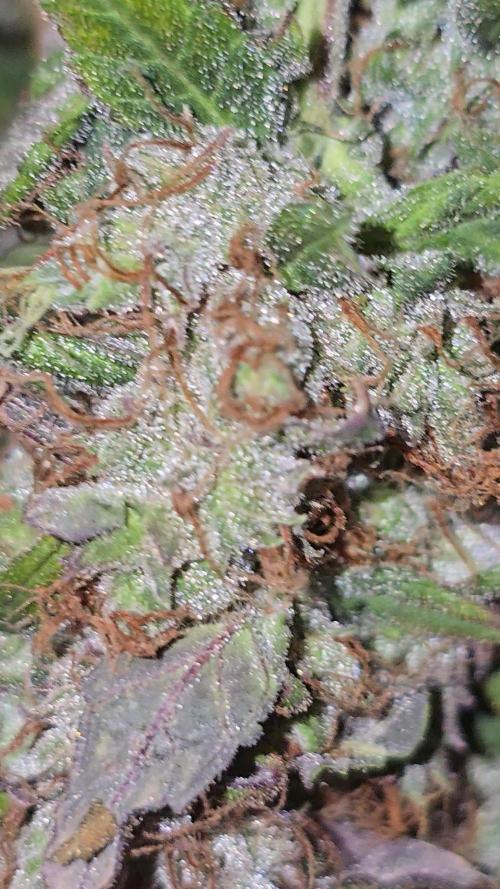
Harvest week for the Milky Way F1 growmies 🙌 Pretty happy with how she handled this cycle, recycled soil first time ever, dead of winter, undersized light for a 100x100 tent… she just kept going 💪
In previous runs I did scaled harvests, and every time I noticed a visible resin boost and even some anthocyanin production on some phenos, confirmed that a sudden light intensity increase late in flower does something interesting.
This time I went a different route: last 6-7 days I stripped most of the non-resinous fan leaves and redirected a lateral bar onto the mid/lower zone to get the same effect. Curious if mechanical stress from defoliation plays a role here too, anyone know anything about jasmonic acid? 🤔
Late flower I pushed the setup to ~200w adding 660nm red bars at 40-50cm, which clearly tightened up the buds compared to previous runs 👀
Pulled the CO2 bottles in flower, without a way to measure it I’d rather focus on VPD and fresh air circulation 🤷 Kept them in veg where humidity tolerance is higher anyway.
Now she’s drying and I can’t wait to see how the wet/dry ratio lands 🌿

Likes
8
Share

@Gram_Solo
Follow
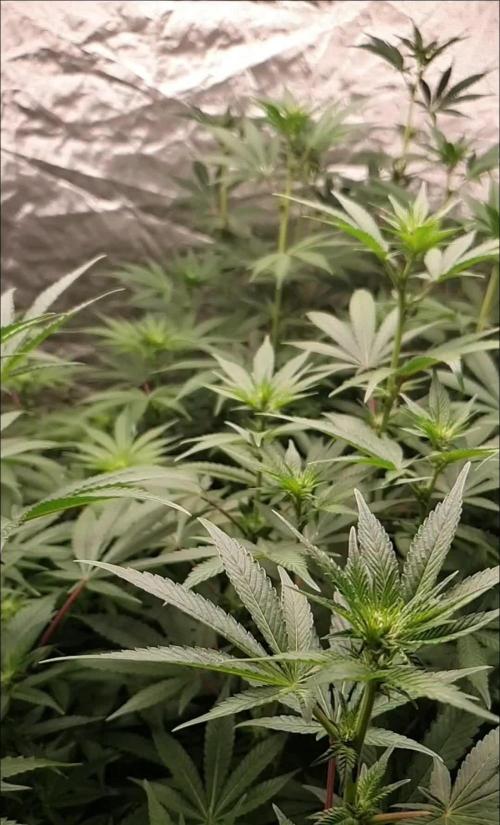
Bud sites coming through now!
Bud ignitor 🔥🔥
Did another defoilation on the bottom half and took away any big blocking fan leaves.
Need to sort my light height out this week as there nearly touching.

Likes
17
Share


Likes
34
Share


@Salokin
Follow
Hello Growmies,
We’ve entered week 10, and the Watermelon Candy F1 Hybrids stand as a testament to the art of cultivation. Sharing the tent with Epic Buzz and Red Banana Pudding, they've reveled in the same meticulously controlled environment, with each plant exuding its unique vibrance.
The fade has begun its delicate dance, a visual symphony of hues signaling the nearness of harvest. This gradual shift is not just a visual treat but also a sign of the plants channeling their energy into the dense, trichome-laden buds that have developed into rock-hard nuggets. The intense, pungent aroma that fills the air is a prelude to the flavors and effects to come.
Watermelon Candy #1 stands out with its remarkable bud structure, its stature commanding attention amidst its siblings. Not to be outdone, Watermelon Candy #2 and #3 boast their own magnificent floral nodes, each a promising indication of the bountiful harvest that looms a mere two weeks away.
The TrolMaster's environmental control has been nothing short of exceptional, keeping the conditions optimal for these final and decisive stages of flowering. Our unwavering nutritional regimen has supported the plants without the need for alteration, ensuring a finish as robust as the care provided.
As we anticipate the impending harvest, we're reminded that cultivation is as much about the journey as it is about the destination. The hard nuggets and the powerful scent are clear markers of success, yet it's the anticipation of the cut that holds a certain thrill—a culmination of weeks of dedicated effort.
Soon, we'll have the privilege of trimming and curing the fruits of our labor, but until then, we watch and wait as the Watermelon Candy F1 Hybrids prepare to reveal their final, glorious form.
Stay lifted, and ready for the harvest that awaits,
Salokin

Likes
1
Share


@Grow_miss
Follow
The effect was very Indica-heavy, but I also harvested it with a relatively high amount of amber trichomes.
W

Likes
18
Share


@VI_Cannabis
Follow
June 7 - We ordered some new lights last week, they are 240w kingbrite samsung lm310h with uv/ir, 3000k, and meanwell drivers.
We setup the new room and moved the girls into there. After a bit of LST and a watering (with nutrients) at roughly 7ph, they were ready to go under the 2 new lights and the same SF-1000 we have been using in this grow.
The new room is a 12 ft enclosed trailer. I moved everything from the small tent into this. I put clear poly on the walls, floor and ceiling. I put poly on the shelf I am going to be keeping in there as well. I bought 50ft of 6mm mylar and lined the floors, roof and sides with it. I plan to get some reflective tape to seal everything and to cover the wood. I did not get much of a chance to watch temp's today as they it was later in the evening after all was said and done. The inline fan blowing in air from outside.
June 8 -
9 AM i checked the plants, they were at 25.2 and 50% RH. Late through the day I had checked and we had gotten up to around 32 degrees. So I moved the inline fan to the closer vent, hooked up to that, and had the air blowing out of the trailer with the inline fan sucking it from above the lights.
I then added oscillating fan and had it blowing air on the left side of the room so it would somewhat circulate once I closed the doors. I then checked at about 9pm and we were at 22 degrees. Definitely noticed a decent amount of growth already. I have the lights on a 22/2 cycle as I was worried about the heat at night time.
June 9 -
Some great growth from the girls, still having problems controlling the temps in the afternoon. I decided to prop the door open a bit to have a constant breeze throughout the day while I am at work. Decided to do some more LST and also a bit of defoliation. I took about 25% of the leaf's that were blocking the new growth as it was getting a bit bunched up. I was then told the leaf's are almost solar panels for them. So from now on I will be trying to just do some tucking unless needed. The leaf's I removed were most of the damaged leaf's, I am not to sure if that makes much of a difference. I gave them a watering with only water as there is a potential I am getting a bit of a nutrient buildup along with the PH problem. Or potentially the reason for the ph problem is nutrient buildup. After watering with A PH of 7 I got some run off and tested it. The smaller plant gave me a PH of about 5.5 where the bigger one is around 5.0.
June 10 -
Plants are looking happy and showing tons of growth. Seems to be trying to stretch outwards. Not a ton of sign of PH issues showing so potentially getting it under control. Still a bit of damage to previous leaf's but it is what it is! The last few days I have been leaving the door open a bit in order to keep the temps down. I decided to test something and turn the lights off (automatically) at 11AM and back on at 5PM so light schedule has now changed to 18/6 and it seems I may have figured out the issue. We haven't had lots of sun the last couple days so it hasn't been to hard and I have yet to know if it truly fixed the heat issue for now. (I will be looking into a ac unit as well since it typically gets to around 30-35 around here.
June 11 - Pulled some of the branches back down and added a few more LST spots. Seems we have a good amount of growth from the smaller plant out of the 2 topped spots. Unfortunately it looks like I fucked up on the bigger plant and only one of the nodes seems to have new growth. I will continue to monitor that but I think I cut the node to low and also to soon. Other then that, the girls are doing great. They seem to be absolutely loving these new lights. I gave them some nutrient water today as well. roughly 3L each. They seem to be A hell of A lot more thirsty under these new lights.
June 12 - The girls are doing great , they are still just doing growing away. Lots of progress everyday. I am going to be getting a go-pro so I can set-up a time-lapse for the rest of this grow. I received my new inline fan, I got A ac infinity CLOUDLINE T4 with the temperature humidity controller. I am going to be having one fan pushing fresh air in and one fan pulling out the hot air. I will be doing that tomorrow since I have to work today.
June 13 - I ordered another 50ft of mylar and that showed up today. I have decided to remove the shelf and add another 3+ feet to the grow space. So today I installed more poly, mylar, the ac infinity fan. I have it set-up to pump in air if it gets to warm. I am thinking of switching it to the output that way if it gets to hot or to humid I can have that air pulled out of the trailer. Right now my other inline fan is the outtake and I just have it set on full. Overall I think everything is set-up a bit better and more accessible. I will be putting my 2x2 tent in there at the left of the doors so I can have a veg room when these 2 are in flower. I plan to have 4 in veg and 4 in flower for the next grow. Still waiting on JOTI seeds, ordered 3 weeks ago and still have not been shipped. I will be getting those going the moment they arrive.
The girls seem to be happy still, did a bit more LST to try to keep everything even, mainly I'm just pulling down on the spots I already have tie wire on.


Likes
12
Share

@TrickzGrowz
Follow
Servus Moin!
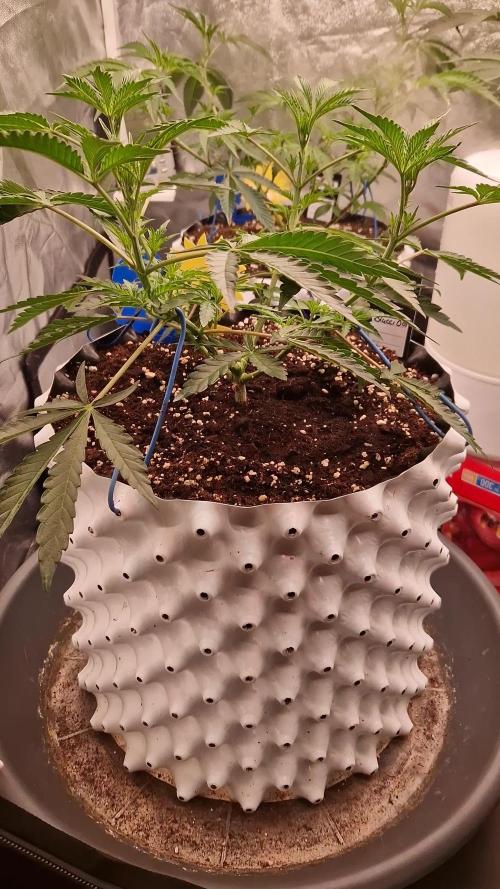
Der Stretch fängt bereits für die Blucci OG an und man sieht deutlich wie die unteren Triebe nach dem defolieren jetzt nach oben wachsen wollen.
Likes
15
Share

@Natrona
Follow
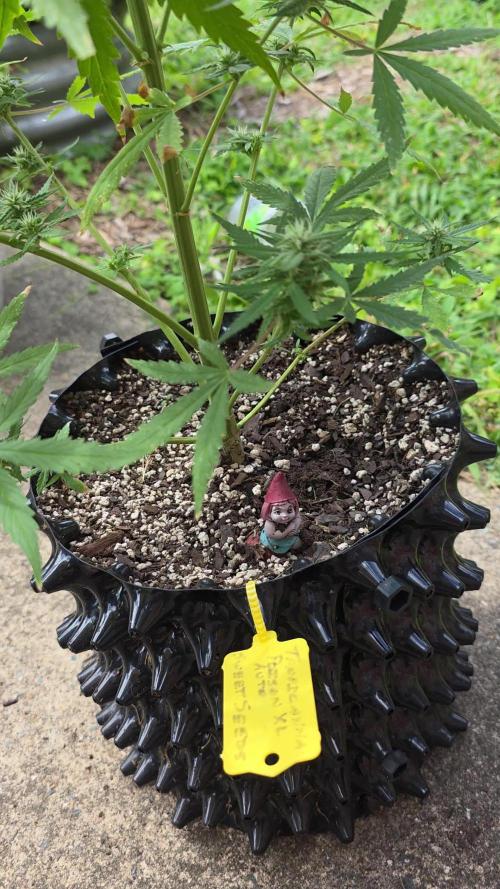
Tropicanna Ppison XL Auto- Outside
W7F5
8/10-16
This week’s weather has been a mix of rain, clouds and thunderstorms. Temperatures were mostly in the mid to upper 80s during the day and low 70s at night with humidity in 70%.
I watered 2 times with compost tea adding green sensation on the last watering.
Tropicanna Poison X auto is fattening up her buds. The structure shows minimal hairs and mostly calyxes.
Her buds have lots of sugar leaves which possibly can trap moisture causing rot. I check all my outside plants daily in the morning. If it rained that night, I give each stem a good shake to help dry them out. So far so good, no mold or other fungus or bug issues. The pics show the trichomes starting to fill out even without a magnifier. Some of her stems are pink which maybe genetics for reds and pinks. I hope I’m one of the lucky ones achieving the beautiful pinks of this Sweet Seeds Red line Strain. I am getting excited to see the full development of buds, colors and smells. Let’s go!
Thank you all for your continued support and encouragement. Your likes and comments motivate me to keep sharing my journey. Let’s continue to learn to grow together!
Stay green, growers love 💚🌿,
💫Natrona💫

Likes
14
Share


@Naujas
Follow
79 days!!!!! and the harvest is already harvested :) The whole growth until week 6 went very well, then the girl got a little worse, (I think it's my mistake, which I described in previous weeks), but besides all that she managed to ripen perfectly, matured stiff flowers, full of shiny sticky trichomes with a very, very sweet aroma ;) 210 gr of wet buds, I also collected a lot of sugar leaves from which I will make bubble hash :) I can't wait to taste it :) this is my first trip with Sweetseeds Looking at the flowers I understand that I will definitely repeat it :) I will leave more feedback after the smoke review:) good luck to everyone.
Likes
21
Share


@MadeInGermany
Follow
Hey everyone 😃.
This week she has done great 👍.
It was done again on all the drifted topping and sprayed one last time with neem oil so that the last trips are finally gone 😁.
We haven't had any pests for so many years and all of a sudden we have such little shit parts 😅.
This week it was poured twice with 1.2 l of water.
GHSC enhancer was added during a pouring (1 g per l)
The tent was cleaned every day this week and the plants were checked for health.
The humidifier is filled once a day.
Next week I will decide how I will continue the training because I have space again in the flower tent 😀.
Until then, I wish you and your families a good start into the new year 2021 🙏🏻.
Stay healthy and let it grow 🍀
You can buy this Strain at
https://www.amsterdamgenetics.com/product/kosher-tangie-kush/
Type:
Kosher Tangie Kush
☝️🏼
Genetics:
Kosher Kush
X
Tangie
👍
Vega lamp:
2 x Todogrow Led
Quantum Board 100 W
💡
Bloom Lamp :
2 x Todogrow Led
Cxb 3590 COB 3500 K 205W
💡💡☝️🏼
Soil :
Canna Coco Professional +
☝️🏼
Fertilizer:
Green House Powder Feeding
☝️🏼🌱
Water:
Osmosis water mixed with normal water (24 hours stale that the chlorine evaporates) to 0.2 EC. Add Cal / Mag to 0.4 Ec Ph with Organic Ph - to 5.5 - 5.8 .

Processing
Likes
14
Share


@kevgrow
Follow
Hey friends, end of week 4 from seed :)
- I had to transplant plant #2 from a 2 gallon pot to a 5 gallon fabric pot because roots were coming out from the 2 gallon pot, I began noticing some change in the color on leaves so I immediately decided to make the change.
- Plant #2 still hasn't revealed its gender to me, I can't figure it out because I see small pistils all around the leafs but there is just one area on the main stem with to very small round balls. I am hoping pistils come out from these balls as it did on other parts of the plant.
- Thinking of purchasing a bigger tent, I feel this one will fall short once this plant matures. I might leave it another 1-2 weeks in vegetative stage.
- Trimmed some leaves
- Performed some LST on plant #2
Processing
Likes
4
Share


@420keef
Follow
First week of flowering! There are already small hairs coming out, so that's the third female i got from some bagseeds


Likes
Comments
Share

@Cloudfan101
Follow
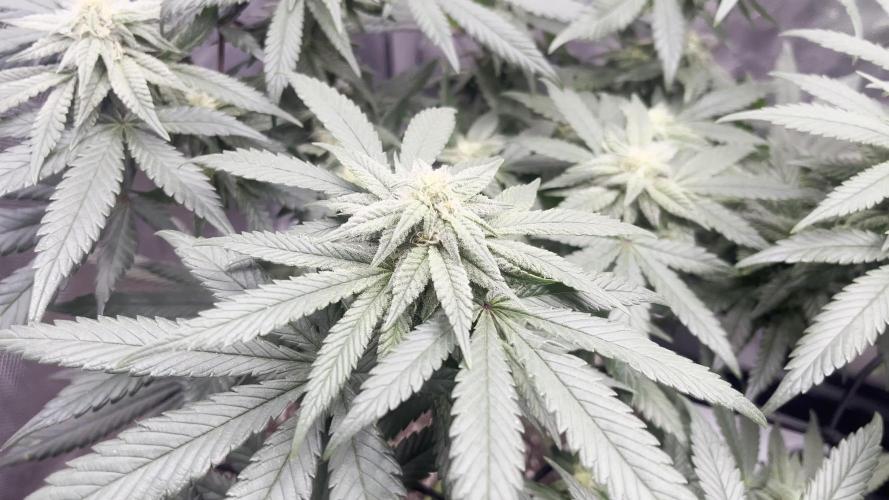
Flower Week Four!
Buds are developing nicely. Both girls have sets of 9 on leaves towards the top!
Likes
38
Share


@Cariboo_OG
Follow
Utopia Haze is a rare heavily sativa dominant hybrid (90% sativa/10% indica) strain created through back crossing Brazilian Sativa strains. This tasty little bud took home 1st Place for Best Sativa in the 2008 High Times’ Cannabis Cup and for good reason – with its potent 18-22% average THC level and long lasting cerebral effects, Utopia Haze is one powerhouse smoke. The Utopia Haze high comes on soon after you finish your first toke, hitting you with a strong cerebral lift that infuses you with a sense of hazy relaxation.
Type: Feminised/Photoperiod
Cultivation: Indoor/Outdoor
Flowering Time (days): 70-75
Indoor Yield (g): Up to 650
Feminised Outdoor Harvest Month: October
Feminised Outdoor Harvest Month Week: 3rd-4th week
Aroma: Citrus, Woody, Pungent, Mint
Effect: Cerebral Lift, Hazy Relaxation, Sleepy
Welcome Everyone to the Final Entry of my Utopia Haze Grow !
There is so much to discuss ! I have been extremely busy as of late trying to get this Harvest together, but i am happy to have it here for you now !
I Seriously under estimated the amount of time, help from others, and my own necessary skills to pull this off.. and i still kind of screwed it up lol !
But its worth noting i have never actually done this before and trying to document it during....was extremely hard.
It is next to impossible to work an iPhone with rubber gloves on !
First I want to discuss everything step by step so before you jump straight into the comments on how the end product is so small in "quantity"
Rest assured i am happy with its"quality"...and thats all that matters to me because Life is a journey not a destination! and i have learned so much from this grow that I couldn't be any happy even if i messed some things up :)
But at the very least I hope you read through this entry in its entirety with an open mind and focus more on the process, rather than just the outcome!
I ran out of Ice & i was only able to wash three times..(normally I've heard you should go sometimes 5-6 washes)
Preparation is Key & things will be much better next round :)
Photos 1-22
These are pretty self explanatory but for those of you just tuning in now.. this is what happens to a very happy plant when you don't have the necessary tools to monitor key components of growing cannabis.. Ph, as well as EC levels play a very key role in the outcome of your grow lol that being said I was just able to save this plant by purchasing both tools but that doesn't mean the plant didn't suffer because of the prior events.. This was a Huge reason behind me choosing to turn this harvest into what i would consider
"Solventless Hash Rosin" from "Ice water extracted Bubble hash".
Pictures 23
The idea here is the process of using "fresh Frozen Cannabis" this has been discussed many a time online on such sites as instagram and here on grow diaries as well.. I personally have Never tried the process so i decided to try it out and make a judgement for myself..
Video 24
The Cannabis has now been in the freezer for 72 hours making it very well frozen.. as you can tell i struggled getting it all into the 25u Screen Wash Bag. One thing of note i would do differently is i will de-stem my next batch as i also believe this played a part in the amount of plant matter that escaped through the sieves.
Photo/Video's 25-28
The idea here is "ice water Seiving" & especially with the bags that I am using here that are only have screen material on the bottom portion of the bag it is very important to have spaces in-between the screens to allow the water to pass directly through the screens into the bottom bucket with the least amount of resistance.. because the hash is so extremely temperature dependant if it gets warm on the side of the bag.. it will stick there and not make it to the bottom to become use able product..
29
You do not need to use as much Ice as i used here lol... the idea is to keep everything very cold..i certainly achieved that but at the sacrifice of using so much that i ended up grinding product and producing "contaminants" but in the end they are just plant matter that i would be smoking when i rolled up my joint either way so.. I'm not super disappointed..
But it should be noted that what you want to achieve here is a Layering effect where you have the wash bag between two small layers of ice while the "water current" washes the Trichomes away allowing them to be separated by the screens setup below :)
Before Starting the machine you should allow some time (i.e.;10-12minutes pre soak to allow the product to become saturated) before the first cycle.
By video 32 I have just ran out of ice lol..
Video 33-34
Here I have a tip for you.. to separate the screens that you sieve through.. cut 5 gallon buckets to stretch them across nice and tight.. it'll make scooping your Bubble that much easier ! i learned this from the many "Frenchy" videos I have watched :)
Picture 35
Here in lays the problem for most people.. drying your hash without loosing vast amounts of "Terpenes" whilst also stay ever vigilant against mold !
Thanks to all those videos I've watched on youtube.. id like to think this was one of my most successful parts of this process..
Things to Note; Terpenes start to seriously evaporate at temperatures 68F or 20C
you need to stay as cold as possible whilst bringing the Relative Humidity in the space down into the 40-30% to stay away from that nasty mold !
I used my cold storage room in the basement.. with a dehumidifier running to keep the space at 45% RH & staying at a constant 15c.
All while spreading the hash as thin as possible across parchment paper, on top of the white screens with a fan moving air across both sides of the paper.
Pictures 36-38
These are some macros i took in the middle of my drying session I fell in love with the colour.
Yes i know the black spots are plant material but they will get caught when i bag the hash & squish the oil out.
Thing to Note; at this stage it is important to ensure you 'micro plane" the hash down as fine as you can whilst staying weary of the temperature... any "chunks" will hold pockets of moisture.. that lead to potential problems..ie; mold ...
Picture/Video 39-41
Successfully planed bubble hash ready to be bagged and Squished !
Picture 42
Ive decided to follow Pedro.. from Pedros Grow Room and double bag to be on the safe side so i don't have any blow outs.
So thats One 25u bag inside one 160u bag ! :)
Pictures 43
This is almost 3 grams of the bubble hash from above, already melting in the bag.. this is where i ran into trouble again lol things started getting to warm in the house and i was only able to get one of the three squish's i did on video :( things started getting sticky.
Picture 44
This is basically just a photo of the equipment I'm using; 3x5 LowTemp Cage in the frame I built myself, with a 20Ton bottle jack.
Something to note here is this is an older Lowtemp model with only a single heating zone which is which i have it closed here heating Both sides of the press :)
As well as the importance of having adequate pressure on your plates.. my rig is very overkill for the size of hash bags..lol
Video 45
Here is the lovely press video.. its didn't quite work the way i wanted either lol my directional folding wasn't quite tight enough for a big "drip" :)
&the Press was set to 65°c
Photo's 46-50 are pretty self explanatory :) I had a blow out.. but still managed to pull an 80% return from the hash once squished...& yes it tasted amazing :)
Was it worth it in the end... that could be debated.. for some..i understand..its not your thing, but for those of us that are interested in making our own concentrates.. free from Solvents...
I wouldn't make it any other way :)
If even ONE of you reading this diary finds it helpful to reference for ANYTHING.....even if its "what not to do" ill consider it a success !
Thanks again for tagging along on this garden adventure.. its been one heck of a journey !
Much Love from B.C. Canada,
Until Next time,
Cariboo

Likes
2
Share

@LittleBigTrees
Follow
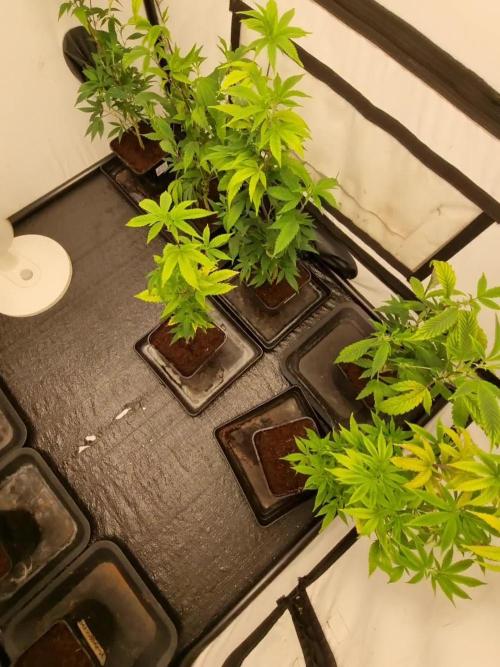
Defoliated and cut them back ready to flower them.
Took some new cuttings of both phenos.