
Likes
Comments
Share


@NightsAssassian
Follow
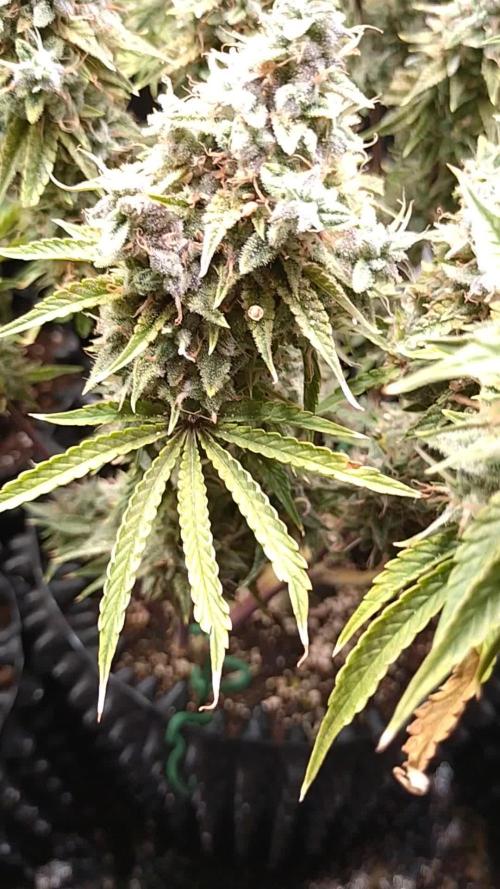
Day 28: On day 21 until day 24 i switched the light schedule to 7-1 and i did not give them water at all. On day 24 i topped the soil with dr jimz organic nuts along with watering with dr jimz soup for the soil mix. i put a trellis net up however i have not actually used it yet. Also on day 24 i changed the lights back to a 6-2 schedule. I am letting them kind of do there own thing trying not to bother them much unless needed and I am however having problems with one of the plants a pic of it up top. It is growing however its just clawing the whole time and i dont know what to do or how to fix it so any advice would help because i really dont want to toss it. Thank you for checking my grow out and as always if you have any pointers or questions feel free to ask. Thanks again and happy growing.
PS:
I didnt take any photos for week one sorry in regards to that I was a bit nervous starting a grow diary and finally decided to do it end of week 2. Thank you for viewing and leave any tips or tricks if you see necessary. Thanks again and happy growing. 😀


Likes
16
Share


@Tipton
Follow
They're getting going good! They love their new homes... Love the 1000w mh in my 5x5

Likes
9
Share


@HIAZ_urbanbudfarmer
Follow
GG has been going well, a lot of growth this week, continue to tie her down , really good structure on her. Taken a few cuttings to clone, flipping to flower.👏🤞👍


Likes
9
Share


@HUMO_Cultiva
Follow
We start week 3 of bloom!! Goofiez 2 amor compound genetics it’s the champions!!


Likes
40
Share


@Ukfarmer420
Follow
Hi guys,
So this week im expecting rapid growth on all the plants, my plant still has orange spots i call it plant aids 🤣. There on 18/6 light cycle. I will be doing some lst on them to try and fill my grow space out abit.
I been soaking them and turning lights down for 2 hours then turning light back up for a few hours then soaking again so on so on. My misses plant is doing better than mine thats for sure tho.
Happy growing canna family 💚🍁
Processing
Likes
9
Share


@Wsummers
Follow
Anyone seen these bugs b4 an what is the best way to get rid of them, plants still look really healthy
Likes
Comments
Share


@High_Grade_Dadli
Follow
Did some defoliation this week also had some worm attacks one of the luxuries that comes with outdoor n they always seem to wait until the buds start to get pretty


Likes
44
Share


@SooSan
Follow
Gros changement de plans !
Mars Hydro m'a sponsorisé, je vais donc tourner à 100% en Mars Hydro !
J'ai donc une nouvelle tente, la 2in1 90x60x140 Mars Hydro !
Et un FC-E 4800 devrais bientôt arriver 😍
J'ai divisée la 90x60x140 en 3 parties (et donc 3 Diaries) :
1️⃣
🏠 60x60x140
☀️ FC-E 4800
🍁
1x Black Bomb / Philosopher Seed
2x Amnesia Lemon / PEV Seeds
1x Blueberry / PEV Seeds
1x Blueberry / 00 Seeds
1x Wappa / Paradise Seed
1x Dark Phoenix / Green House Seed
1x Quick Sherbet / Exotic Seeds
1x Mango Cream / Exotic Seeds
1x Banana Frosting / Sensi Seed
1x Hindu Kush / Sensi Seed
1x Fast Mix / Sweet Seed
📎 https://growdiaries.com/diaries/122084-grow-journal-by-soosan
2️⃣
🏠 30x60x90
☀️ TS1000
🍁 4x Fast Mix - Sweet Seed
📎
3️⃣
🏠 30x60x50
☀️TS1000
🍁 4x Quick Sherbet
📎 https://growdiaries.com/diaries/122080-grow-journal-by-soosan


Likes
25
Share


@XperencdGmanXG
Follow
These 2 are growing likes beasts. They will both be going outside in the next 2 weeks or so. Just waiting on overnight temps to stay in the double digits and we are GTG.

Likes
74
Share


@Mr_Maes
Follow
We are officially in full bloom. The have been enjoying 6-7 hours of sun light per day for about 4 days now, then brought back in under the cobs. The girls are all exploding with growth and stacking what I expect to be huge buds.

Likes
2
Share

@PhinolaGreen
Follow
11. Woche
Ich gieße sie mittlerweile mit Eiskaltem Wasser und das hat dazu geführt, dass Green Gelato Auto von RQS Purplet 😍 Schaut euch gerne die Bilder an, sie sieht wirklich traumhaft aus. 7-10 Tage noch, dann hat sie den Punkt erreicht, der mir gefällt 😄😊
Ich habe die gestern alle gespült. Insgesamt habe ich 4x Wasser durch jeden Topf laufen lassen.

Likes
44
Share

@Ukfarmer420
Follow
So I'm learning that the zkittles is always hungry lol, 3 weeks left for her and will be feeding pk booster this week.
Runtz is showing pisstils now on day 28 so about right for this stage.
Day 1 for my new bean ethos genetics banana daddy auto, looking forward to this.

Likes
10
Share

@trelopoulos
Follow
Ladys are ready! they look and smell delicious.. started drying them.

Likes
8
Share


@Salokin
Follow
Week went again very uneventful. The plant does what she is supposed to be doing (gaining weight) :). Still lots of new pistils appearing overnight, I am checking the Trichomes daily, however, everything remains milky, with only very little % of amber trichomes. Once amber colours start increasing I will start flushing.
Likes
16
Share


@DrLaggis
Follow
Day 72: The Finale 🌿🌟
It’s finally time. My very first grow is coming to an end—at least the cultivation phase. The plant is now ready for harvest, and I can’t believe how incredible this journey has been. I never expected to enjoy the whole process so much—from nurturing the plants to watching them grow and evolve. I’m absolutely hooked and can’t wait to dive into the next steps: harvesting, drying, curing, and of course, starting a new grow soon with fresh ideas and experiments!
While it may not be the largest yield, the quality of the buds speaks for itself. The time, love, and care I’ve put into this grow is visible, and I’m pretty proud of the results. I’ll admit, I was a bit impatient at times (which I think every first-timer can relate to 😅), but the experience was priceless.
Here are a few interesting highlights from my trimming and harvest process:
1️⃣ Dark Phase Before Harvest
Two days before harvest, I put the plant in complete darkness to encourage resin production. I'm not sure if it really made a difference, but it was worth trying!
2️⃣ Wet Trim vs. Dry Trim
I decided to go for a wet trim because the buds were really dense, and I wanted to avoid any risk of mold. I’ve read that wet trimming can speed up drying and may slightly impact the quality, but this is part of the learning experience. Next time, I’ll try a dry trim for comparison!
3️⃣ Yield Update
Wet, the total came in at 179 grams from my plant. Trimming took around three hours, and it was actually a lot of fun, despite the time commitment.
4️⃣ Curing Plan
The buds are now hanging in the tent for about 8 days. Once dried, they’ll go into jars with Boveda Packs (62% humidity) for another 3 weeks of curing. I'll update the smoke report once they’re fully cured, but I’ve already had a sample of the same strain from a friend, and I can say it’s pretty amazing.
Final Thoughts on My Grow 🌱✨
As mentioned earlier, this grow has been an absolutely incredible experience, and it has definitely set me on a path to jump right into my next grow. There were ups and downs along the way, such as over-pruning, which I believe stressed the plants a bit. Additionally, I think they could have benefited from an extra week to mature. We also faced many temperature fluctuations this summer, which impacted the plants due to external weather conditions.
I'm really pleased with the quality of the buds. The quantity is okay—I can’t fully gauge it yet—but I’m sure there’s more potential to unlock. I've gained valuable experience in what worked well and what didn’t. Overall, the countless lessons learned during this grow far outweigh the few mistakes made. I'm incredibly proud of my first results!
As this long journey comes to an end, I want to thank everyone who followed along. I hope you enjoyed all the content. In that spirit, happy growing, and see you next time! 🌟
Likes
5
Share


@Fefa128
Follow
Hey there growers!! Sorry for skipping flower so bad.. here are some videos of the ninth and tenth week.
No excuses, but someone stole from me back then and I didn't feel like making videos for a couple of weeks.
But the experience went on, the female plant reversed and it's pollinating itself with my help like you see in the videos. Sorry again for the Spanish audio 😅

Likes
78
Share


@ClubRiot
Follow
Week 8 ,
pH Perfect Connoisseur Bloom Part A ( 1 ml/L )
pH Perfect Connoisseur Bloom Part B ( 1 ml/L )
CarboLoad Liquid ( 2 ml/L )
Sensi Cal-Mag Xtra ( 2 ml/L )
Sensizym ( 2 ml/L )
Bio-Heaven ( 2 ml/L )
Big Bud ( 2 ml/L)
Nirvana (2 ml/L)